[This article originally appeared in the July 2022 issue of Photoshop User, the Magazine for Lightroom and Photoshop Users. To learn more about Photoshop User and to sign up to read the latest issue for free, click here.]
By Sean McCormack
As the keeper of the Nik Collection keys, DxO is mindful of its heritage. Despite the transition between many companies, they’re keeping the flame alive and regularly adding value to these much-loved and -used plug-ins. In mid June they launched Nik Collection 5. Like the previous update, two of the plug-ins have been rewritten from the ground up. This time it’s Color Efex and Analog Efex getting that love.
In the mind of DxO, there are two parts to the Nik Collection: the creative part, which covers Color Efex, Silver Efex, Analog Efex, and Viveza; and the technical part, which covers Dfine, Perspective Efex, HDR Efex, and Sharpener. With this update, the creative part has been fully rewritten and updated with a modern interface.
In line with the previous plug-in updates, Color Efex gets both ClearView and film grain additions, which add world-class dehaze and film grain emulations, respectively. The new additions to control points seen in Silver Efex in the previous release, have also been added. These give far greater precision for making local adjustments within each filter. A surprise new addition is that of PhotoLab 5 ESSENTIAL. This means that casual plug-in users get a free RAW converter using DxO’s much-loved conversion process. With PhotoLab 5 ESSENTIAL, you can go straight from camera to Nik processing without the need for another host application.
IS THERE MORE TO THE NIK COLLECTION?
It’s probably bad of us to assume familiarity with the Nik Collection. As one of the oldest plug-in sets out there, most photographers have probably come across it at some point. The company, Nik Software, created most of the plug-ins between 1995 and 2012. At the time, the plug-ins could be bought individually, or as a discounted set. Thirty-five percent of the company was owned by camera company Nikon, for whom Nik created Capture NX for editing Nikon camera files.
In 2012, Google bought the company to get access to the code for use in its own products, as well as selling the plug-ins. It dropped the price for the Collection from $500 to $150; a huge drop, much to the joy of photographers everywhere, unless you’d just bought them. In 2016, Google made the software free, and by 2017 announced that there would be no further development. There was great sadness amongst Nik lovers everywhere.
That’s when DxO stepped in and purchased the Collection in late 2017. Since 2018, they’ve been updating the plug-in yearly, and they even added the new plug-in Perspective Efex in 2020. Obviously, they couldn’t do this work for nothing, so the $149 price point returned. With all the work DxO is doing, it’s clearly not money for old rope, and long may they continue this work.
As a collection, these plug-ins cover most of the postprocessing and image-finishing a photographer could require and were often seen used on winning photos from professional competitions internationally.
NIK vs. ADOBE
As with most other add-ons, the benefit of using the Nik Collection is having tools that do a particular task faster and easier; with such tools as Dfine and Sharpener, it’s having more precise noise reduction or sharpening tools. With the creative plug-ins, it’s having specific looks achievable immediately. A great example is the Tonal Contrast filter, which creates a far more interesting look than mere Adobe Contrast or Dehaze can achieve.
INSTALL
The install process is straightforward. Unlike a lot of installers, it uses colorful custom screens that take you through the process. Once installed, you are invited to download PhotoLab 5 Essential.
COLOR EFEX PRO 5
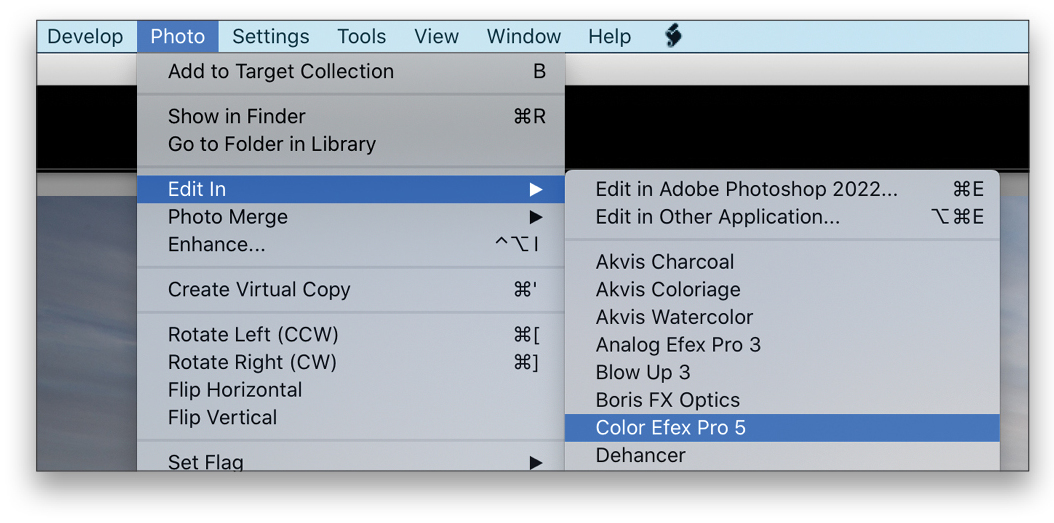
We’ve covered Color Efex Pro in the past, so this will just highlight some basic edits to show some of the new processing and interface. Start the process by choosing Color Efex Pro 5 from the Edit In menu in Lightroom Classic.
The new interface opens, and it’s glorious! That immediate full-screen view is a joy to behold. On the left are the available filters and presets. On the right is the settings panel, where you’ll find the Loupe and Histogram, followed by the DxO Filters panel with ClearView and Grain. Below that is the main filter stack (after you add your first filter). One notable change is that there’s no Add Filter button. This is now done on each filter: Clicking a filter name will replace the current filter; to add a filter instead, click the + to the right of the filter’s name.
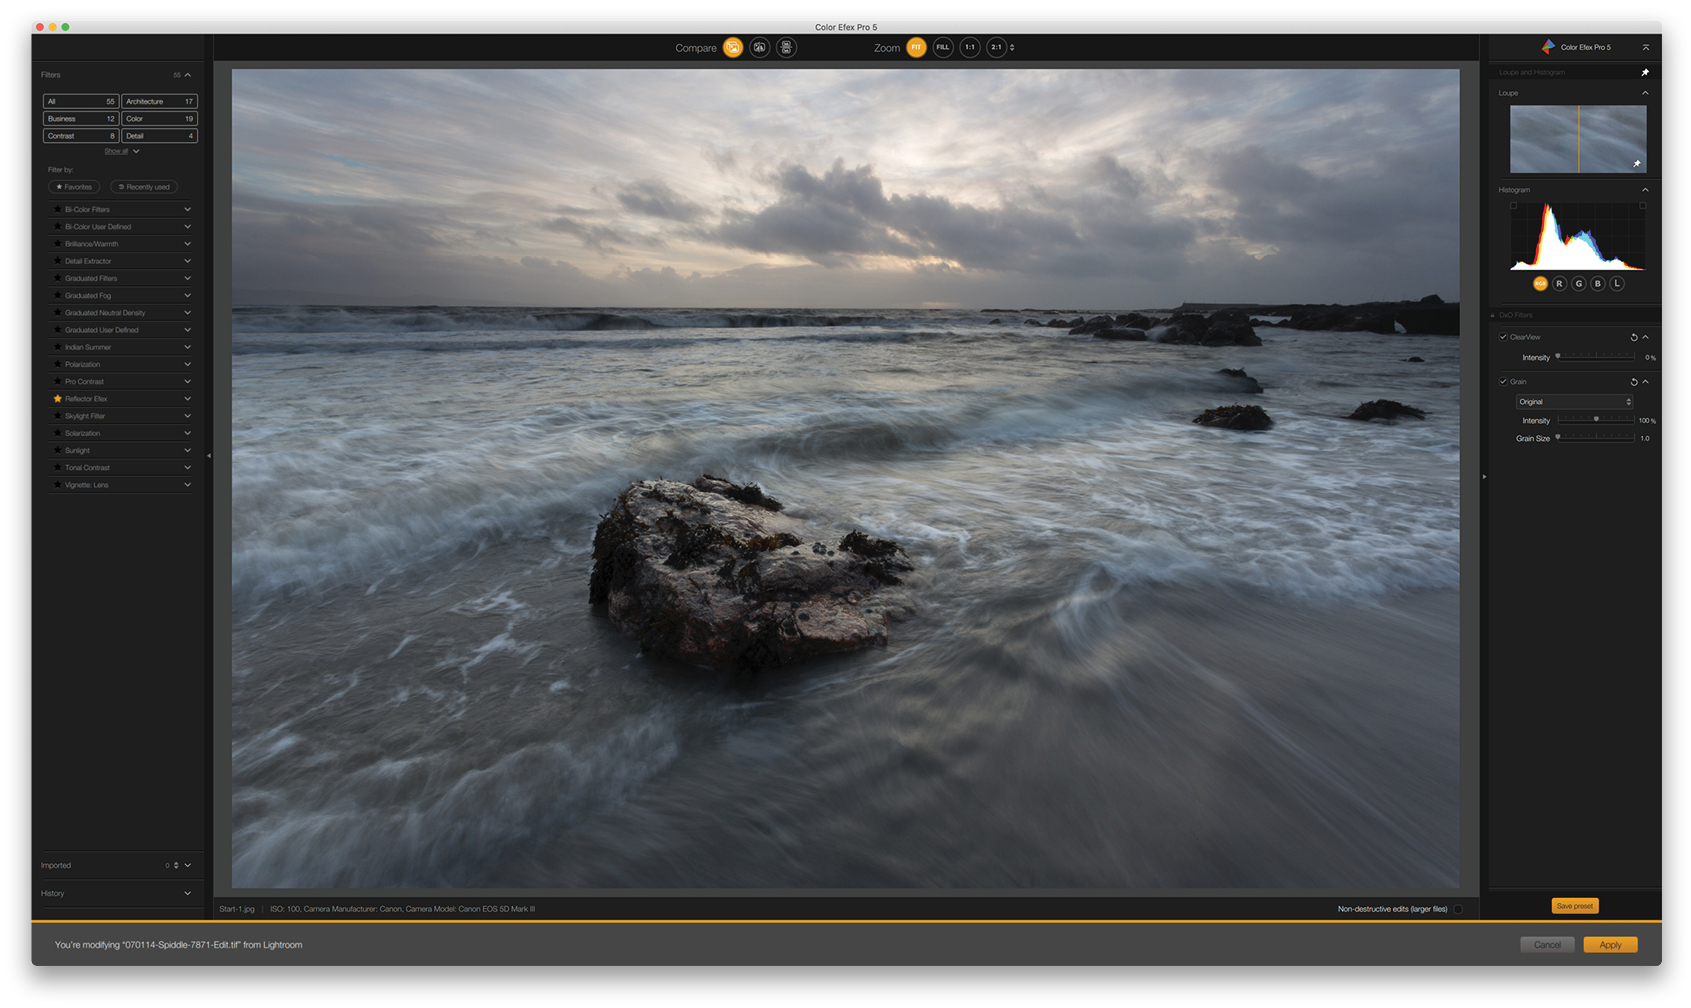
At the top of the preview window is Compare and Zoom. Compare lets you choose between the after, a split before/after with a slider, or a top and bottom before/after view. Zoom gives Fit or Fill, 1:1, and a menu of other zoom options.
On the left, the Filters categories are in a compact mode, showing only six categories. Click Show All just below those category buttons to reveal all the categories.

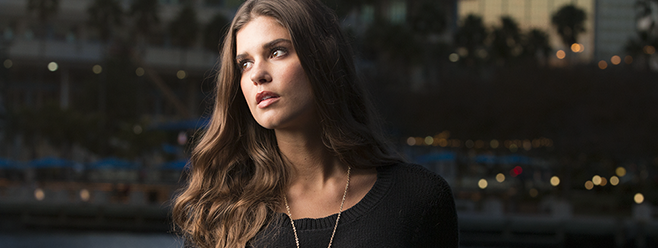
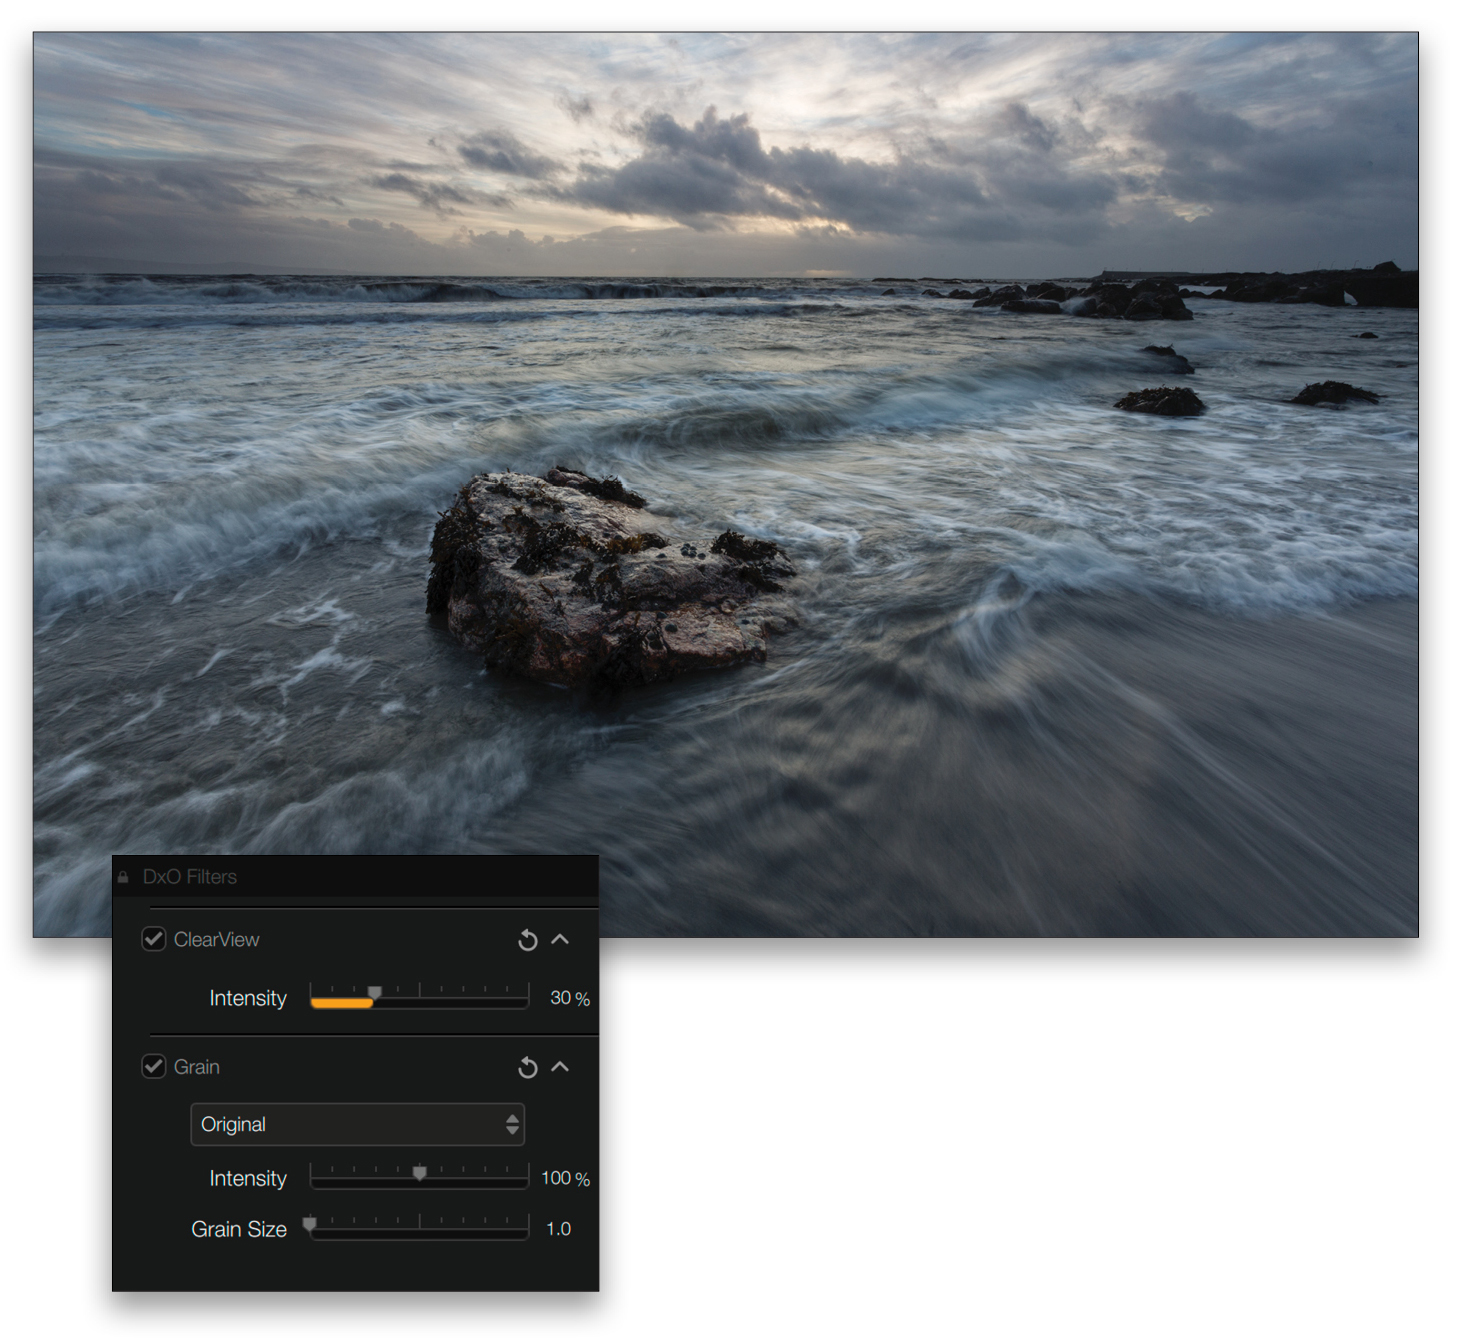
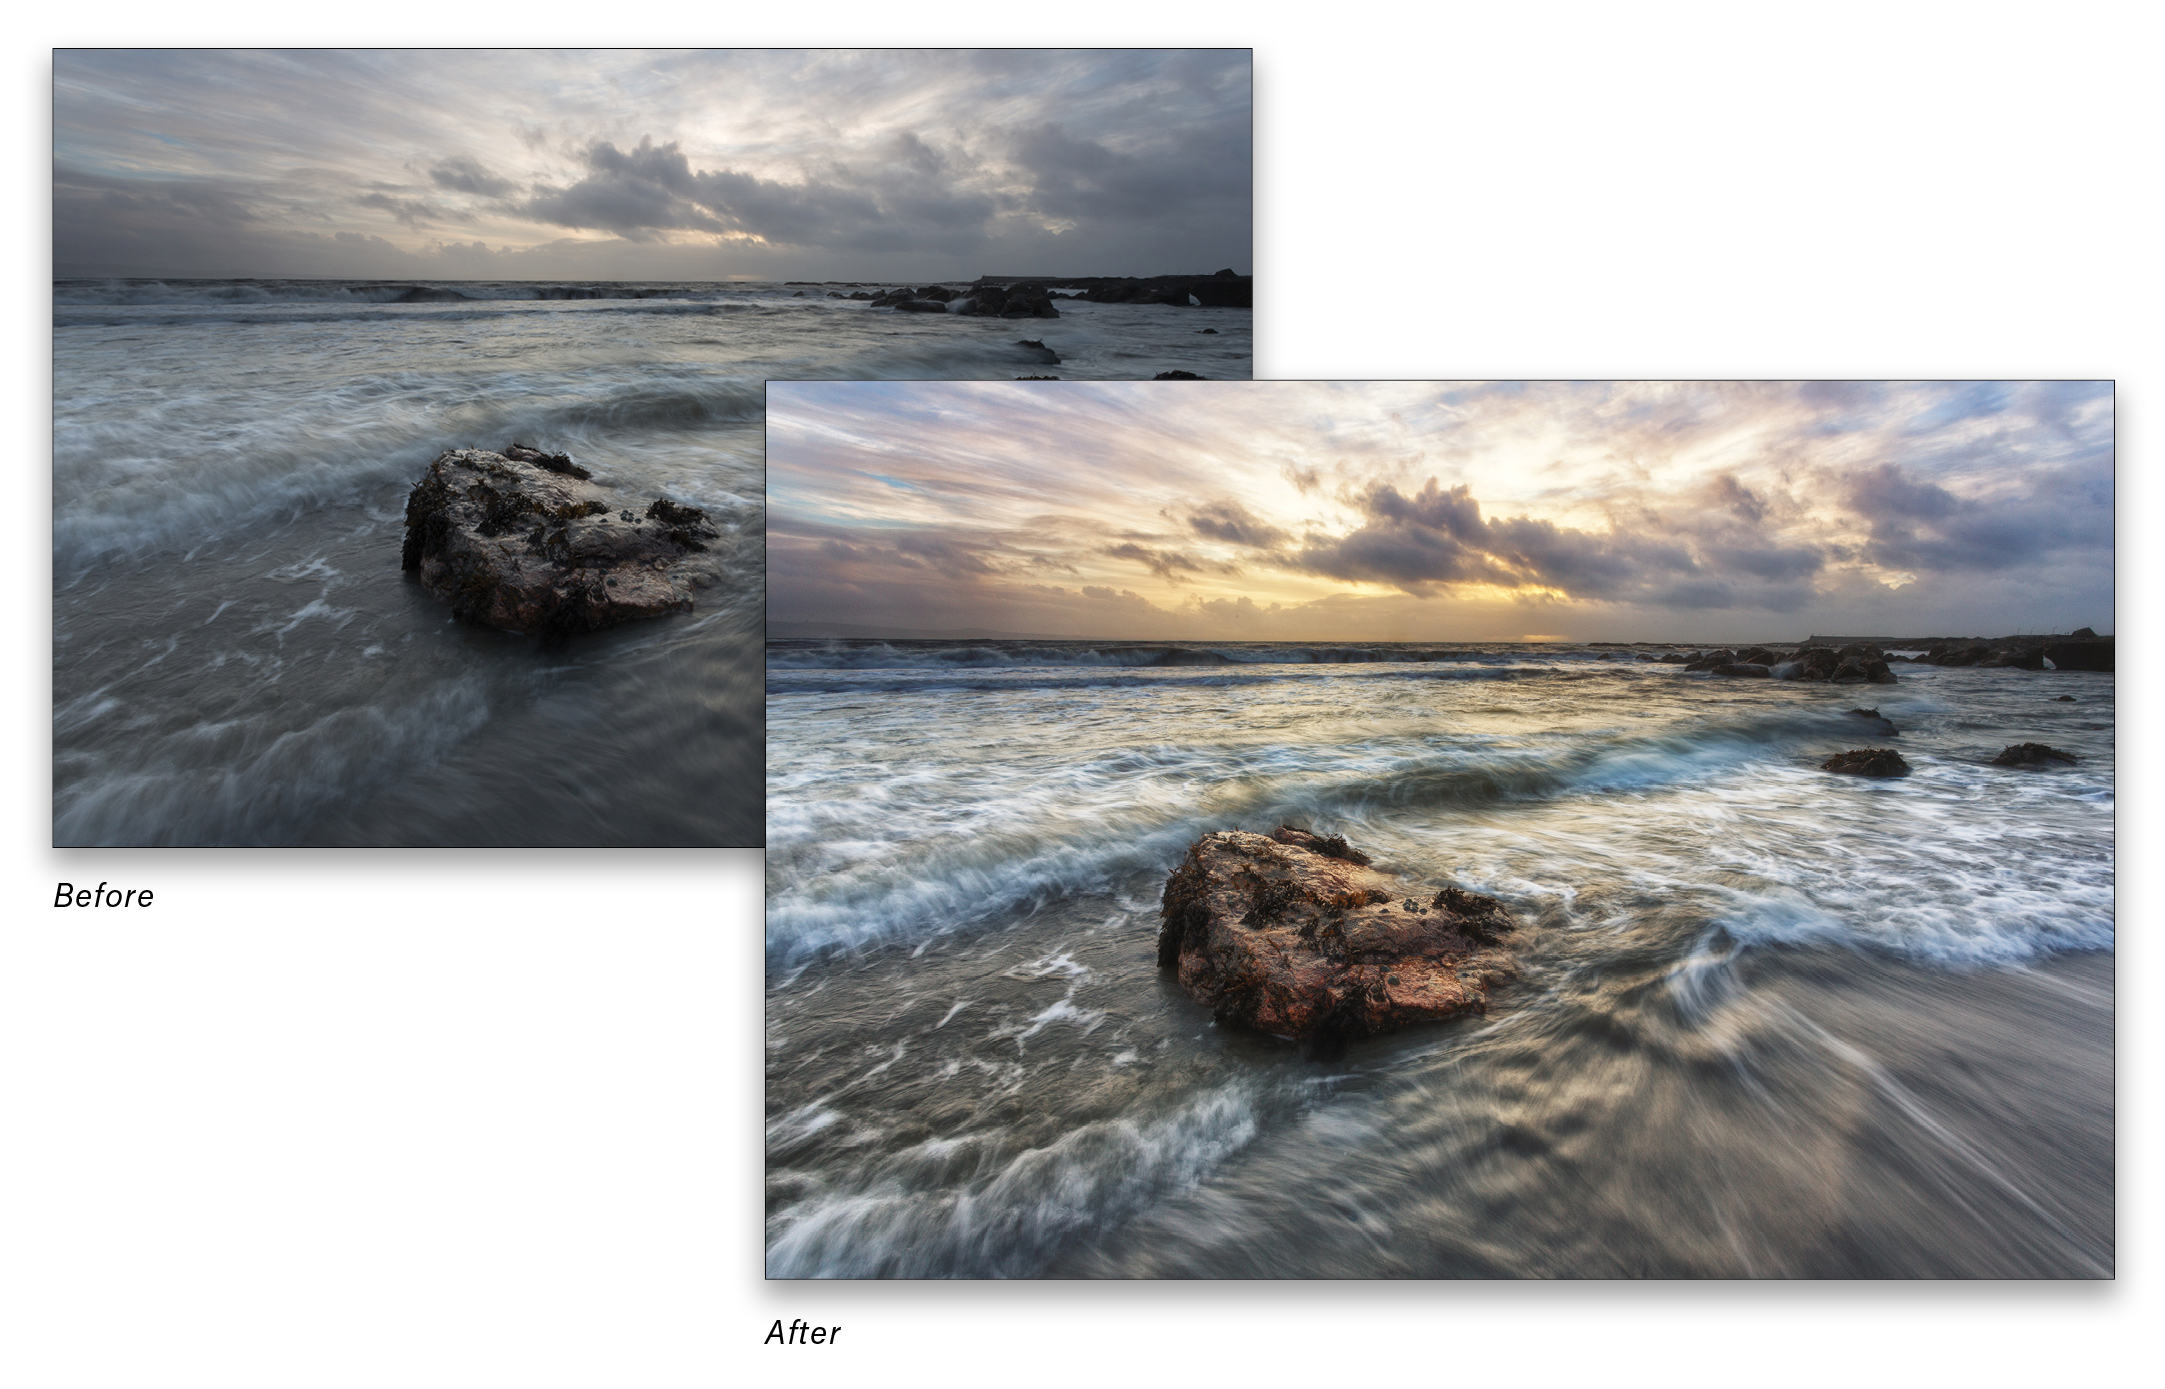
From there you can choose a narrower range such as Landscape. The photo here is fairly unedited, bar some spot removal.
STEP ONE: Before applying one of the creative filters, you can improve the general contrast using ClearView. Set it to 30% for a deeper contrast. This does darken the image, but you’ll be correcting this when you add filters.
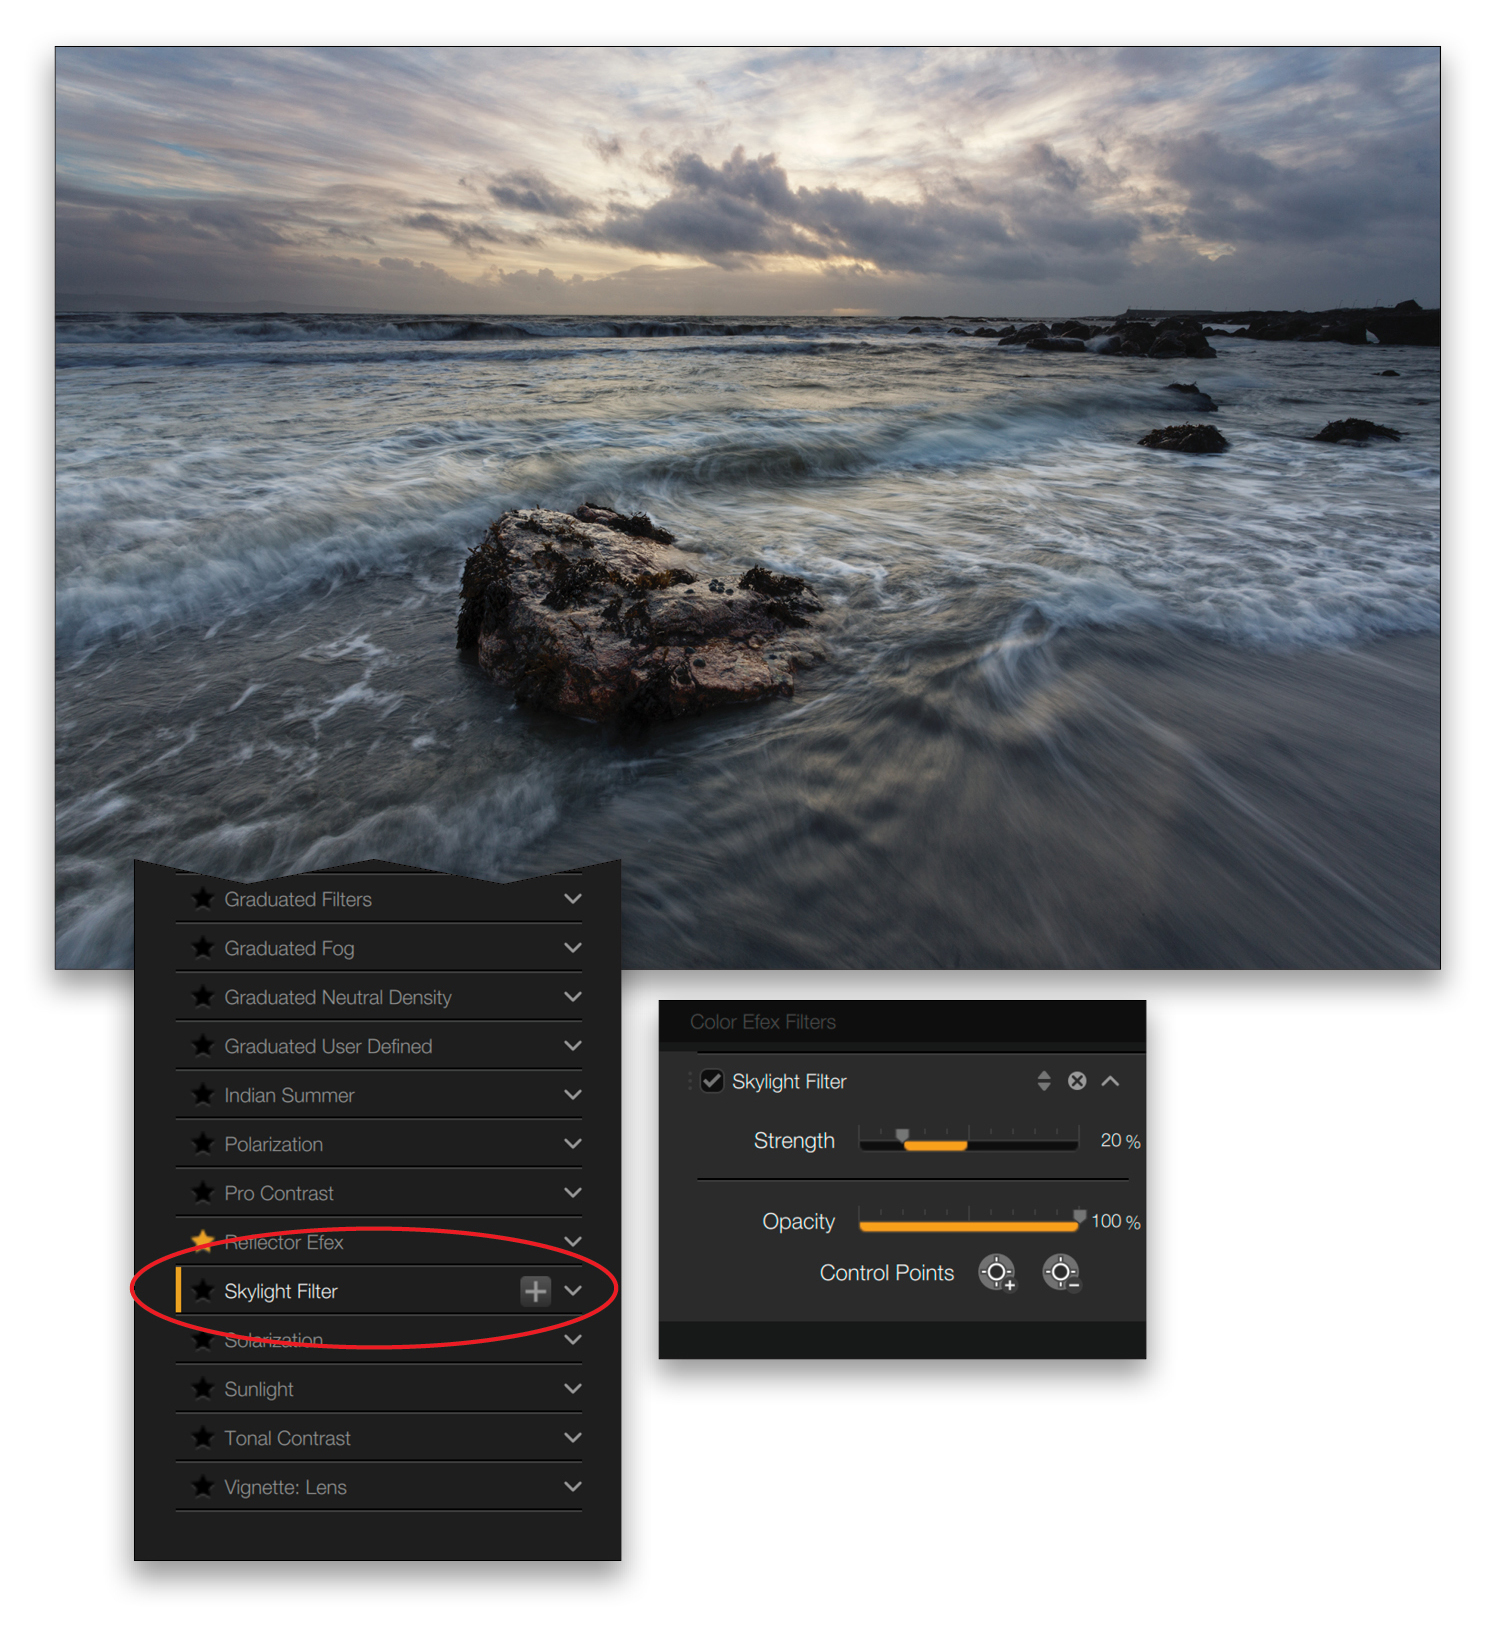
STEP TWO: The first filter that’s worth applying is the Skylight Filter. Because this is the first filter we’re adding, clicking its name will add it; there’s no need to use the + icon here. This filter cleans up the look, and adds warmth and clarity. Even the default setting looks great on this image. Note that there’s now an orange bar on the filter’s name on the left to let you know it’s applied.
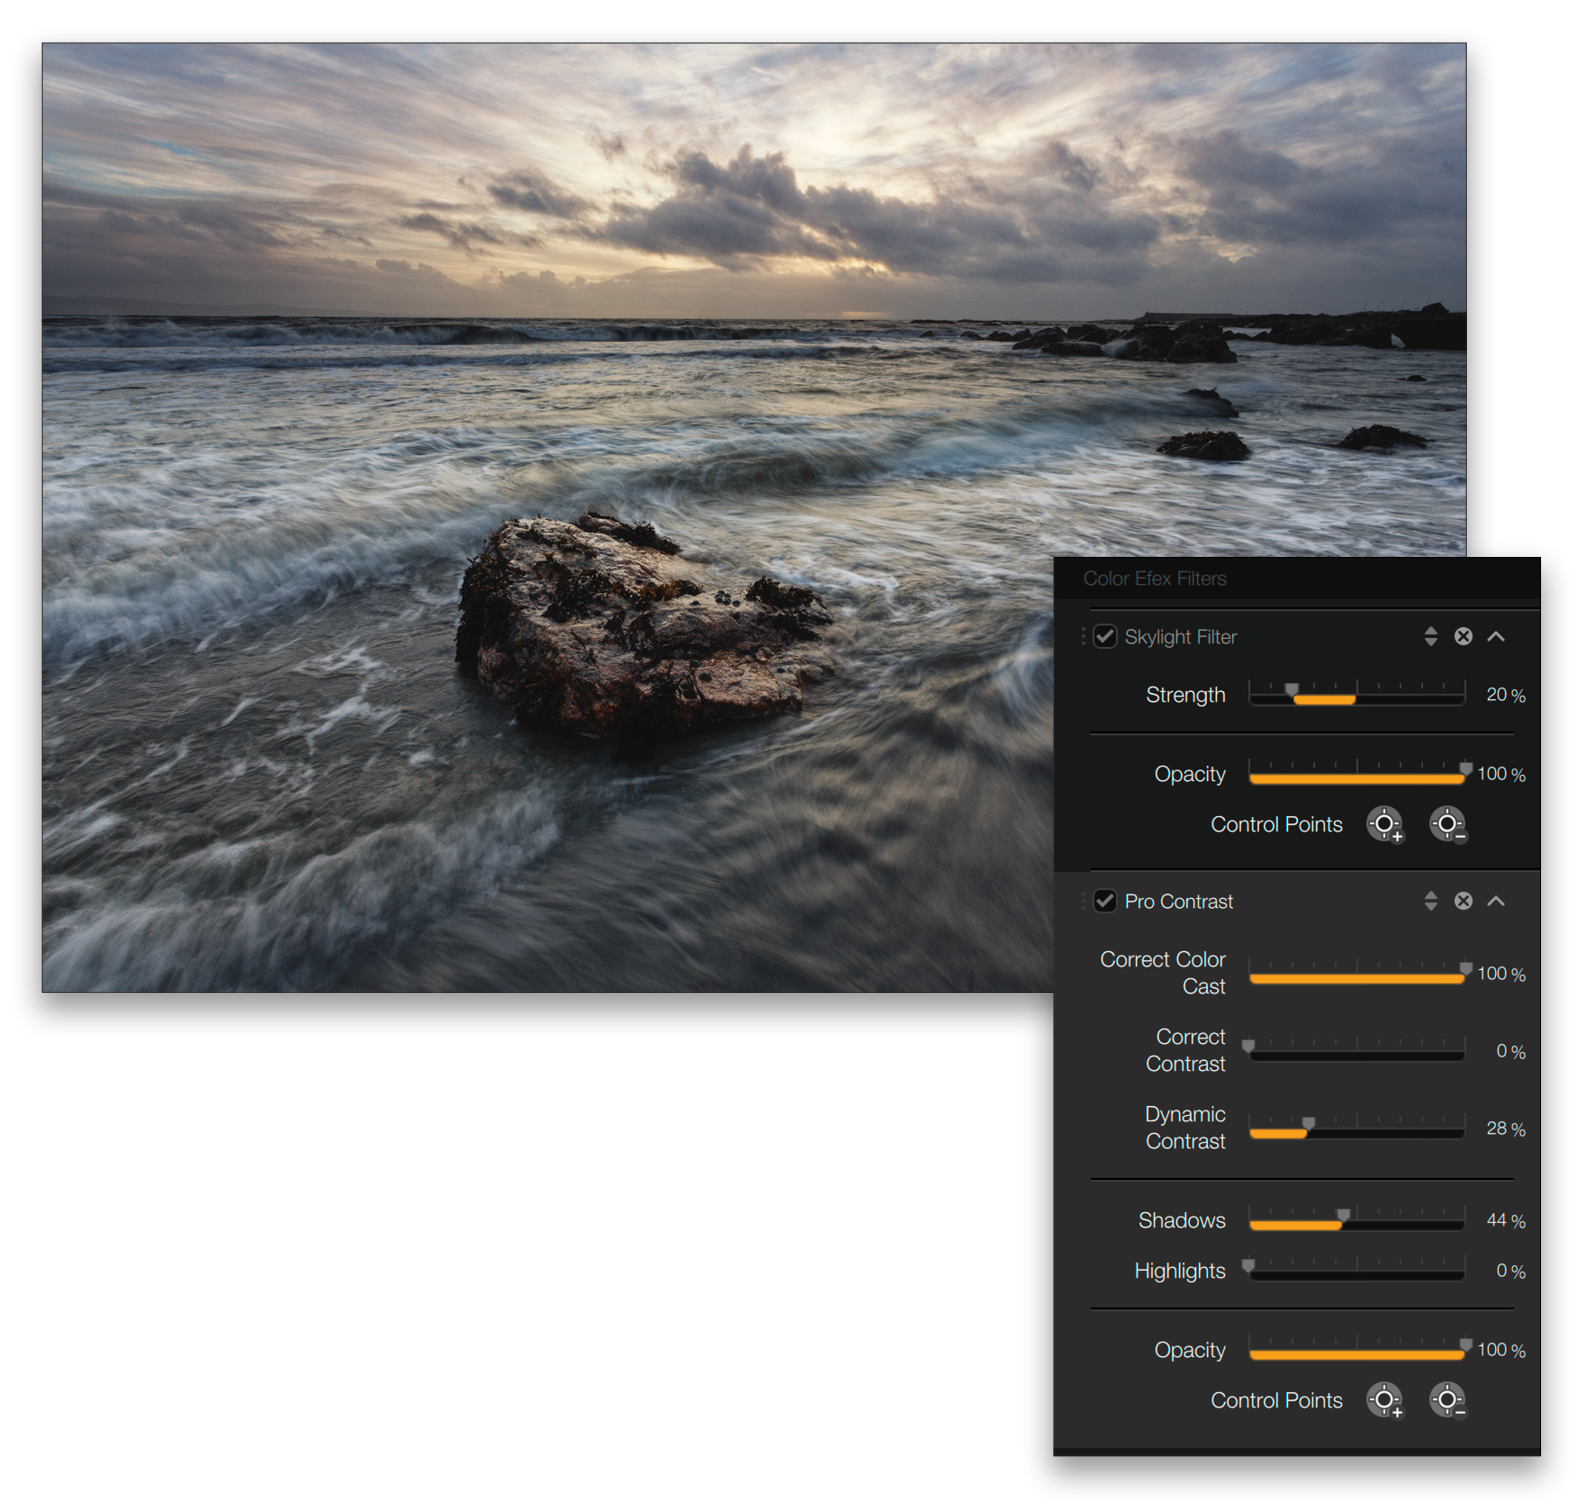
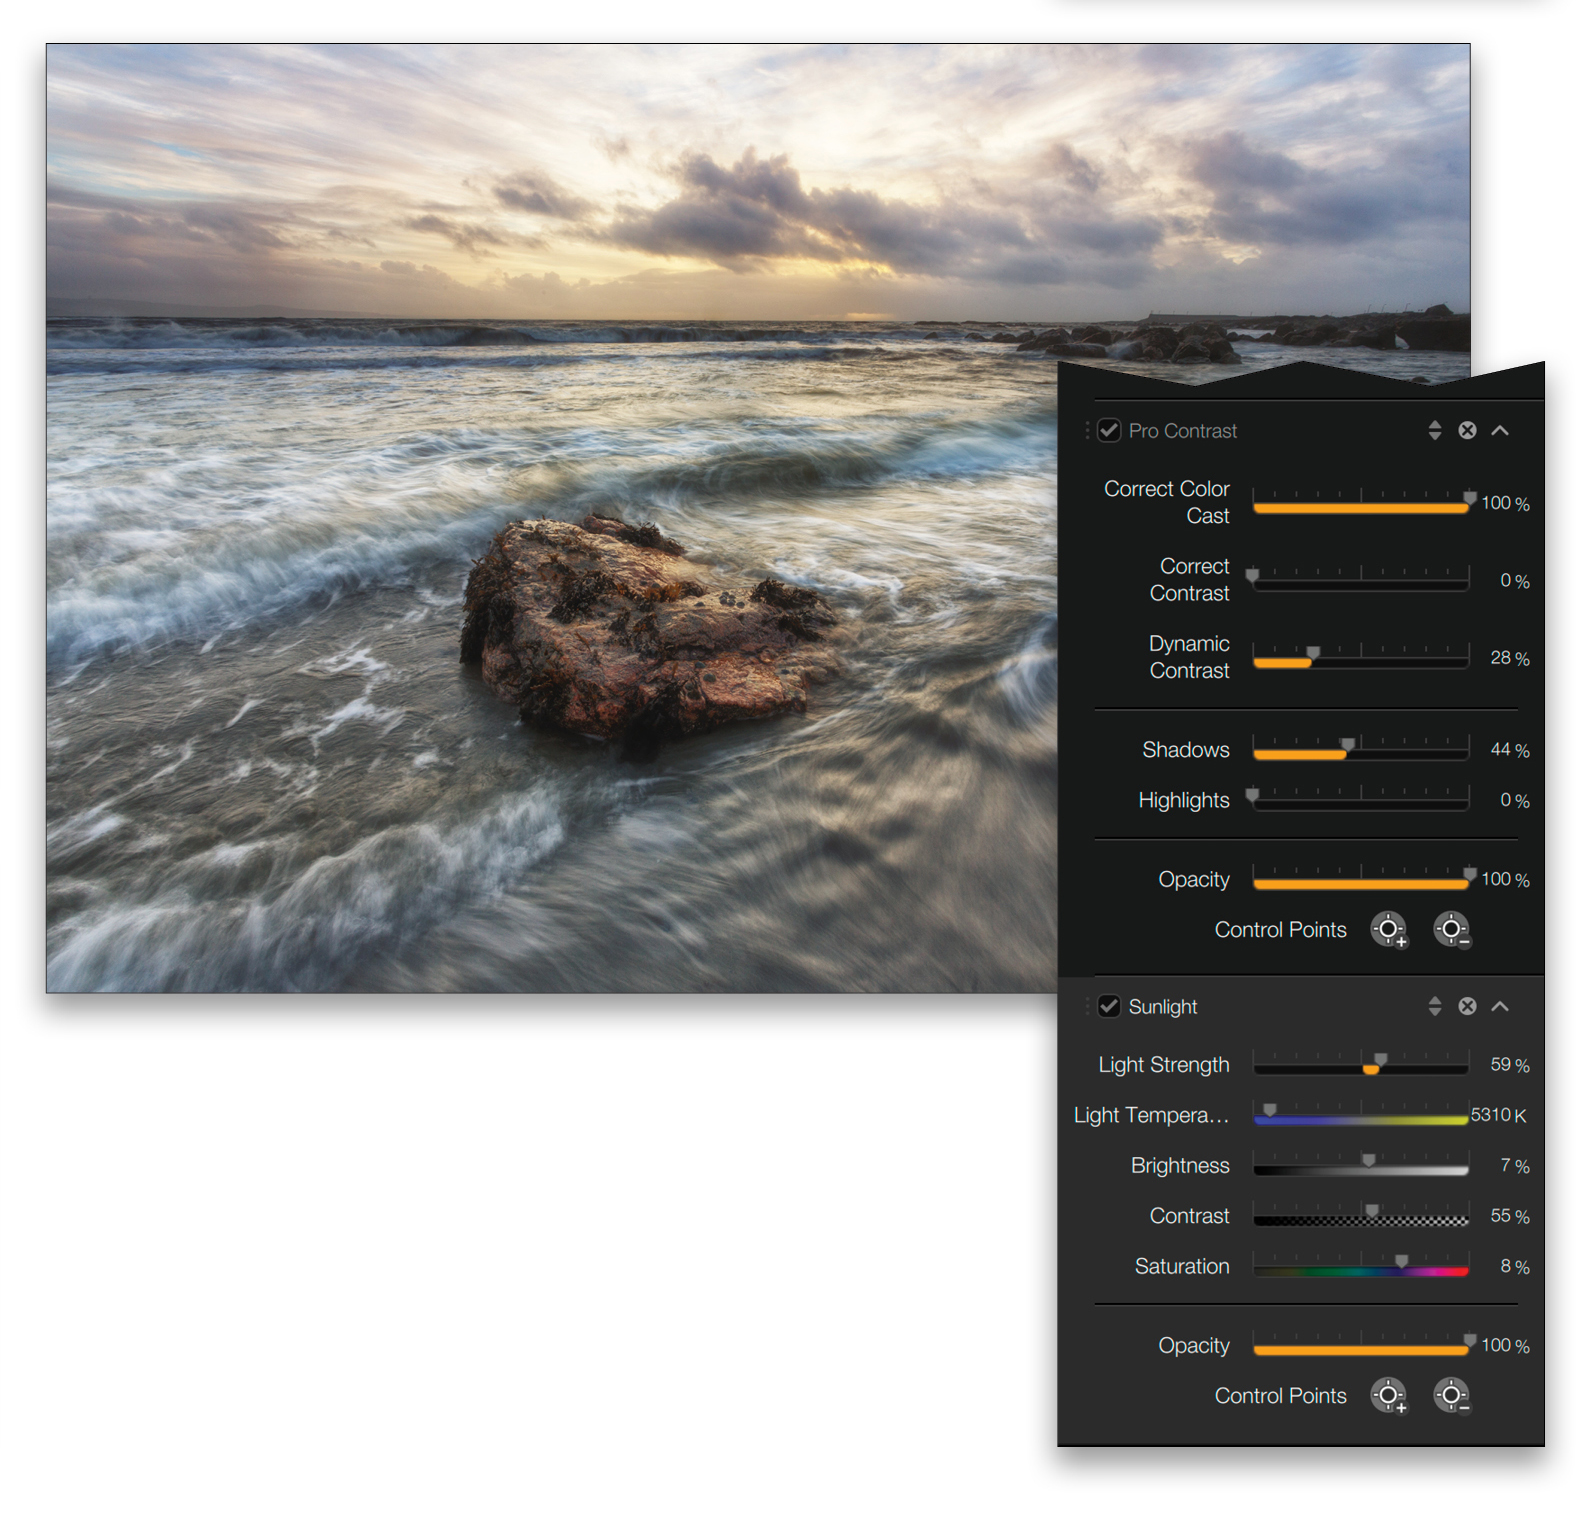
STEP THREE: Click on the + next to Pro Contrast. Changing Correct Color Cast to 100% will warm this image nicely. We’ll also set Dynamic Contrast to 28% and Shadows to 44%.
STEP FOUR: The final full filter we’ll need here is Sunlight. The default is nice, but we can do better. Let’s set Light Strength to 59%, with a Light Temperature of 5310K. To compensate, we’ll move Brightness to 7%. The Contrast needs a change as well, so we’ll set that to 55%. Finally, we’ll set Saturation to 8% to introduce more color.
STEP FIVE: The photo looks great for so few changes. There’s one more thing to do, though, and that’s to darken the sky. For this we can use the Pro Contrast filter again, so we’ll click the + next to it to add one. Next, we’ll click the Control Points + icon in the Pro Contrast filter in the filter stack on the right and click multiple times in the image to add a series of control points to cover the sky. There are seven here. Shift-click on the non-selected points to select all of them. To see the mask, click the square icon above the control points in the panel.
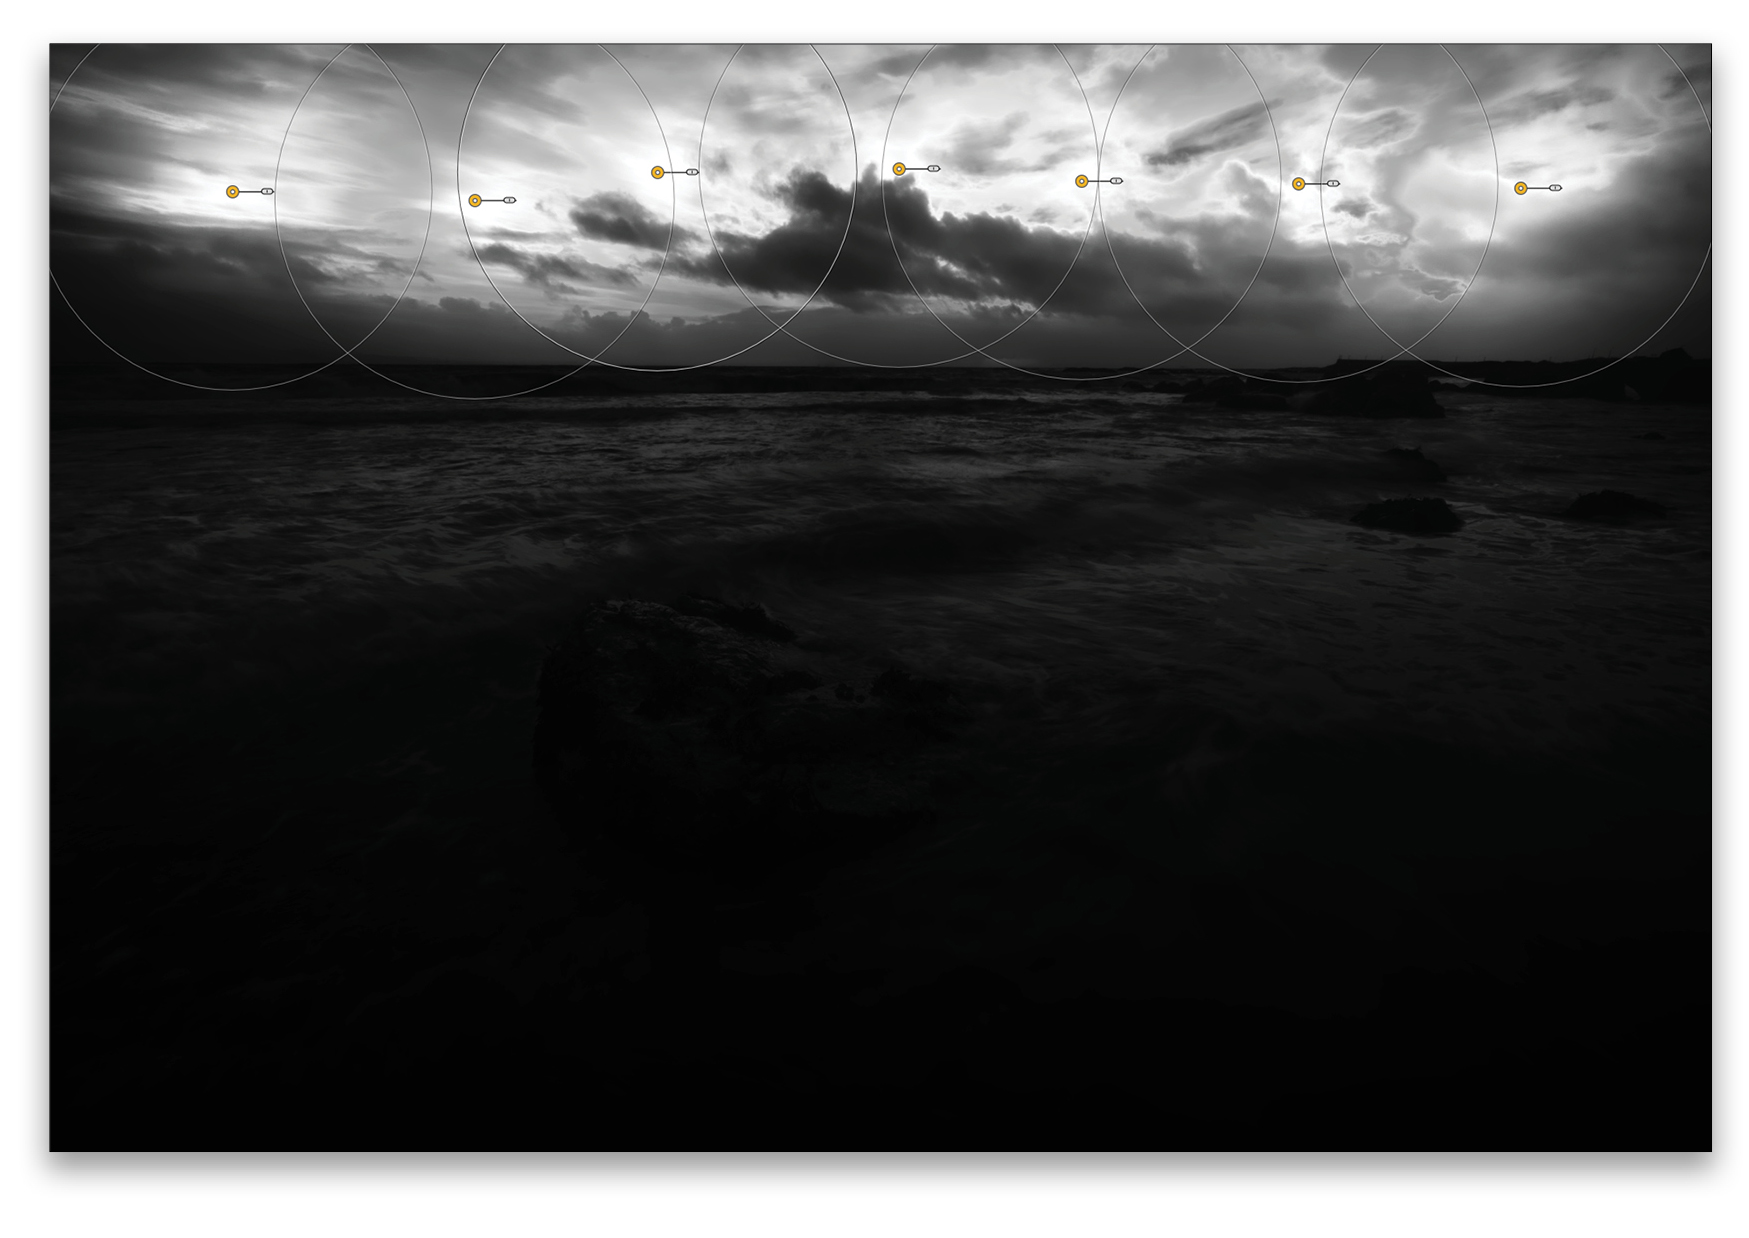
Here we set the Luminance to 66% so the brighter parts of the sky are selected, and then set Dynamic Contrast to 98% and Opacity to 32%.

With the photo complete, there are a couple things to consider before saving.
Creative Control
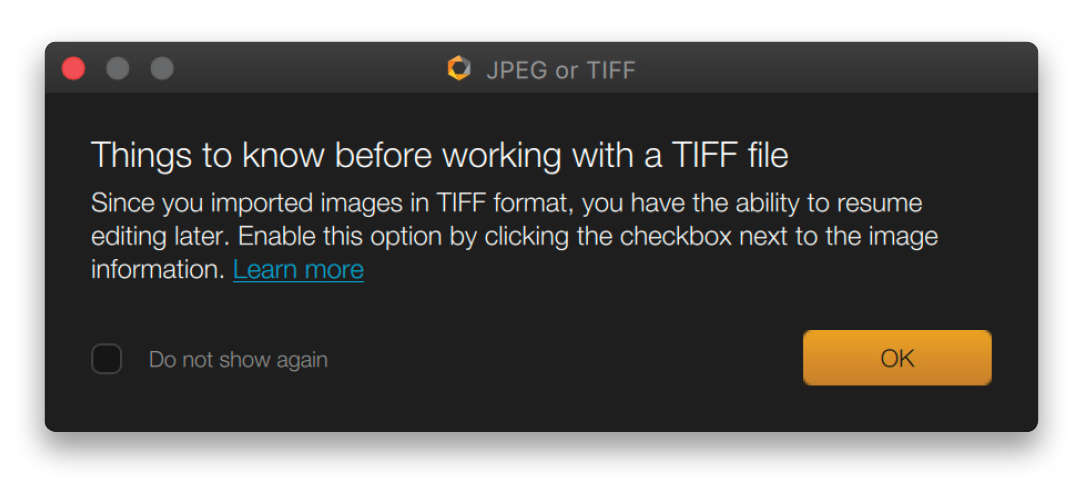
The first thing we need to consider is: “Do we want to be able to edit this image again?” There’s an option in Nik to use a part of the TIFF specification to create files that can be edited nondestructively. Such files contain the original image, an edited preview layer (which is what the user sees), and the instructions for Nik to turn one into the other. It’s a fantastic use of metadata and, while the cost is a larger file, it’s worth it for the editing ability.
When you open a TIFF file in Nik Collection 5, you get a dialog letting you know that you can save this in a way to make it editable in the future.
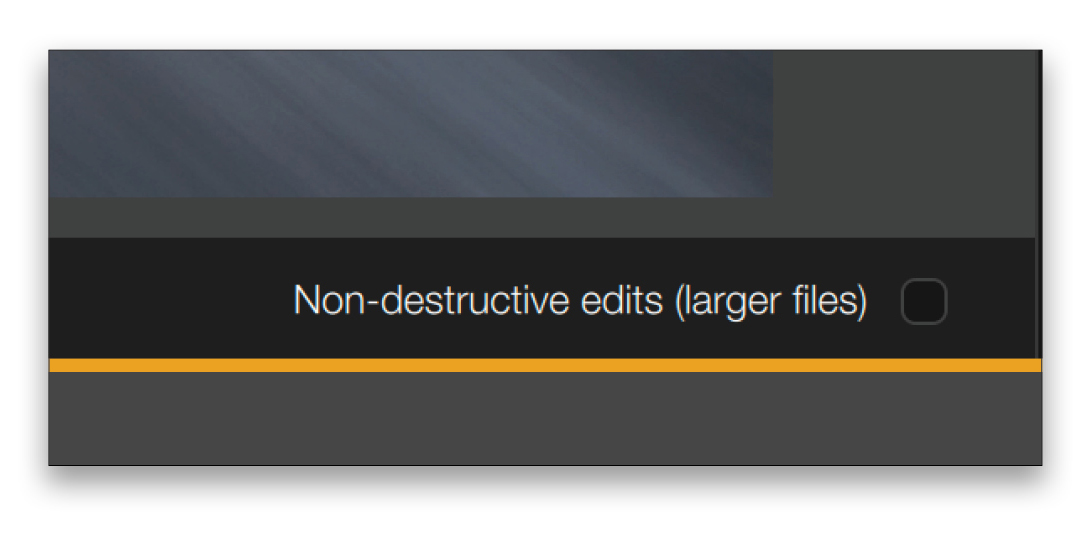
The checkbox it refers to is at the bottom right of the photo preview.
Save Preset
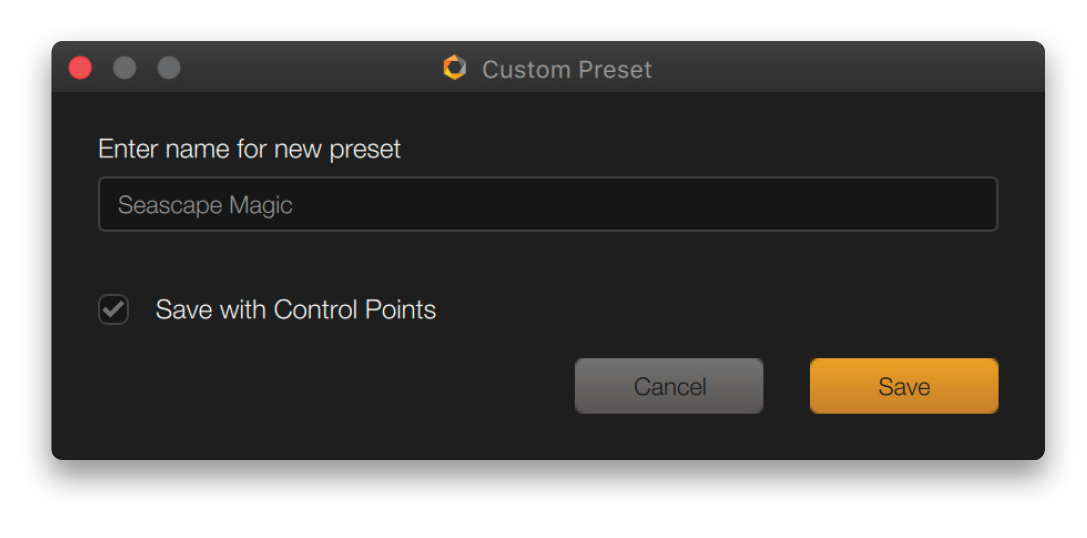
The second thing to consider is: “Would we like to use these settings again on another image, but far quicker?” That’s where presets come in, and Nik Collection 5 makes this easy. There’s a Save Preset button right there at the bottom of the Right panel.

Click the button and the Custom Preset dialog appears. Name the preset and click Save. This preset now appears in the Custom section on the left.
Apply
When you’re done, click apply to return to your host application. As this one started in Lightroom, it’ll return to Lightroom. To edit again, use the Edit Original option when sending it back to Nik Collection.
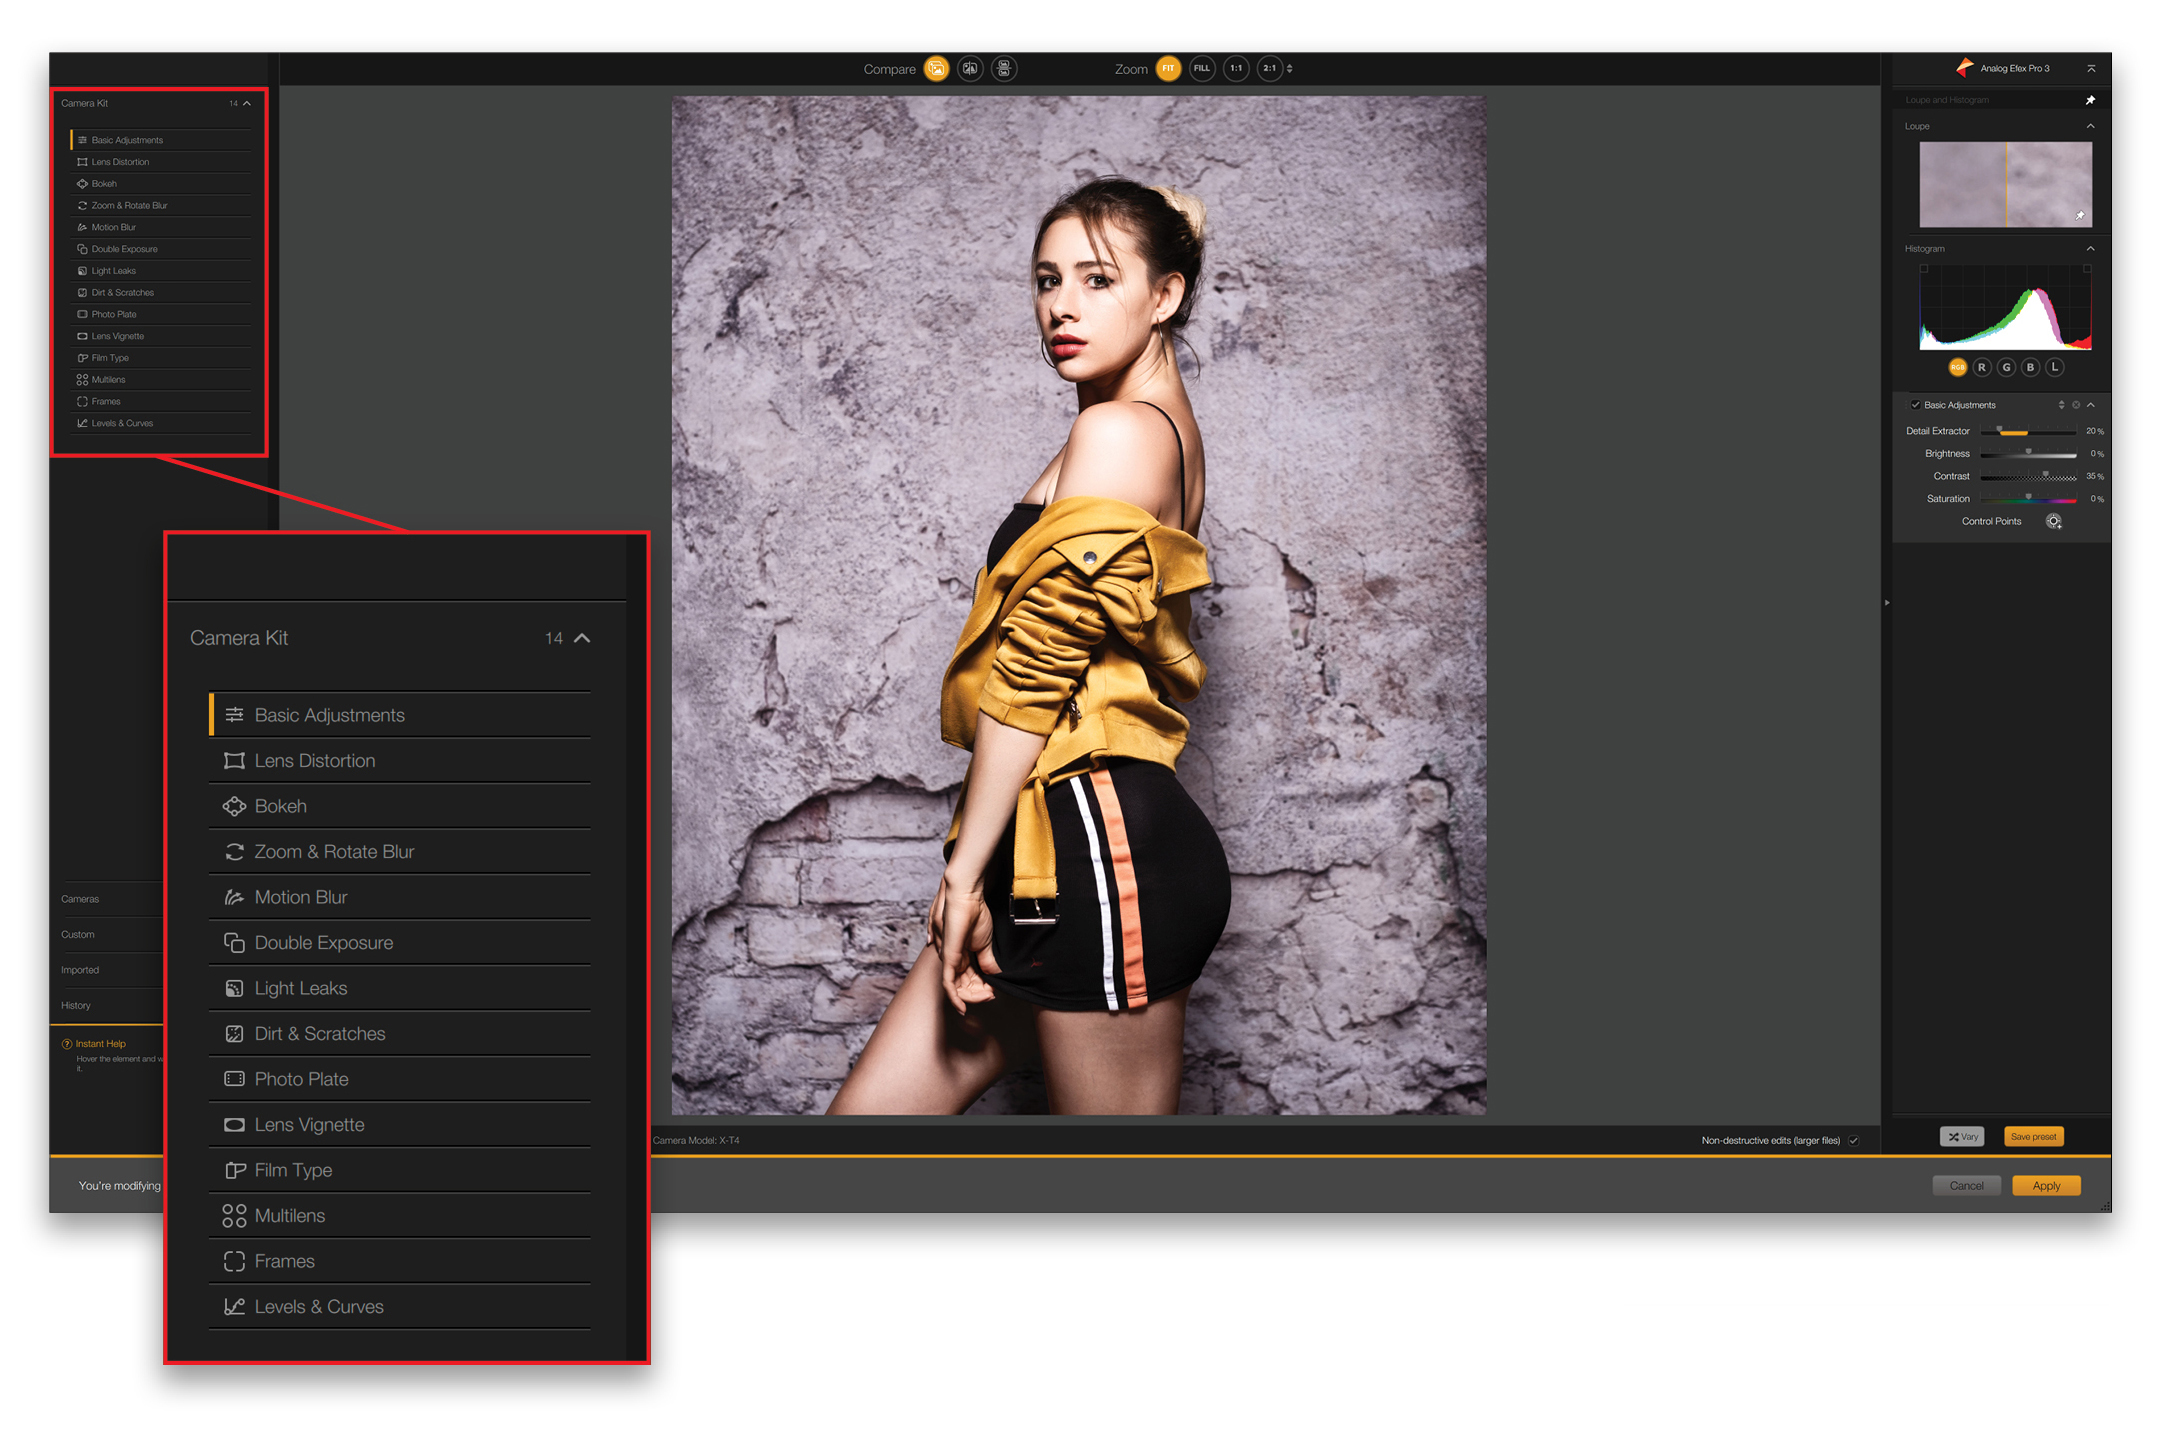
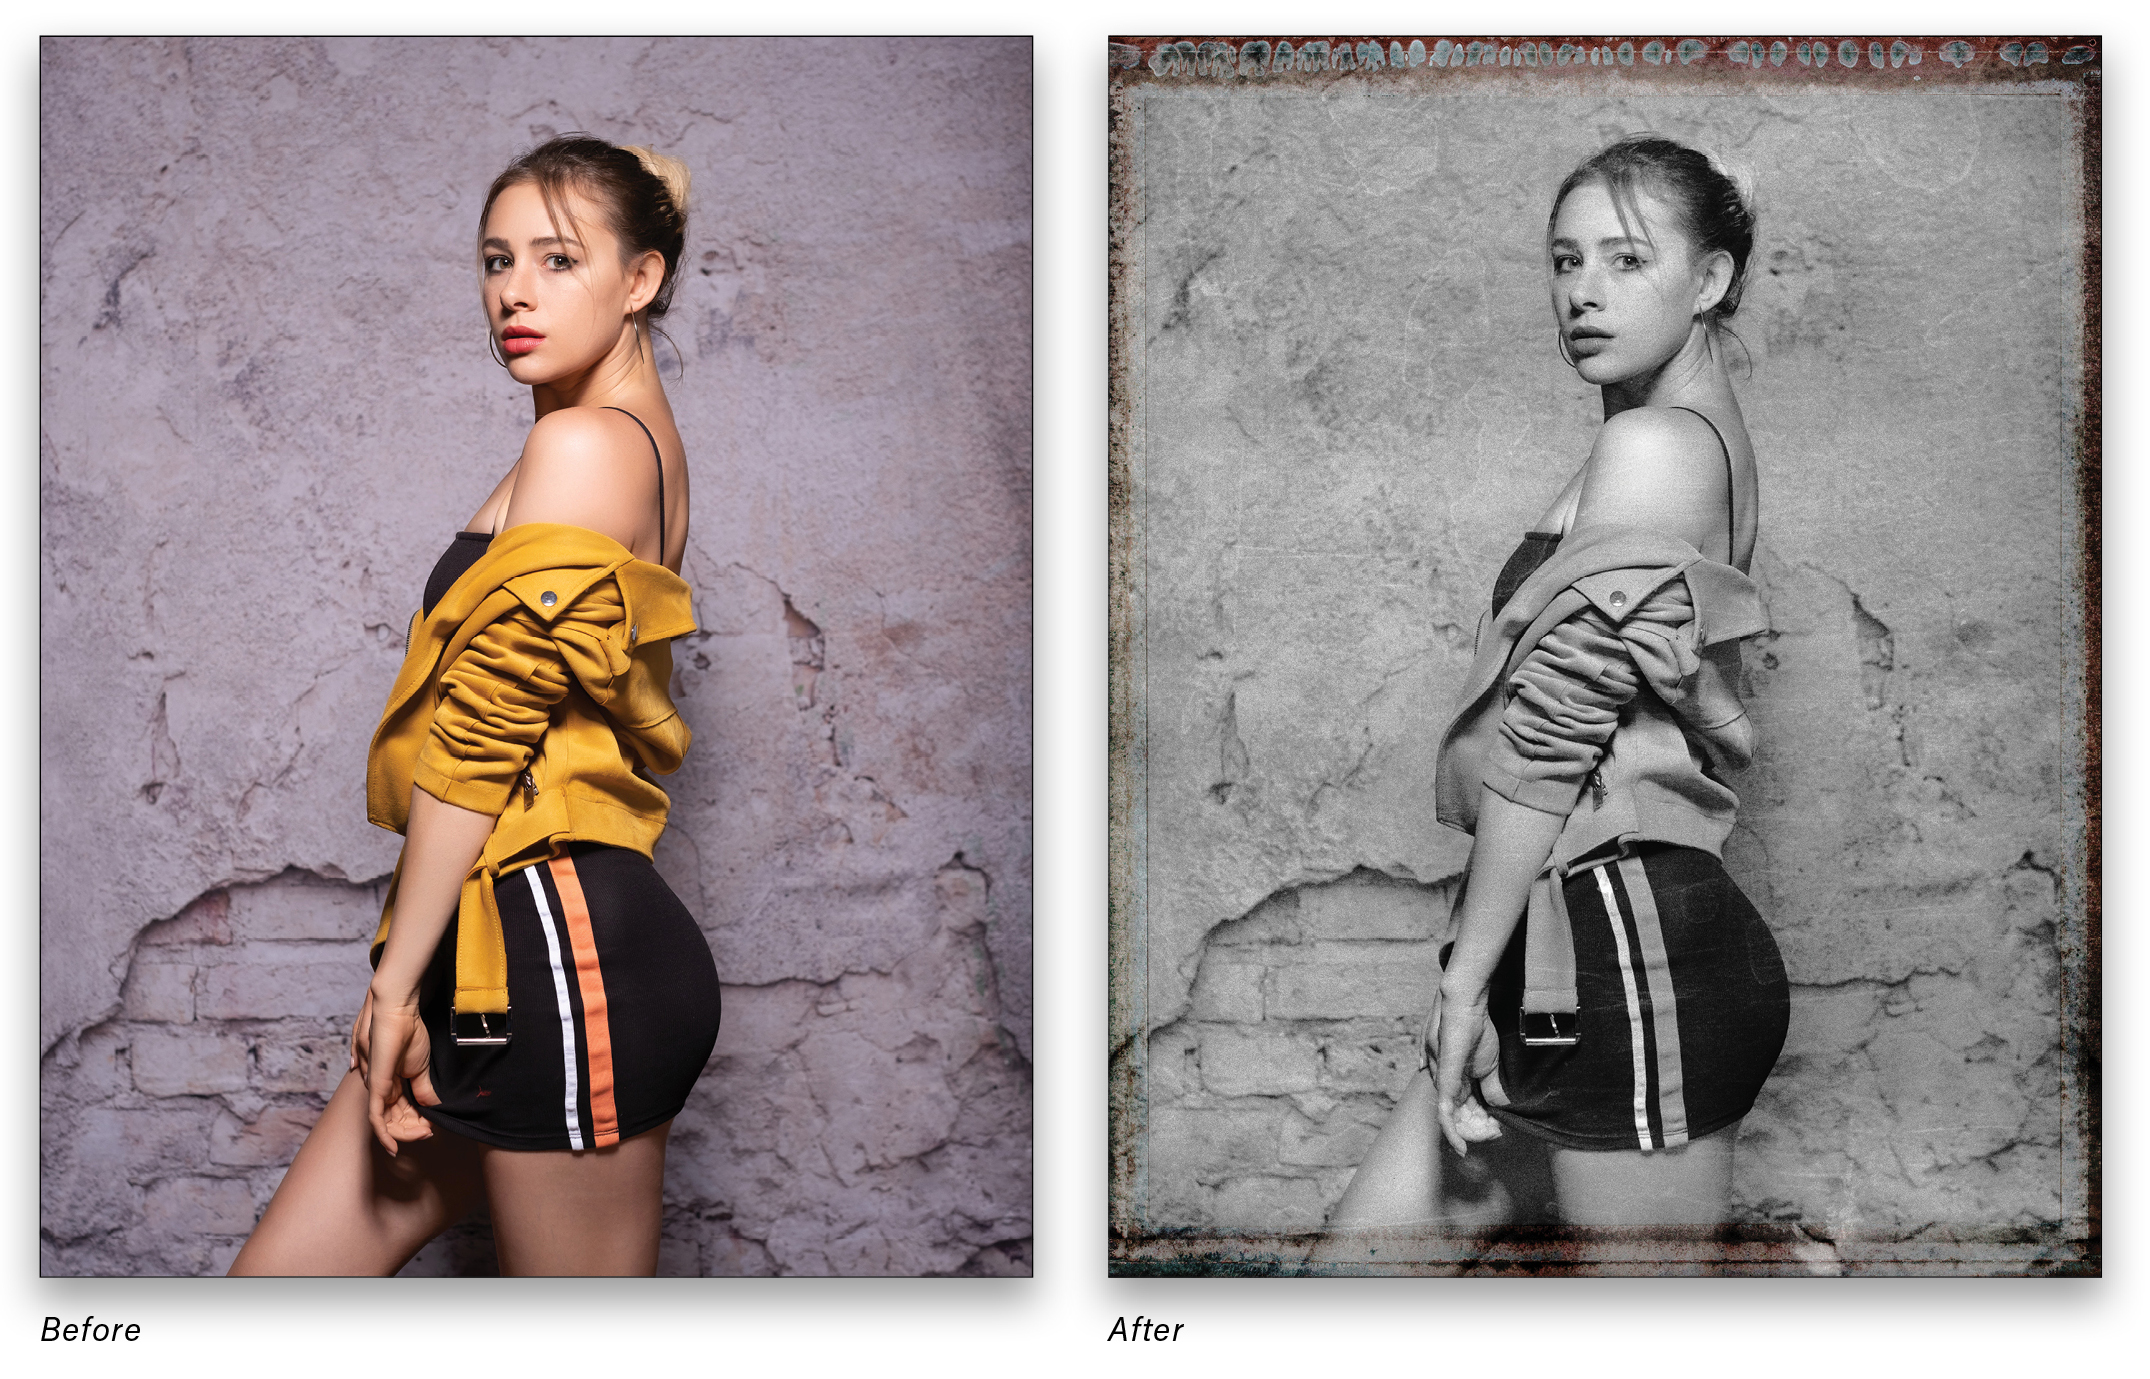
ANALOG EFEX PRO 3
Analog Efex follows the new interface you’ve seen with Color Efex, but it’s a slightly different beast.
With Analog Efex, you build the look from the Camera Kit on the left, choosing from things such as Film Type, Lens Distortion, etc., to create something retro and unique. You can’t remove Basic Adjustments (on by default); but you can use the checkbox in the settings panel on the right to turn off the effect. The combination of Detail Extractor and Contrast gives an amped-up version of Lightroom’s Clarity.
STEP ONE: We’ll begin by setting Detail Extractor to 15%, and everything else to 0.

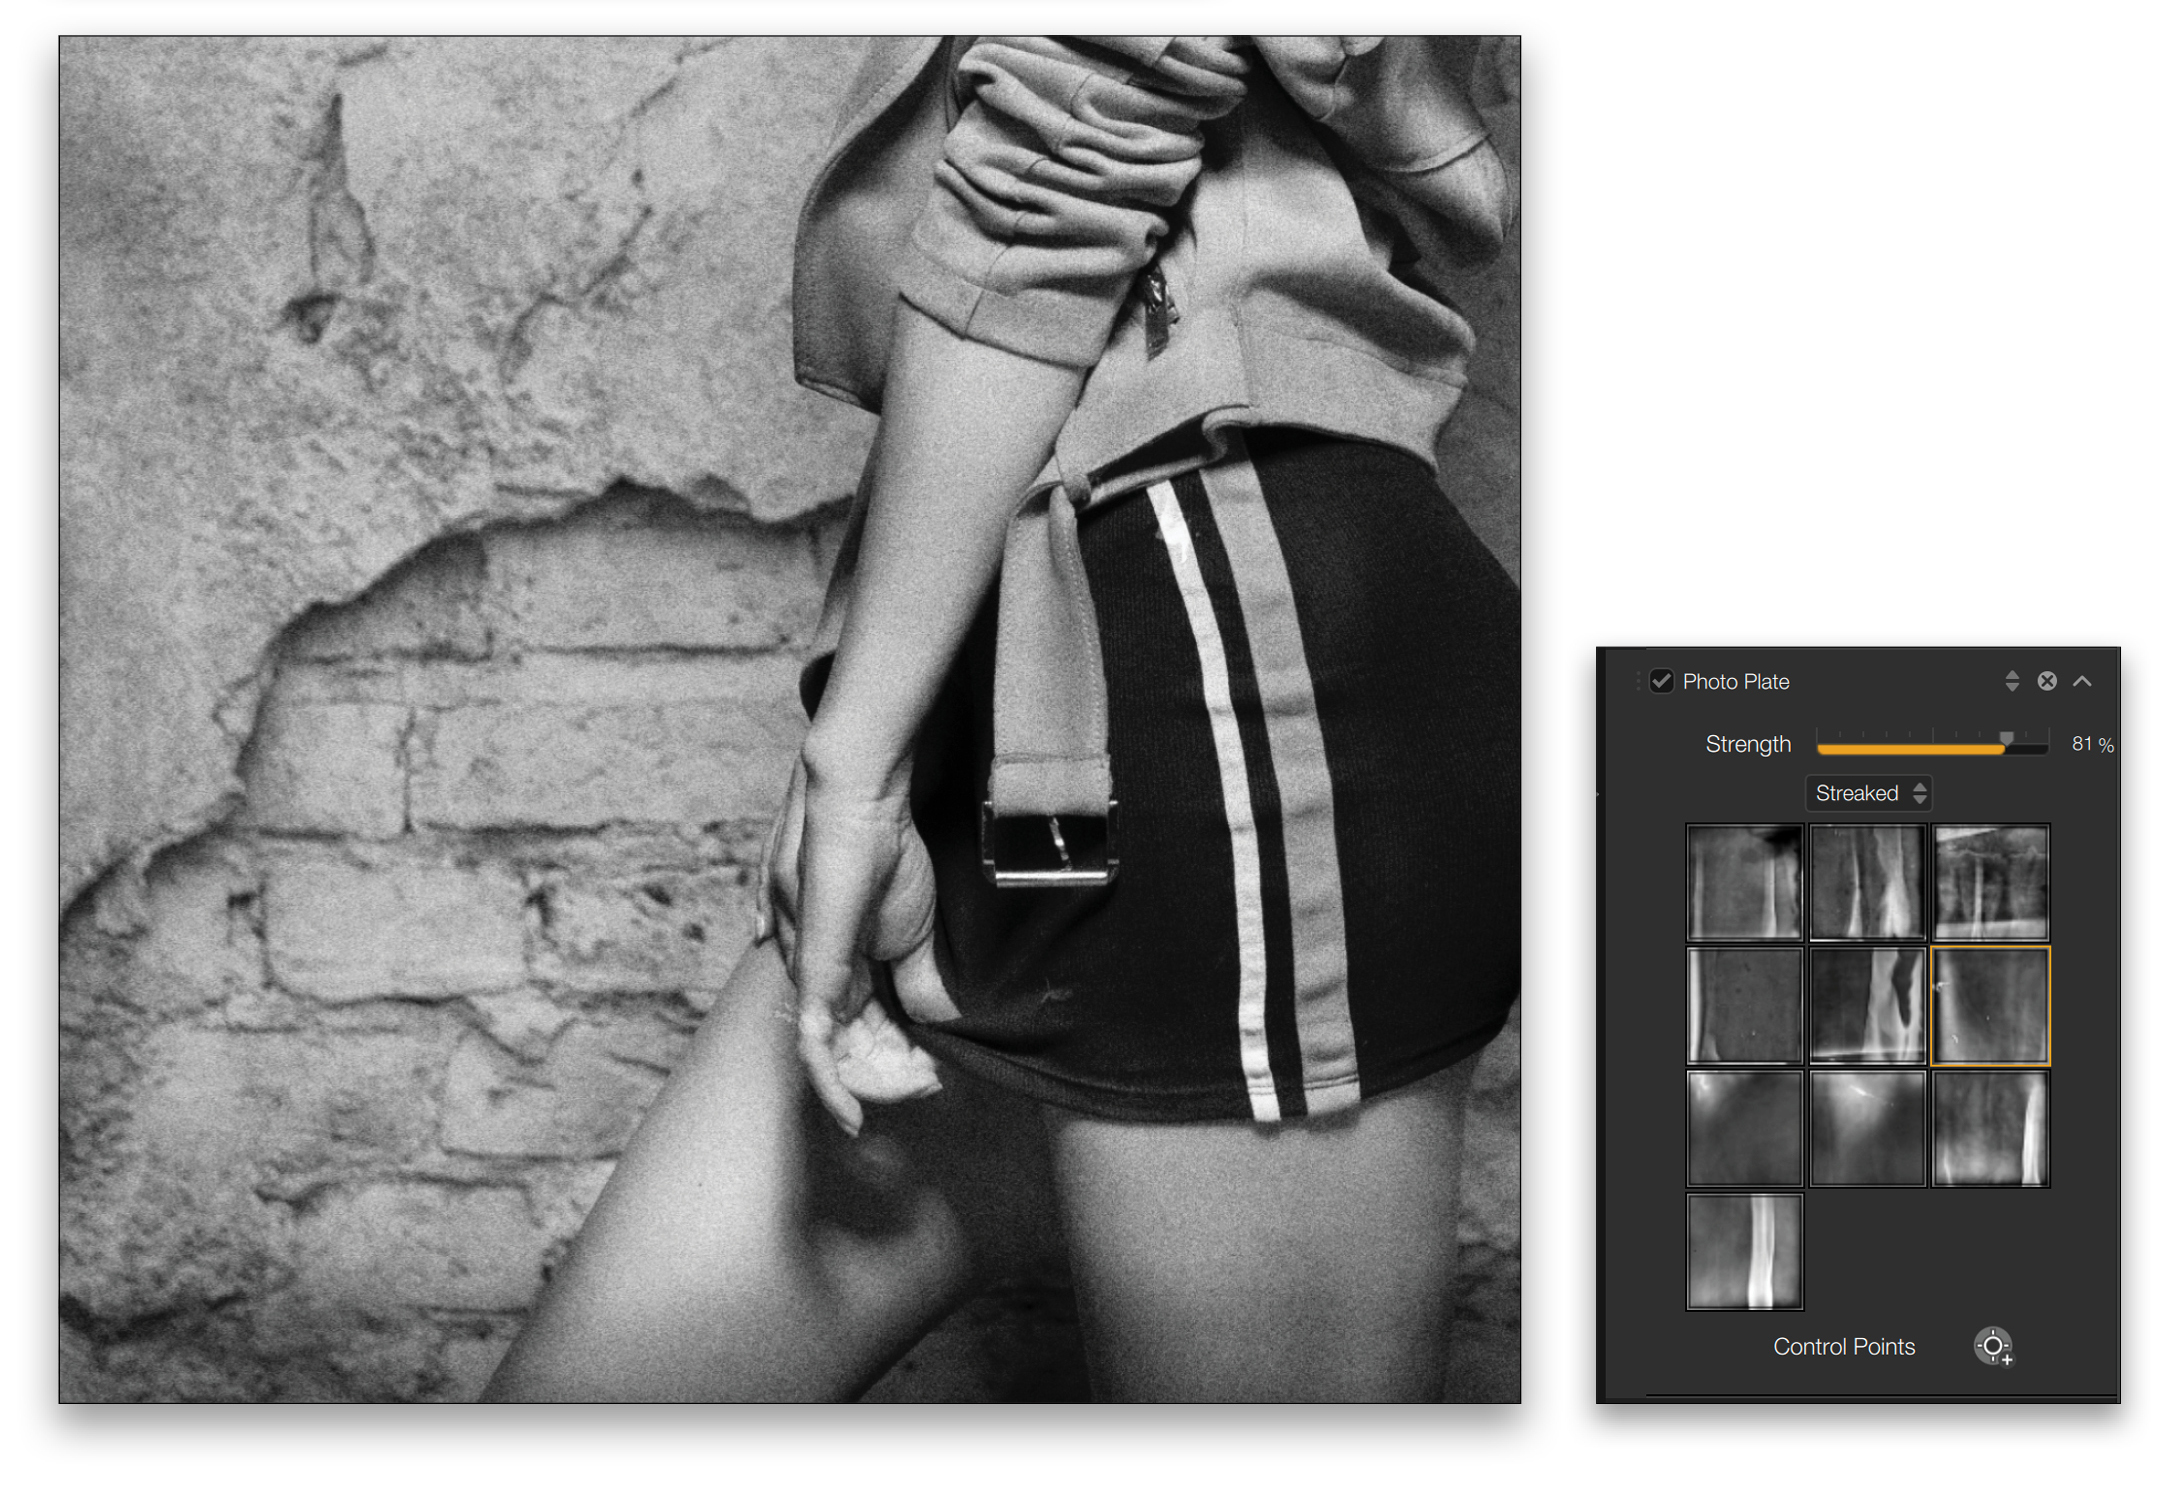
STEP TWO: There are plenty of bokeh and blur effects, but for this let’s go with a more retro framed plate. Click the + on Film Type to change the color tone. From the drop-down menu in the settings panel on the right, we’ll choose B&W Neutral. You can choose whichever look you prefer, but here it’s the third one on the second row. We’ll set Fade to 35% and Strength to 31%. To decrease grain, we’ll lower Grain per Pixel to 169.

STEP THREE: To grunge up the image a little, add Photo Plate. There are a few different types, but for this try the Streaked section. Quite by accident, we’re again using the third option in the second row. We’ll pull back the effect by setting Strength to 81%.
STEP FOUR: To go really retro, you could go for a Polaroid border. Click the + next to Frames, and from Filmstrip, choose the first in the bottom row. It fills the frame too much, so we need to set Scale to 50% to reduce coverage.
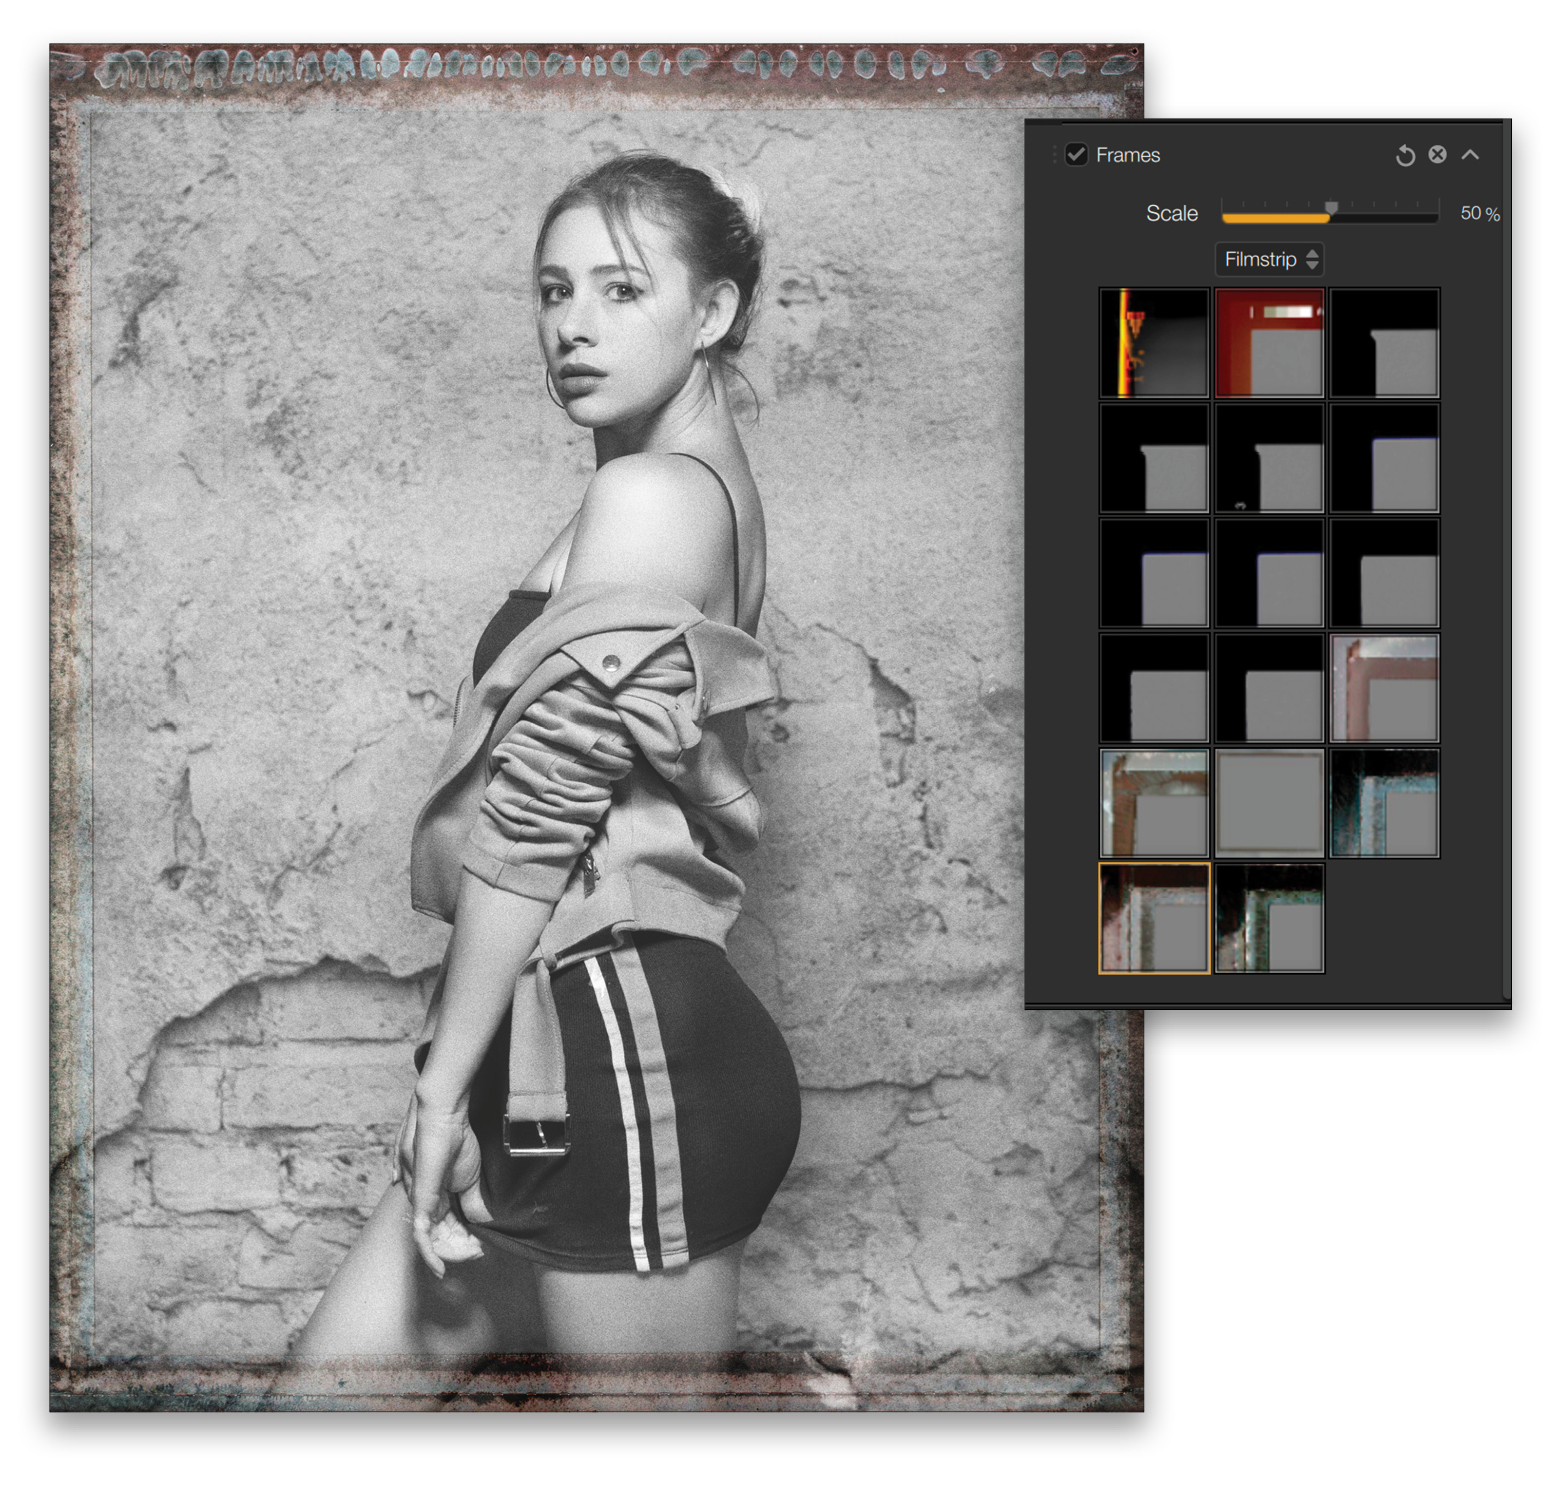
STEP FIVE: For additional grunge, add some Dirt & Scratches. Selecting Scratches from the drop-down menu, click the first one in the second row.
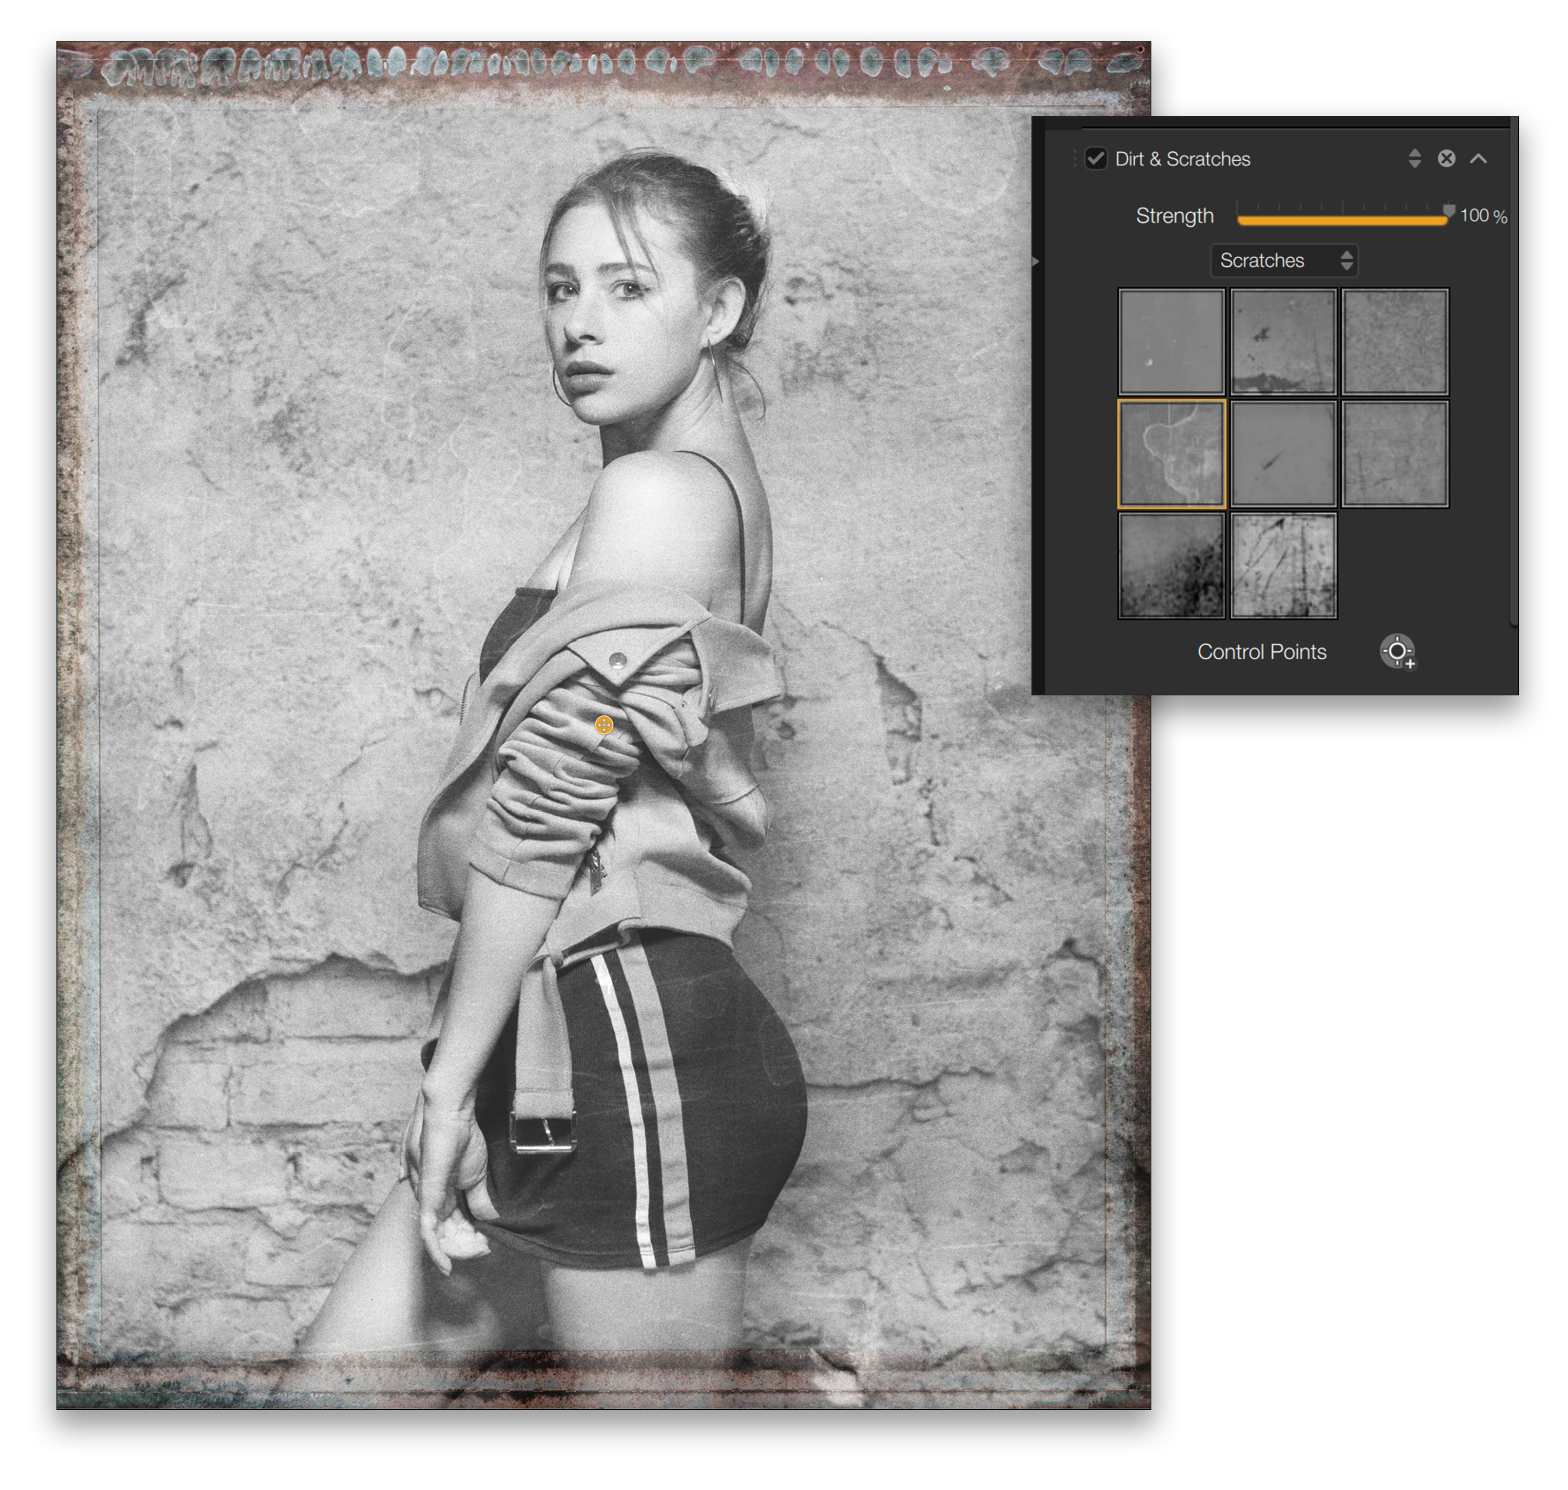
STEP SIX: The final step is to regain some of the contrast via Levels & Curves. Here’s how the interface looks at the end. The orange beside each section in Camera Kit indicates that it’s active in the current look. You can’t control the order of effects in the right panel; they match the order from Camera Kit.

Click Apply to return to your host program.
PHOTOLAB 5 ESSENTIAL
DxO’s PhotoLab 5 ESSENTIAL is included with Nik Collection 5. They also offer a discounted upgrade to the ELITE version, should you desire. With ESSENTIAL, you’re not getting the same processing as you would with DxO PureRaw 2.0, which uses the new DeepPRIME engine for processing. It also has options for HQ and PRIME, but ESSENTIAL only offers the HQ option, so it gives the most basic of the methods DxO has for RAW processing. It does, however, give a flavor for the processing that can be done in PhotoLab 5 ELITE. PhotoLab could take a book to discuss, so we’ll only take a passing look.
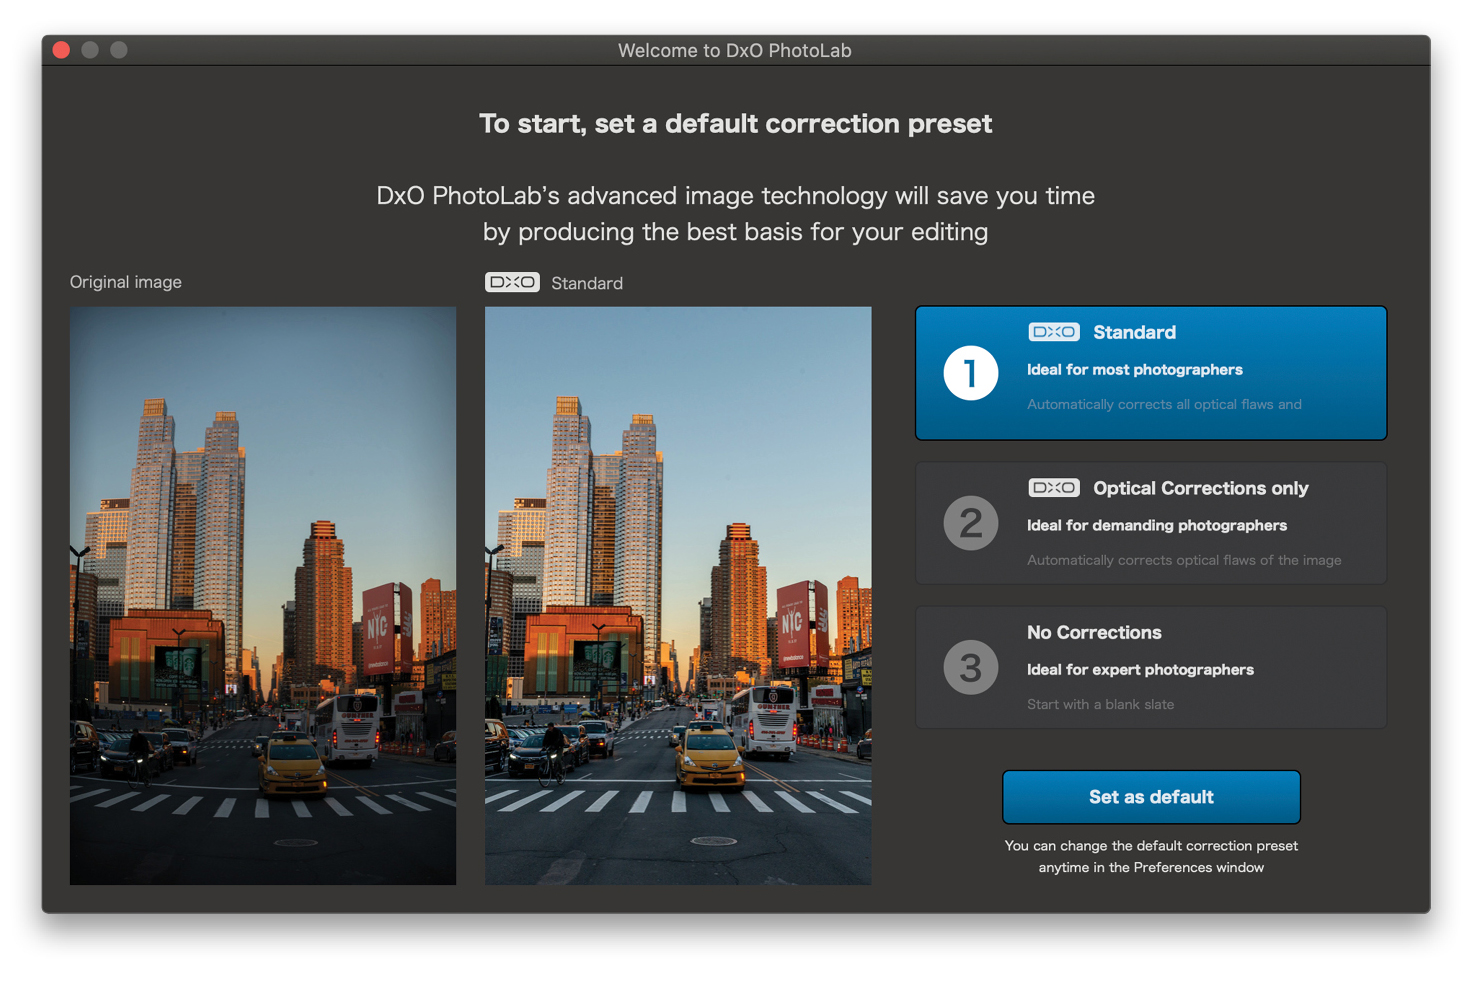
On install, you get the option to choose how much auto-processing is done.
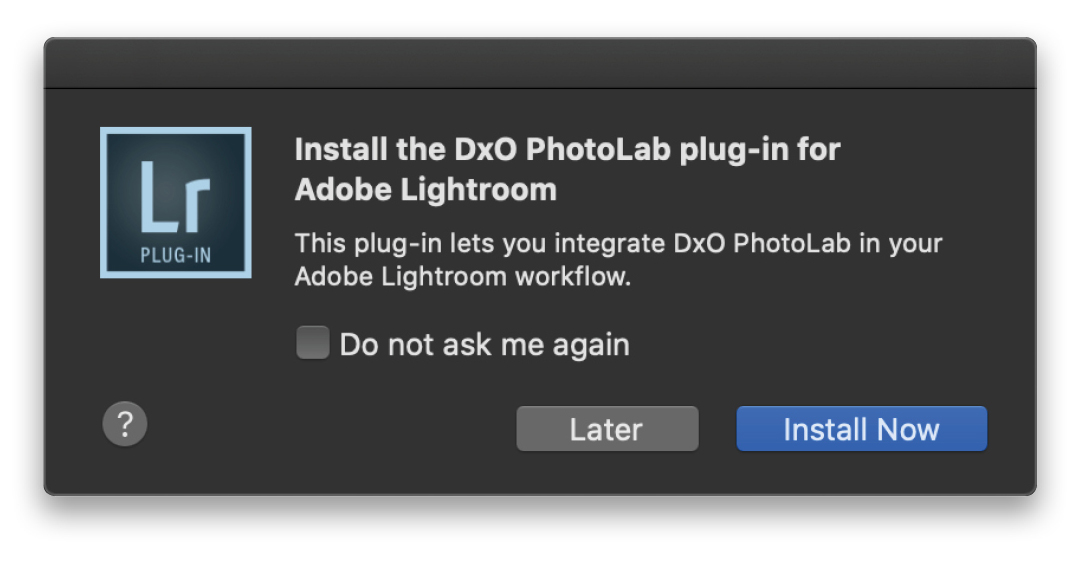
You also get the option to install a plug-in for Lightroom.
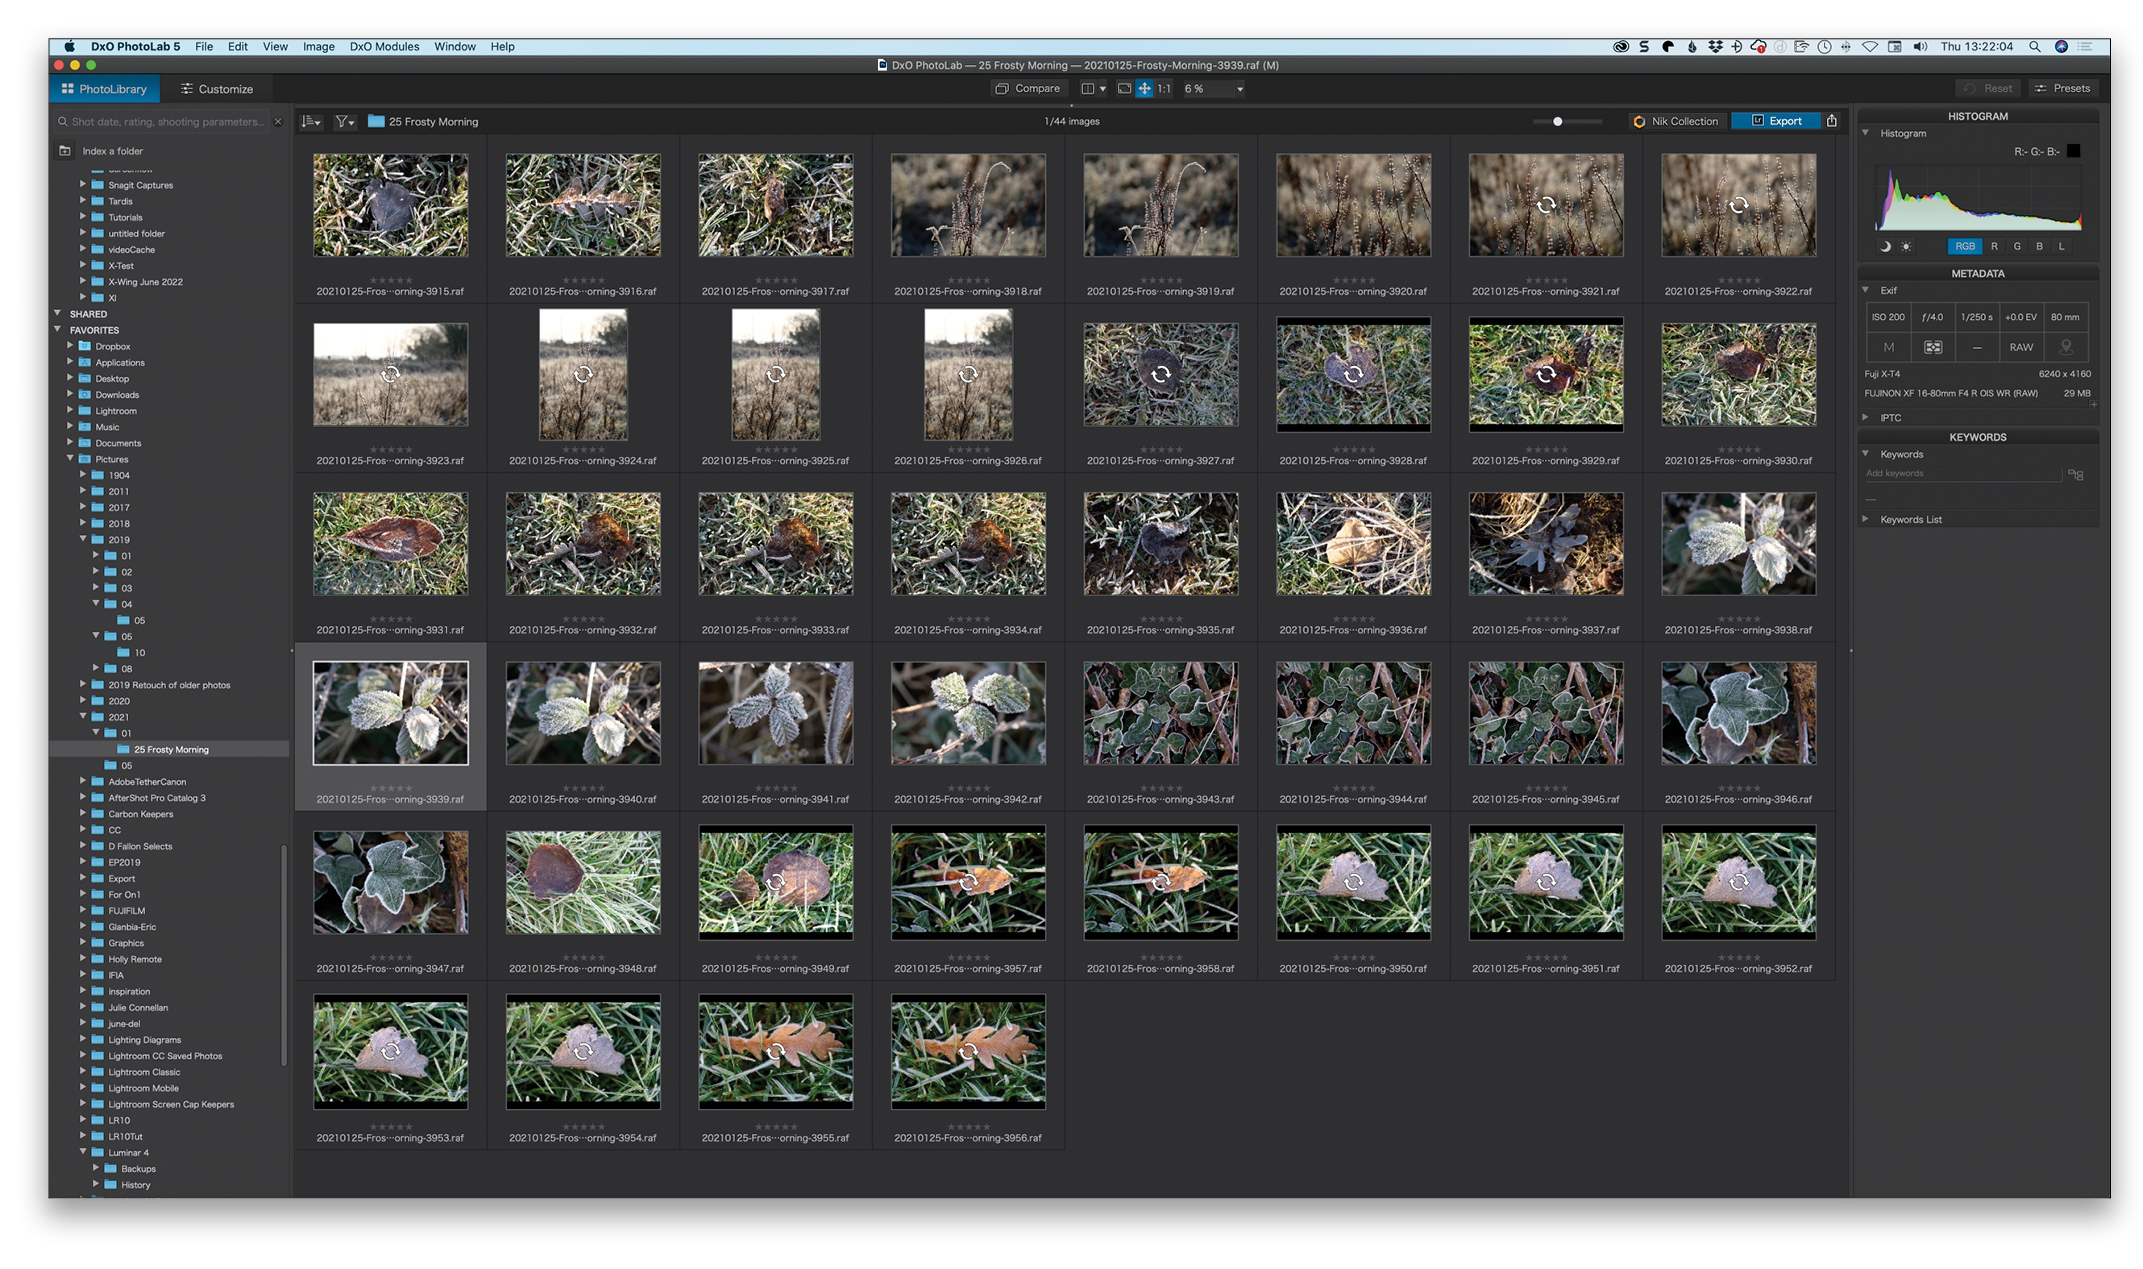
With the app installed, run it to see what’s there. There are two main parts: PhotoLibrary and Customize.
PhotoLibrary
PhotoLibrary uses a browser on the left. The preview area is empty until you select a folder. Once you select a folder, PhotoLab will suggest a list of modules to download for automatic corrections. Selecting a photo will populate the metadata information on the right.
Customize
In Customize, you can edit your selected file. As well as the Customize tab at the top left, you can double-click on a thumbnail in PhotoLibrary to switch to Customize. On the left is the Histogram, a navigator in the Move/Zoom panel, a History panel, and the Preset Editor. On the right are the Basic Tools. These include DxO Smart Lighting and ClearView Plus.
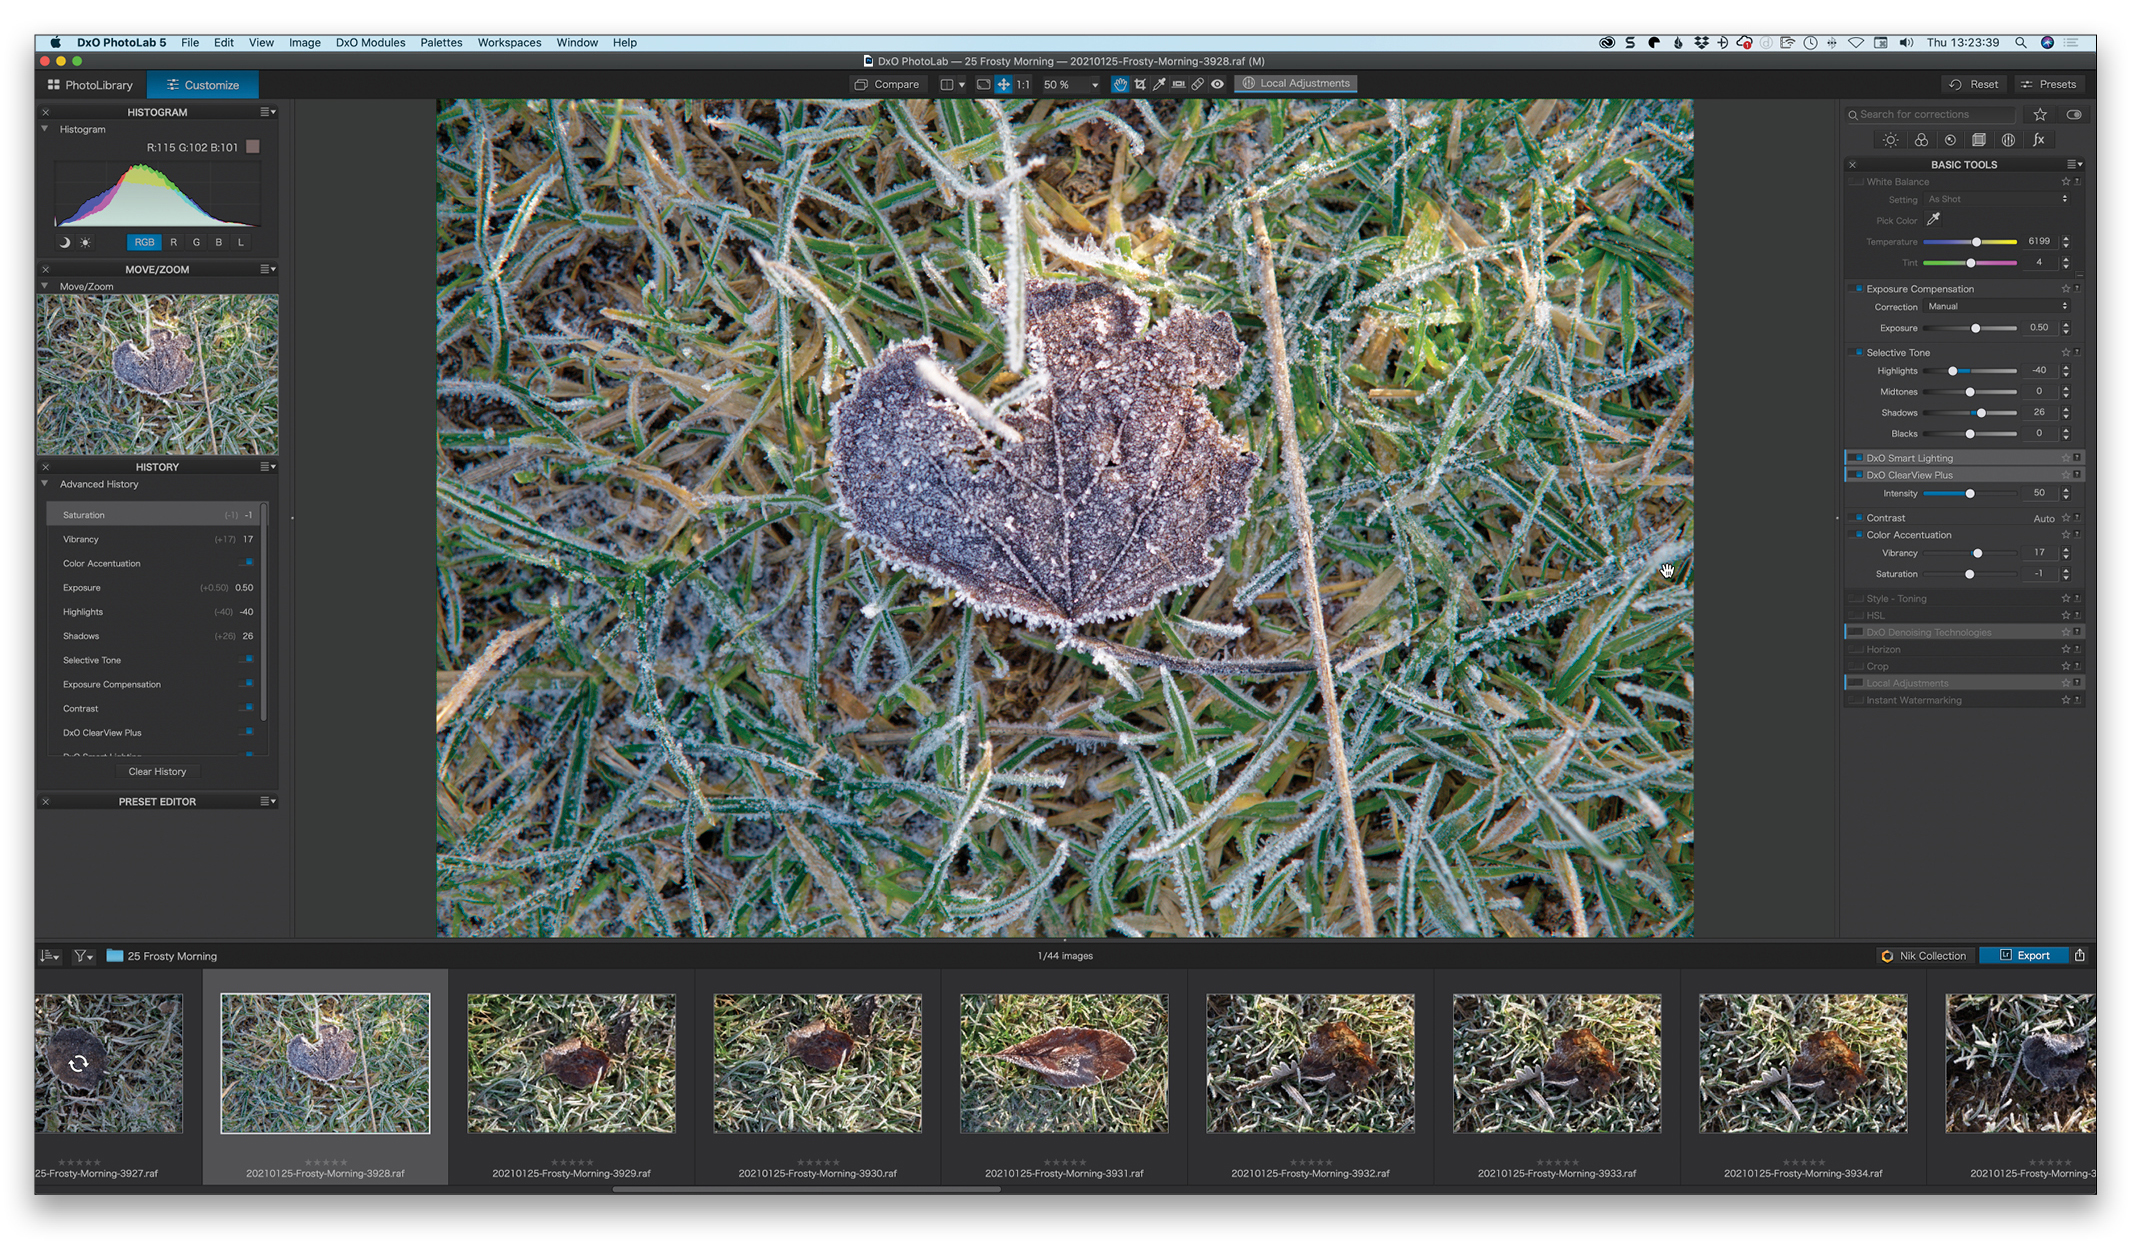
Nik Integration
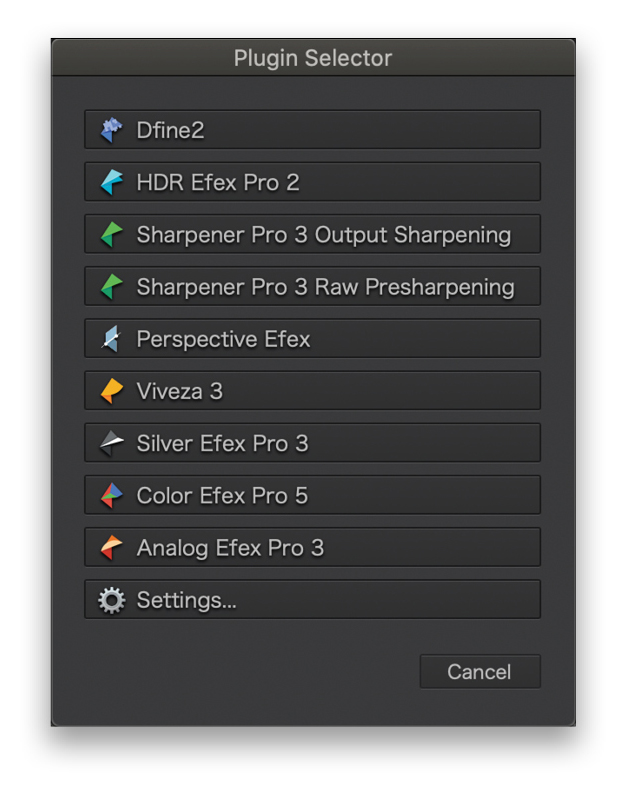
In PhotoLibrary, at the top right of the preview area, is a Nik Collection icon. Click on this to access all the plug-ins. This means the Nik Collection can act as a standalone system from DxO.
PROCESS AND PROGRESS
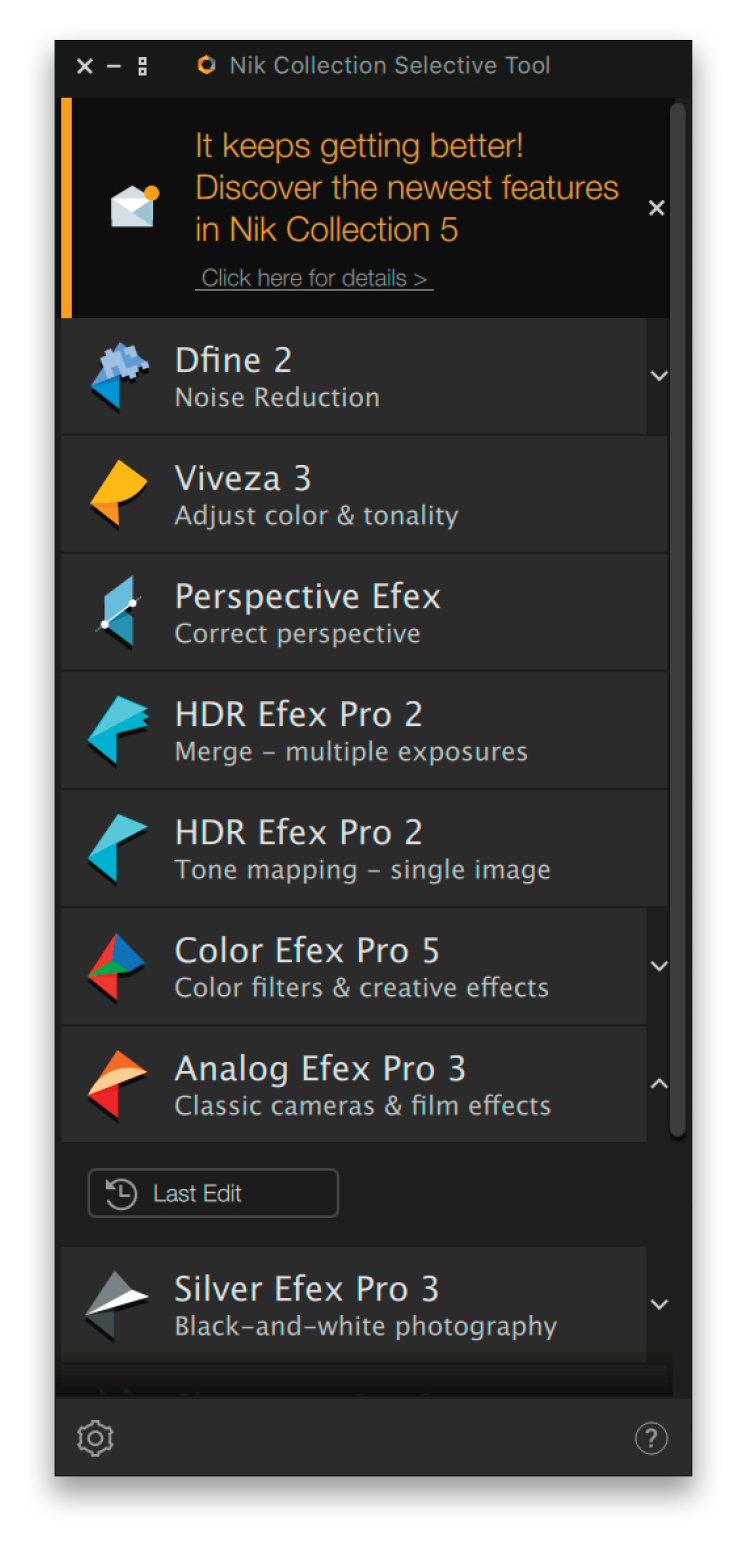
While some of the biggest changes are cosmetic, they really make the collection feel more modern and cohesive. The updated interfaces make Nik Collection 5 a pleasure to use, especially with Color Efex Pro 5, one of the most-used of the plug-ins. Things like Last Edit in the Nik Collection Selective Tool (in Photoshop) for the creative presets mean you can get to your edit faster.
The addition of PhotoLab 5 ESSENTIAL is an interesting one, and does make the Nik Collection usable without requiring the purchase of an additional host.
About Photoshop User and KelbyOne
Photoshop User magazine comes out digitally 12 times a year and is part of KelbyOne, the leading educational resource for Photoshop, Lightroom, and photography. Pro members have access to more than 900 video courses and 100 back issues of Photoshop User. To learn more about KelbyOne, click here.