Tune Your Top-Down Drone Shots with Atmospheric Effects
[This article originally appeared in the July 2022 issue of Photoshop User, the Magazine for Lightroom and Photoshop Users. To learn more about Photoshop User and to sign up to read the latest issue for free, click here.]
By Dave Williams
Pick your target! That’s the first key to creating a killer top-down drone shot. We’ll come back to that, but I wanted to make that point straight off the bat, and here’s why: Drones are becoming far more accessible and, as a result, drone photographs are now more common than ever. The shots are no longer a novelty; however, the drone itself can be a novelty to the consumer.
As drone pilots, we need to realize that our drone is a camera just like the one held in our hands, but we can position it almost anywhere around us in 3D space. It’s common for a new drone pilot to take photos of familiar things they see every day, but from a new perspective, which is the “airplane-window” effect. Imagine flying over your hometown in an airliner and seeing your house below, then taking a snapshot on your phone to document a new angle of a familiar thing. This is what we need to avoid with our drones; it needs to be a creative composition, not a snapshot. You may also consider adding VFX to your drone shots to make them look more aesthetically-pleasing.
The same rules of photography apply, but we’re applying them via a remote controller rather than to a camera in our hands. With this approach, we can open a whole world of creative expression and shoot everyday locations in a brand-new light.
One of the most common things to do with a drone is to shoot straight down, which gives photographers a lot of challenges to overcome. When you get it right, it can give spectacular results, but it can also go completely wrong and totally flop.
The biggest challenge is the lack of any sky, because the sky can often make or break a landscape photo. The primary composition considerations when shooting top-down photos with a drone are colors, patterns, lines, textures, and light. It’s also more important than ever to scrutinize and critique your images honestly and admit to any shortcomings.
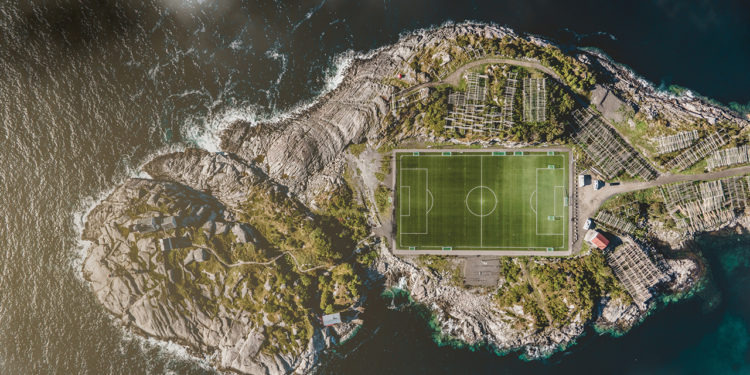
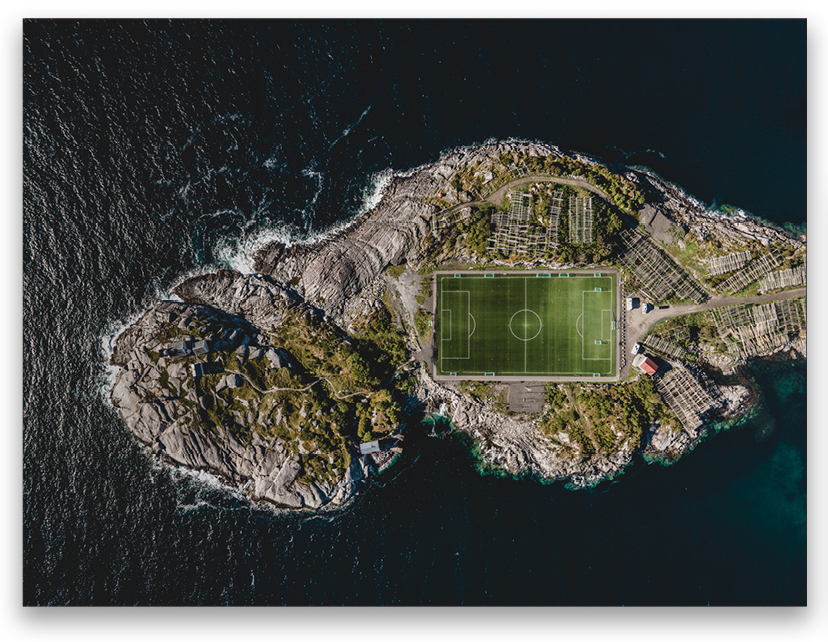
Aside from these compositional elements, it’s important to include a subject that’s interesting or compelling. In this tutorial, I’ll take you to Norway to a famous soccer pitch (playing field) on granite rocks at the end of a fishing town in the Arctic. The reason this works as a top-down image is because the soccer pitch is not only recognizable, but it’s also framed twice: first by the rocks and then by the sea.
EDITING THE SHOT
We can treat the shot just like any other landscape when it comes to our initial adjustments, applying them in either Adobe Lightroom or Adobe Camera Raw before taking the image into Adobe Photoshop to add our atmospheric effects. Here’s the shot from the drone after it’s been edited in Camera Raw.
STEP ONE: The first task in Adobe Photoshop is to duplicate the Background layer by pressing Command-J (PC: Ctrl-J) so you can work nondestructively on your image. It’s important to work nondestructively so you can easily undo any undesired actions or make adjustments without overwriting the original image.

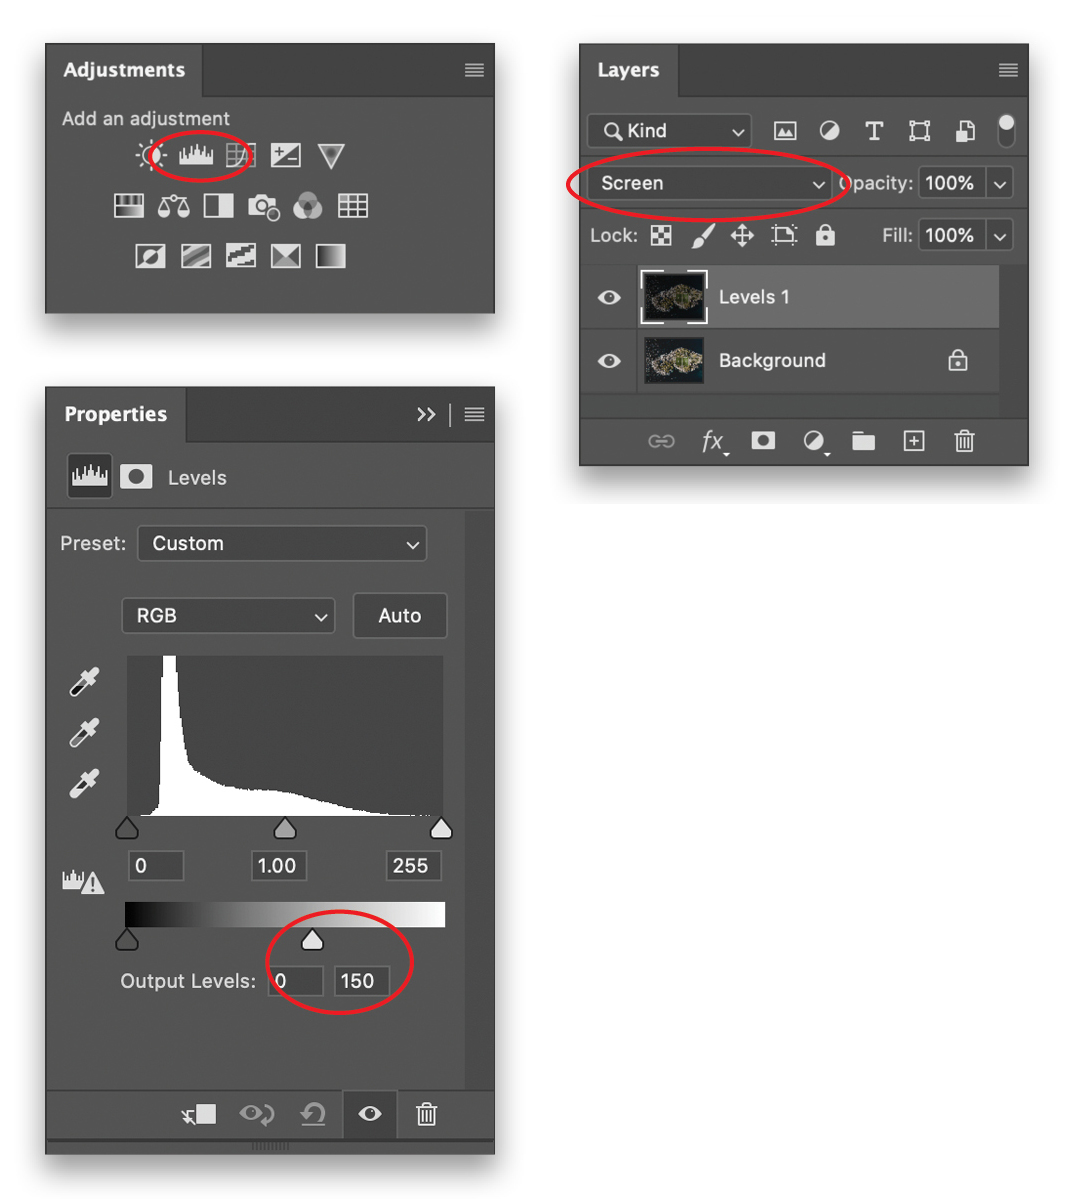
STEP TWO: Next up, we’ll use a Levels adjustment layer to darken the scene, which will give some of our added atmospheric details the chance to pop later in the edits. Click on the top (duplicate) layer in the Layers panel to make it active, open the Adjustments panel (Window>Adjustments), and click on the Levels icon (it’s the second icon in the first row). In the Properties panel (Window>Properties) drag the white Output Levels slider to the left, taking the image brightness down almost halfway (around 150) by changing the white point.
With the Levels adjustment layer active, Shift-click the duplicate image layer in the Layers panel so they’re both selected. Then, press Command-E (PC: Ctrl-E) to merge the layers. Set the blending mode for this layer to Screen near the top left of the layers panel.
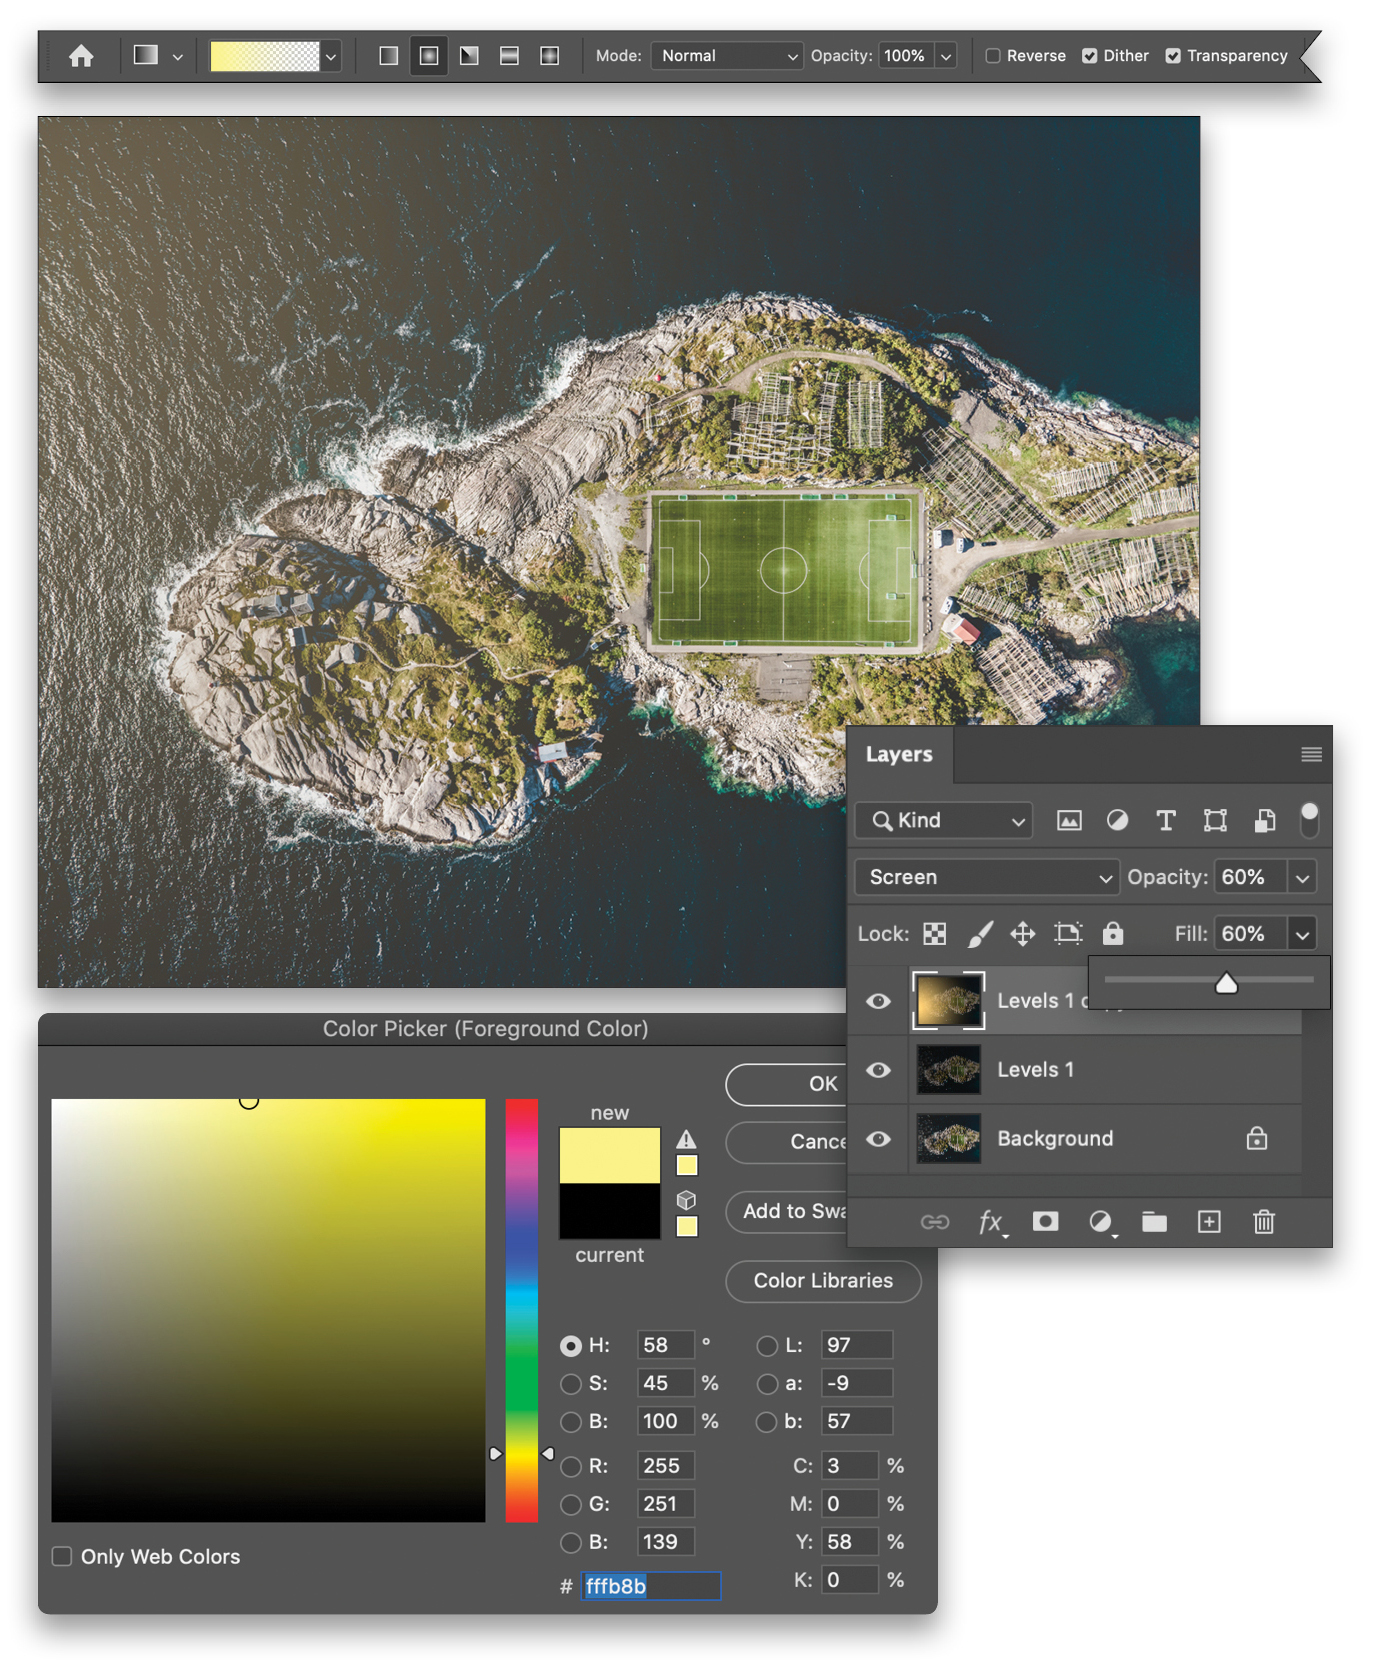
STEP THREE: Our top-down image has no sky, but that doesn’t mean we can’t maximize the sunlight to provide a little atmosphere to the scene. In this particular image, we can see that the sunlight is coming from the left because it’s reflecting on the sea to the left of the scene, and we can verify this because the shadows are falling to the right of the rocks and buildings in the shot. To emphasize the light, first duplicate the Levels layer. On this new layer we’re going to create a radial gradient to mimic the light from the sun emanating from the left of the image.
Grab the Gradient tool (G) and, in the Options Bar, click on the gradient preview to open the Gradient Editor. In the Basics set, select the Foreground to Transparent gradient, and click OK to close the Gradient Editor. Click on the Foreground color swatch at the bottom of the Toolbar to open the Color Picker, select a light yellow (#fffb8b), and click OK. Select the Radial Gradient icon in the Options Bar, and then draw a gradient starting from the left edge of the document, all the way to the right.
To give a more realistic look to the light, change the blending mode to Screen near the top left of the Layers panel, and set both the Opacity and Fill to 60%.
STEP FOUR: Our next task, now that we have light in the scene, is to inject some serious aerial atmosphere by adding clouds to our shot. First, create a new layer and then press D on your keyboard to set the default colors of black for the Foreground and white for the Background. Then, select Filter>Render>Clouds. The clouds created by Photoshop use random values that vary between the Foreground and Background colors in our Toolbar. When these clouds are generated, they can be particularly realistic in a top-down view, which makes them perfect for this application, but we still need to make some adjustments.
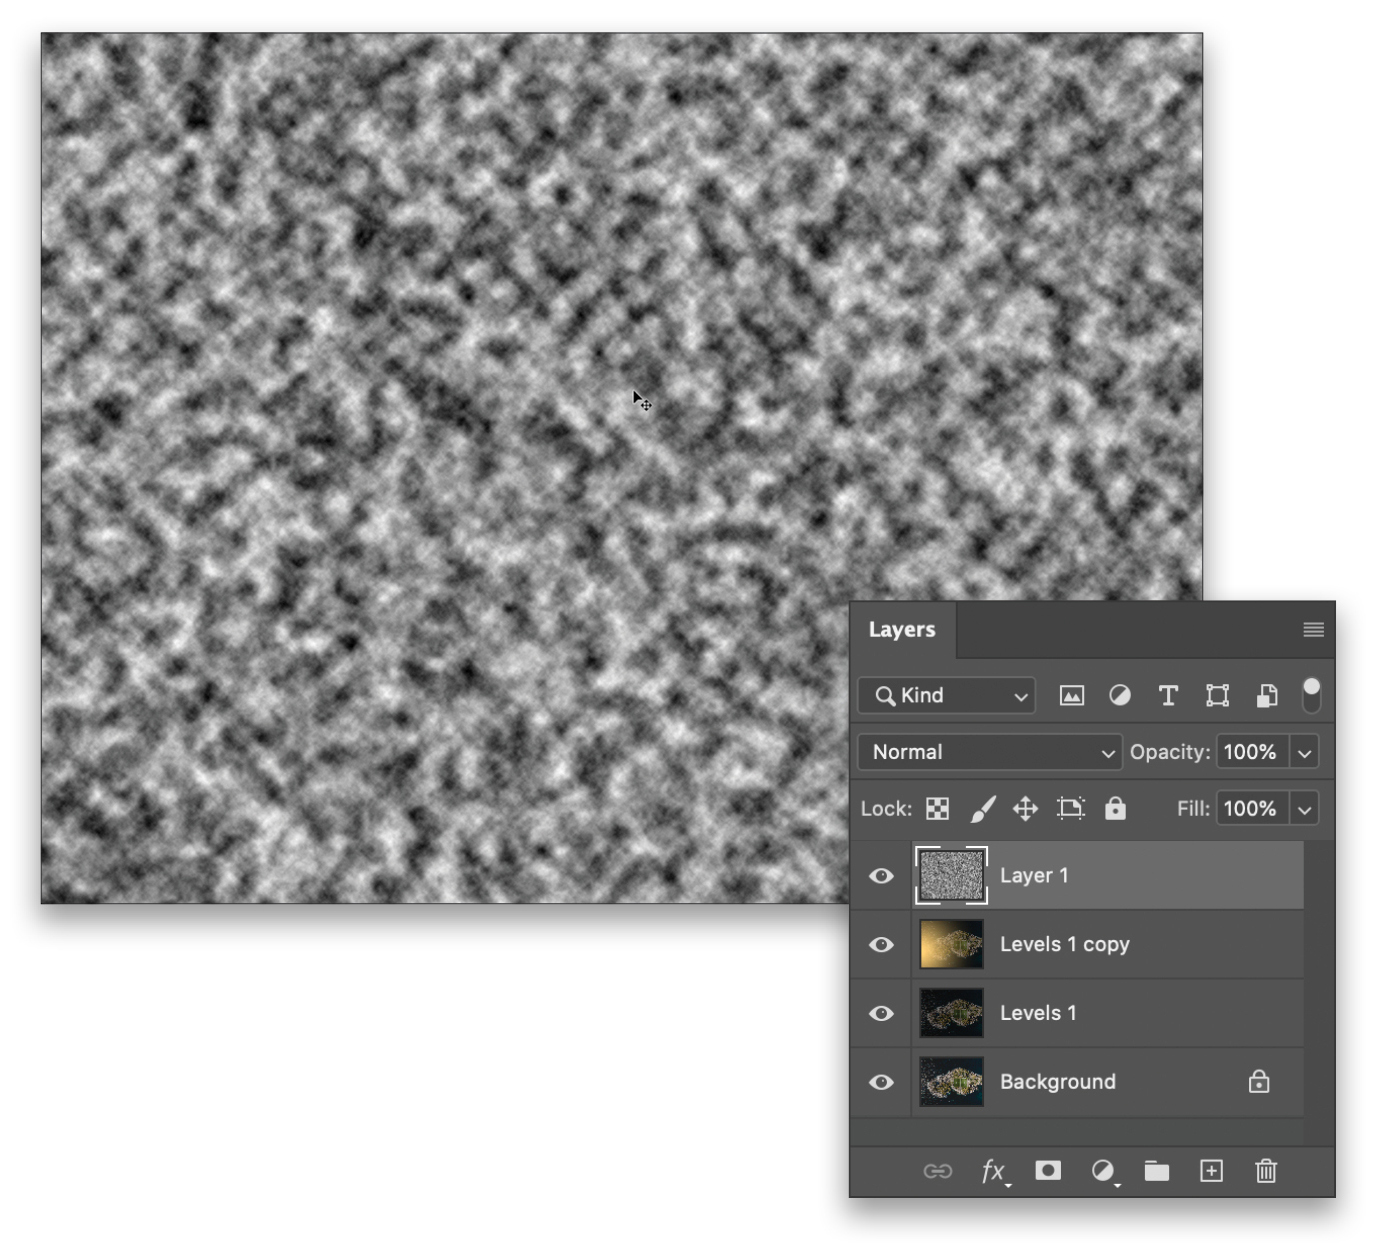
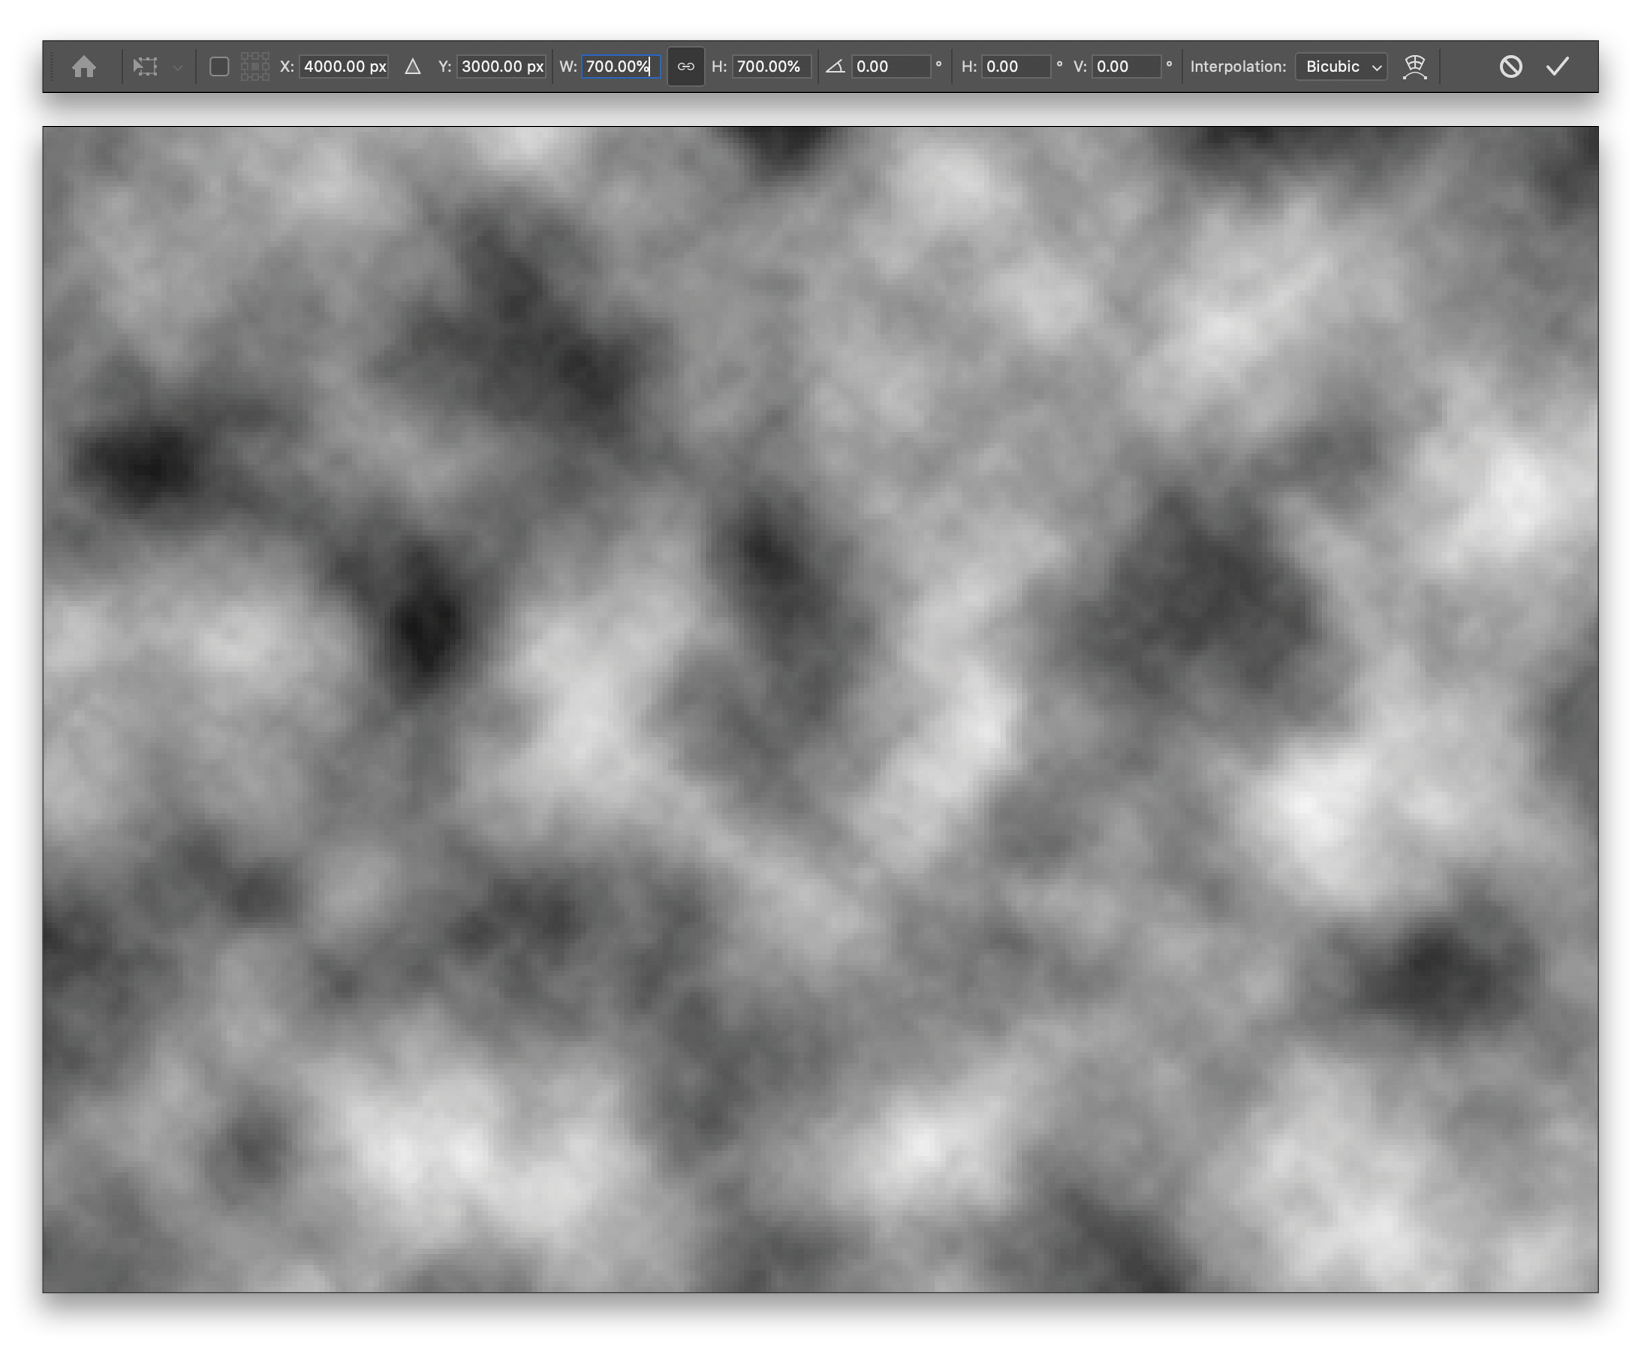
STEP FIVE: Our clouds look small so, to make them more realistic, let’s scale them up. Press Command-T (PC: Ctrl-T) to access the Free Transform tool, and then we’ll use the Options Bar to scale the clouds up by changing the Width to 700%. The linked chain icon between Width and Height should be selected so that the Height also changes to 700%. Press Enter to commit the transformation.
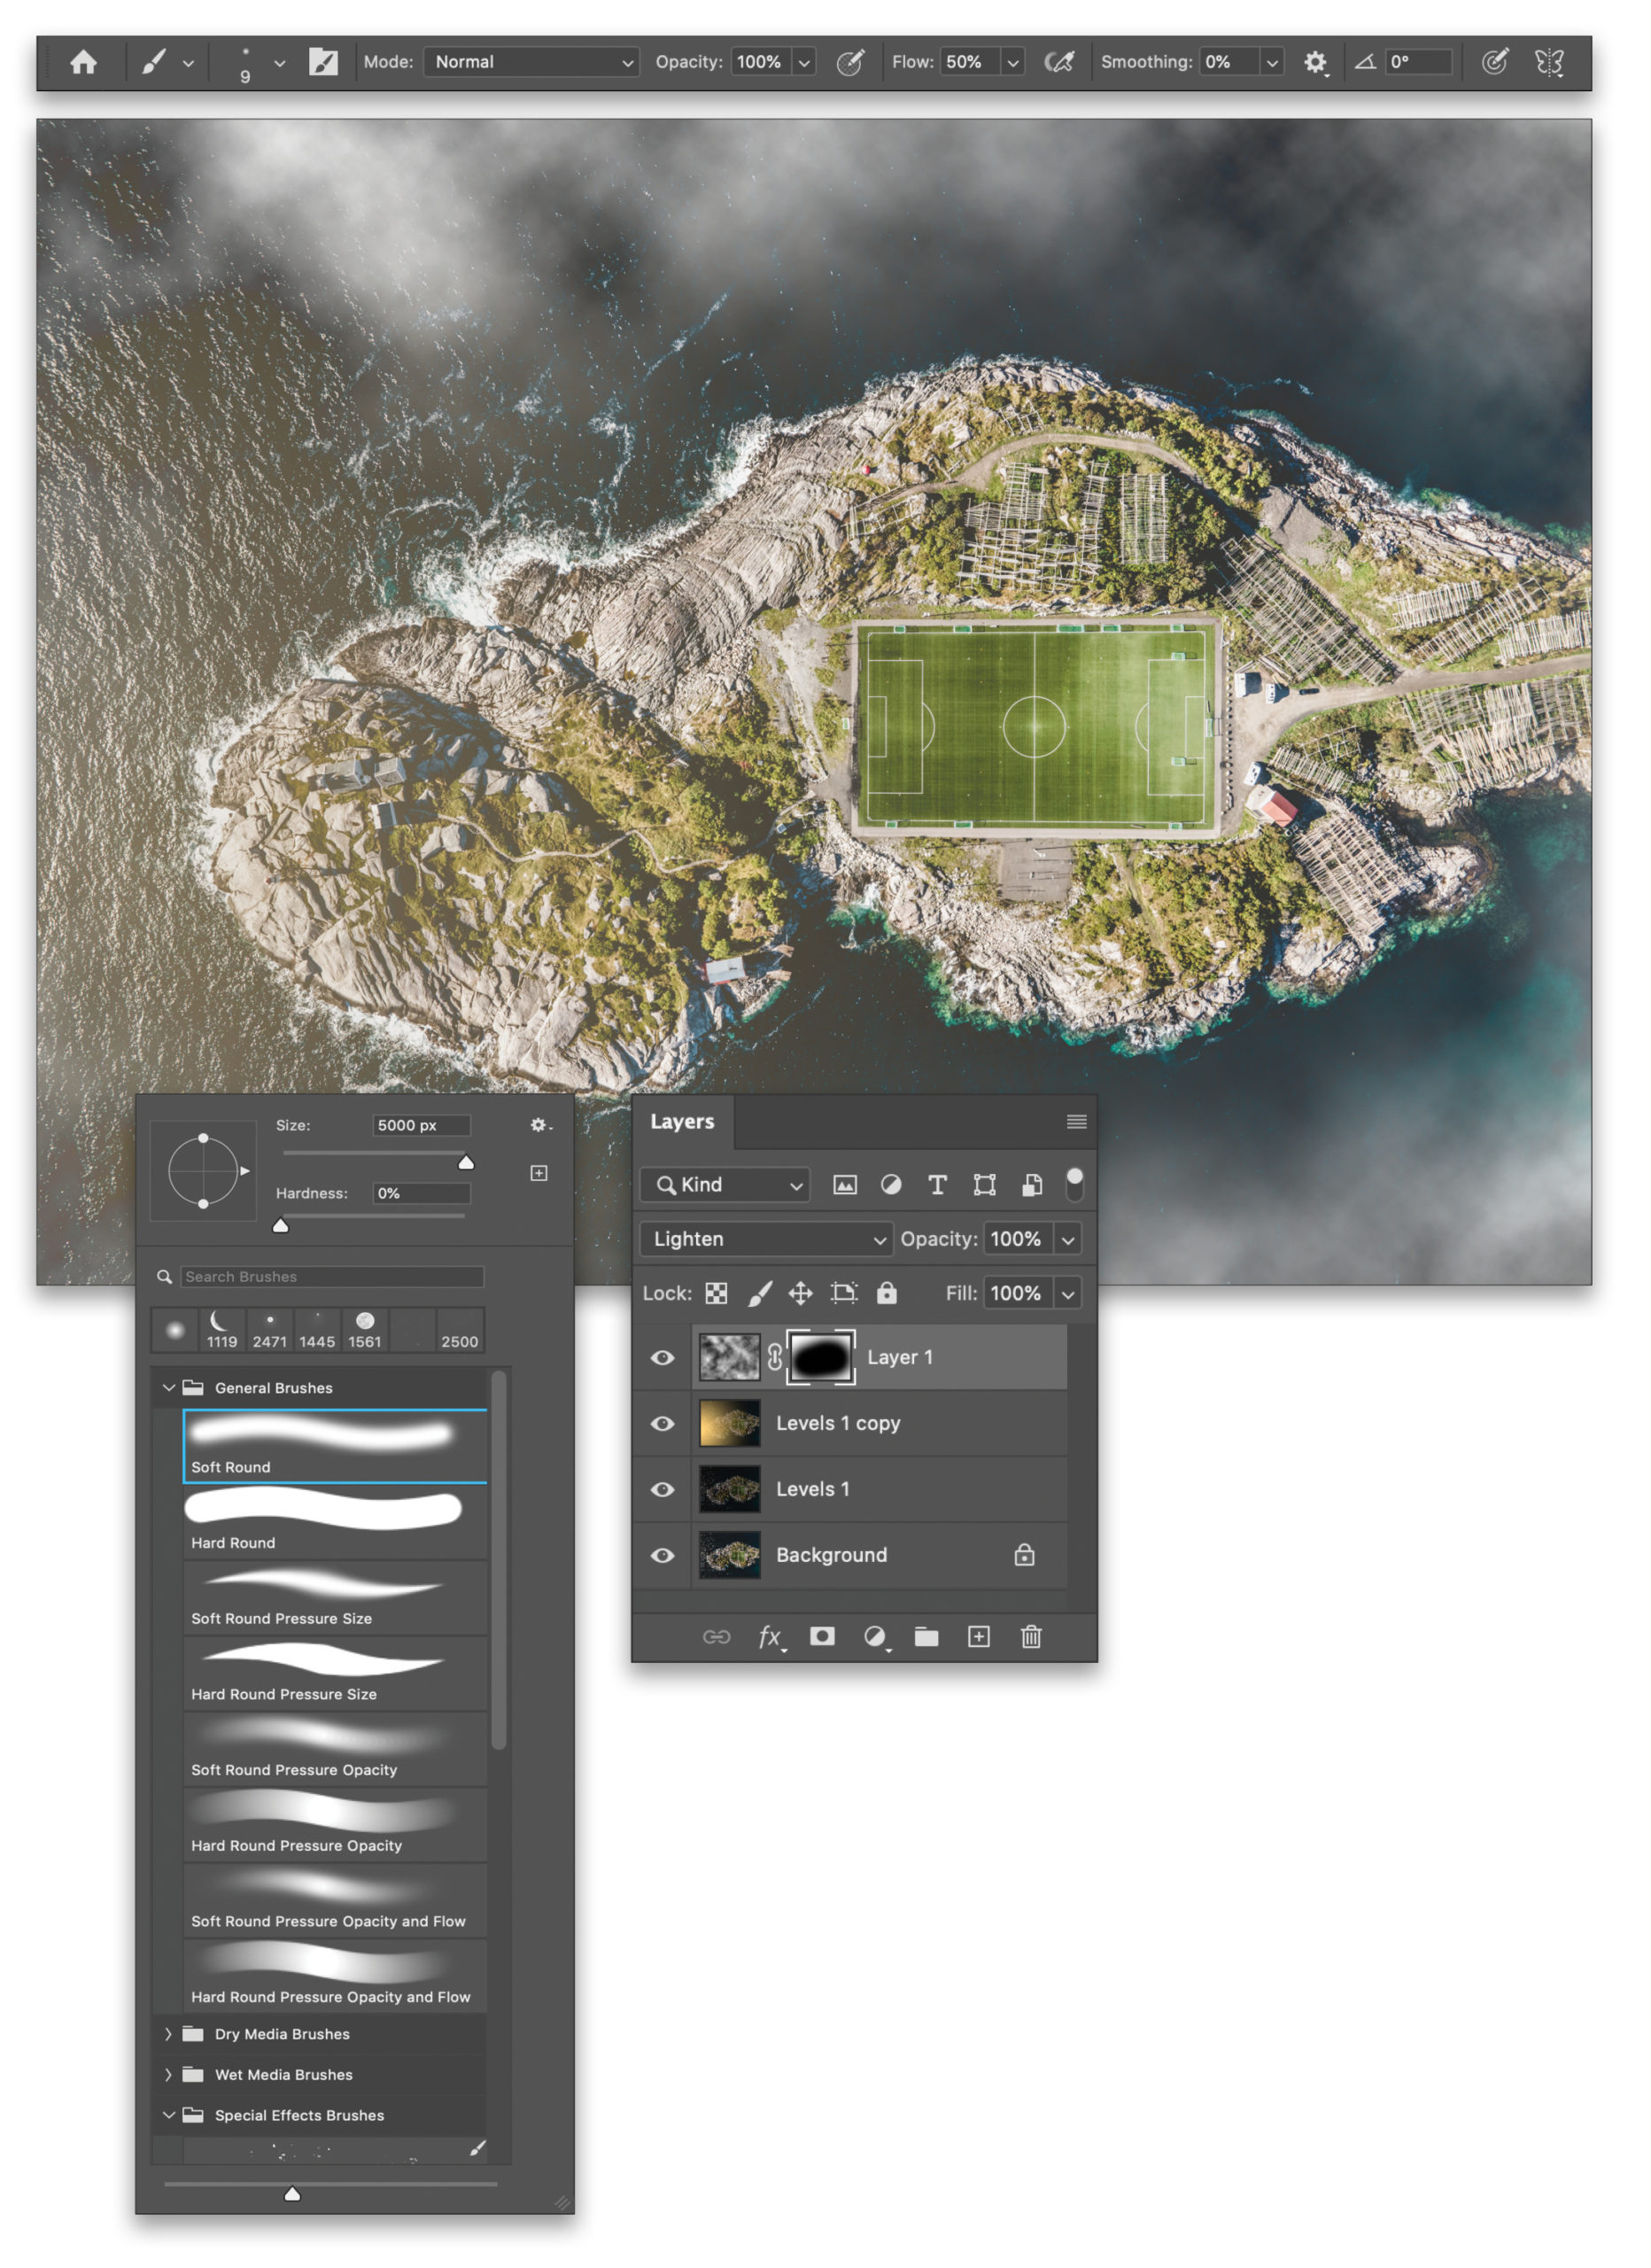
STEP SIX: What we have right now isn’t going to pass for clouds because they’re full of darkness, so let’s fix that. With the clouds layer active, we’ll use a layer blending mode so we can see through the clouds. Each blending mode offers a different style: for example, with Overlay we get more of a haze and the appearance of shadows on the ground; or Hard Light will give the appearance of the clouds getting a direct hit of sunlight. We’ll use Lighten to give the clouds a bit of a fluffy appearance and also show a little shadow, giving the scene some depth and separation. Now, add a layer mask by clicking the circle-in-a-square icon at the bottom of the Layers panel.

STEP SEVEN: Our clouds look more realistic now, but we need to step it up a gear and lose the clouds that are obscuring our view, which also helps with realism. Let’s paint out the clouds we don’t want. Our layer mask is white, which means we can see all the clouds. To remove clouds, we need to paint with black on the mask. So click on the layer mask thumbnail in the Layers panel to make it active, and make sure the Foreground color is black by pressing D then X.
Press B to access the Brush tool, and choose a large, soft brush. In the Options Bar, set the Flow to 50% and Opacity to 100%. Now brush over the clouds we want to remove, revealing the scenery beneath, and leaving some clouds in strategic locations to complement the overall look of the scene.
We now have our scene: a unique top-down drone shot with some cool, realistic atmosphere. The reason this works is because we’ve taken natural elements and shown them from a new perspective. This situation didn’t happen, but it’s possible that it could have, and we’ve taken it and put our own spin on it.
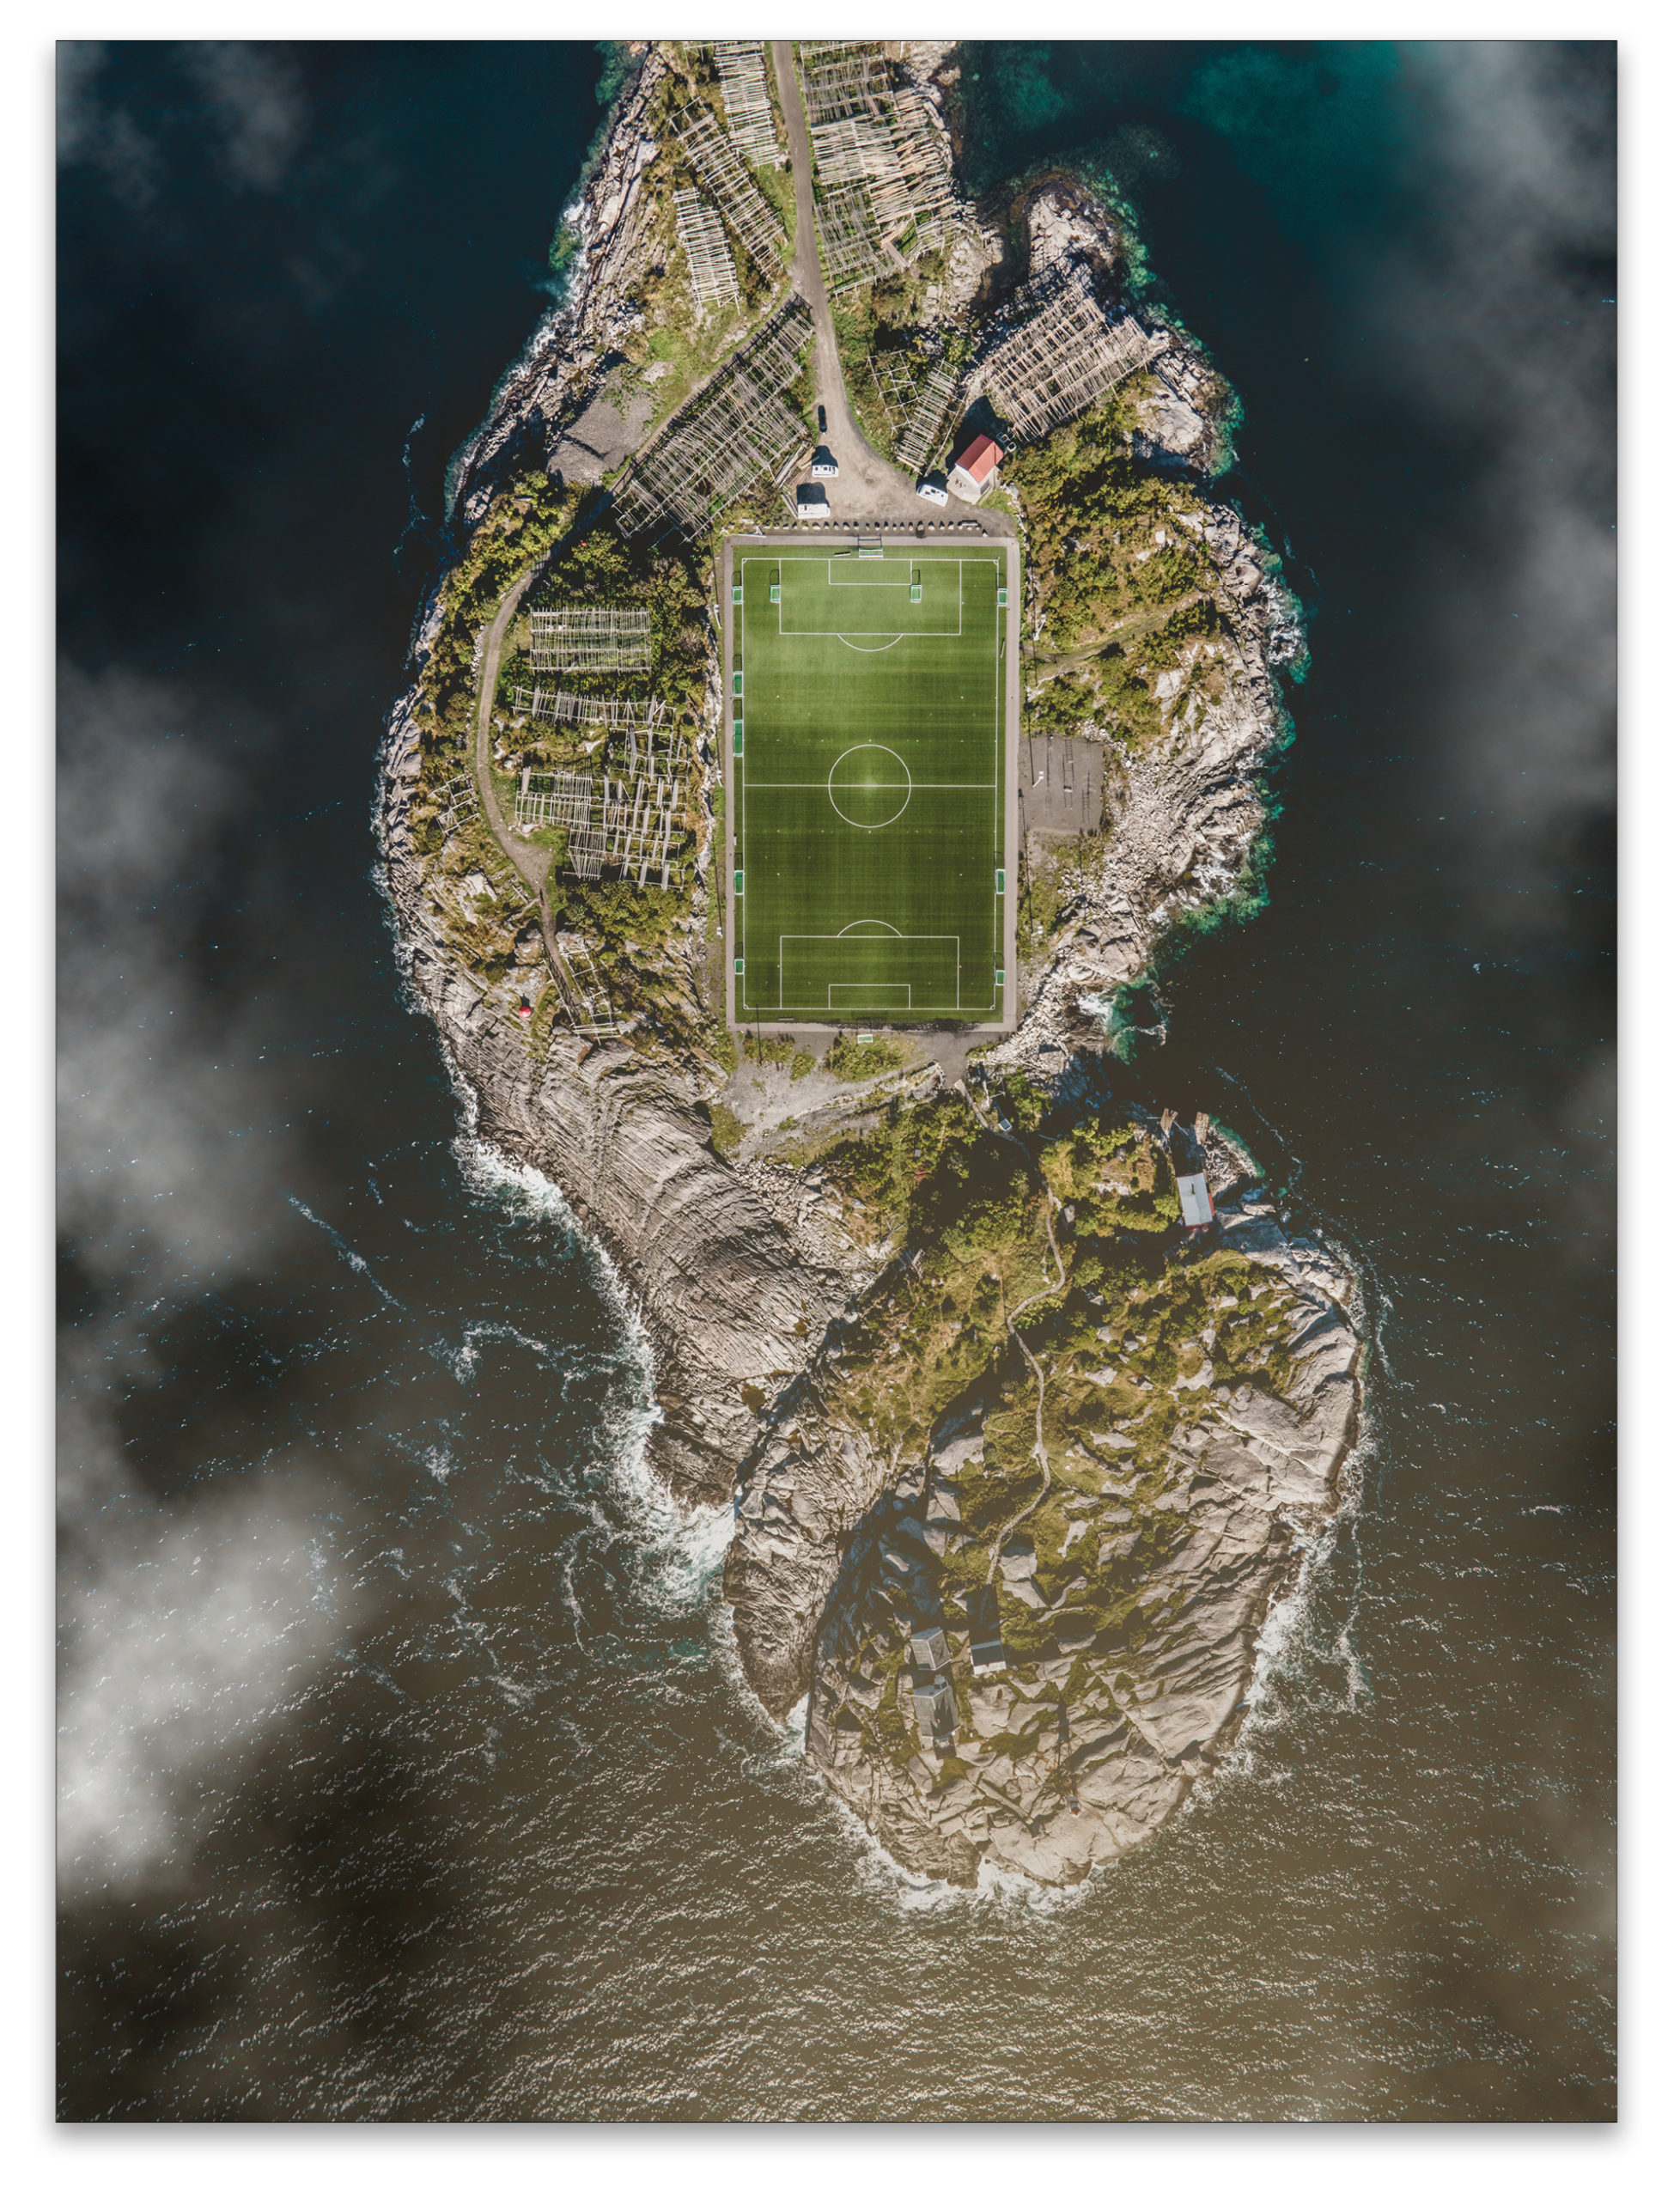
If I now wanted to take this image and post it to Instagram, I’d consider rotating it to ensure it fills the screen so people are more likely to pause on it while they’re scrolling, and hopefully, give me some engagement to help me grow.
About Photoshop User and KelbyOne
Photoshop User magazine comes out digitally 12 times a year and is part of KelbyOne, the leading educational resource for Photoshop, Lightroom, and photography. Pro members have access to more than 900 video courses and 100 back issues of Photoshop User. To learn more about KelbyOne, click here.