Cloning an Object and Changing Its Color
[This article originally appeared in the June 2022 issue of Photoshop User, the Magazine for Lightroom and Photoshop Users. To learn more about Photoshop User and to sign up to read the latest issue for free, click here.]
By Lesa Snider
A handful of Photoshop tools lets you copy pixels from one place to another, but only the Clone Stamp tool lets you change the size (and angle) of the pixels you’re copying. In this column, you’ll learn how to use it to duplicate an object at different sizes in a photo, creating more depth of field. As a bonus, we’ll also change the color of the new objects.
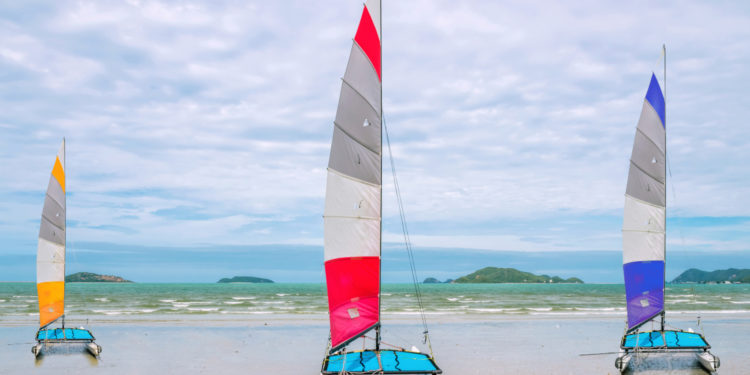
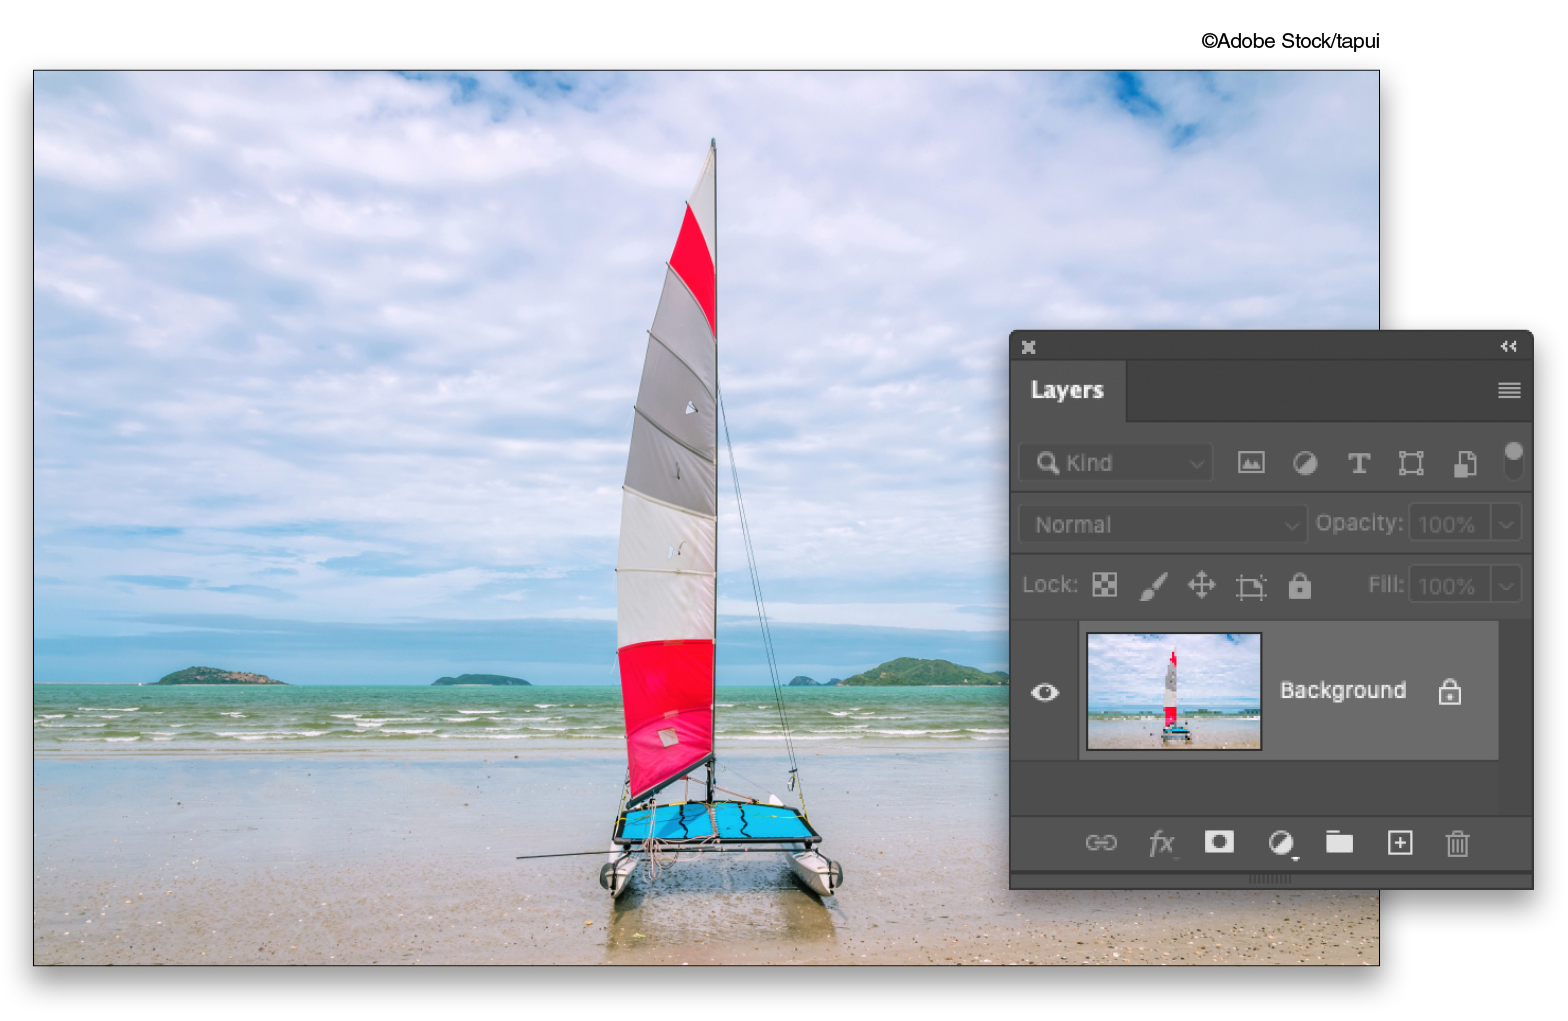
STEP ONE: Choose File>Open and navigate to the photo you want to use, such as this sailboat image, which is from Adobe Stock. If you’re starting in Lightroom instead, select a thumbnail in the Library module and then choose Photo>Edit In>Adobe Photoshop 2022.
If you’d like to download the low-res watermarked version of this image to follow along, click this link, log in with your Adobe ID, and click the Save to Library button. Double-click the image in the Libraries panel (Window>Libraries) to open it in Photoshop.
To make it easier to work with the image, increase the resolution of the practice file. (We normally don’t recommend enlarging images, but this is only for practice purposes.) Go to Image>Image Size, turn on the Resample checkbox, select Preserve Details 2.0 from the Resample drop-down menu, set the Width to 5,000 pixels, and click OK.
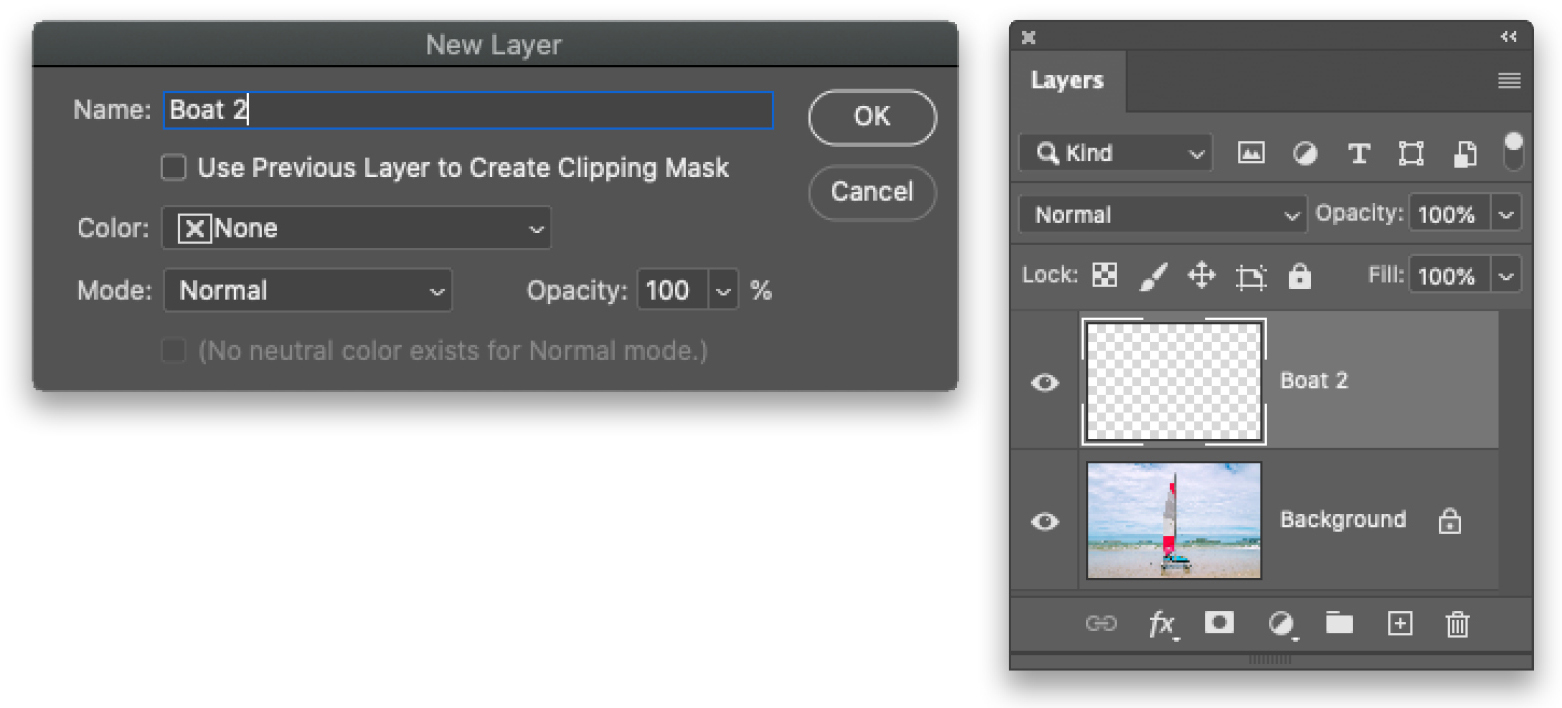
STEP TWO: Choose Layer>New>Layer and in the dialog that opens, enter “Boat 2” into the Name field, and click OK. Cloning each object onto a separate layer prevents you from harming the original image, plus it gives you more selection, color changing, and move options later on.
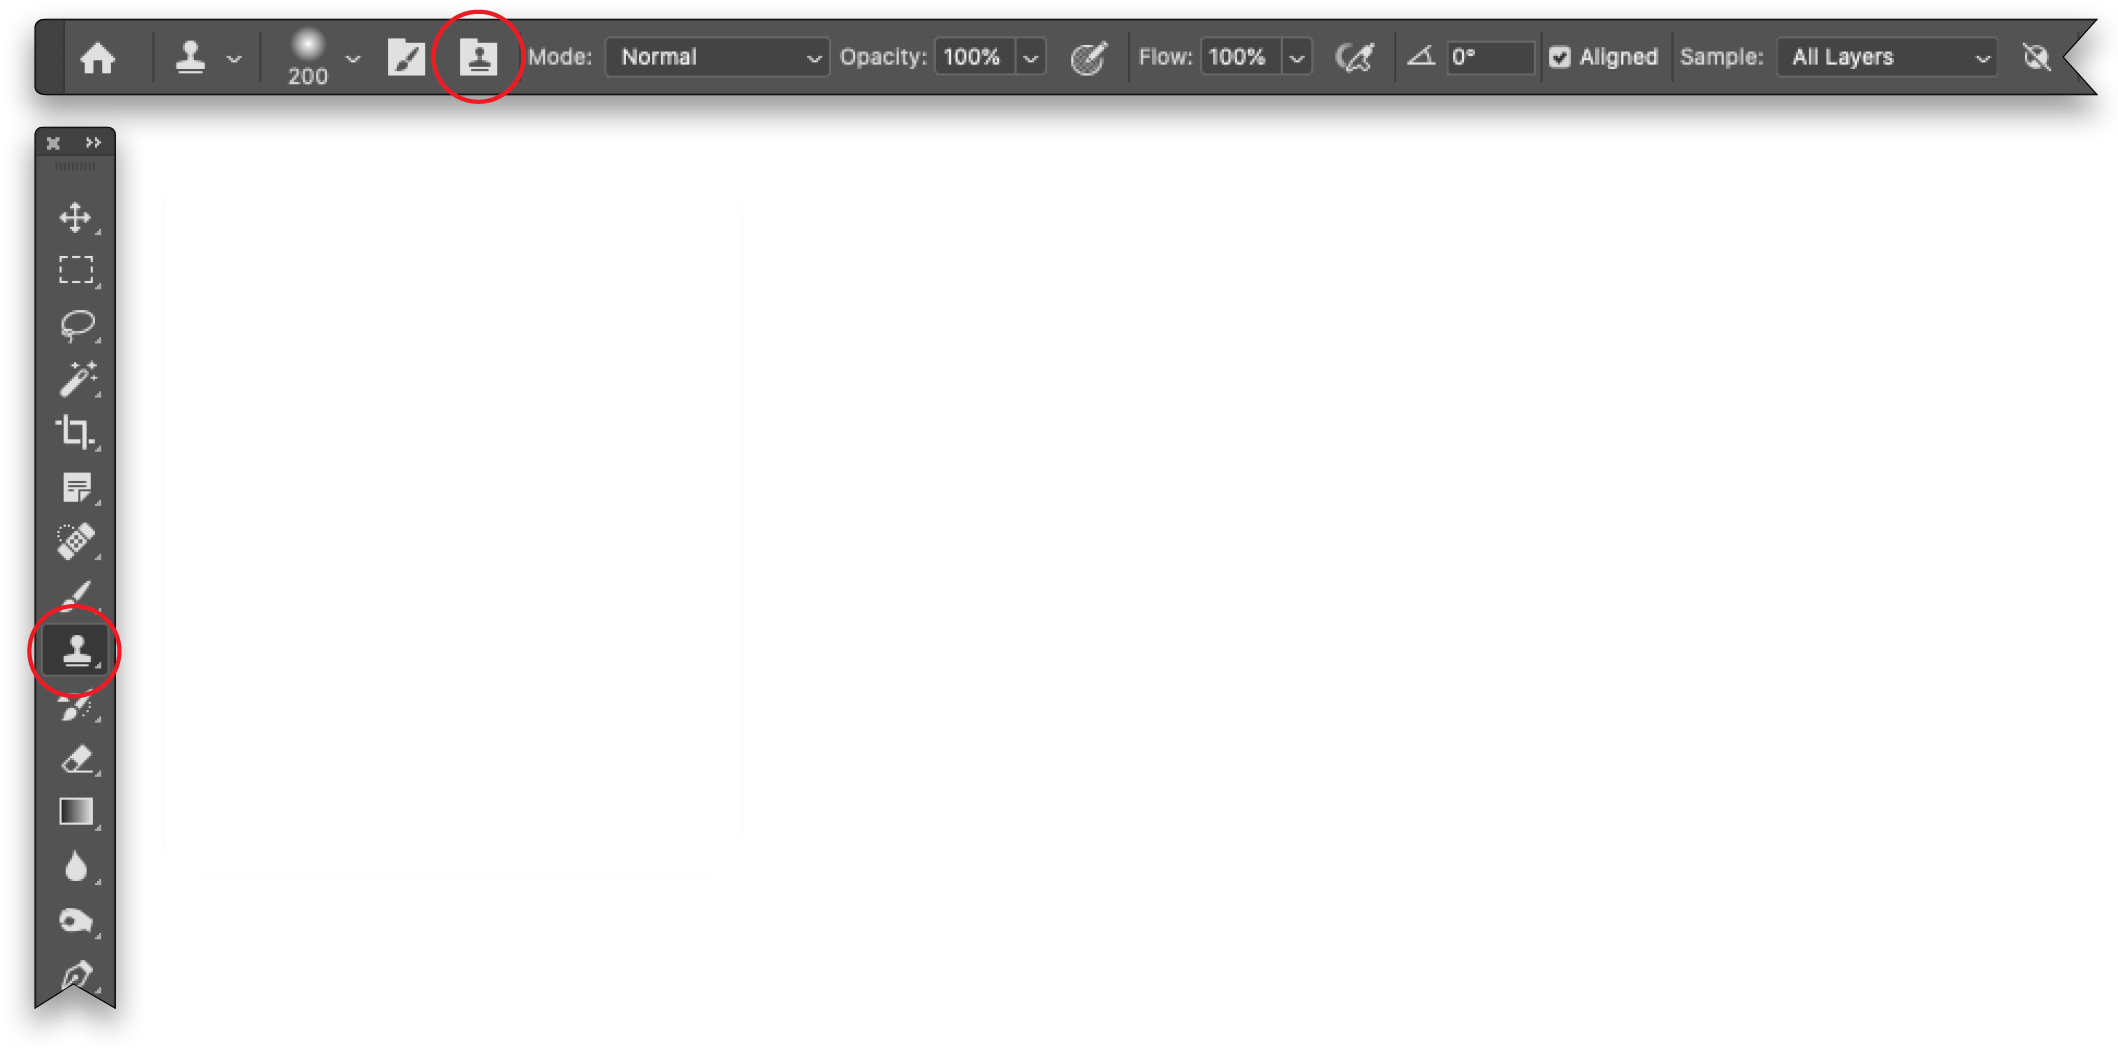
STEP THREE: Press S to grab the Clone Stamp tool (circled). In the Options Bar, set the Mode menu to Normal, Opacity to 100% and, from the Sample menu, choose All Layers. This lets Photoshop copy pixels from all the layers beneath the active layer, which is the new layer you just made. While you’re here, click the icon to the left of the Mode menu (also circled) to open the Clone Source panel.
STEP FOUR: In the Clone Source panel, enter 50% into the W and H fields (circled) and press Enter. If the chain link icon to the right of those fields is turned on (it’s dark when it’s on), entering 50% into the W field also copies it into the H field.

STEP FIVE: Mouse over to the image and point your cursor at the leftmost part of the boat (the cursor is circled here). Use the Left or Right Bracket keys ([ ]) on your keyboard to decrease or increase brush size so it’s a little bigger than that part of the object (a brush Size of 200 pixels was used here). Now press-and-hold Option (PC: Alt) and when your cursor turns into a target (also circled), click that spot to copy it as the clone source.

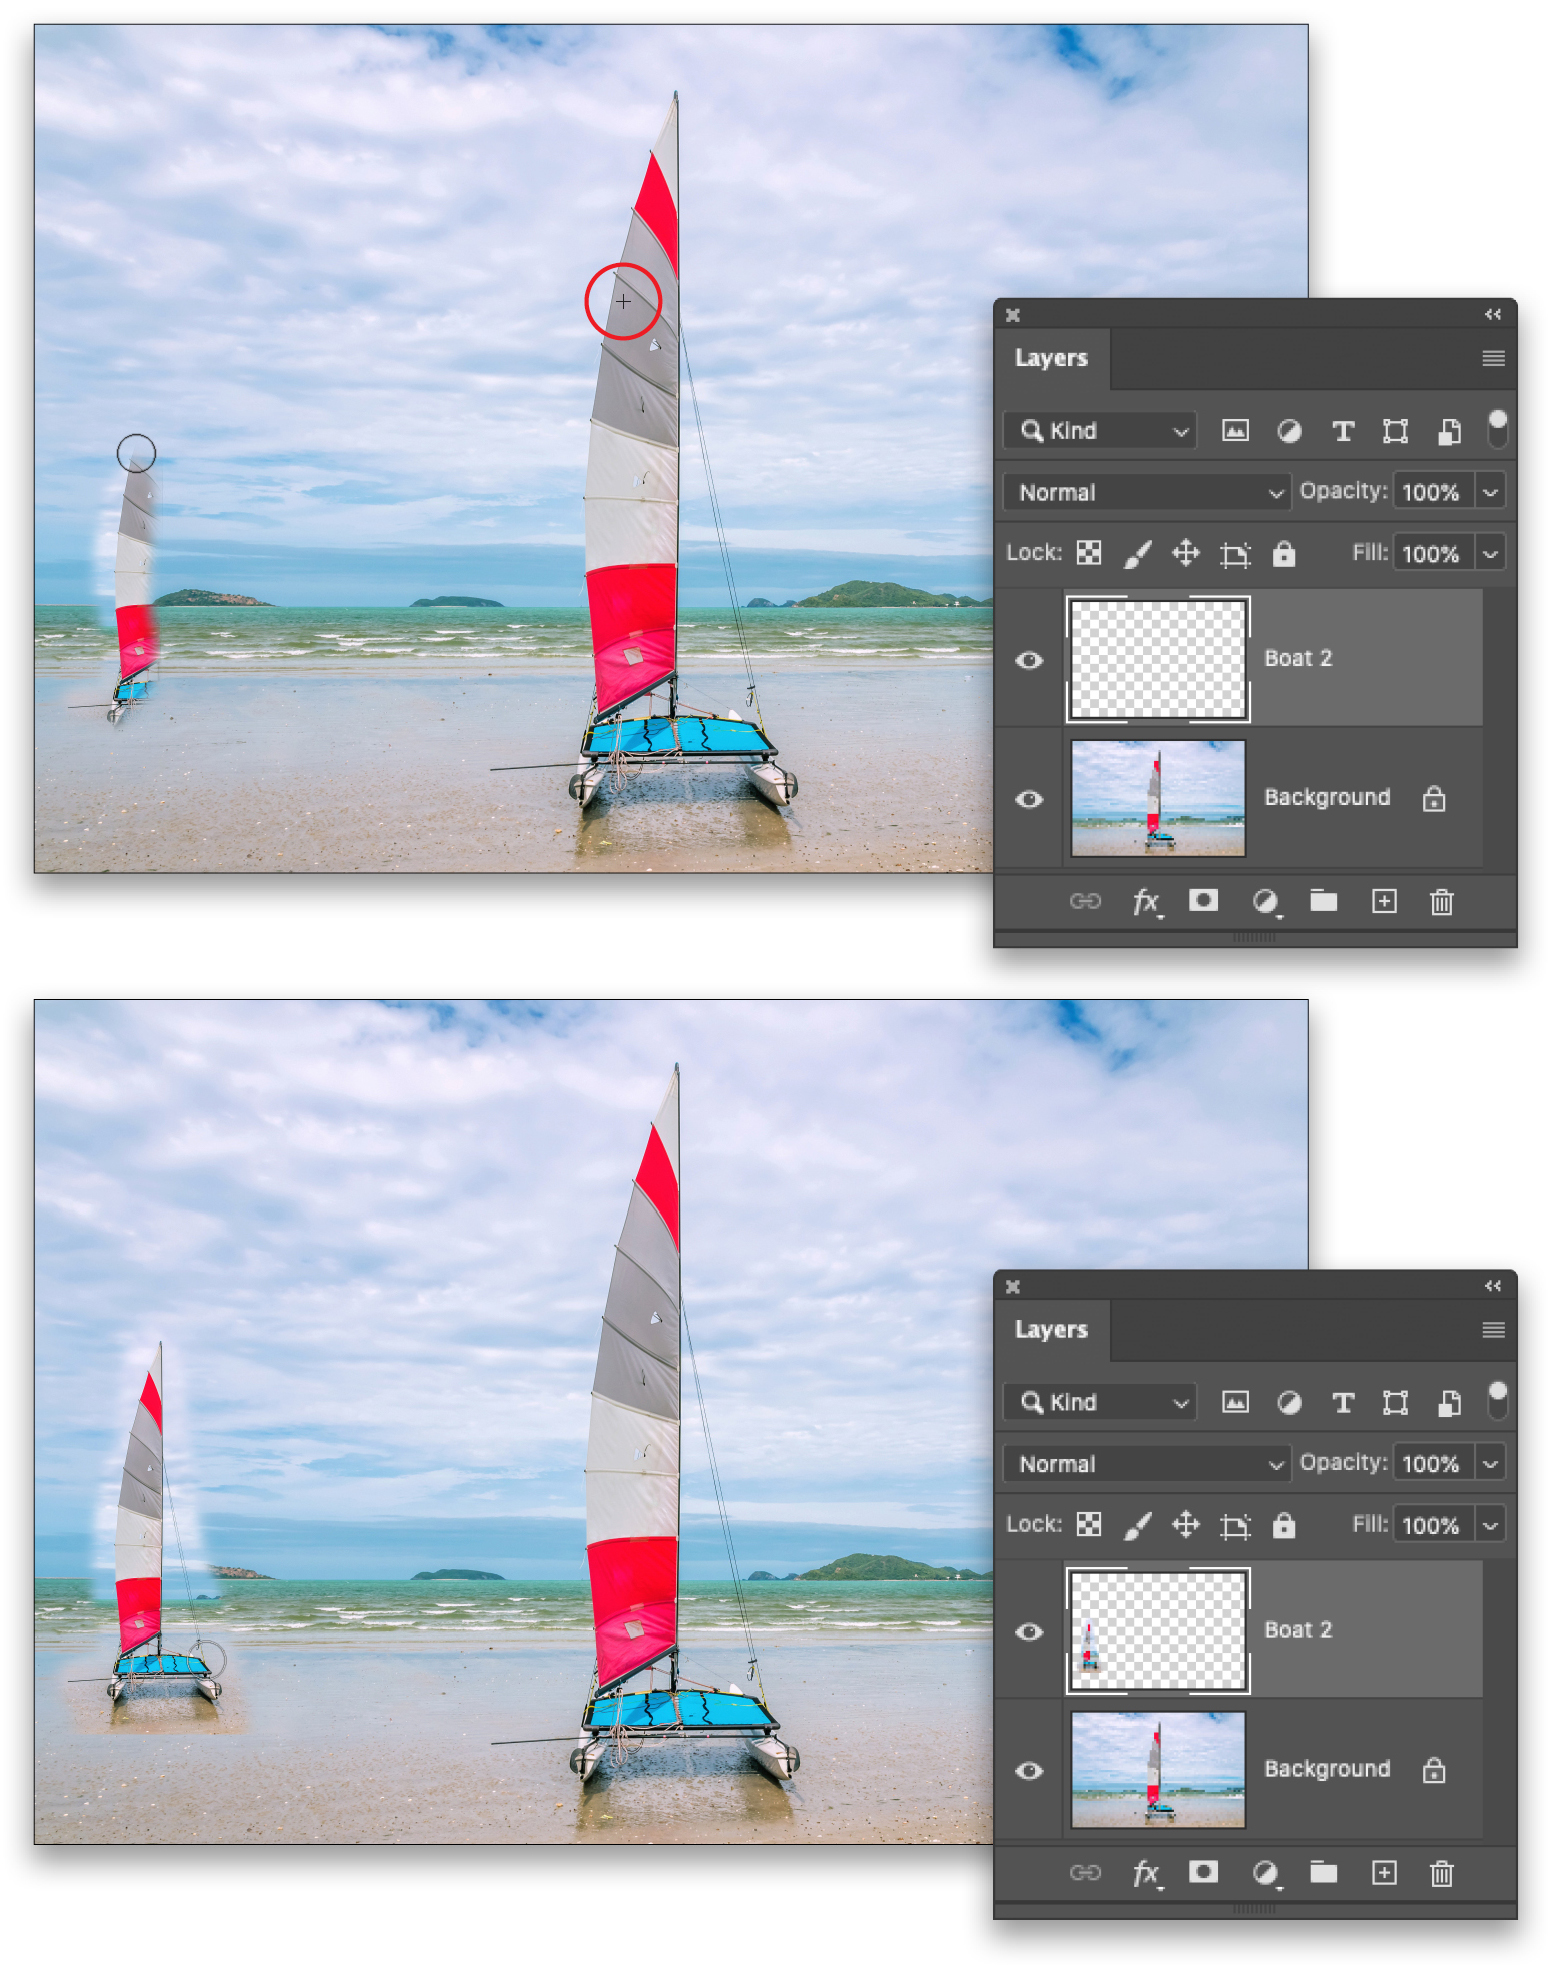
STEP SIX: Point your cursor near the left edge of the document, very close to the water’s edge, and start painting to duplicate the boat. As you paint, a cross-hair (circled) appears atop the clone source (the original boat) to indicate what you’re copying. Watch that cross-hair to ensure you copy all parts of the boat, including the cables and the shadow on the sand.
STEP SEVEN: Choose Select>Select and Mask. In the Options Bar, click Select Subject (circled) and then press R to grab the Refine Edge Brush tool (also circled). Now brush across any areas that need to be refined and Photoshop will re-examine them. Adjust brush size using your Left and Right Bracket keys as described earlier. For example, here you can see the horizontal bar at the bottom left of the boat is now included in the selection. We’ll refine the selection even more in the next step.

Tip: You can zoom in/out of the image by pressing Command-+ or – (PC: Ctrl-+ or –), respectively, and then Spacebar-drag to reposition it onscreen.
STEP EIGHT: To adjust the selection manually, press B to grab the Brush tool (circled) and then paint across an area to add it to your selection. To subtract an area from your selection, Option-drag (PC: Alt-drag) instead. When you’re finished, locate the Output To menu at the bottom of the Properties panel on the right (also circled) and then set it to Layer Mask. Click OK.
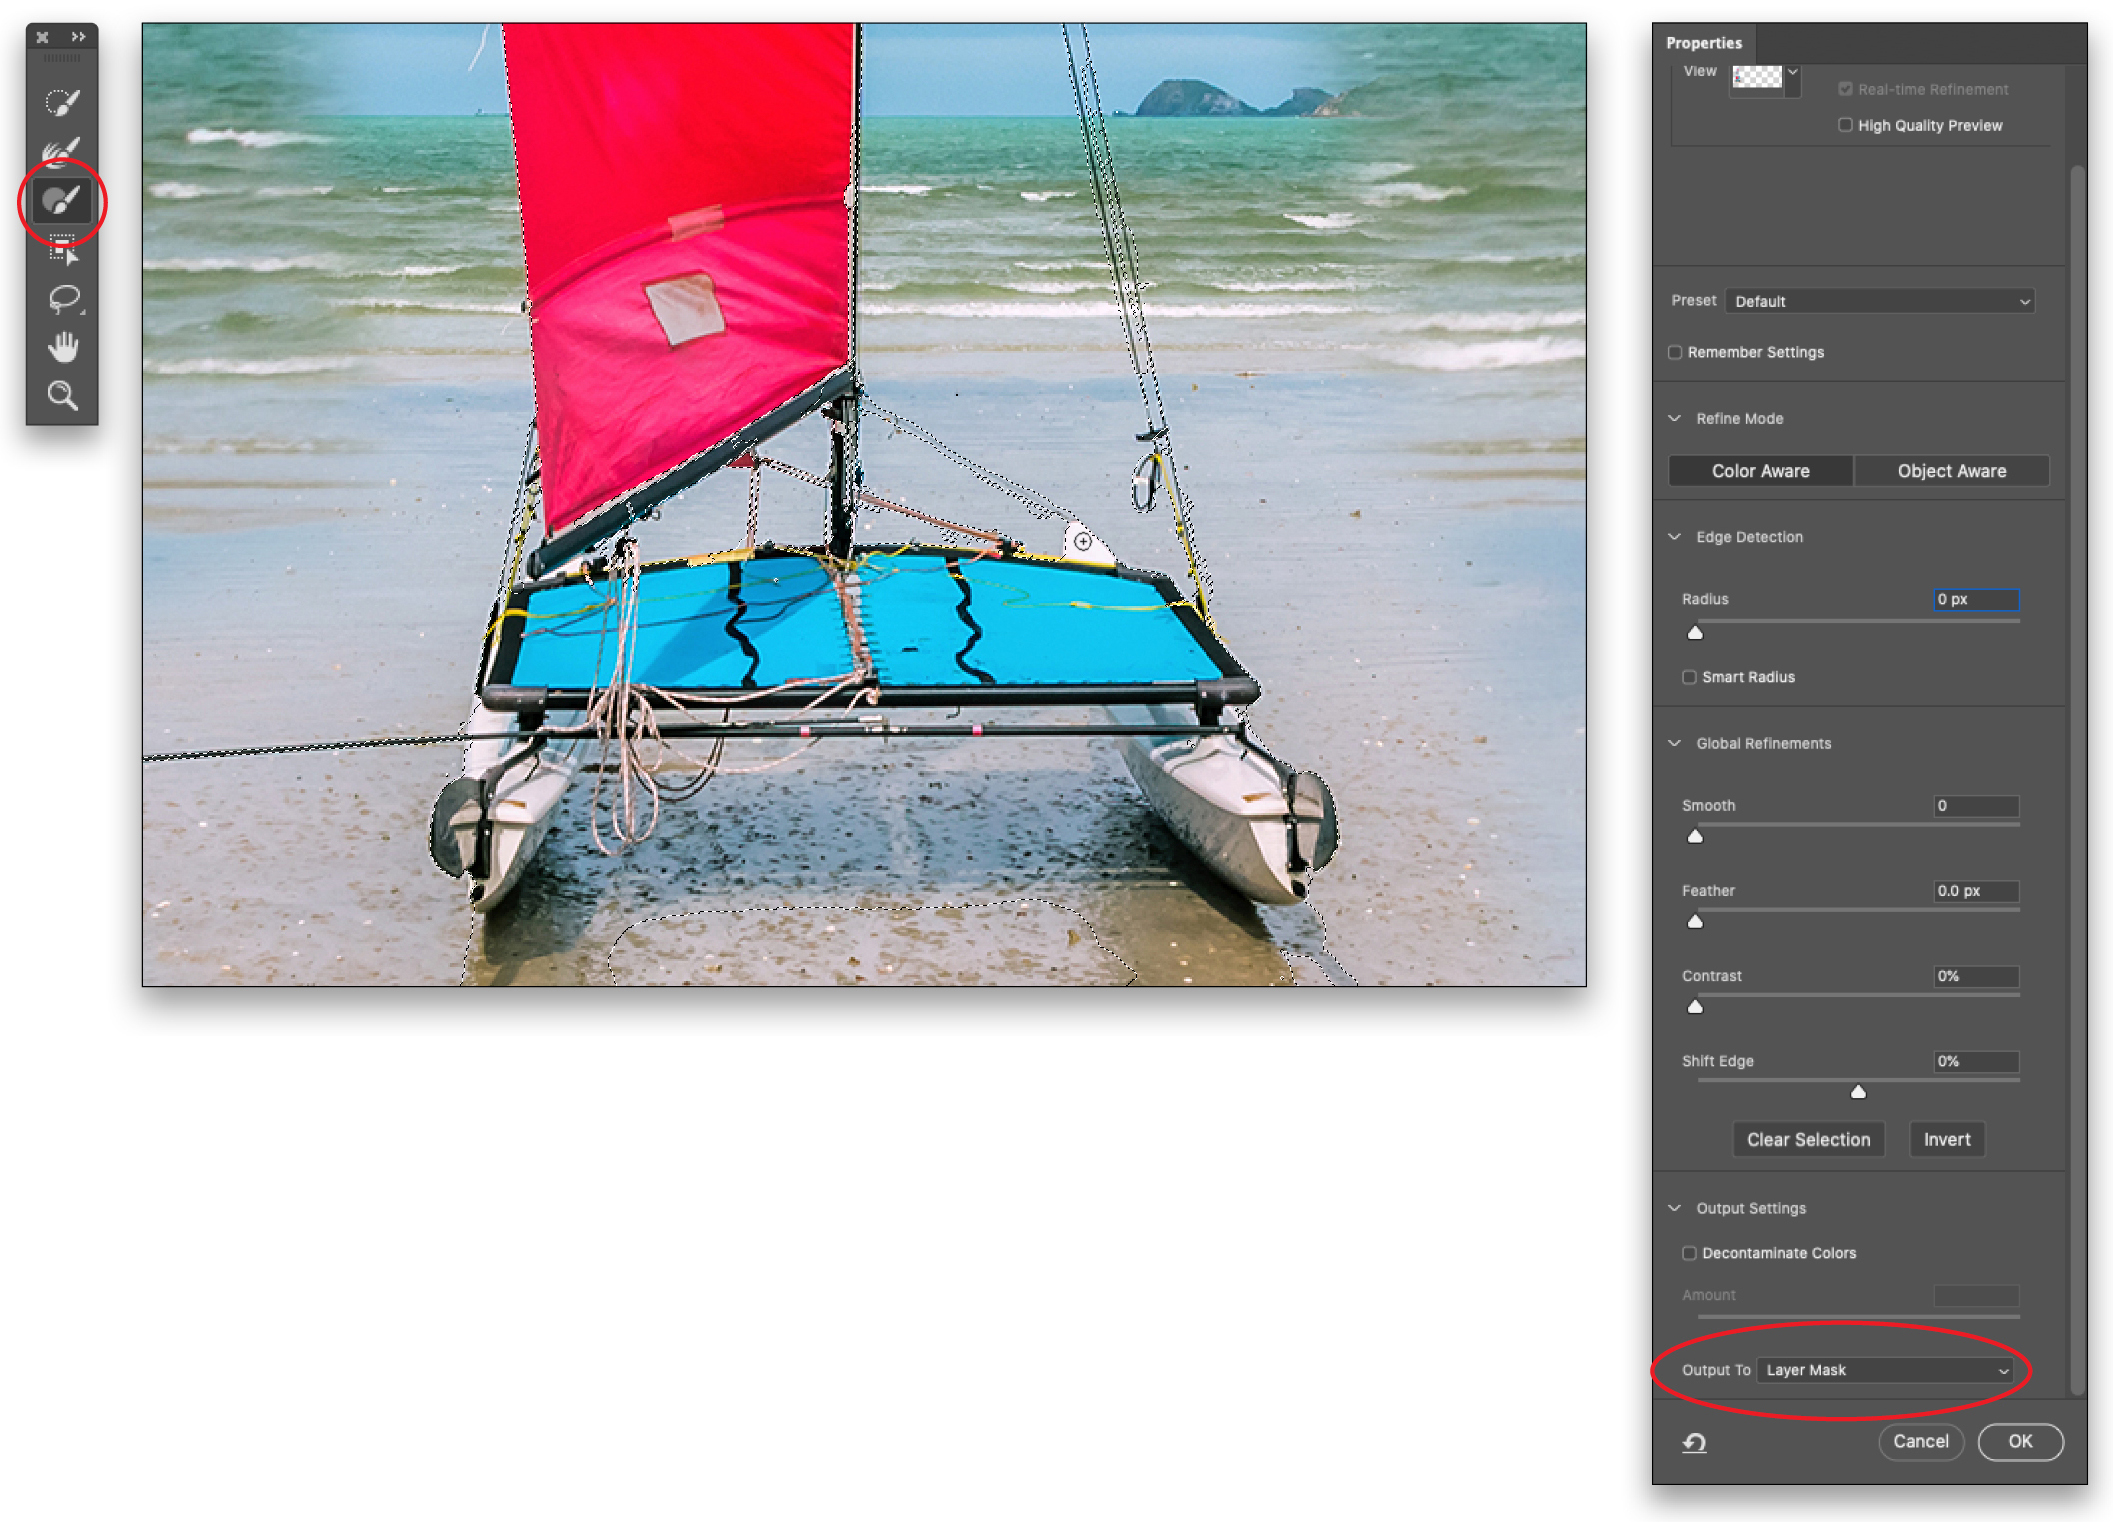
Tip: To create selections in a straight line, click with the Brush tool where you want the selection to start, and then Shift-click where you want the selection to end. It will create a selection in a straight line between the two points.
STEP NINE: If you need to clean up the layer mask (circled in the Layers panel), press B to grab the Brush tool (also circled) and paint with black to conceal (hide) or white to reveal. For example, to soften (hide) the edges of the shadow on the sand, press D to set the color chips at the bottom of your Toolbar (circled) to the default colors of white and black, and then press X to flip-flop them so black is on top. Click the brush preview thumbnail on the left side of the Options Bar to open the Brush Preset Picker, and select the Soft Round brush in the General Brushes set. Set the Size to around 125 pixels, and then paint near the shadow on the sand to hide its hard edges.
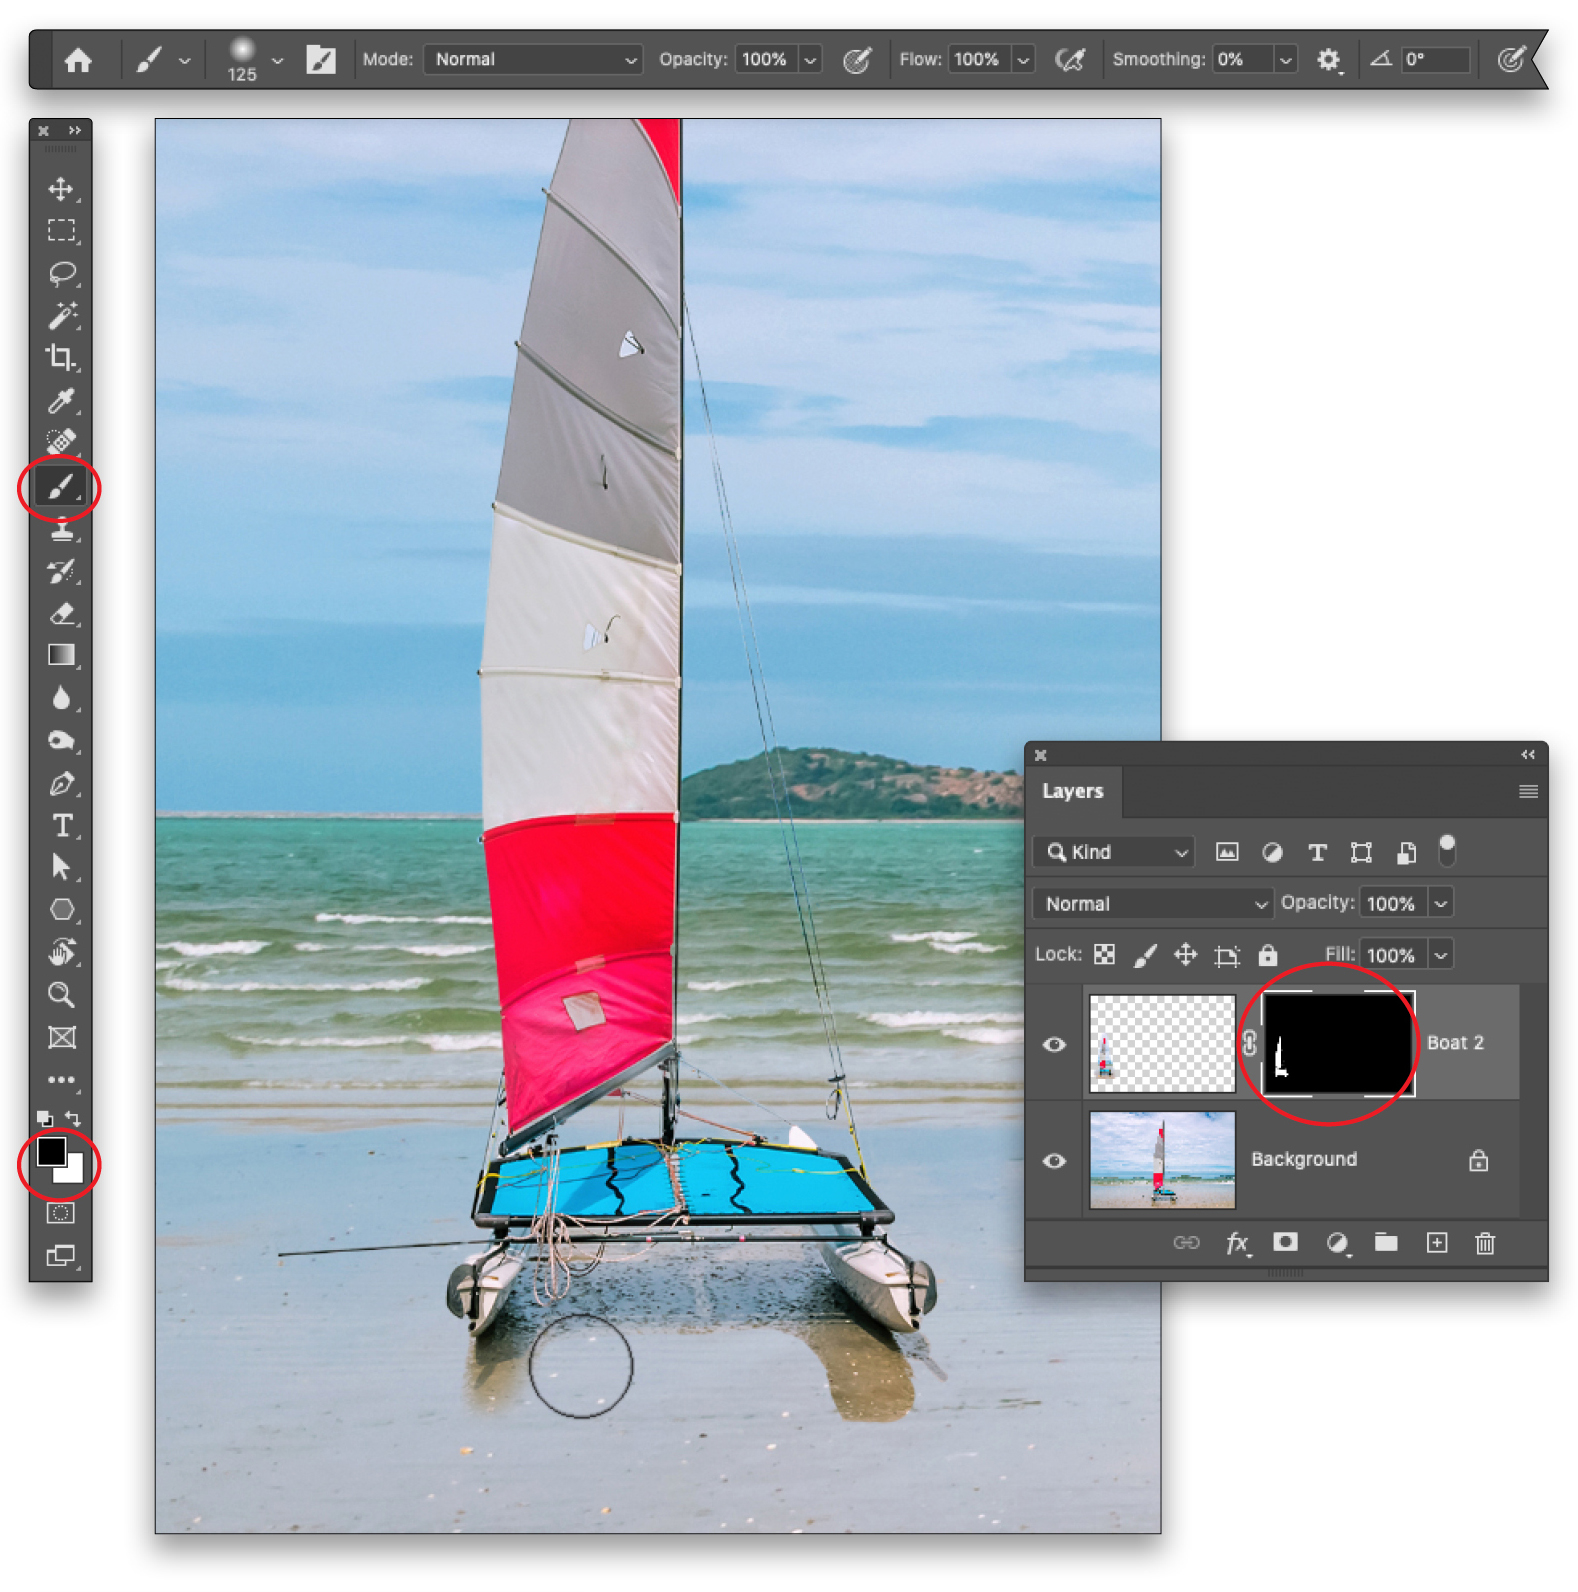
STEP 10: Now let’s change the color of the duplicated boat. Click the half-black/half-white circle at the bottom of the Layers panel (circled) and choose Selective Color.

STEP 11: In the Properties panel that opens, click the Clip to Layer icon (circled) at the bottom of the panel, so the color change you’re about to make will only affect the layer named Boat 2. Choose the Absolute option, and then from the Colors drop-down menu near the top of the Properties panel (also circled), choose Reds. Now adjust the four sliders to produce the color you want (settings of –30, –80, +100, and 0 for Cyan, Magenta, Yellow, and Back, respectively, were used here for bright yellow).
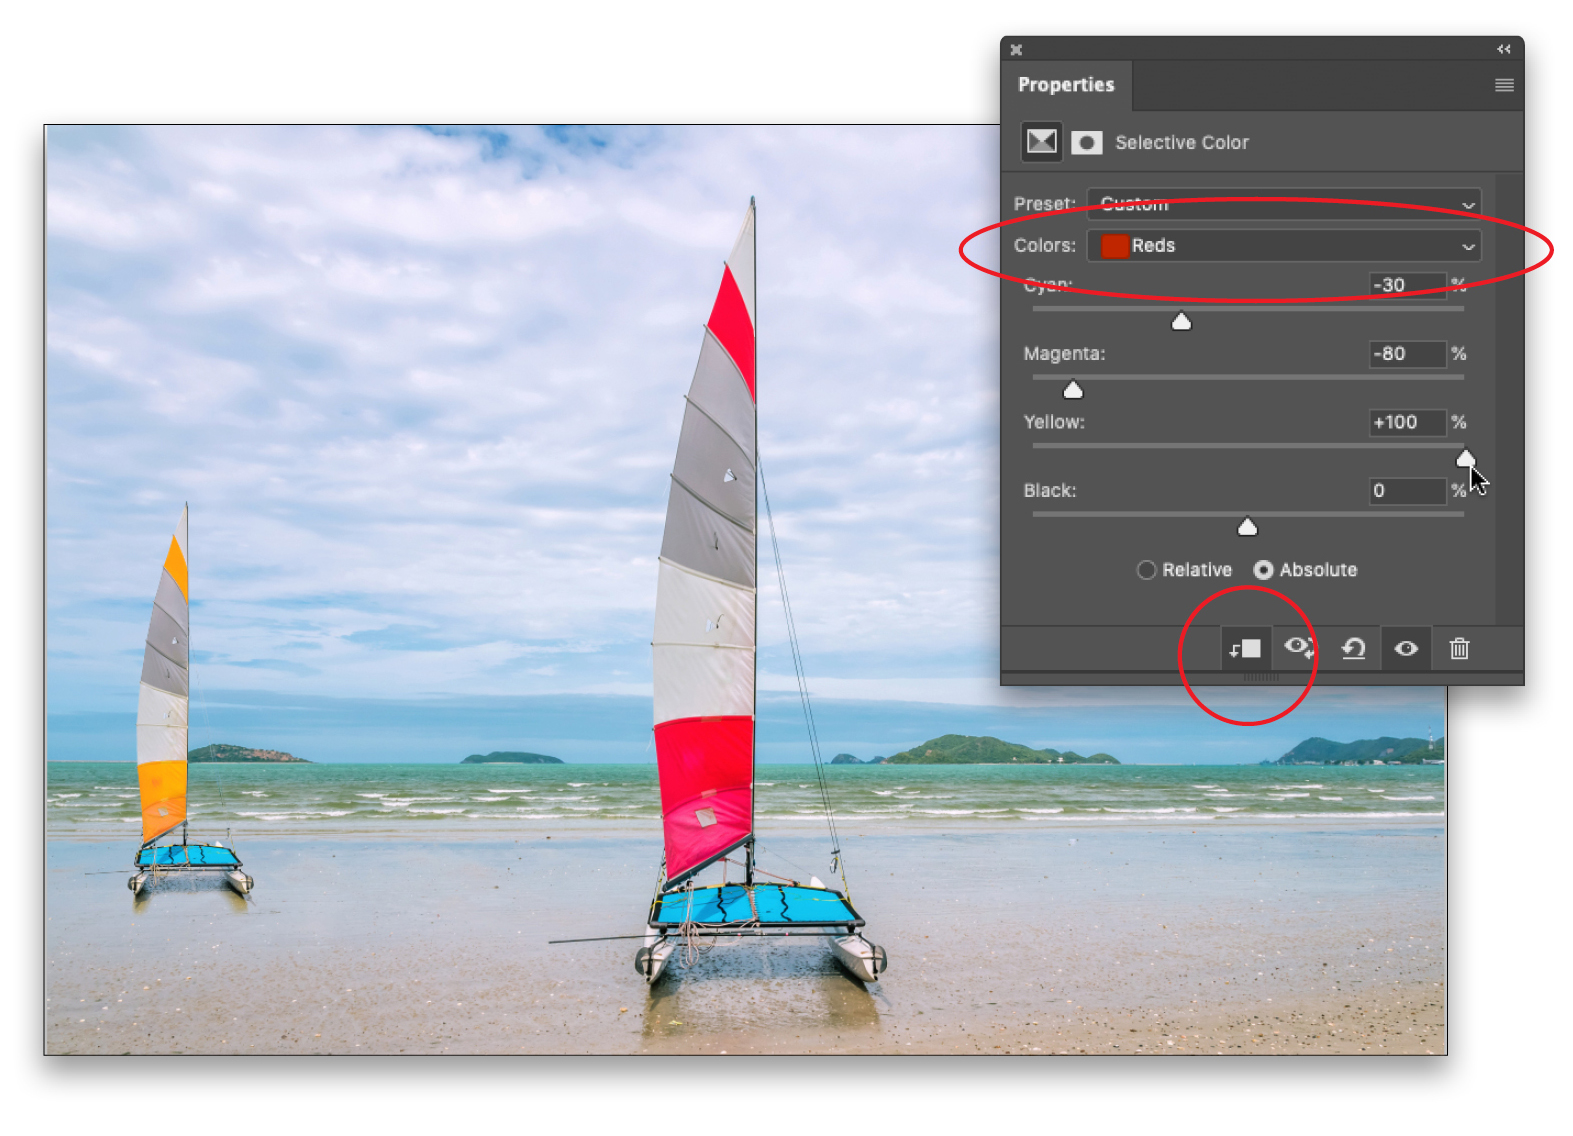
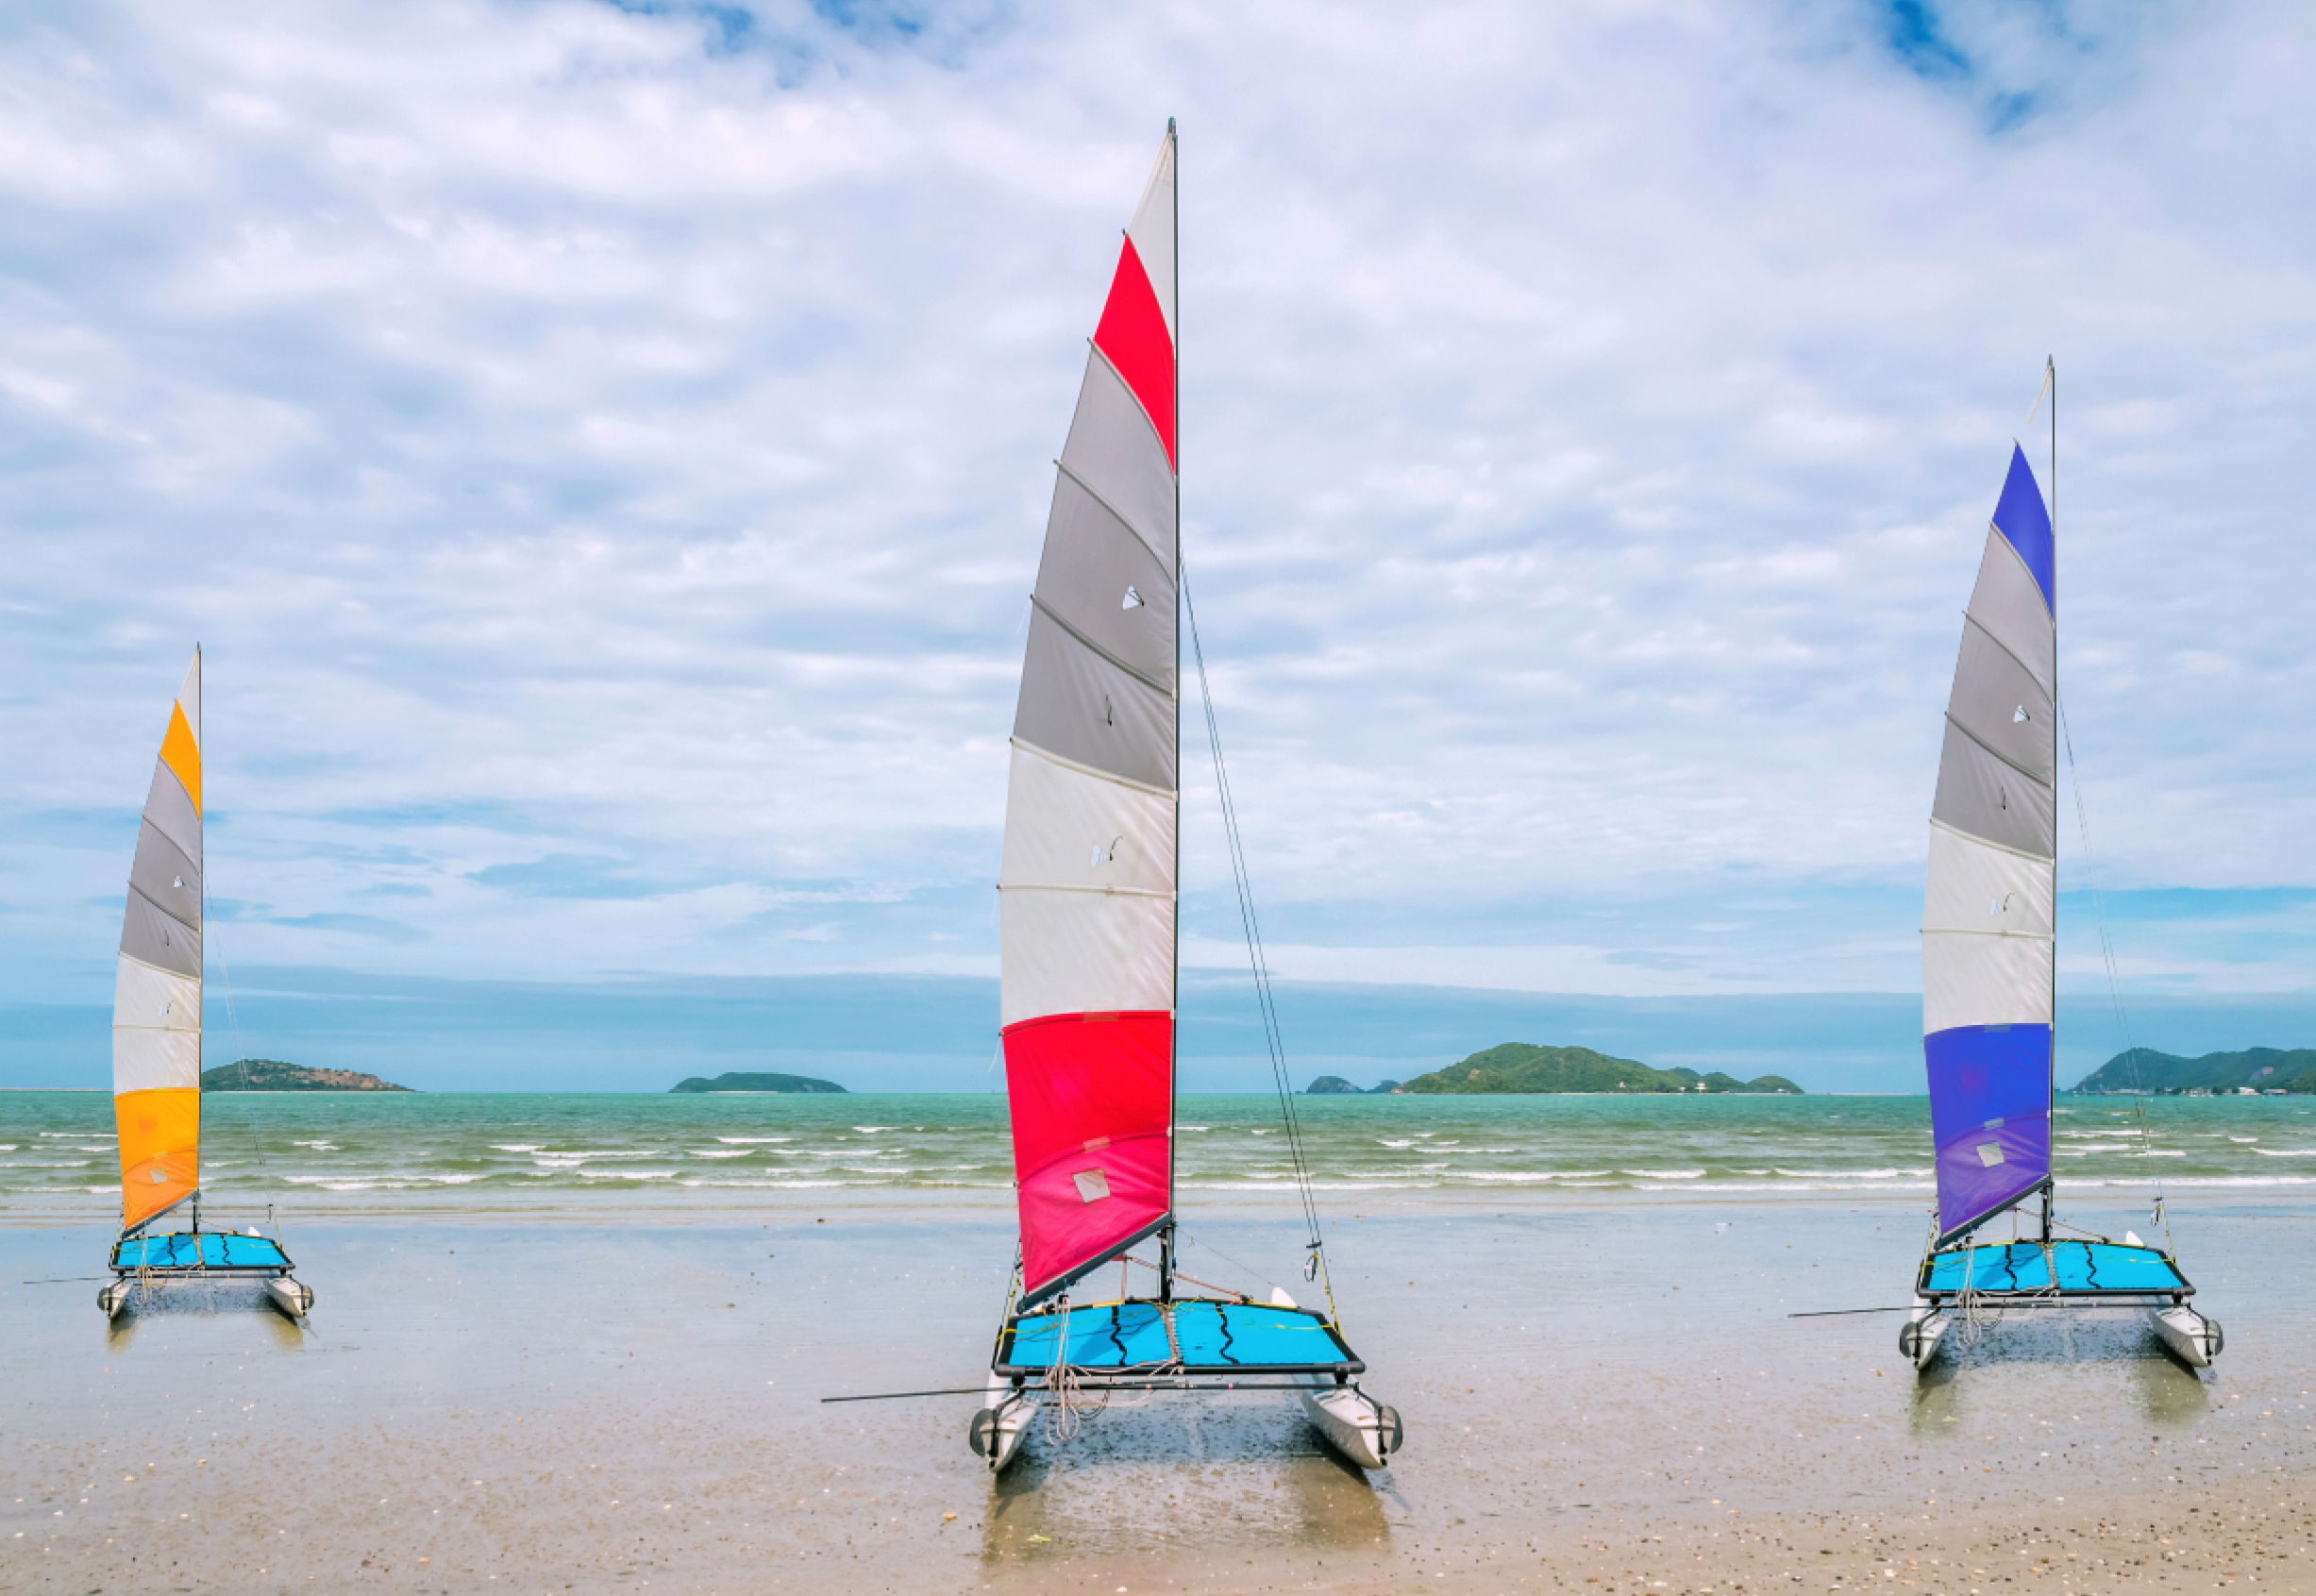
STEP 12: Repeat the steps above to clone another boat, but this time set the Clone Source panel’s W and H fields to 75%, and then clone the boat onto the right side of the document, but not quite as close to the water as you did the first time. Below is the final result, with the Selective Color adjustment layer settings of +100, –35, –100, and 0 to produce blue.

As you can see, by cloning the boats at different sizes and in different places in the photo, they look as if they are different distances from the viewer. And since you cloned each boat onto its own layer, you can continue to fine-tune each layer mask as needed, plus you can use the Move tool (V) to reposition the boats.
About Photoshop User and KelbyOne
Photoshop User magazine comes out digitally 12 times a year and is part of KelbyOne, the leading educational resource for Photoshop, Lightroom, and photography. Pro members have access to more than 900 video courses and 100 back issues of Photoshop User. To learn more about KelbyOne, click here.