[This article originally appeared in the February 2021 issue of Photoshop User, the Magazine for Lightroom and Photoshop Users. To learn more about Photoshop User and to sign up to read the latest issue for free, click here.]
By Lesa Snider
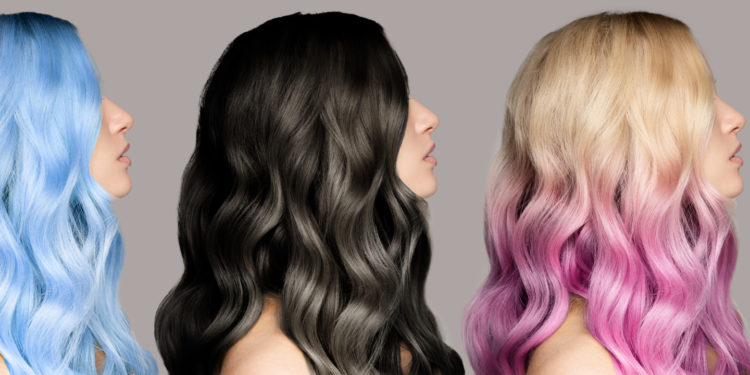
Changing hair color in Photoshop is fairly easy, especially if you’re going from light to dark; going from dark to light is harder because dark areas lack detail. In this column, you’ll use adjustment layers to produce dark brown, pink, and blue hair, then you’ll expand on the technique for an ombre and balayage look.
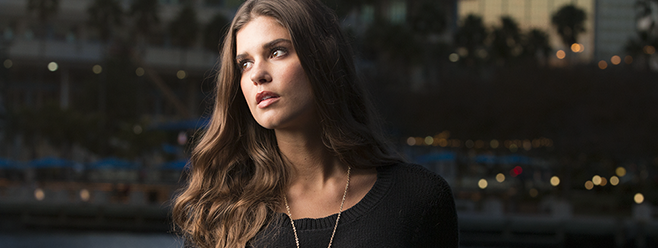
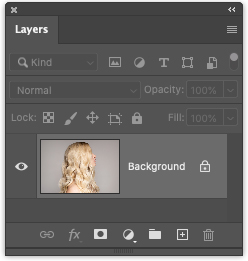
Step One: Choose File>Open and navigate to the image you want to open in Photoshop. If you’re starting in Lightroom, select the image thumbnail in the Library module and choose Photo>Edit In>Edit In Adobe Photoshop 2021. If you’d like to download the low-res watermarked version of this image to follow along, click this link, log in with your Adobe ID, and click the Save to Library button. Double-click the image in the Libraries panel (Window>Libraries) to open it in Photoshop.
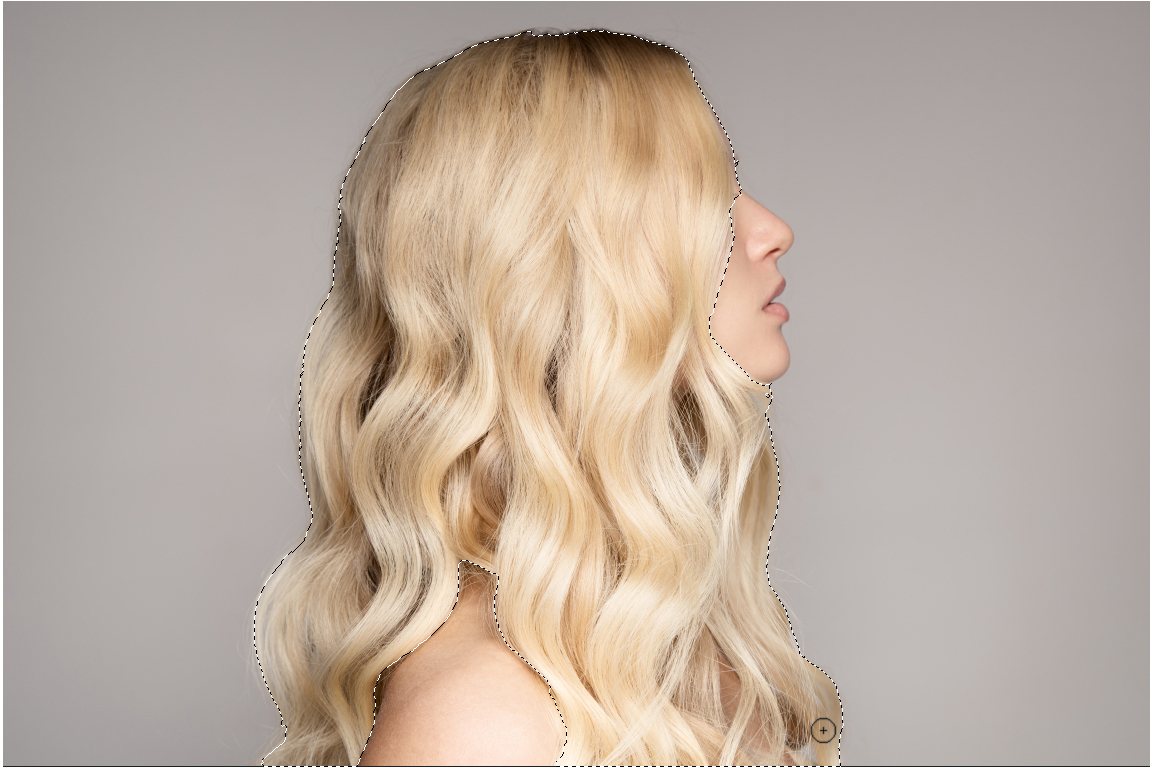
Step Two: First, we need to select the hair, so choose Select>Select and Mask. In the workspace that opens, set the Properties panel’s View menu (circled) to Marching Ants (M) and in the Options Bar, click Select Subject. Now adjust the selection as necessary using the Quick Selection tool (W, also circled). Use the Options Bar to set brush size (circled) to slightly smaller than the area you need to select or deselect (the size of the area Photoshop analyzes and selects is proportionate to the brush size). To add an area to the selection, click-and-drag (note the plus sign on the cursor at the lower right). To subtract an area—her skin in this example—Option-click-and-drag (PC: Alt-click-and-drag) instead (a minus sign appears on the cursor).

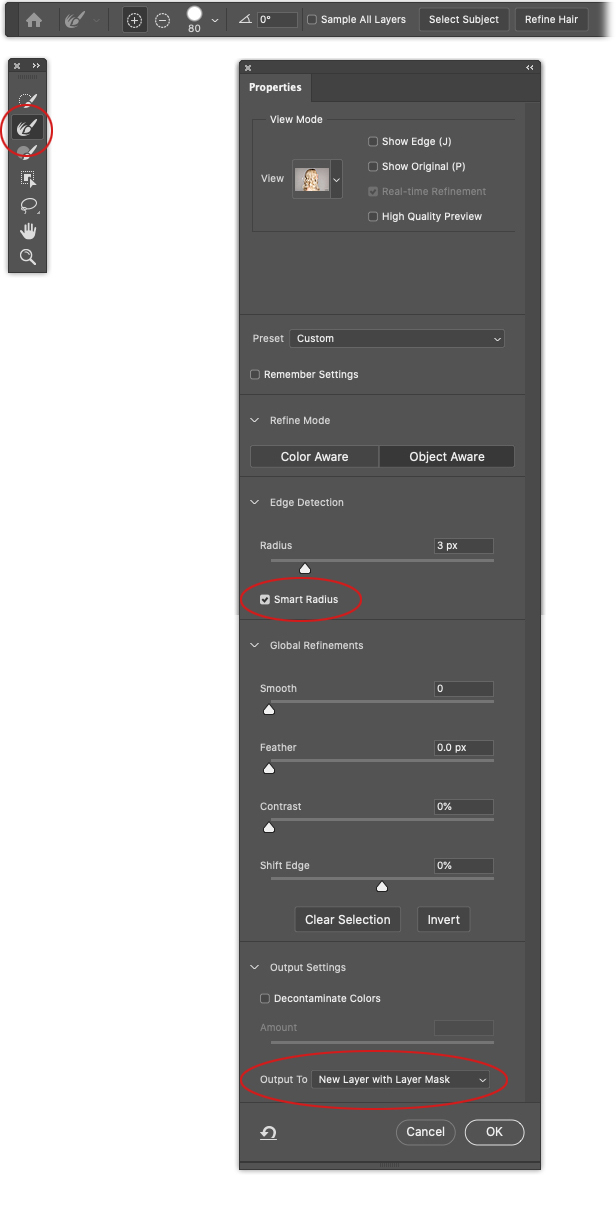
Step Three: In the Properties panel, make sure the Refine Mode is set to Object Aware, turn on Smart Radius (circled) and set the Radius slider to 3 px (try 1 px on the Adobe preview image). Press R to grab the Refine Edge brush tool (also circled) and drag across any wispy hairs or areas where you can see skin through hair. When you’re finished, choose New Layer with Layer Mask (circled) from the Output To drop-down menu and click OK.

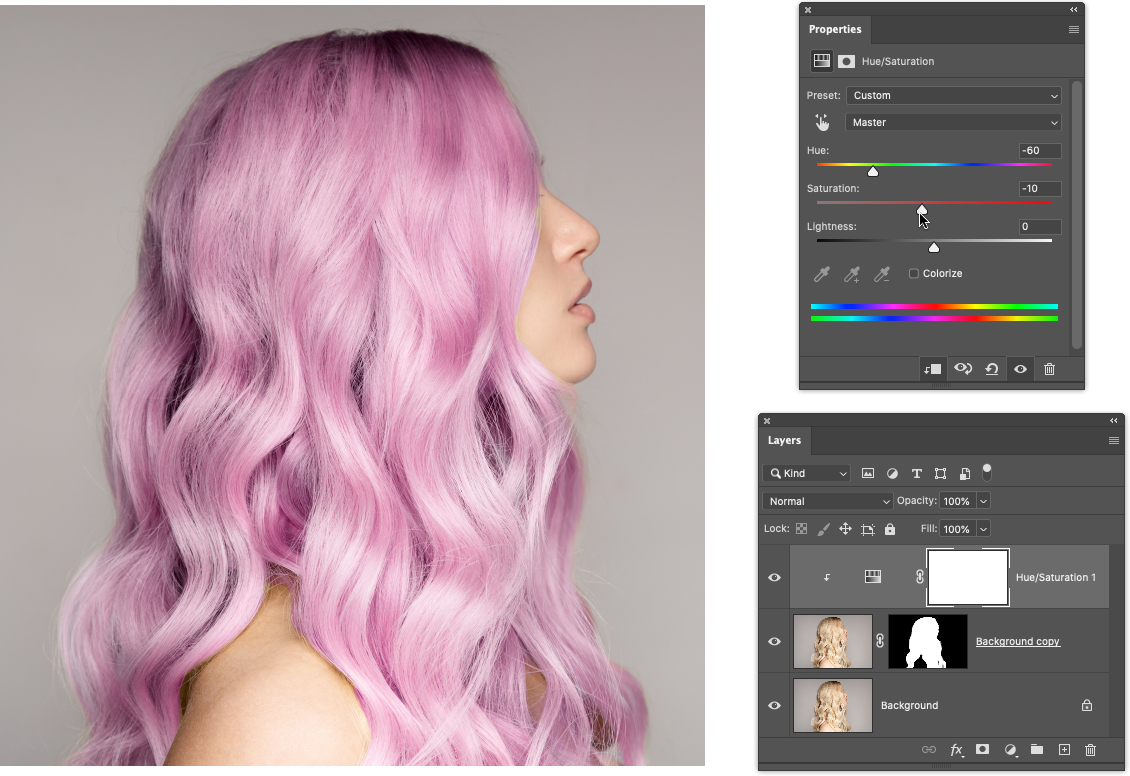
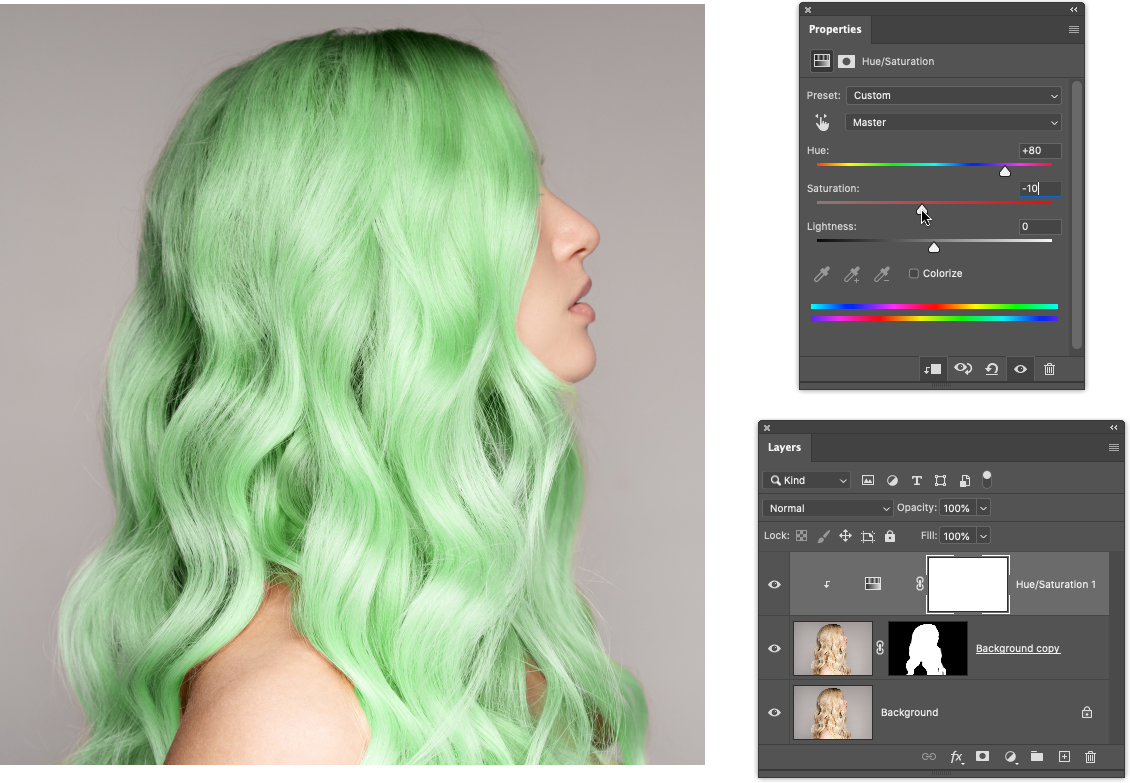
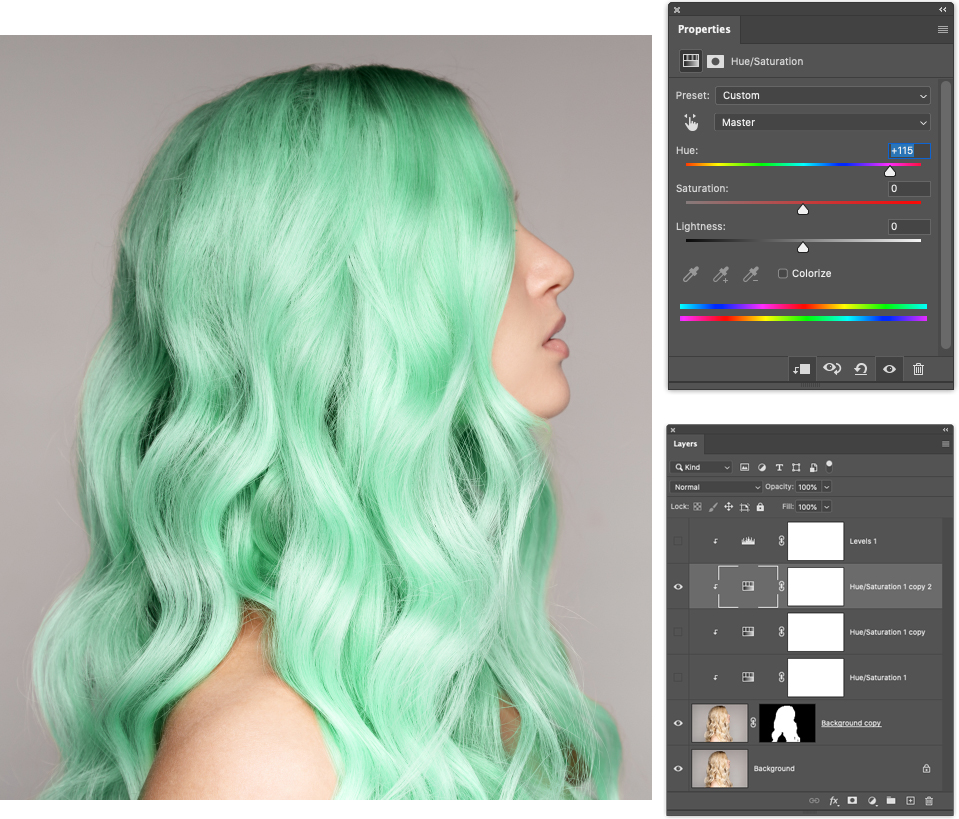
Step Four: In the Layers panel, turn on the visibility Eye icon (circled) for the Background layer. With the masked layer still active, click the half-black/half-white circle at the bottom of the Layers panel (also circled) and choose Hue/Saturation. In the Hue/Saturation Properties panel that opens, click the Clip to Layer icon (circled) so the color adjustment you’re about to make happens only to the layer below with the mask and not the whole image.

Step Five: In the Properties panel, use the Hue slider to change color and the Saturation slider to change color intensity. In the example here, –60 and –10 was used for pink, –180 and +20 was used for blue, and +80 and –10 for green. Don’t bother with the Lightness slider; we’ll adjust brightness in a different way.

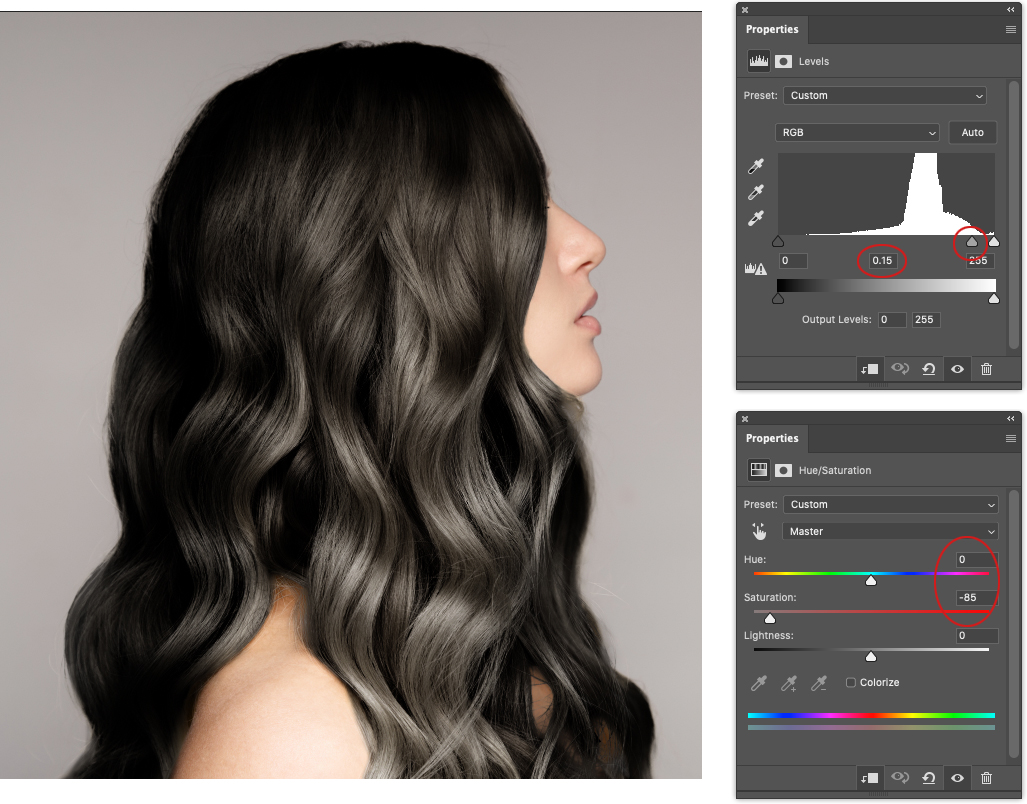
Step Six: Click the half-black/half-white circle at the bottom of the Layers panel again (circled) and choose Levels. In the Properties panel, click the Clip to Layer icon (also circled) so the Levels adjustment happens only to the masked layer under the Hue/Saturation adjustment layer.

Step Seven: To create dark hair, set the midtone slider (circled) in the Levels Properties panel to 0.15 (also circled). In the Layers panel, click the Hue/Saturation adjustment layer to make it active, and in the Properties panel, set Hue to 0 and Saturation to –85 (both circled). By adjusting the Hue/Saturation and Levels adjustment layers in tandem, you can create nearly any color you want.
Tip: Darkening the hair can reveal problems with your layer mask. If you need to fine-tune it, click to activate the mask on the Background copy layer and then use the Brush tool (B) set to a small, soft brush to paint with white to reveal more of the image or black to conceal.
Ombre-Style Hair
The ombre technique produces a gradual color change, typically to the lower half or ends of hair. Happily, you can get it done quickly by applying a gradient to the mask on both the Hue/Saturation and Levels adjustment layers.
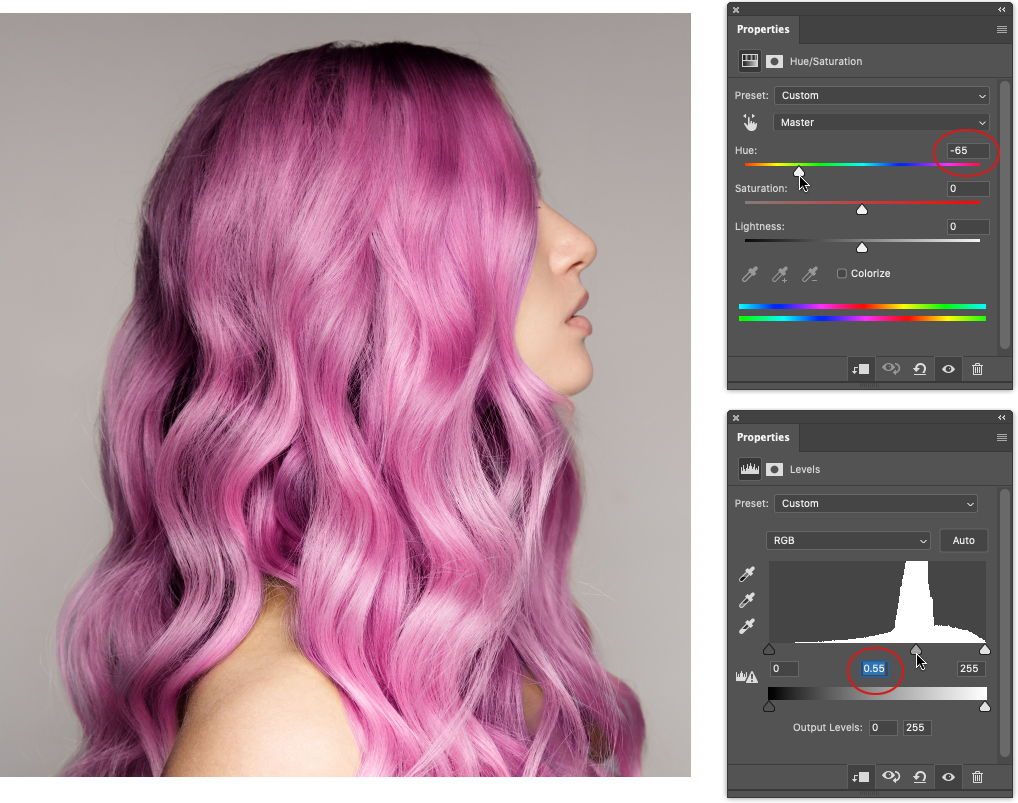
Step Eight: With the Hue/Saturation adjustment layer active in the Layers panel, set Hue to –65 and the Saturation to 0. Activate the Levels adjustment layer and set the midtone slider to 0.55 to produce a nice pink.
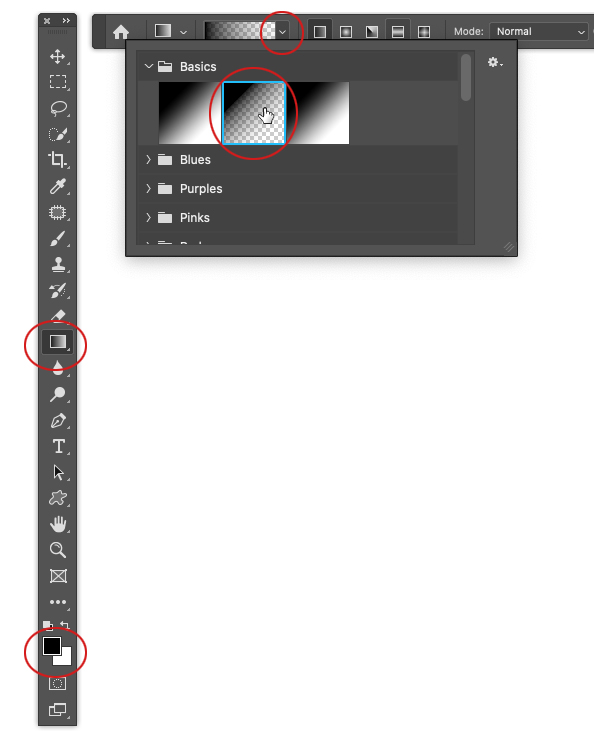
Step Nine: Press D to set the color chips at the bottom of your Toolbar (circled) to the default colors of black and white. Press X until black hops on top. Press G to grab the Gradient tool (also circled) and in the Options Bar, click the down-pointing arrow (circled) next to the gradient preview thumbnail to open the Gradient Picker. Expand the Basics folder and choose the second preset (also circled), which uses the Foreground color chip as the first color in the gradient and transparency as the second. Also, make sure the Linear Gradient icon is selected in the Options Bar.
Step 10: With one of the adjustment layer’s mask thumbnails active in your Layers panel (it doesn’t matter which one), mouse over to the image, click-and-hold where you want the color to start, and then drag downward. You’ll see a line as you drag (circled).

Step 11: Release your mouse and Photoshop applies the gradient to the adjustment layer’s mask. To copy the mask from one adjustment layer to the other, Option-drag (PC: Alt-drag) the mask itself to the other adjustment layer in the Layers panel. Click Yes when Photoshop asks if you want to replace the layer mask.
If you don’t like your first attempt, drag to redo the gradient and then copy the mask to the other adjustment layer as described above. In the Layers panel, click the thumbnail of each adjustment layer—not its mask—and use the settings in the Properties panel to produce the color you want.

Balayage-Style Tri-Color Hair
Building on what you’ve learned so far, you can produce multi-color hair in a balayage style (meaning hand-painted) by using three Hue/Saturation adjustment layers: one for each color. By filling each adjustment layer’s mask with black, you’ll hide the color and then reveal it by using a white brush (in the realm of layer masks, black conceals and white reveals).
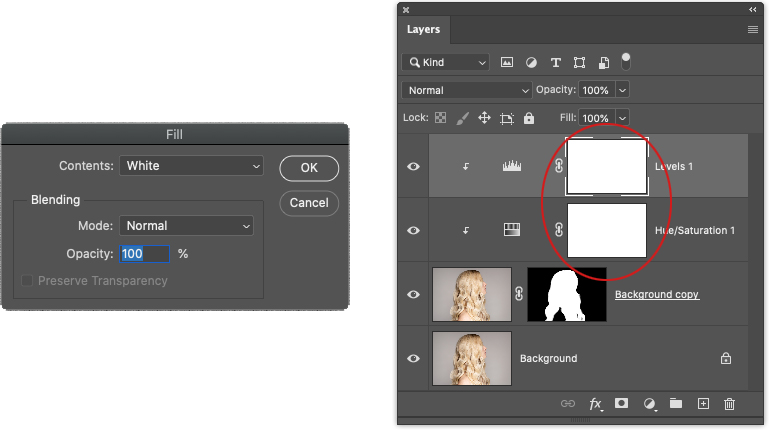
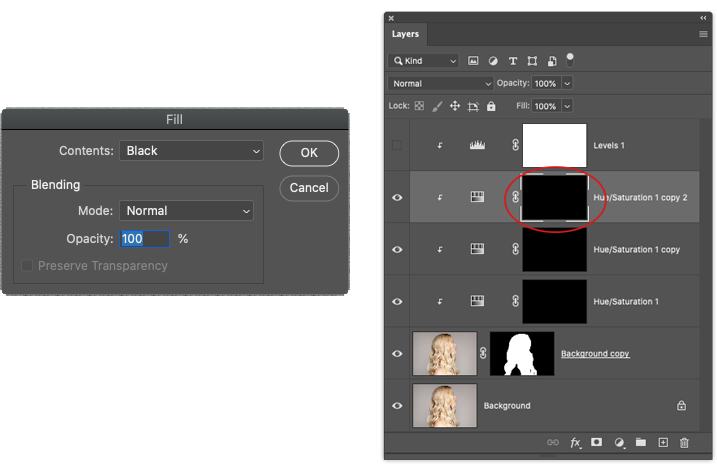
Step 12: Click to activate one of the adjustment layer’s masks in the Layers panel and choose Edit>Fill. From the Contents drop-down menu, pick White, and click OK. This empties the mask, revealing the adjustment atop all the hair. Option-drag (PC: Alt-drag) the white mask onto the other adjustment layer so it’s white, too. Both masks are circled in the Layers panel shown here.
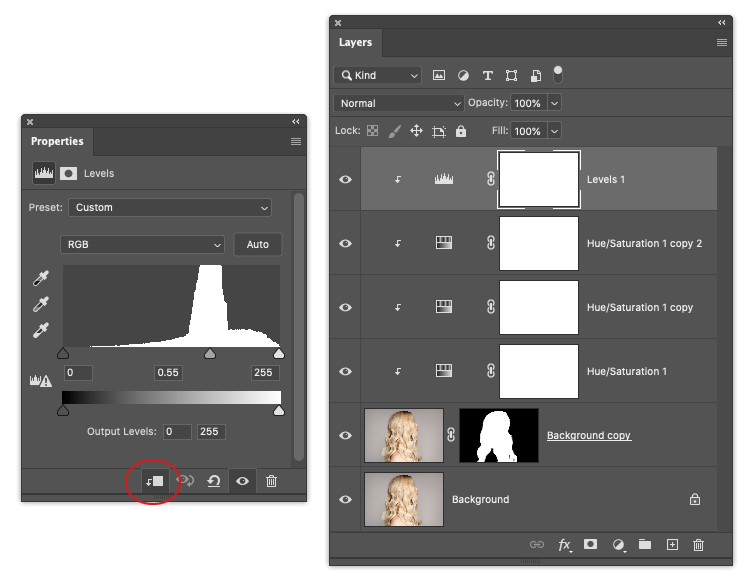
Step 13: In the Layers panel, click to activate the existing Hue/Saturation adjustment layer, choose Layer>Duplicate Layer, and then click OK. Do it again so there are three Hue/Saturation adjustment layers. Note: Be sure to use the duplicate layer command, rather than the keyboard shortcut so Photoshop keeps your clipping intact. That said, the Levels adjustment layer will become unclipped (grumble), so activate it in the Layers panel and click the Clip to Layer icon (circled) in the Properties panel to re-clip it.
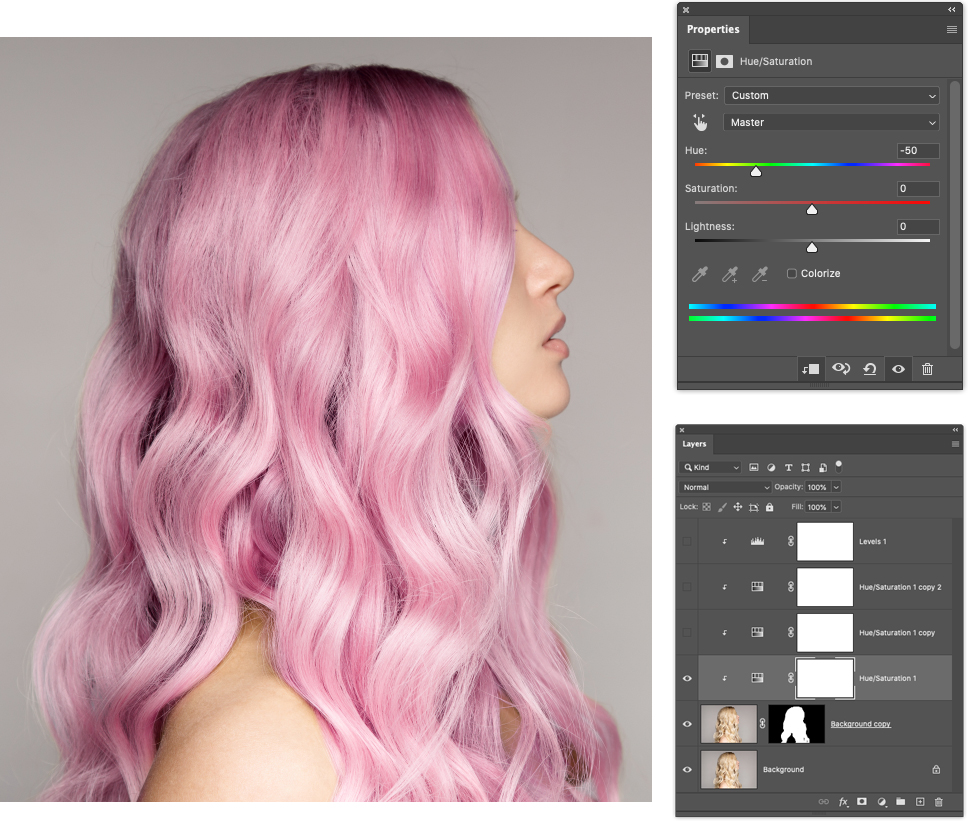
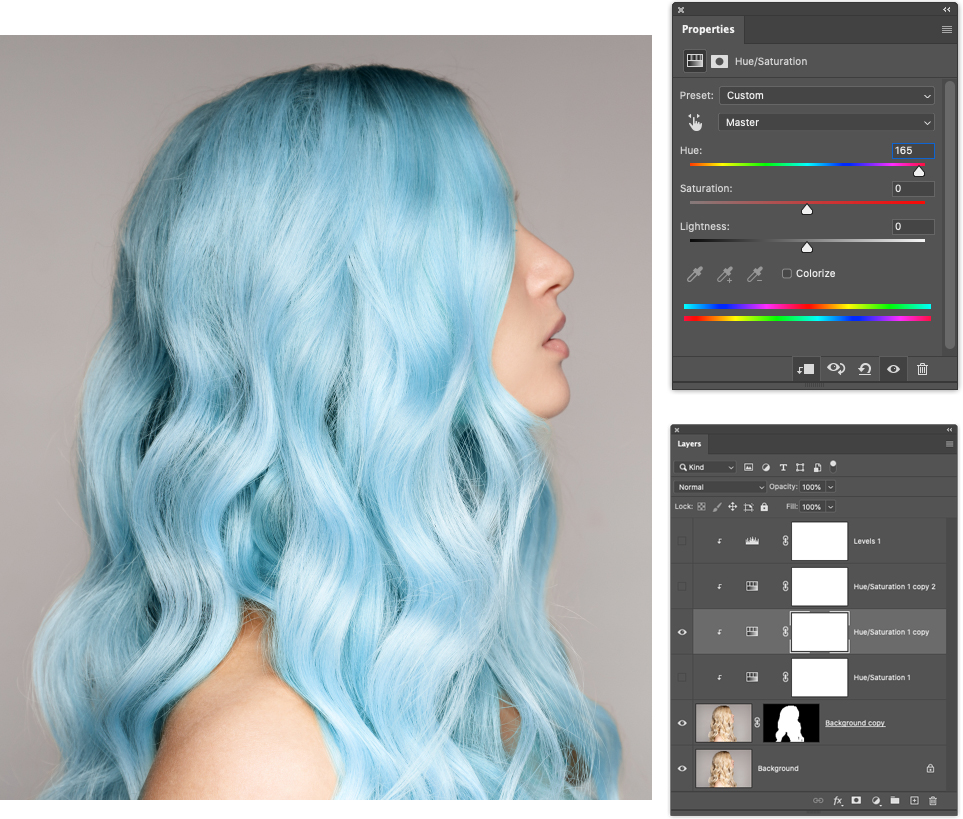
Step 14: Turn off the layer visibility Eye icons for the Levels and two of the Hue/Saturation adjustment layers. Activate the remaining Hue/Saturation adjustment layer and use the Properties panel to set the Hue to –50 and Saturation to 0. Turn its layer visibility Eye off, turn on the layer visibility for the next Hue/Saturation adjustment layer, click on it to make it the active layer, and set its Hue to 165. Turn its layer visibility off, turn on the visibility for the next one, make it active, and set its Hue to 115.
Step 15: Click the mask (circled) on the third Hue/Saturation adjustment layer, choose Edit>Fill, pick Black from the Contents drop-down menu, and click OK. This hides the color from the image. Now Option-drag (PC: Alt-drag) to copy that mask to the other two Hue/Saturation adjustment layers and then turn on the layer visibility for all three layers (leave the Levels adjustment layer turned off for now).
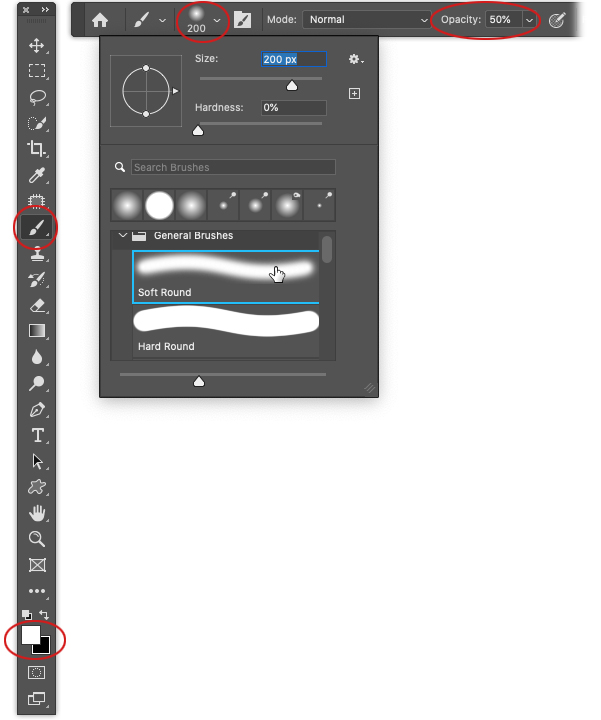
Step 16: Press B to grab the regular Brush tool (circled) and in the Options Bar, use the Brush Preset Picker to pick a soft-edged brush set to the size of the hair area you want to paint (200 pixels was used here, but try 25 on the Adobe preview image). Set Opacity to 50% (also circled). Take a peek at the color chips at the bottom of the Toolbar (circled) and press X so white is on top.
Step 17: With the mask active on the Hue/Saturation adjustment layer (circled), paint repeatedly down the strands of hair. The more you brush across the strand, the more the color will build. If you reveal too much color, press X to flip your color chips so black is on top and then paint back over that area to conceal the color.

Step 18: Repeat the step above on the layer mask for each Hue/Saturation adjustment layer, adjusting brush size as needed to produce the look you want.
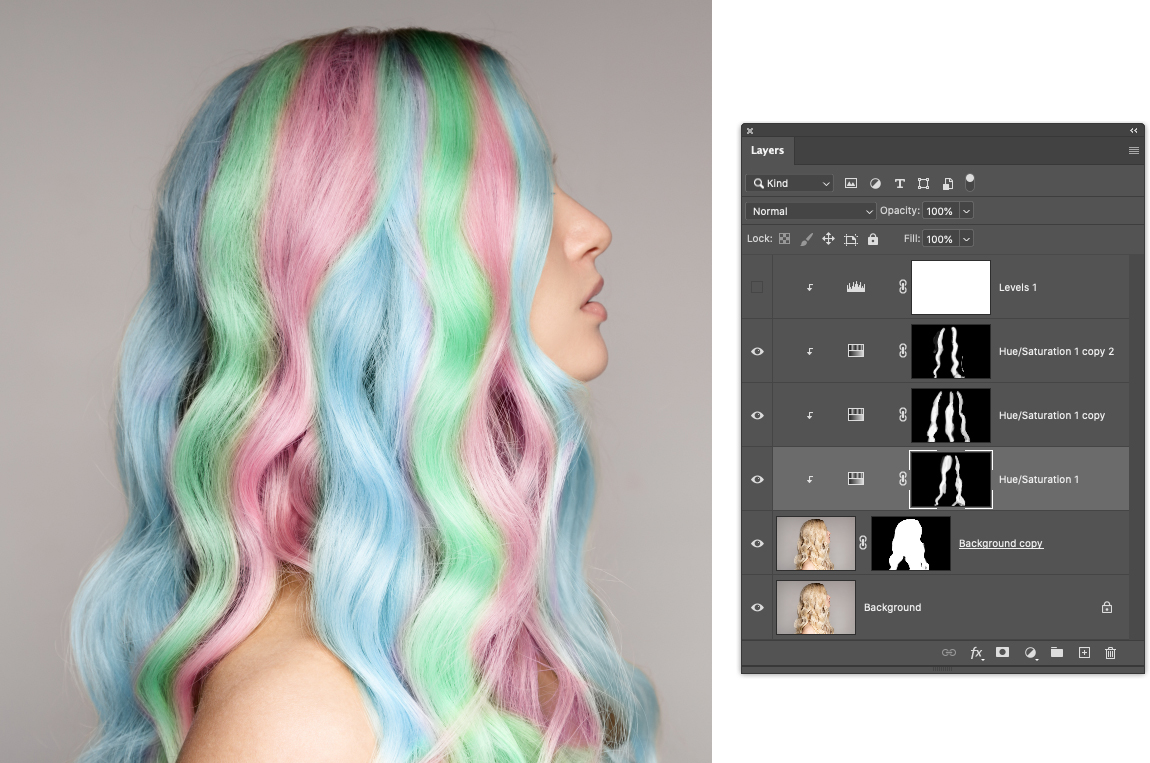
Step 19: Turn on the layer visibility Eye for the Levels adjustment layer and click its layer thumbnail. In the Properties panel, set the midtones to 0.45 (circled).

While there are many steps in this technique, you’ll get the hang of it in no time. Be sure to choose File>Save As and pick Photoshop from the Format drop-down menu so your layers remain intact (if you started in Lightroom, choose File>Save instead). Until next time, may the creative force be with you all!
About Photoshop User and KelbyOne
Photoshop User magazine comes out digitally 12 times a year and is part of KelbyOne, the leading educational resource for Photoshop, Lightroom, and photography. Pro members have access to more than 900 video courses and 100 back issues of Photoshop User. To learn more about KelbyOne, click here.