[This article originally appeared in the July 2022 issue of Photoshop User, the Magazine for Lightroom and Photoshop Users. To learn more about Photoshop User and to sign up to read the latest issue for free, click here.]
By Kirk Nelson

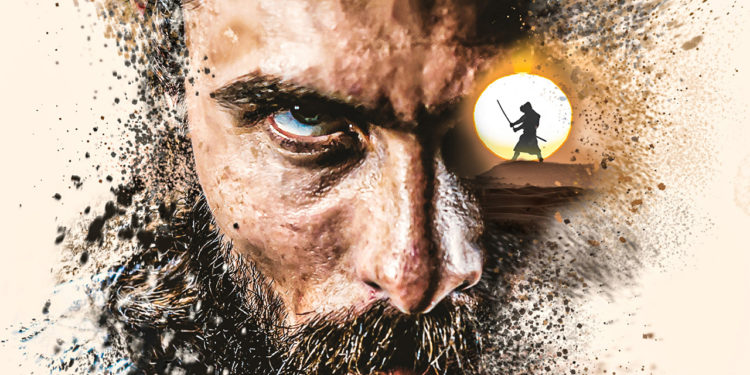
The latest streaming Star Wars series shows us a dark time in the life of fan-favorite Obi-Wan Kenobi. The Jedi is hiding in the sandy dunes of Tatooine and has lost much of his confidence. The series is reminiscent of old samurai films where a lost r?nin has to find his path once more. The marketing art for the series serves as the inspiration for this piece, showing a sand-swept, forlorn hero.
In this project, we explore some great free brush sets from Adobe’s website, and how to use them to get a gritty, sandy effect that just might have you wondering how moisture farming actually works.
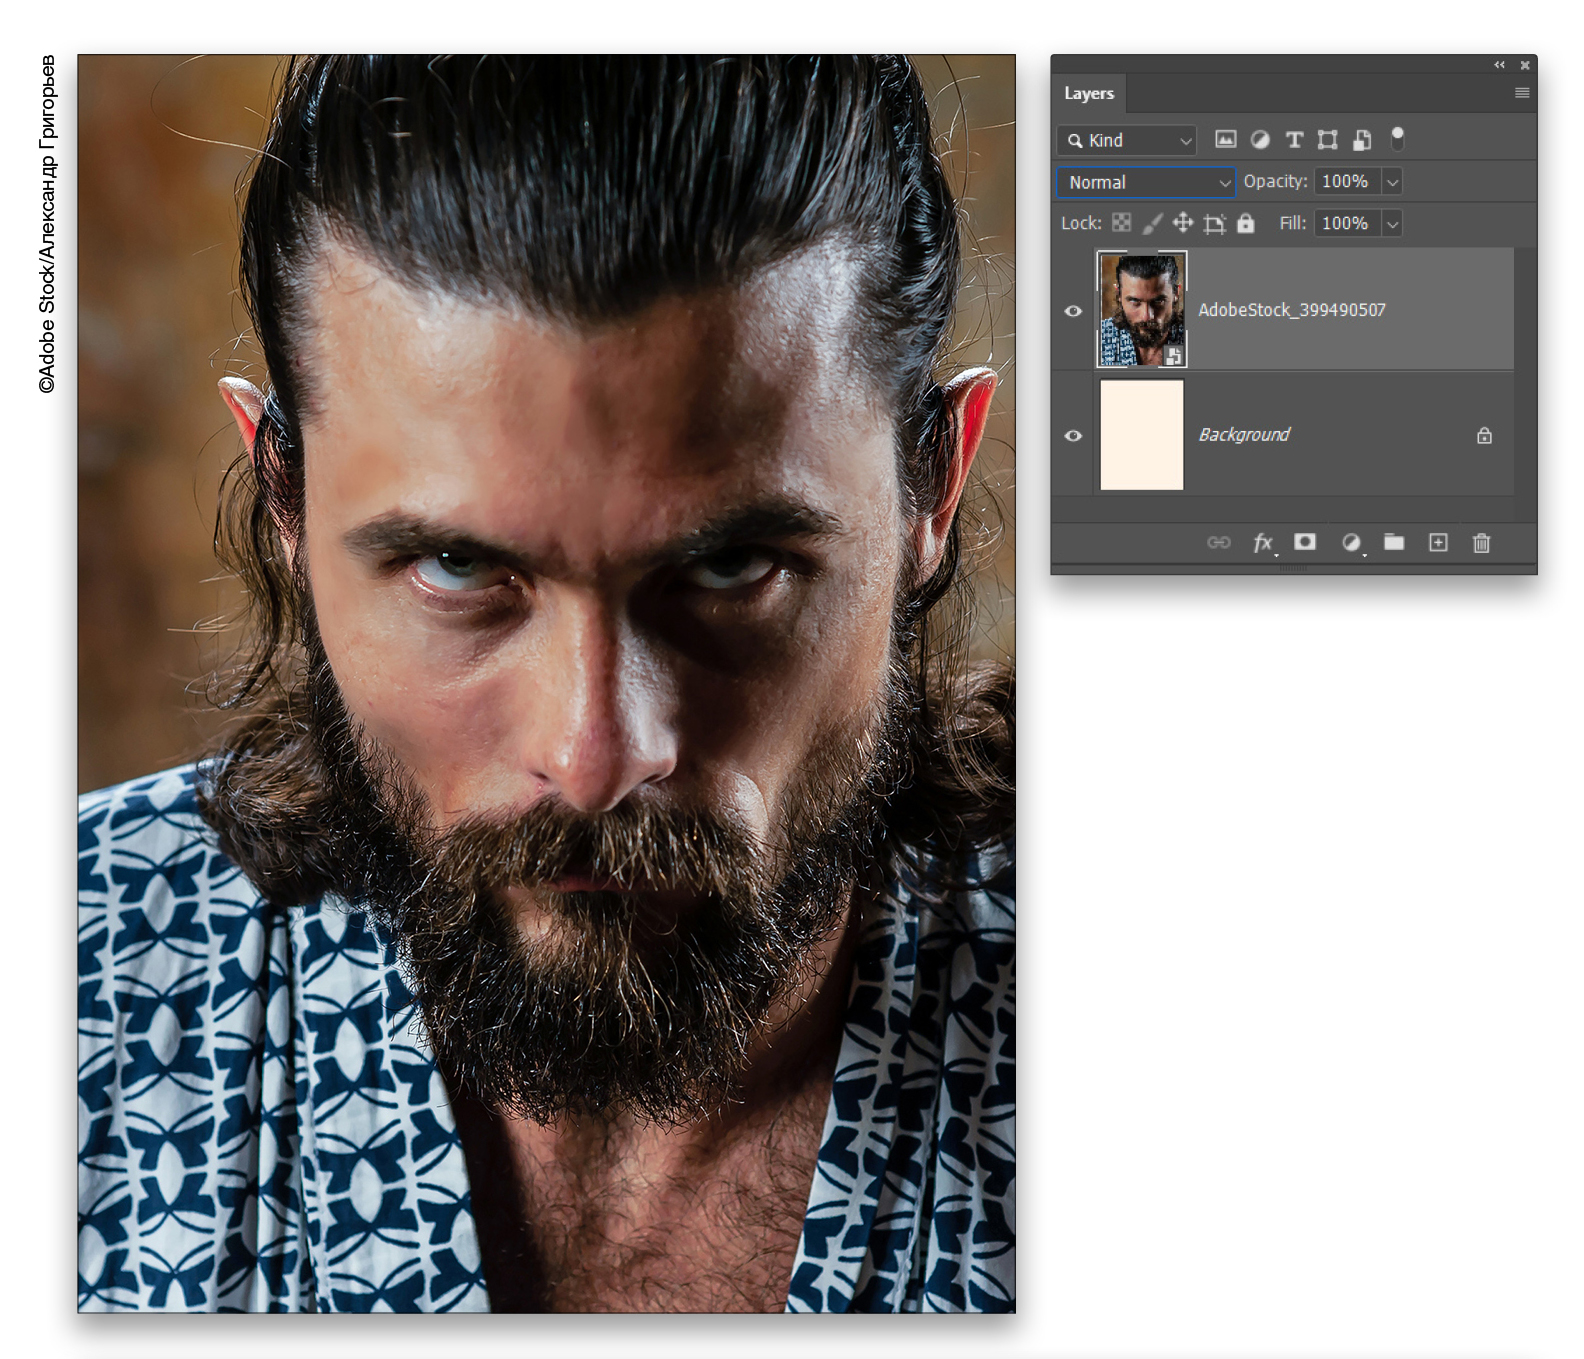
STEP ONE: Open Photoshop, go to File>New and, in the New Document dialog, set the filename to “Sandy_Hero,” the Width to 1500 pixels, Height to 2000 pixels, and Resolution to 72 ppi. Click on the color swatch to the right of the Background Contents drop-down menu, and set it to an off-white color (#fff3e6). Click Create and, after the document opens, go to File>Place Embedded and select the image you’d like to use.
If you’d like to download the low-res watermarked version of this bearded warrior from Adobe Stock to follow along, click this link, log in with your Adobe ID, and click the Save to Library button. Drag the image from the Libraries panel (Window>Libraries) into your Sandy_Hero file.
Use the bounding box to scale and position the image so the face fills the composition. Press Enter to commit the image.
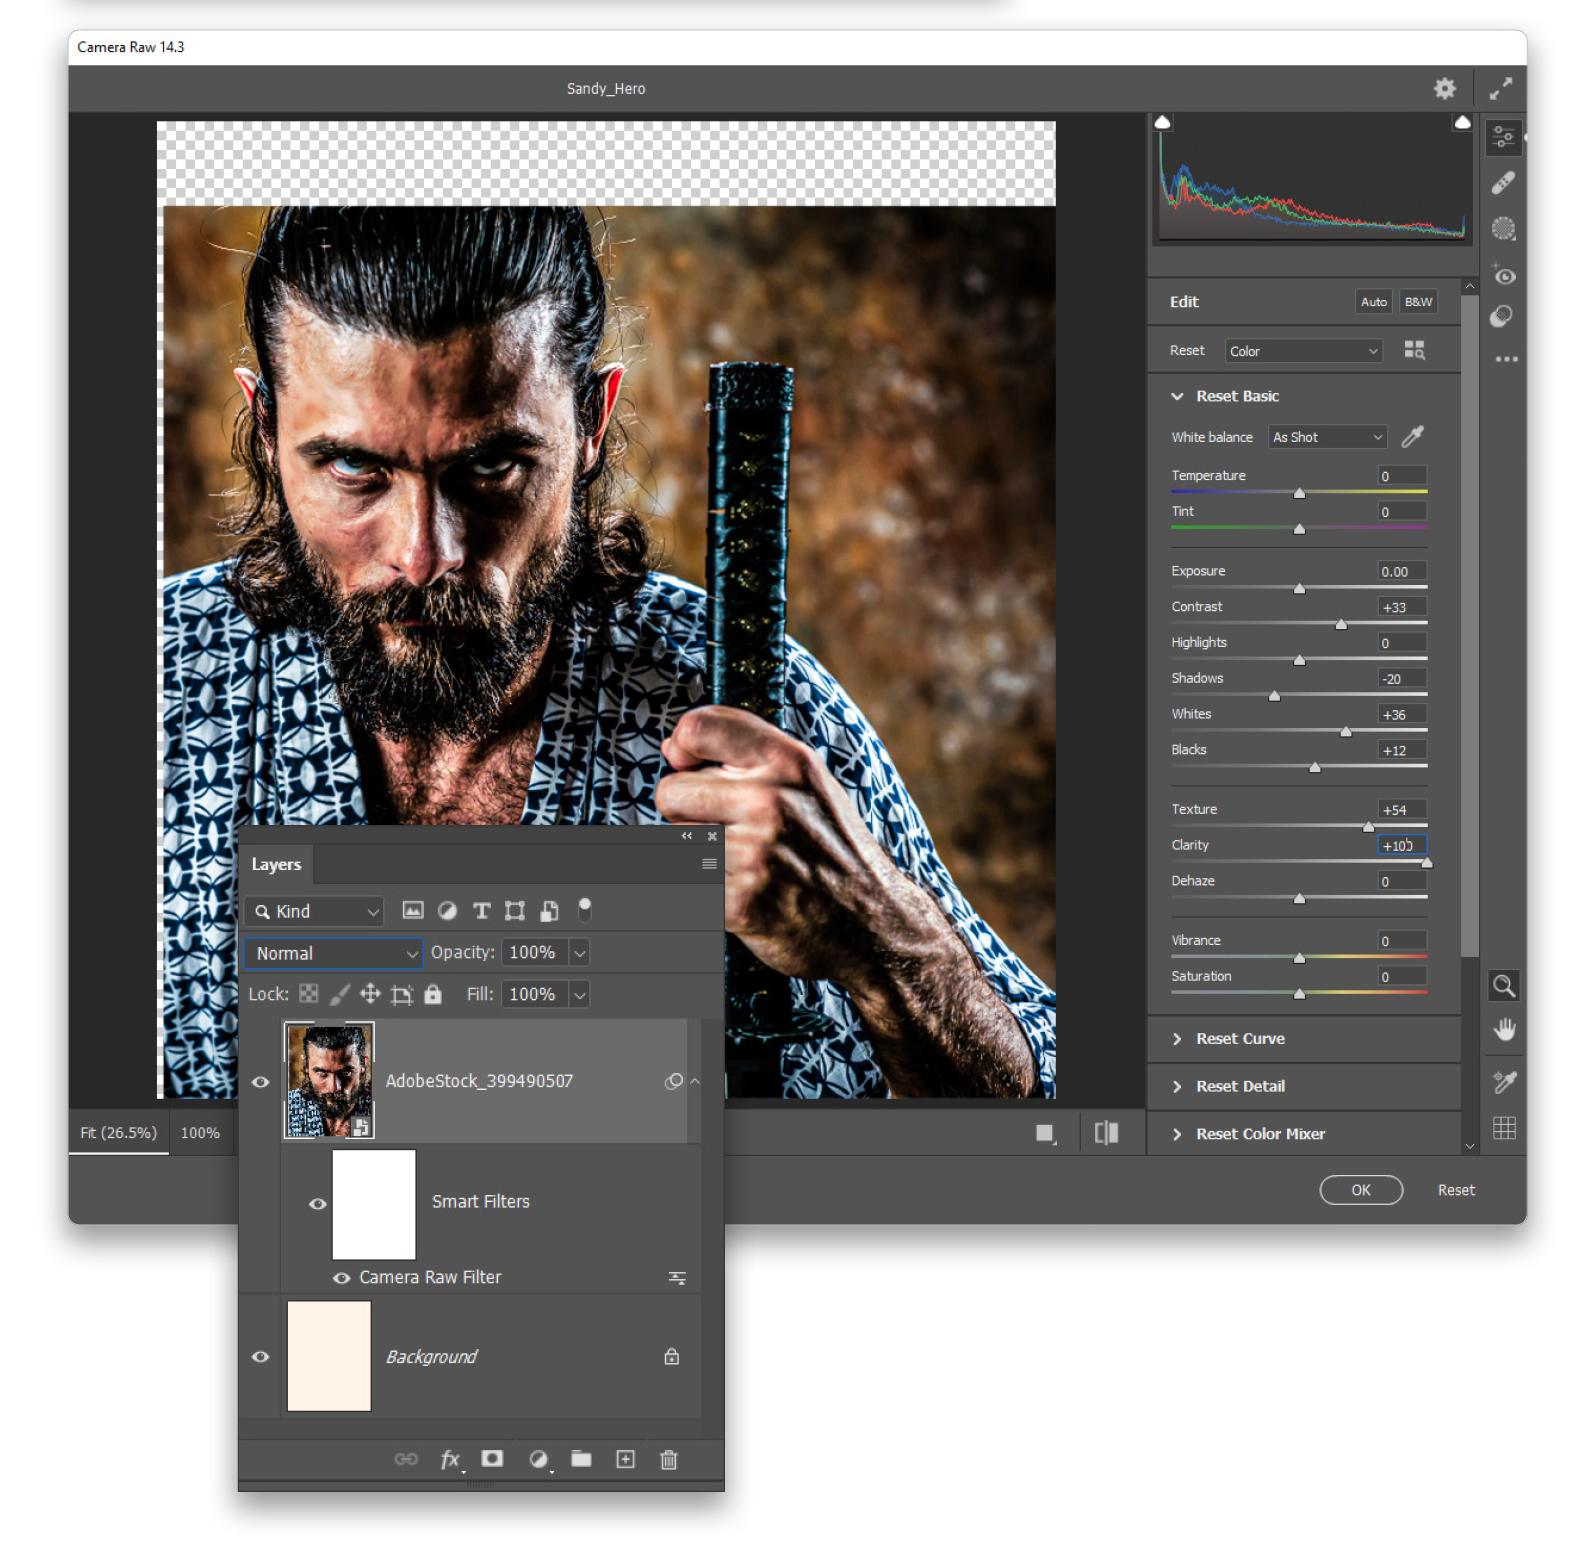
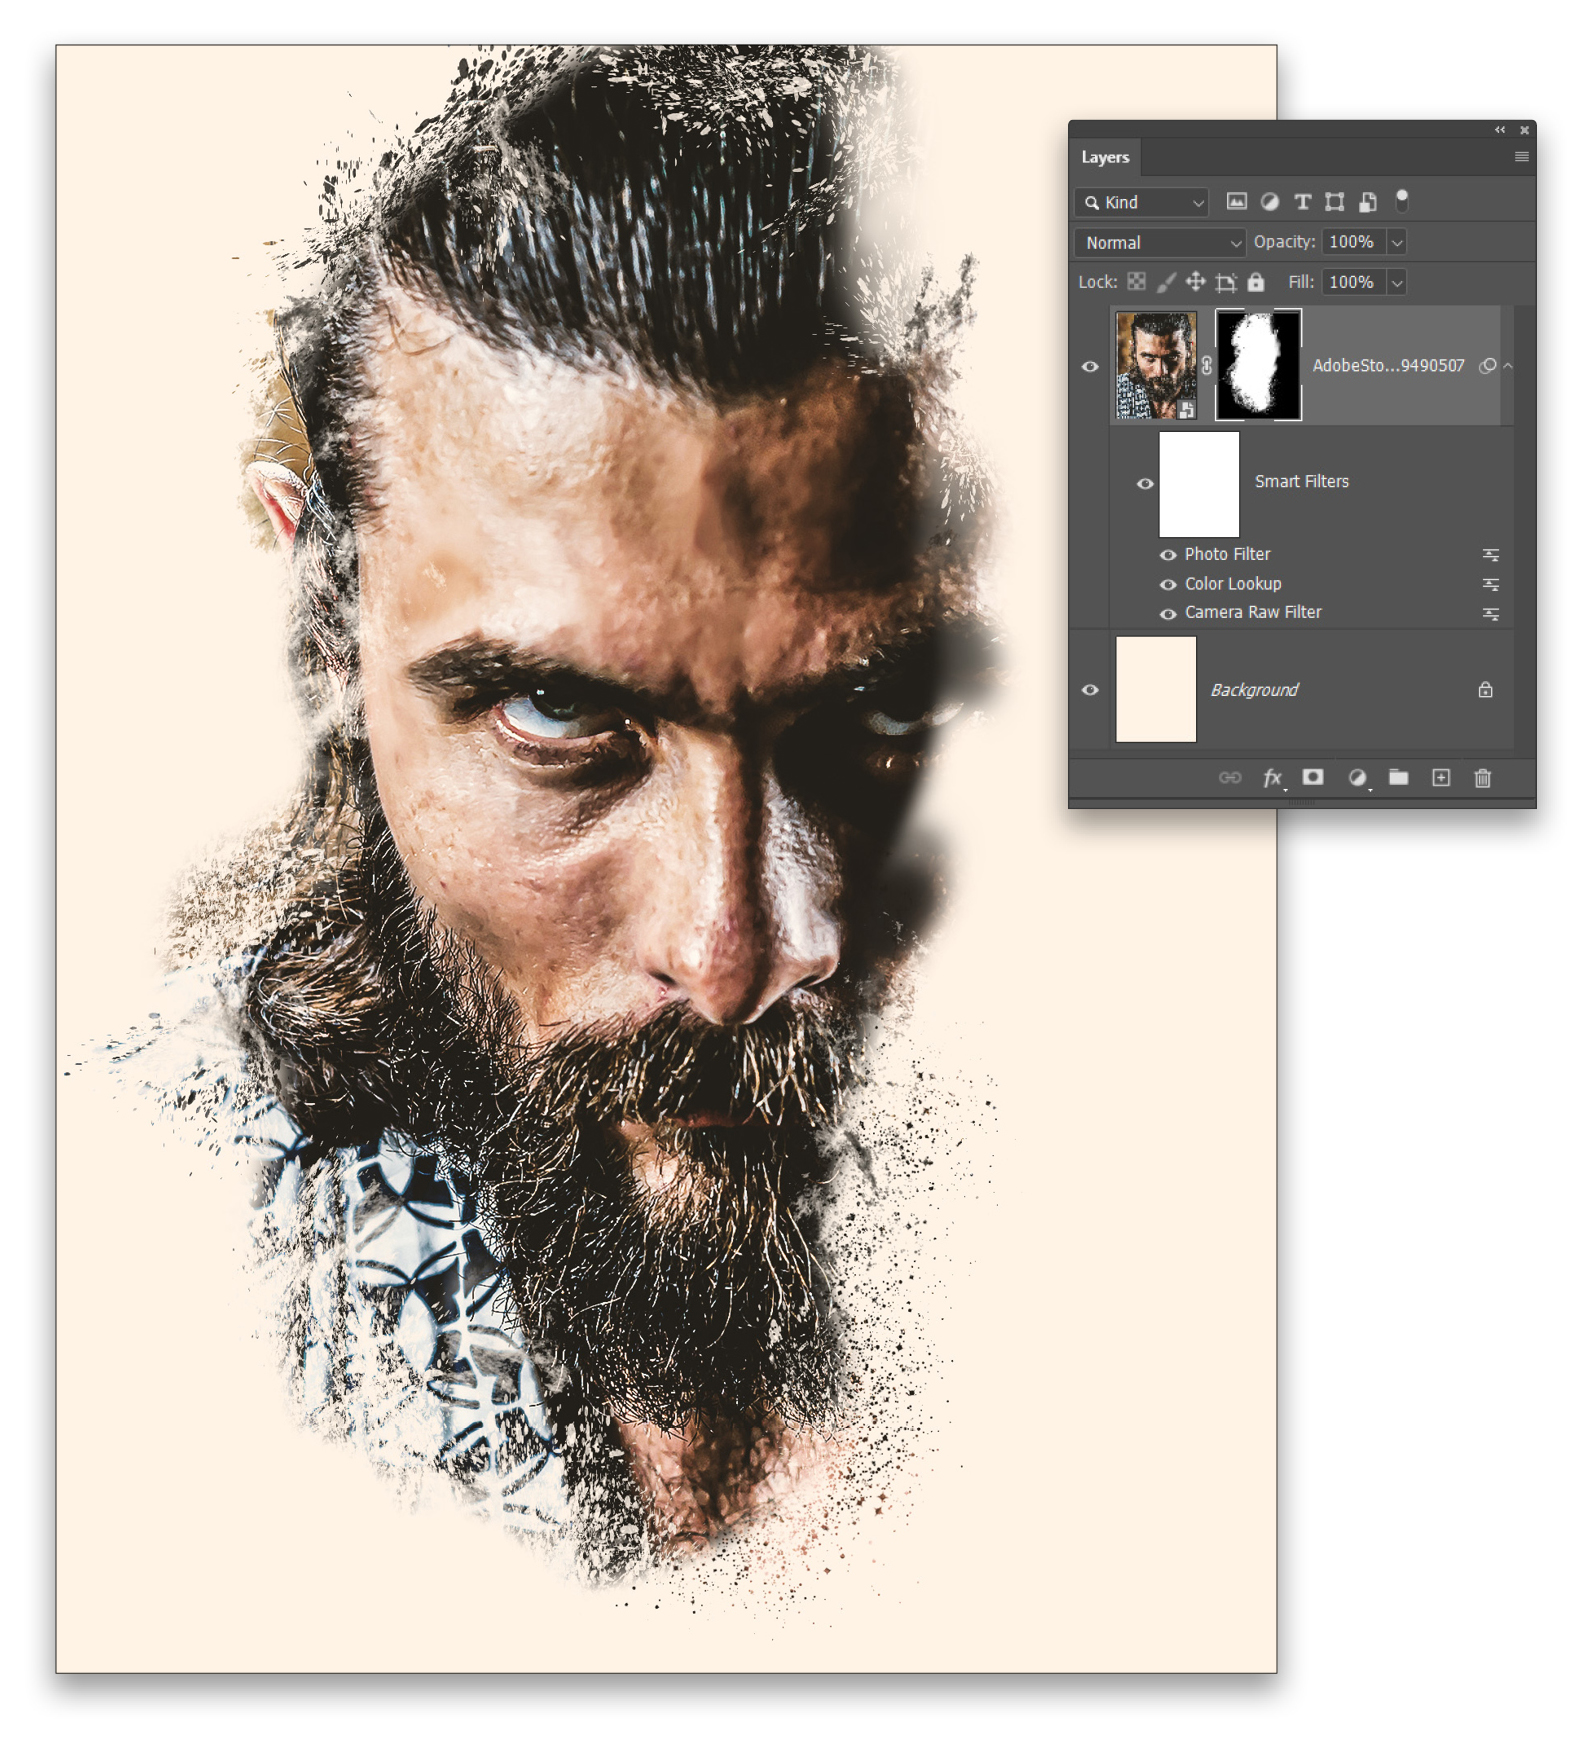
STEP TWO: Go to Filter>Camera Raw Filter and in the Basic panel, set the Contrast to +33, Shadows to –20, Whites to +36, Blacks to +12, Texture to +54, and Clarity to +100. This will give the image a gritty, over-processed appearance. Click OK.
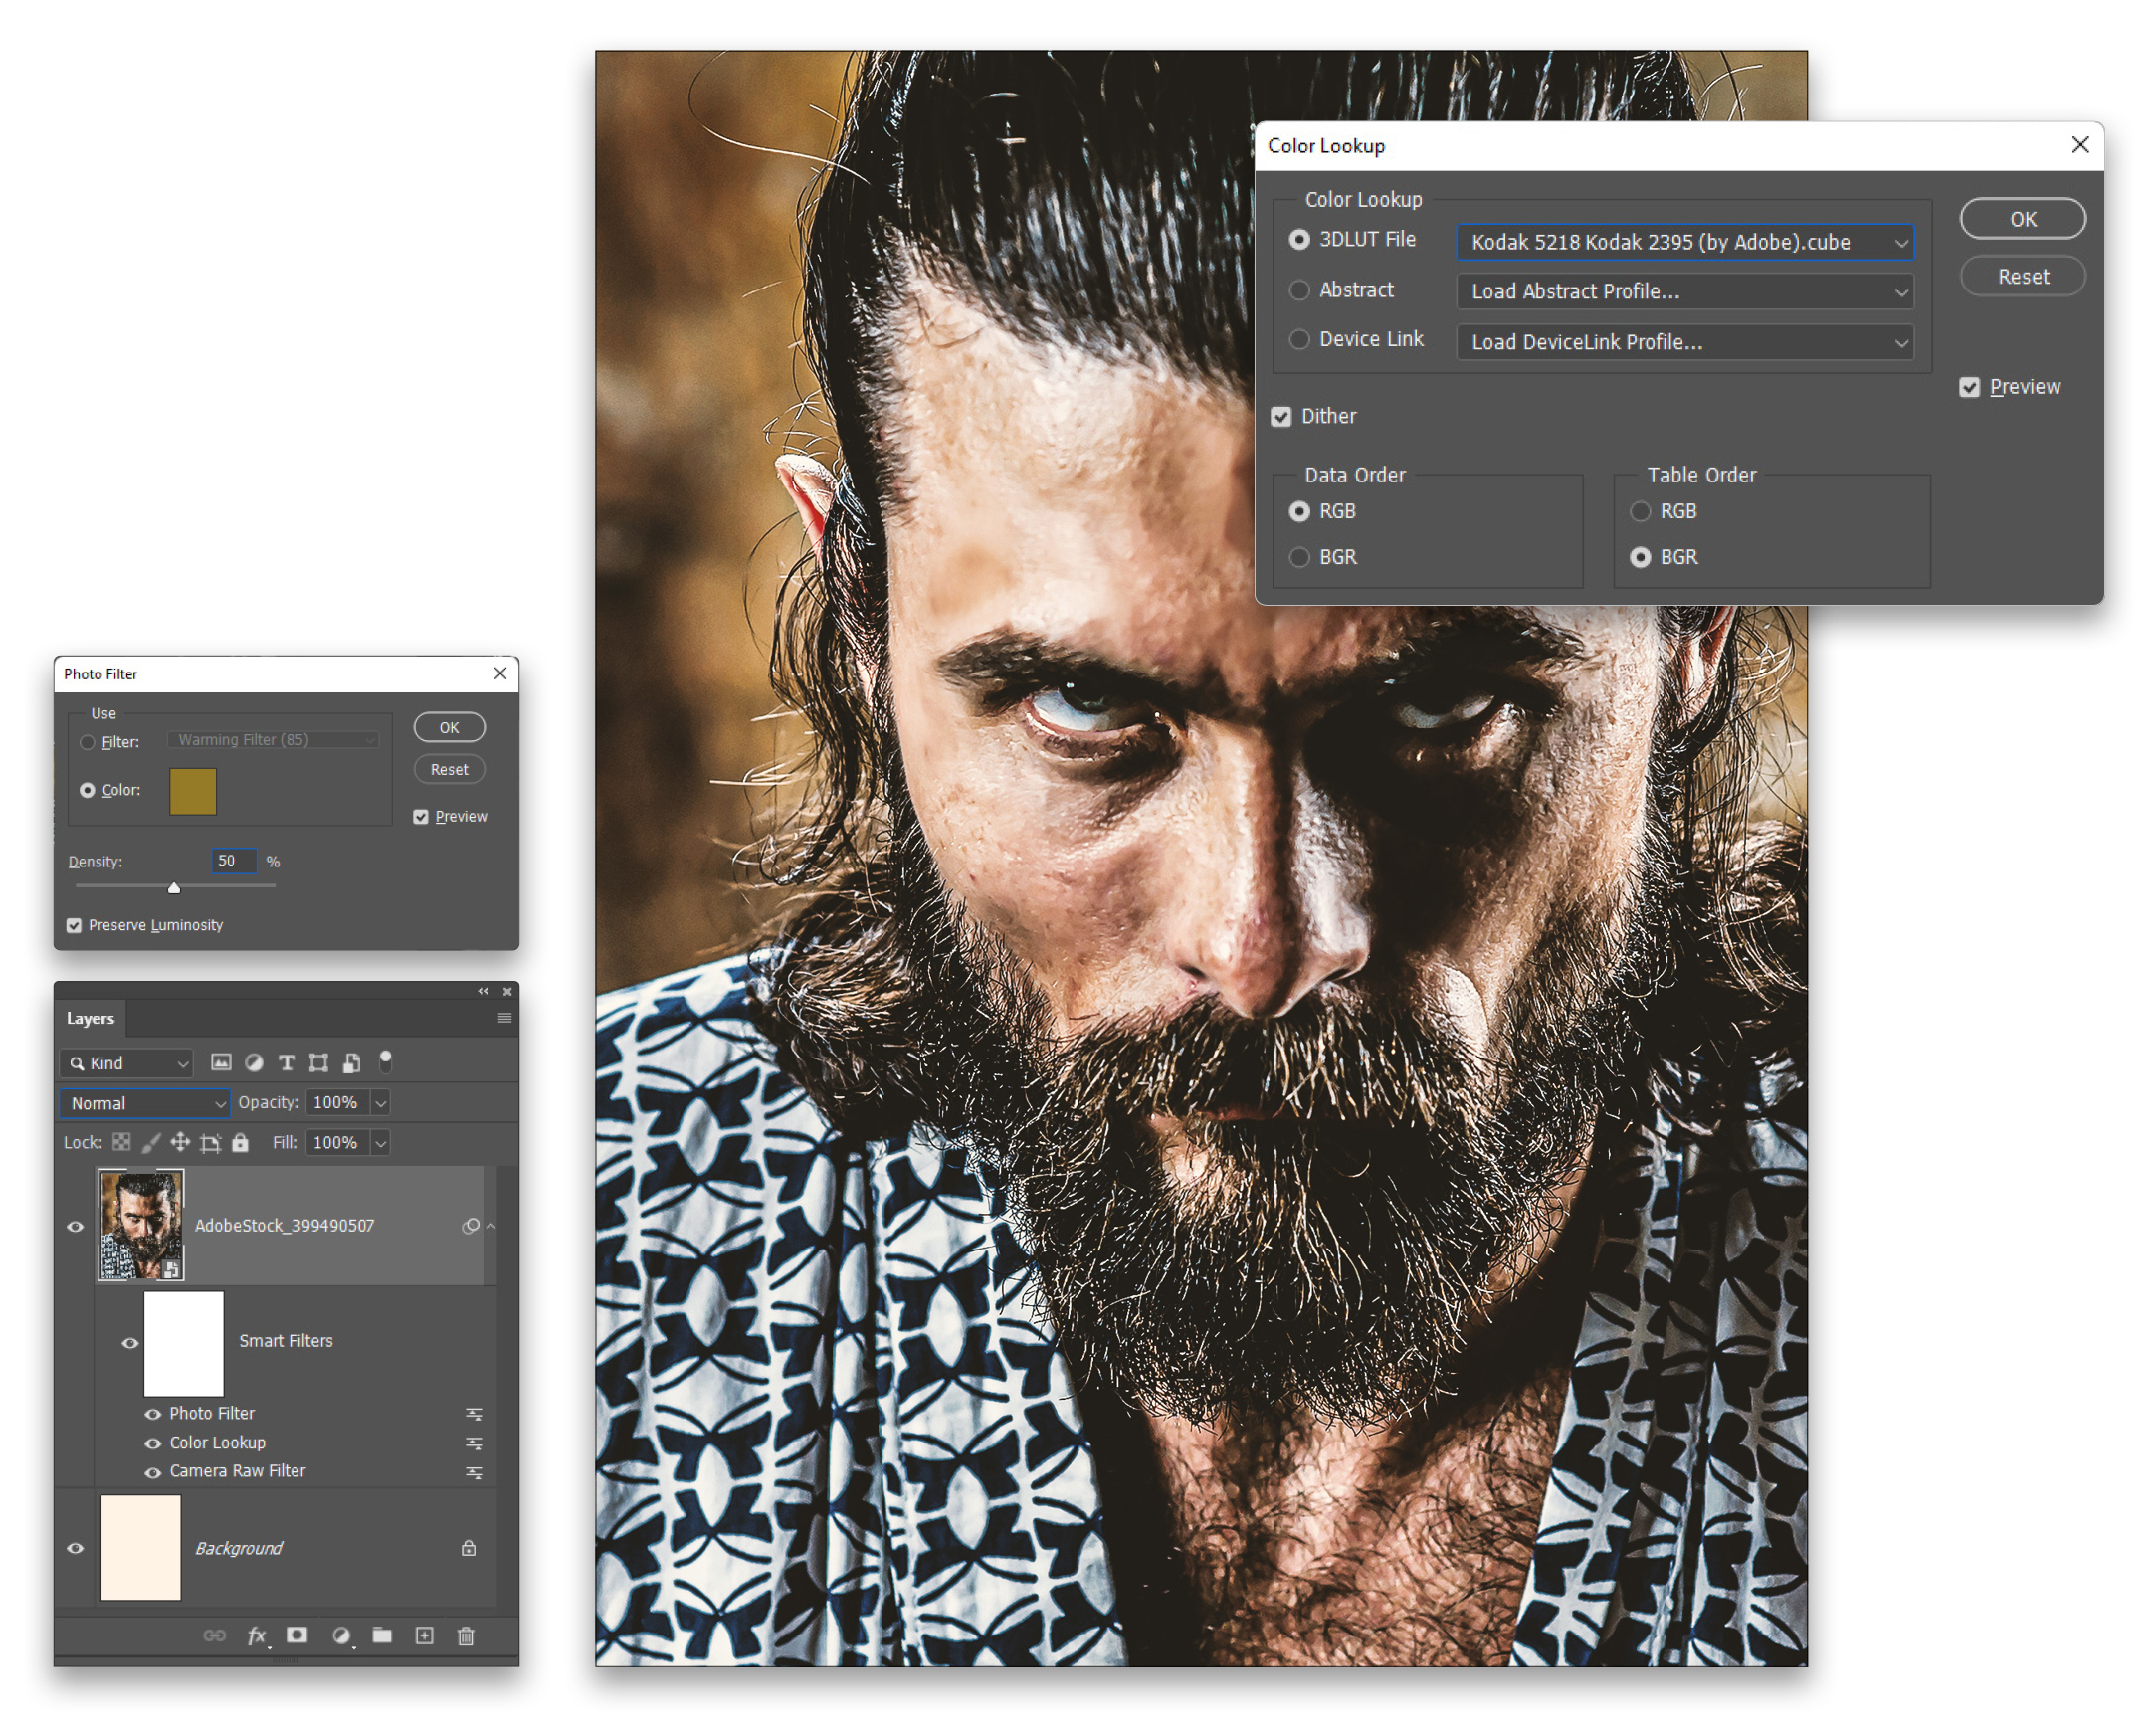
STEP THREE: Go to Image>Adjustments>Color Lookup and set the 3DLUT File to Kodak 5218 Kodak 2395 (by Adobe).cube. Follow this with Image>Adjustments>Photo Filter and use the Color option set to a dirty sand color (#957a27) and the Density to 50%.
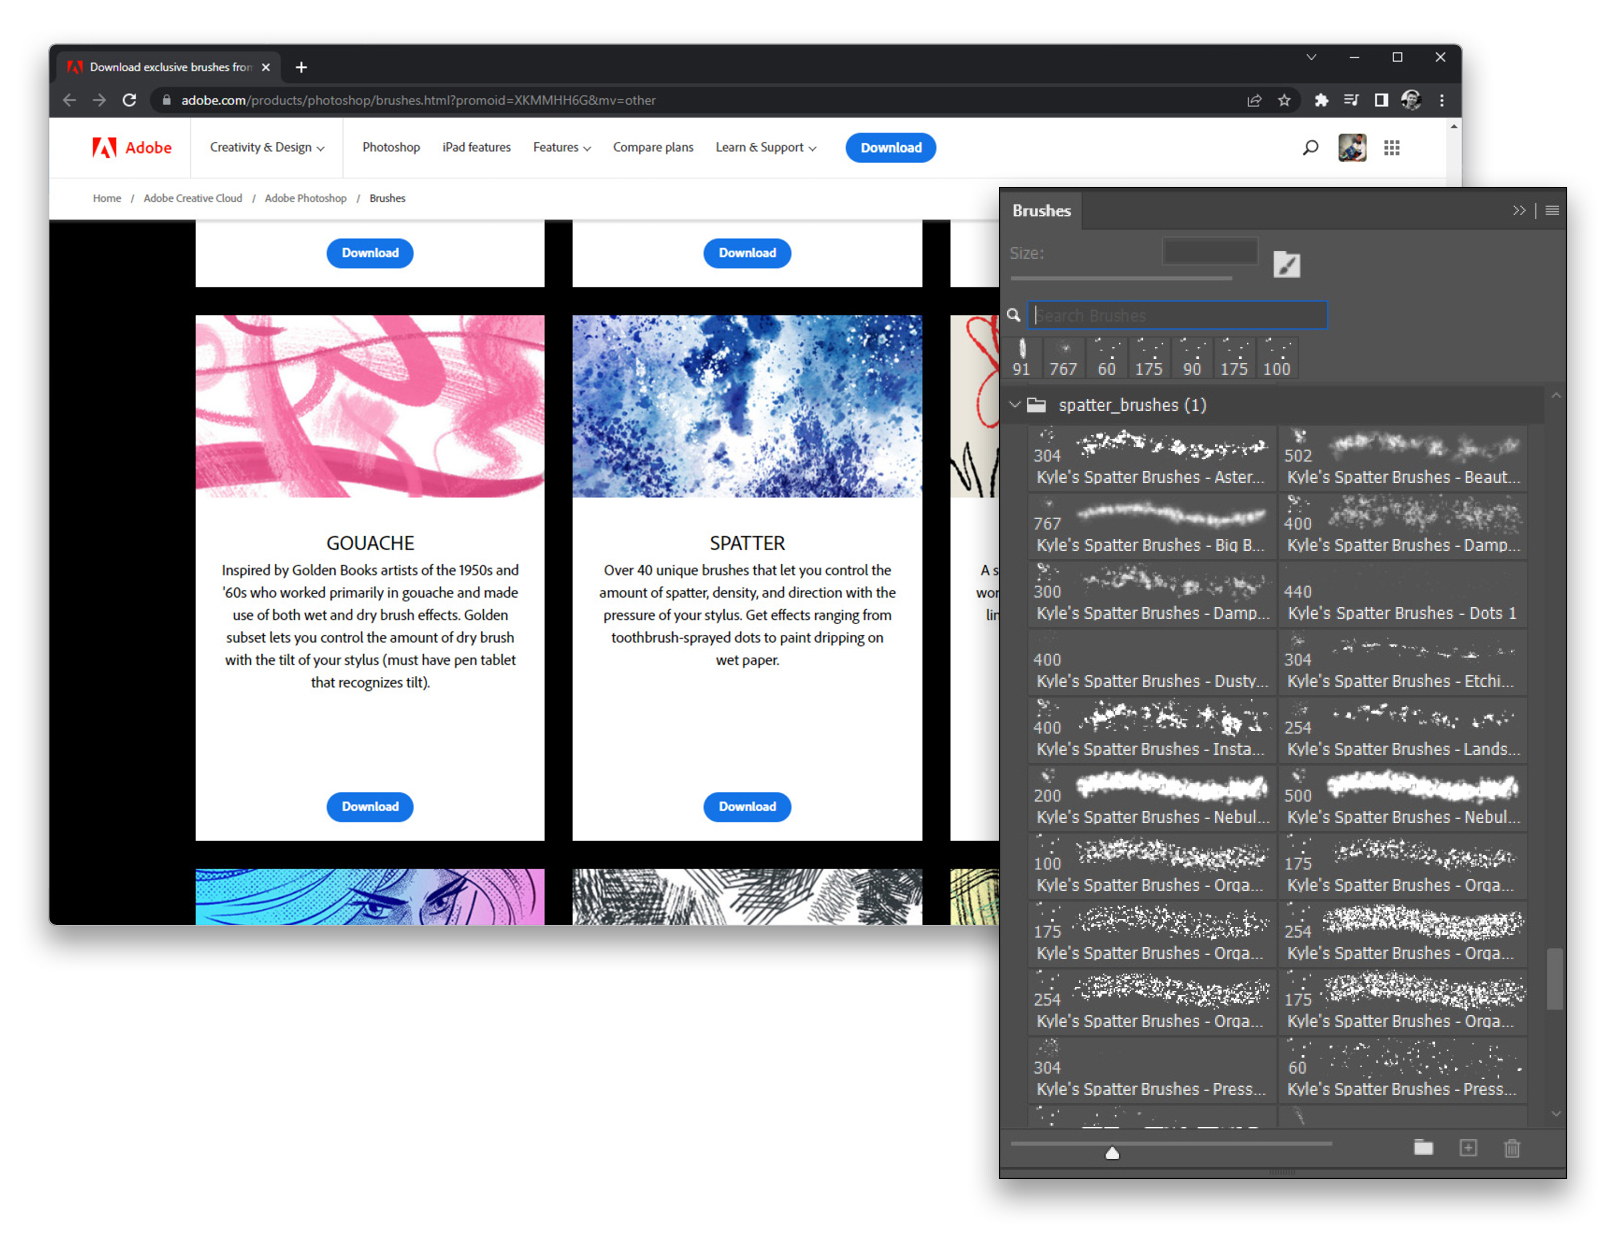
STEP FOUR: Open the Brushes panel with Window>Brushes and use the panel’s flyout menu at
the top right to select Get More Brushes. This will launch a web browser and load a page from Adobe’s website that includes free brush sets by Kyle T. Webster. Find the Spatter brush set, click the Download button, and install the downloaded .abr brush file into Photoshop by simply double-clicking it. You’ll find them in a folder called “spatter_brushes” at the bottom of the Brushes panel.
STEP FIVE: Hold down the Option (PC: Alt) key and click the Add Layer Mask icon (circle in a square) at the bottom of the Layers panel to completely hide the layer behind a black mask. Then grab the Brush tool (B) and press D to set the Foreground color to white. Start with a simple Soft Round brush tip to roughly reveal part of the warrior’s face. Then begin exploring with the various spatter brushes that you just downloaded and paint on the mask to create a very rough, splattered edge around his face. If some of the brushes don’t appear to work, that brush preset is probably set to a blend Mode to something other than Normal in the Options Bar.
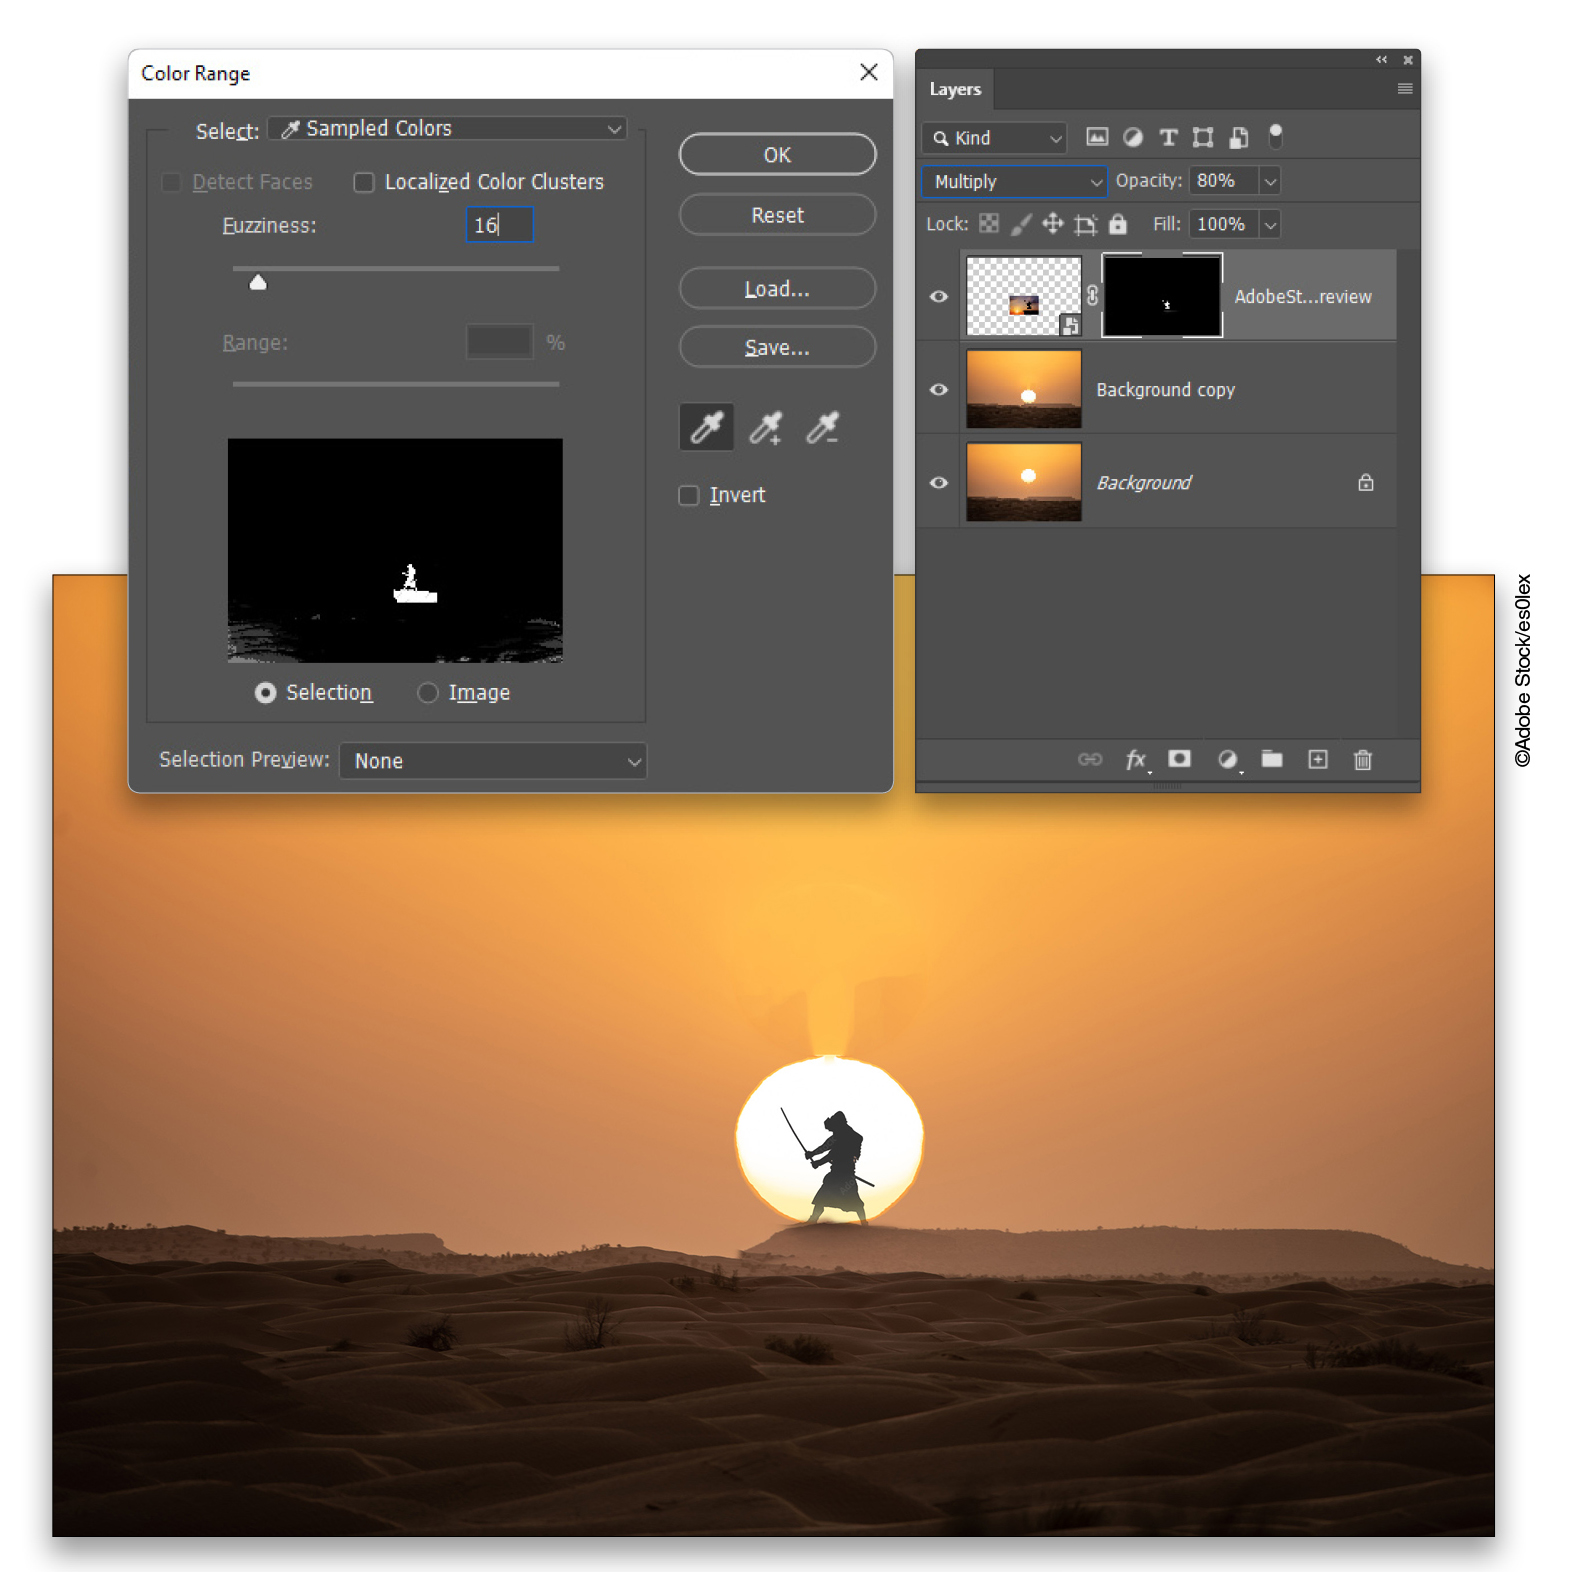
STEP SIX: Open the sunset image from Adobe Stock; you can click here to find and download the preview version to your Libraries panel. Double-click the image in the Libraries panel to open it in Photoshop. Press Command-J (PC: Ctrl-J) to make a copy of the Background layer. Then use the Elliptical Marquee tool (nested below the Rectangular Marquee tool [M] in the Toolbar) to create a circular selection around the sun. Press-and-hold the Spacebar while drawing the selection to reposition it. Then use the Content-Aware Move tool (nested with the Spot Healing Brush [J] in the Toolbar) to drag the sun down to touch the horizon.

STEP SEVEN: Click here to find and download the preview image of the warrior silhouette figure. Drag it from the Libraries panel to the sunset image. Set its layer blending mode to Multiply and then use the bounding box to scale and position the layer so the figure is framed by the setting sun. Press Enter to commit the image.
Go to Select>Color Range and click on the dark color of the silhouetted figure with the eyedropper. Lower the Fuzziness slider to around 16, until the preview in the Color Range dialog shows just the figure standing on the rocky ledge. Click OK.
Click the Add Layer Mask icon to use the selection as a layer mask. Then use the Brush tool with the Foreground color set to black (press D then X) and a Soft Round brush to paint on the mask to hide the figure’s surroundings. Reduce the layer Opacity to around 80% to allow some of the background to show through and then save this file as “Sunset_Figure.psd”
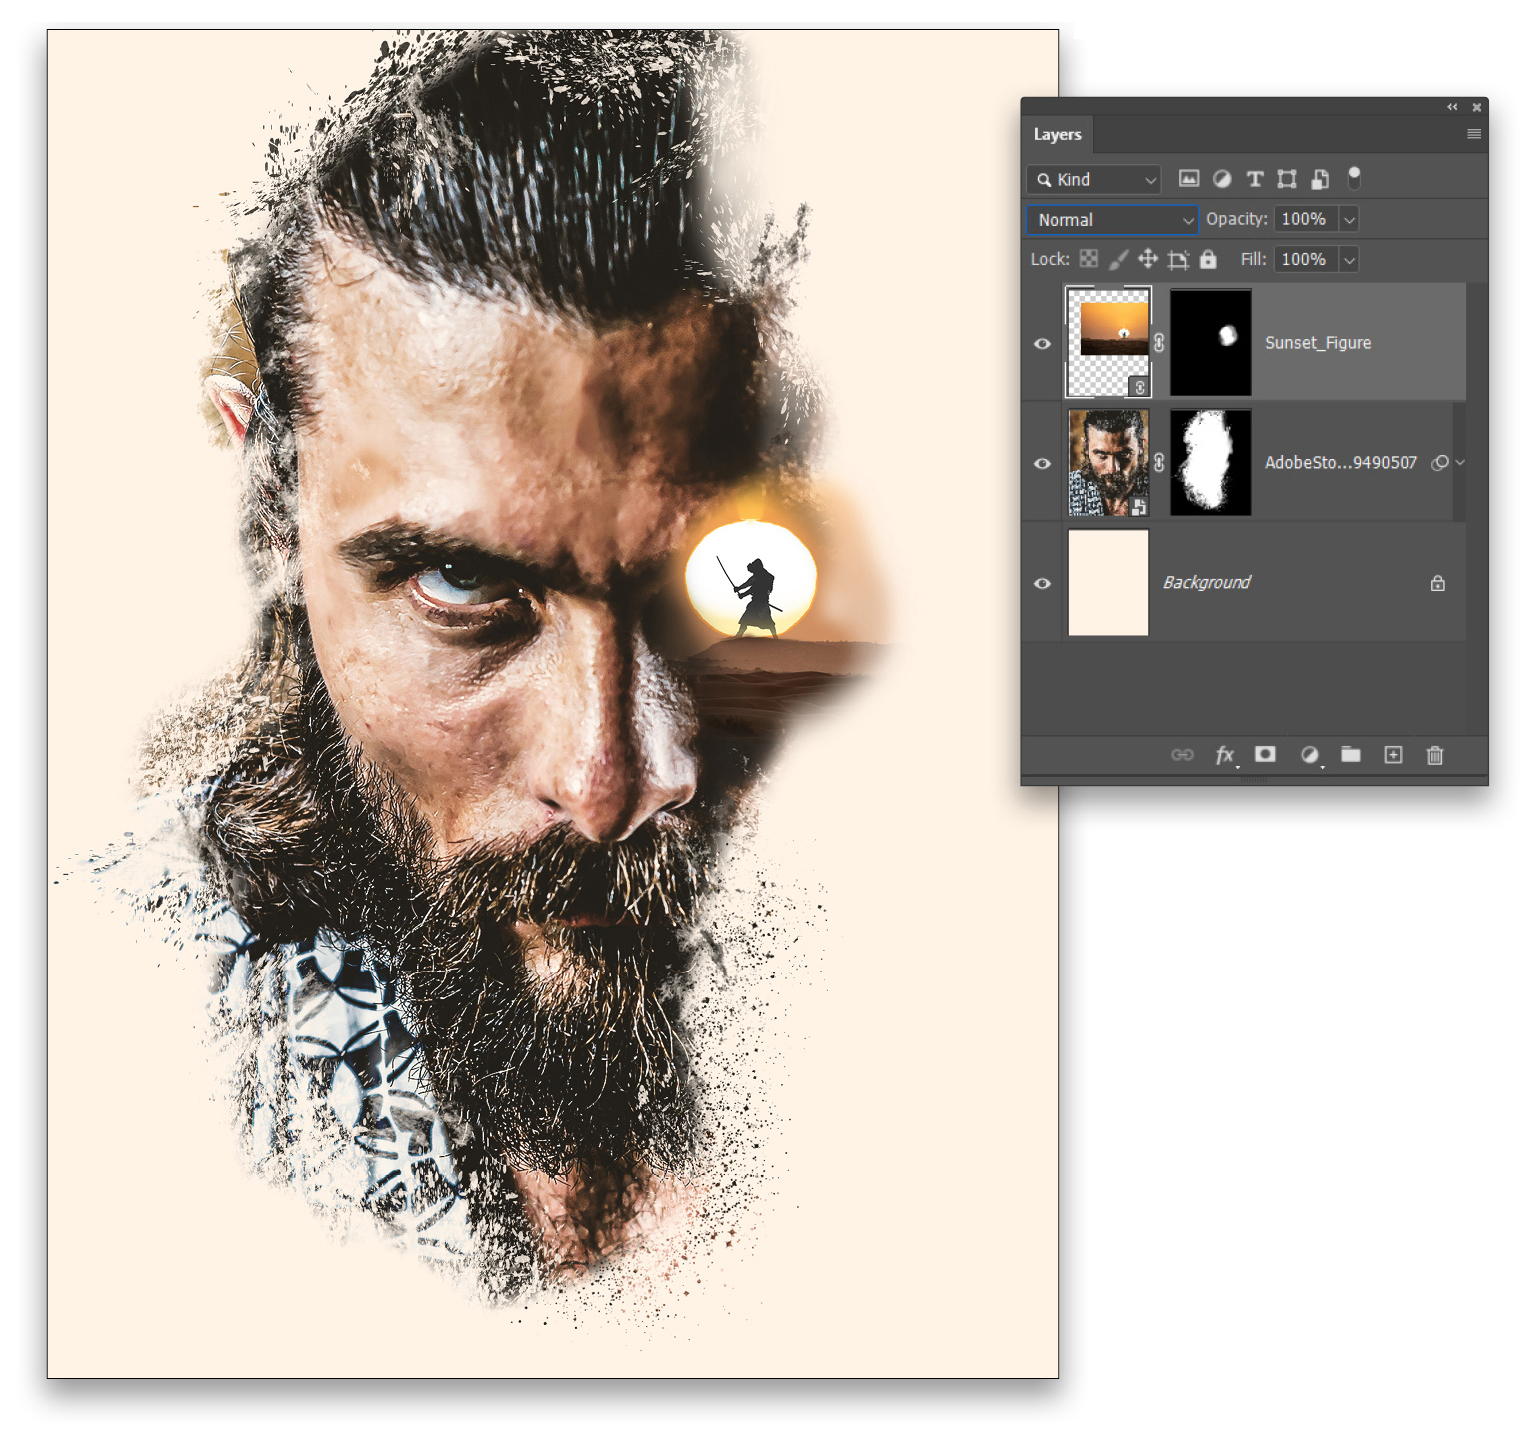
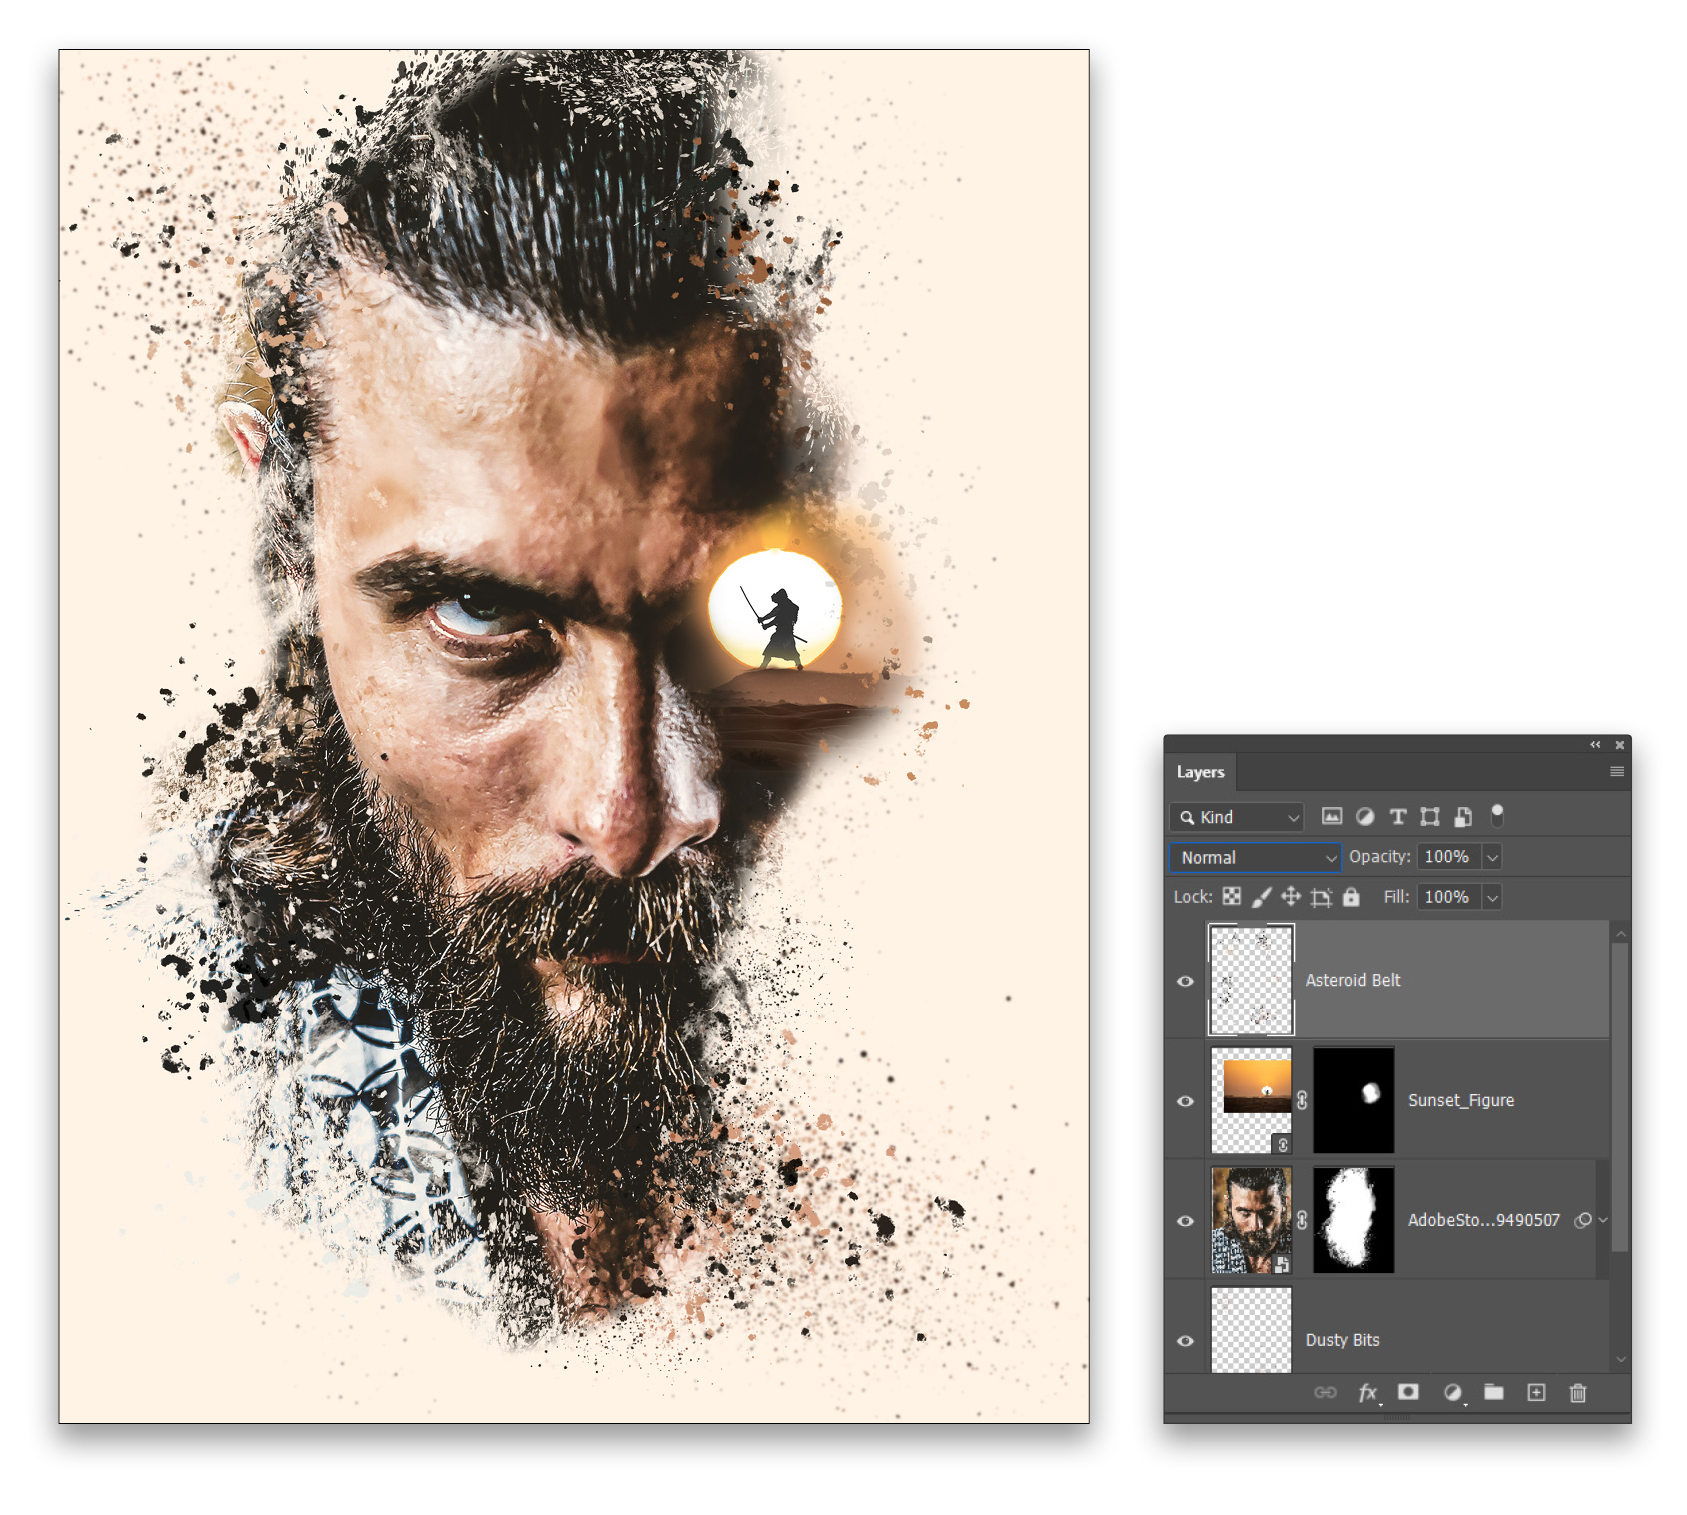
STEP EIGHT: Return to the Sandy_Hero file and Use File>Place Linked again to place the Sunset_Figure.psd file. Scale and position the file so the sun sits within the left eye socket of the larger warrior image (you can temporarily lower the Opacity of the layer to help with placement). Use the Option (PC: Alt) key mask shortcut to hide the layer behind a black mask and then use the Brush tool set to white with a Soft Round brush again to carefully reveal the sunset warrior and blend that image into the larger one.
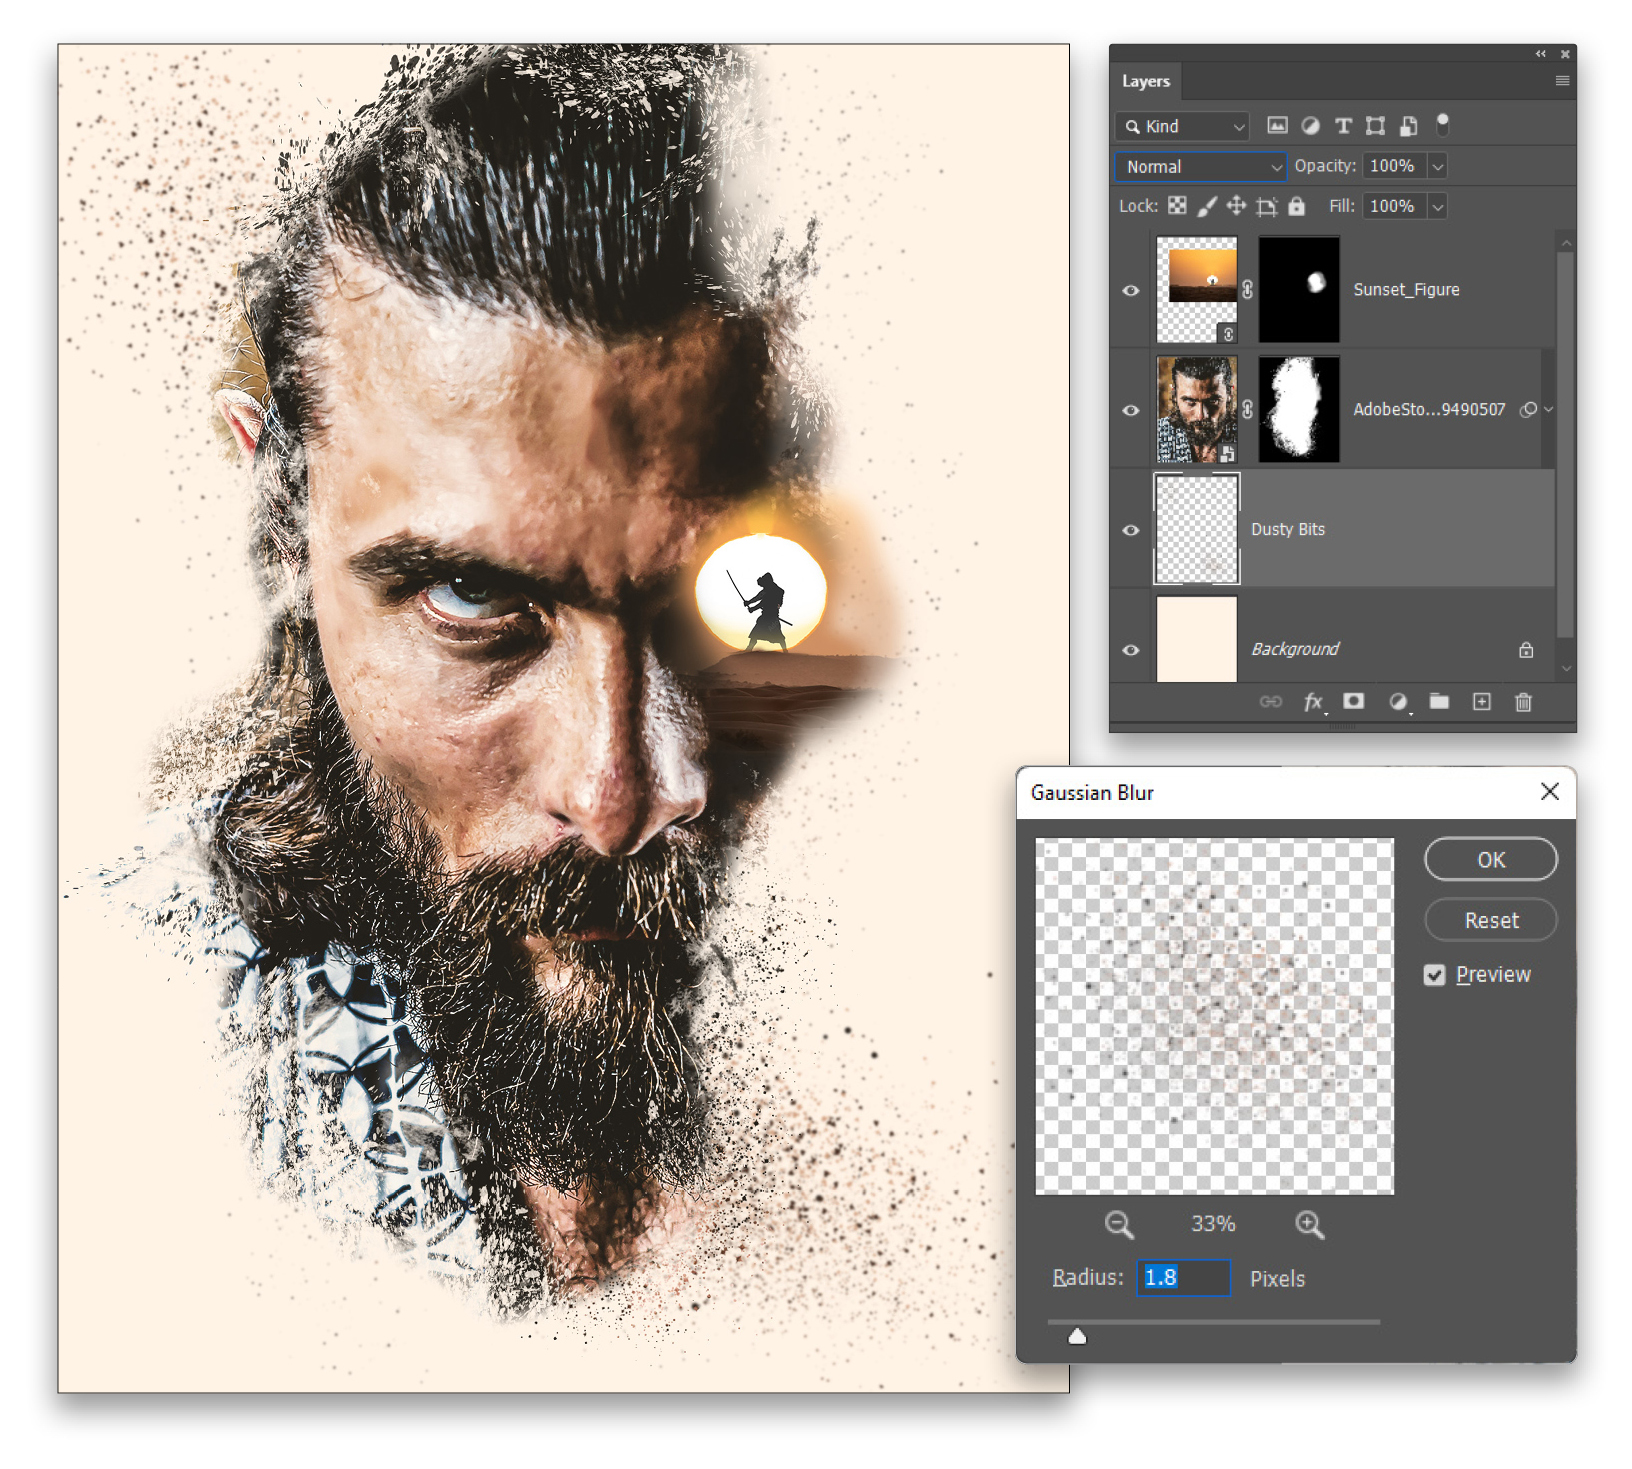
STEP NINE: Create a new layer above the Background layer, double-click its name, and rename it “Dusty Bits.” With the Brush tool active, grab the brush from the spatter_brushes folder in the Brushes panel called “Kyle’s Spatter Brushes – Dusty Bits.” Hold down the Option (PC: Alt) key and click in the image to sample a dark color from the portrait. Then use the Brush to sprinkle some texture around the edges of the portrait. Vary the appearance by selecting a new color after each brushstroke. After sprinkling the “dust,” go to Filter>Blur>Gaussian Blur and use a Radius of 1.8 px. Click OK.
STEP 10: Add a new layer over the Sunset_Figure layer and call it “Asteroid Belt.” Then, using the brush named “Kyle’s Spatter Brushes – Asteroid Belt,” sample some of the midtone colors from the image, and paint in some more grunge around the edges of the warrior’s portrait.
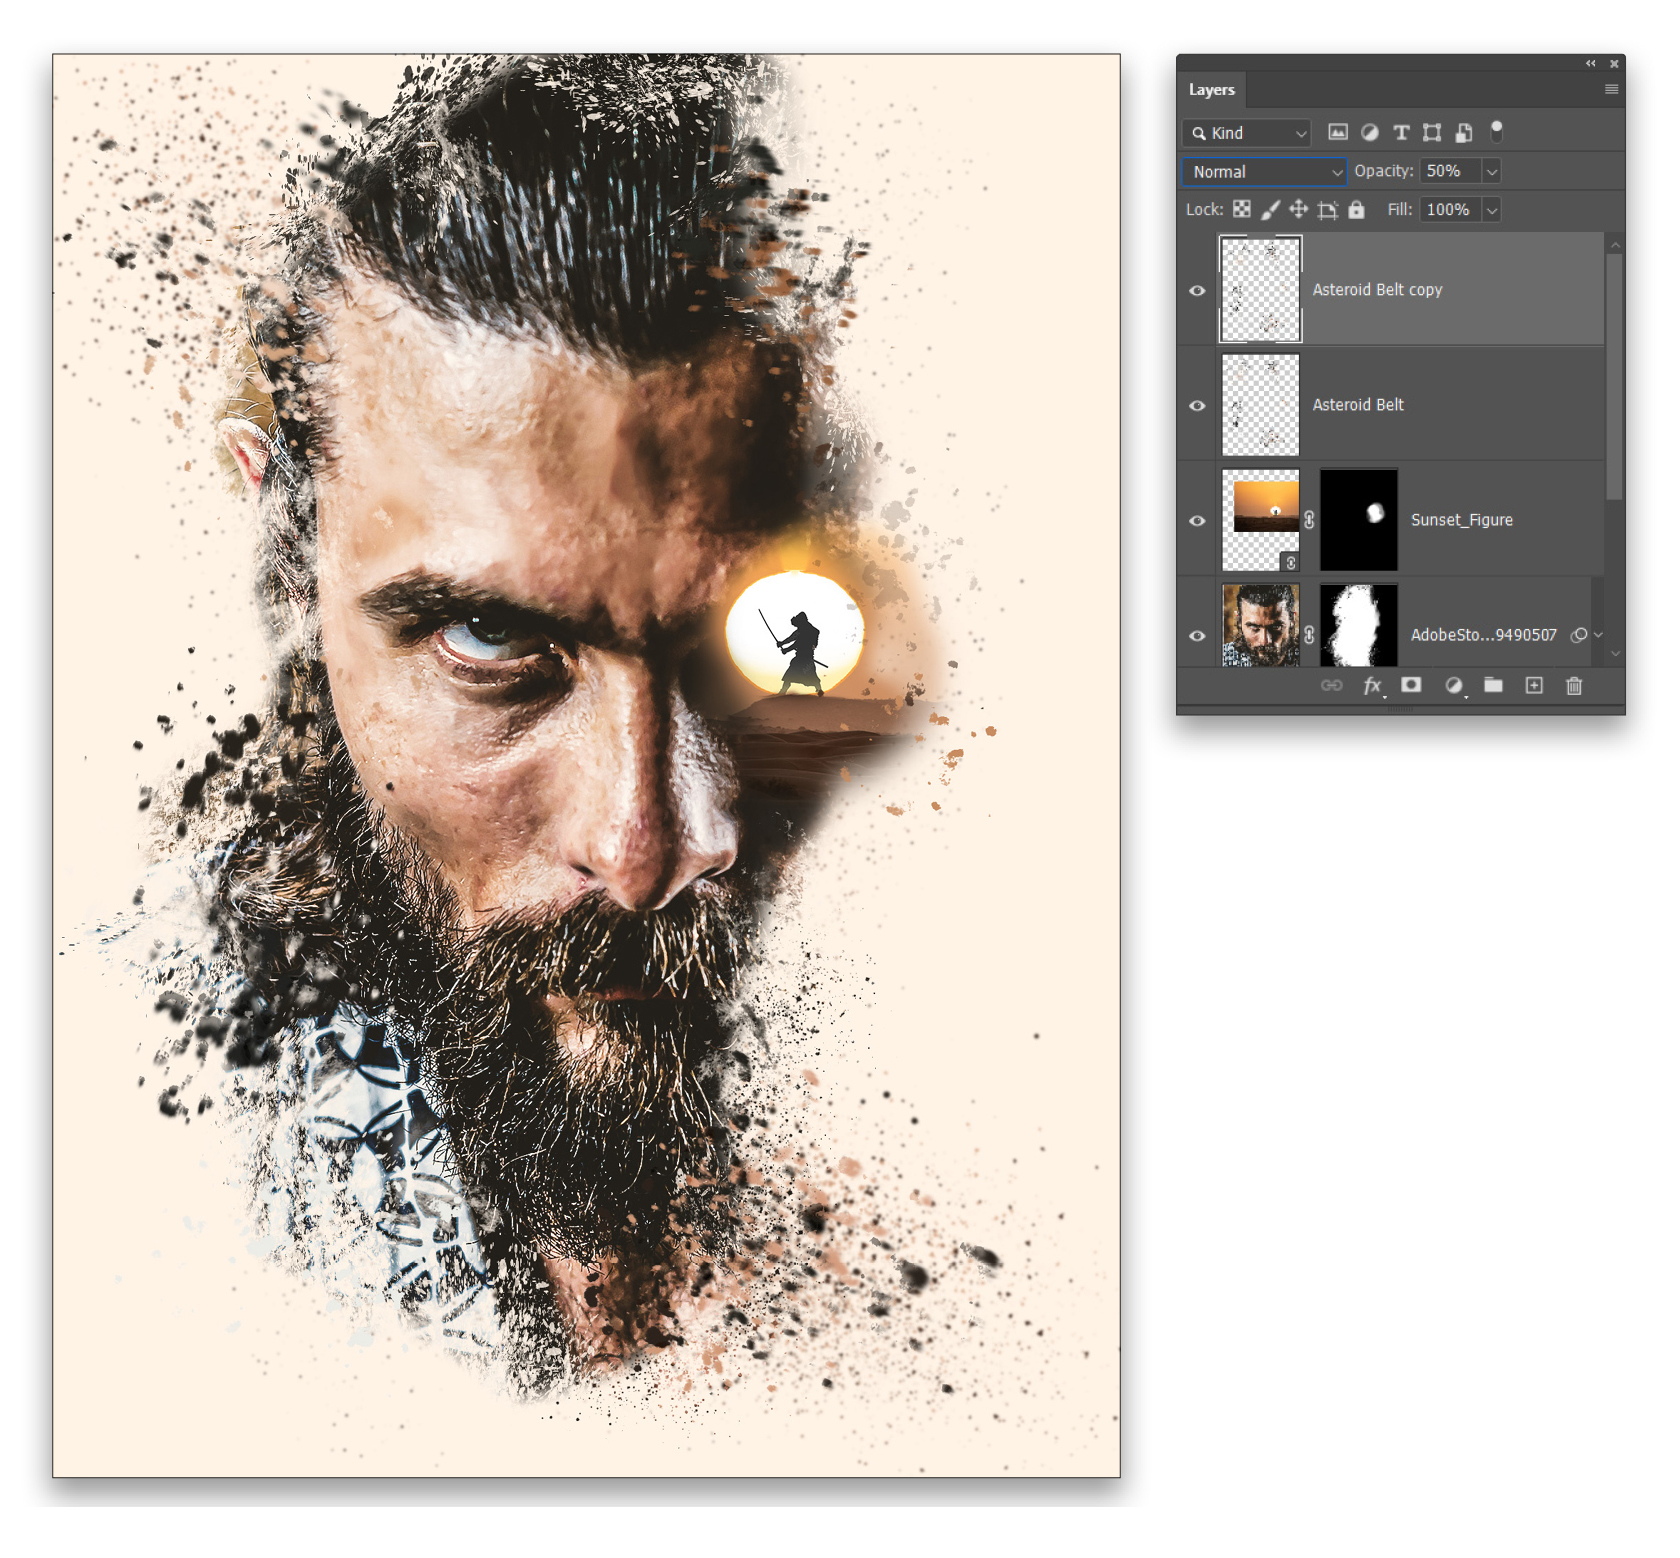
STEP 11: Press Command-J (PC: Ctrl-J) to duplicate the Asteroid Belt layer and reduce its Opacity to 50%. Go back to the original Asteroid Belt layer and grab the Smudge tool (nested with the Blur tool in the Toolbar). In the Options Bar, set the Strength to 25% and use a Soft Round brush tip to gently pull on some of the grunge to give it the appearance of having a bit of windswept motion to it.
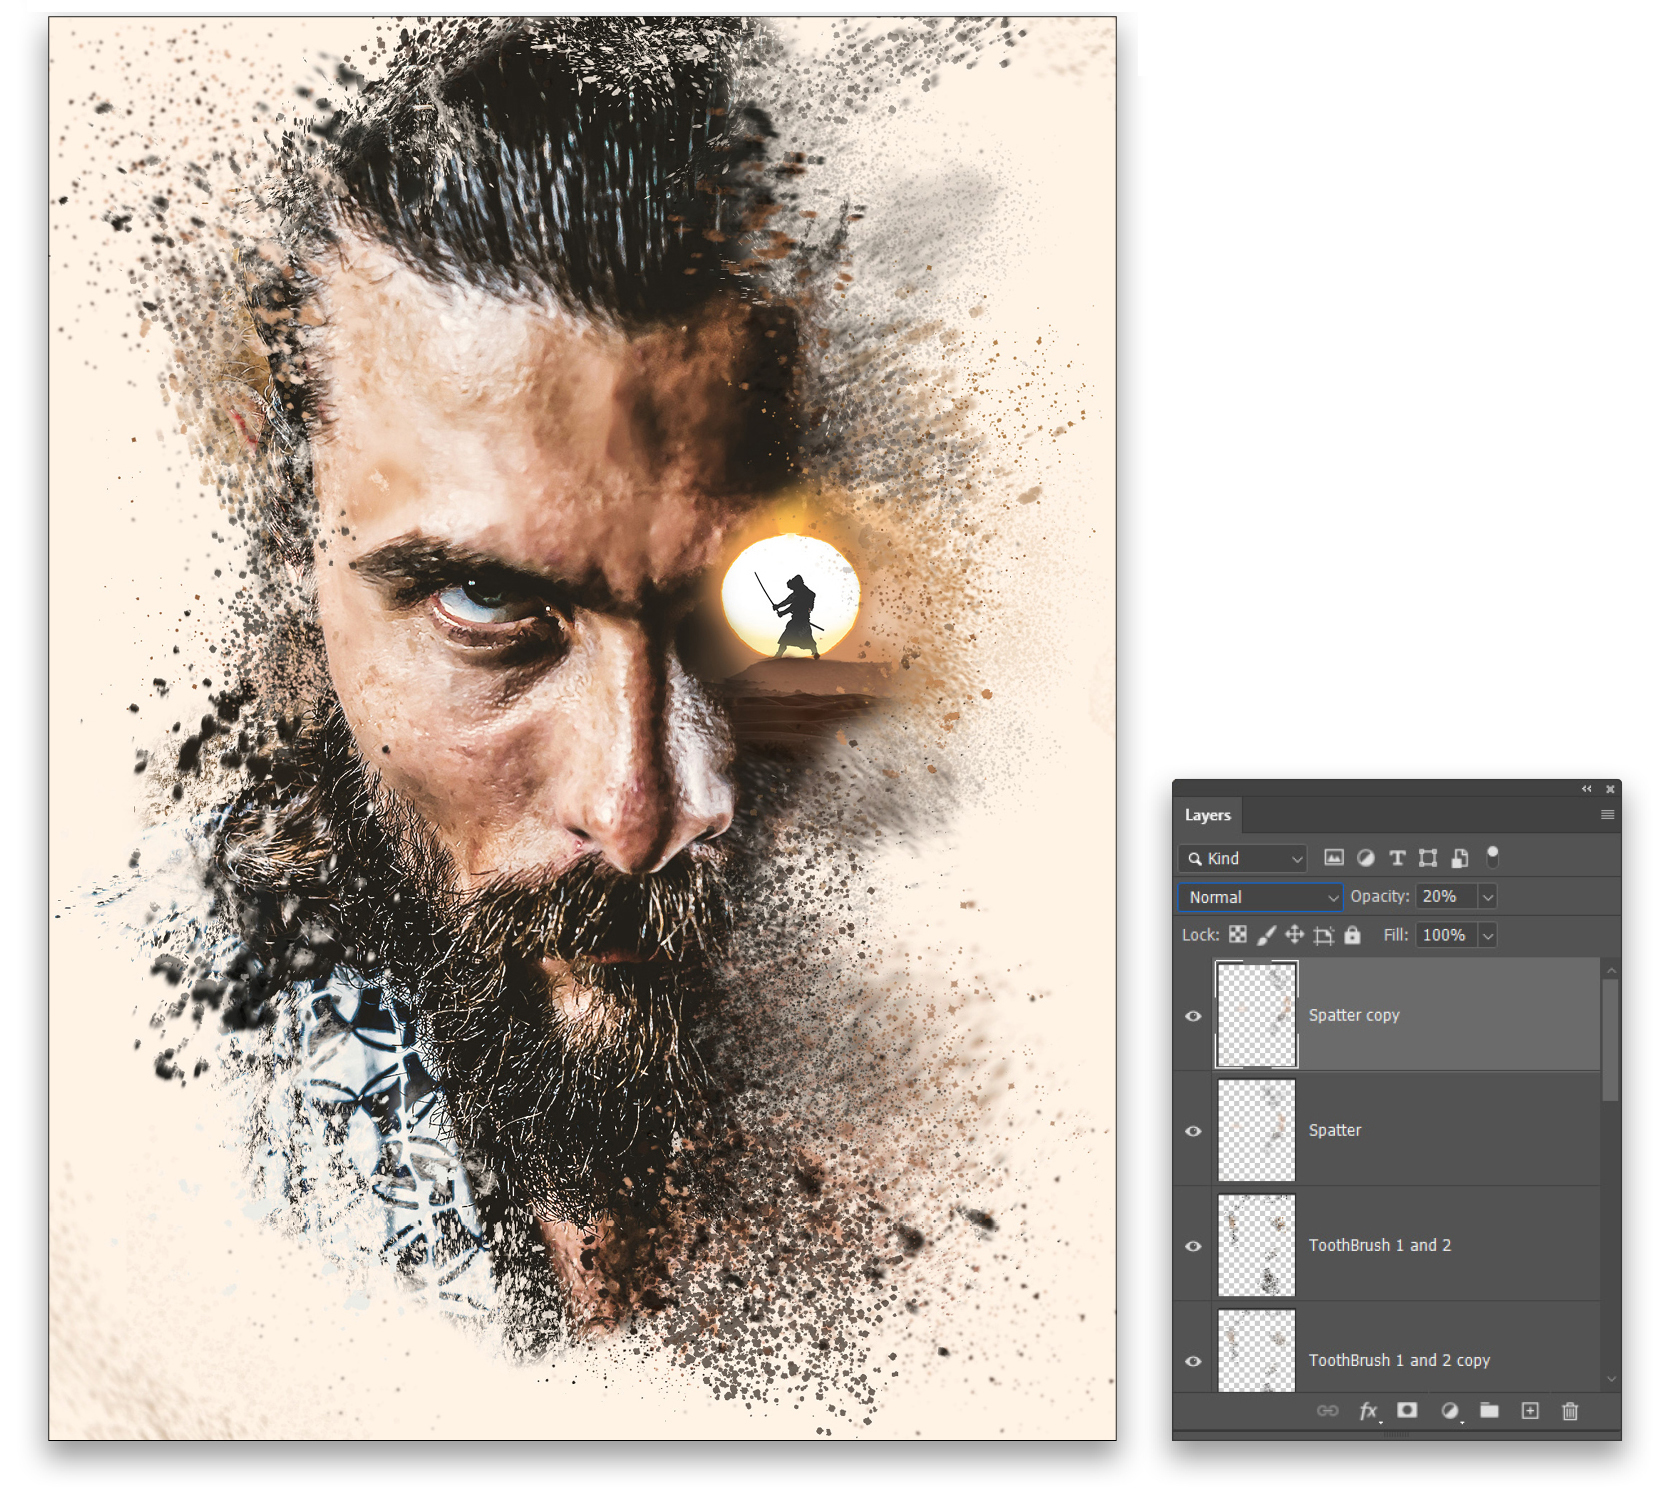
STEP 12: Use the same technique of adding a layer, painting on it with a spatter brush, duplicating it, reducing the Opacity of the copy to 50%, and then smudging the original layer to build up several layers of dirt and grime around the figure. Here we used the following brushes from the Kyle’s Spatter Brushes set: Stars 2, Toothbrush 1 & 2, Big Basic Brush, and Spatter. Feel free to vary the brush selection and the Opacity setting on the copied layers to create your own effect.
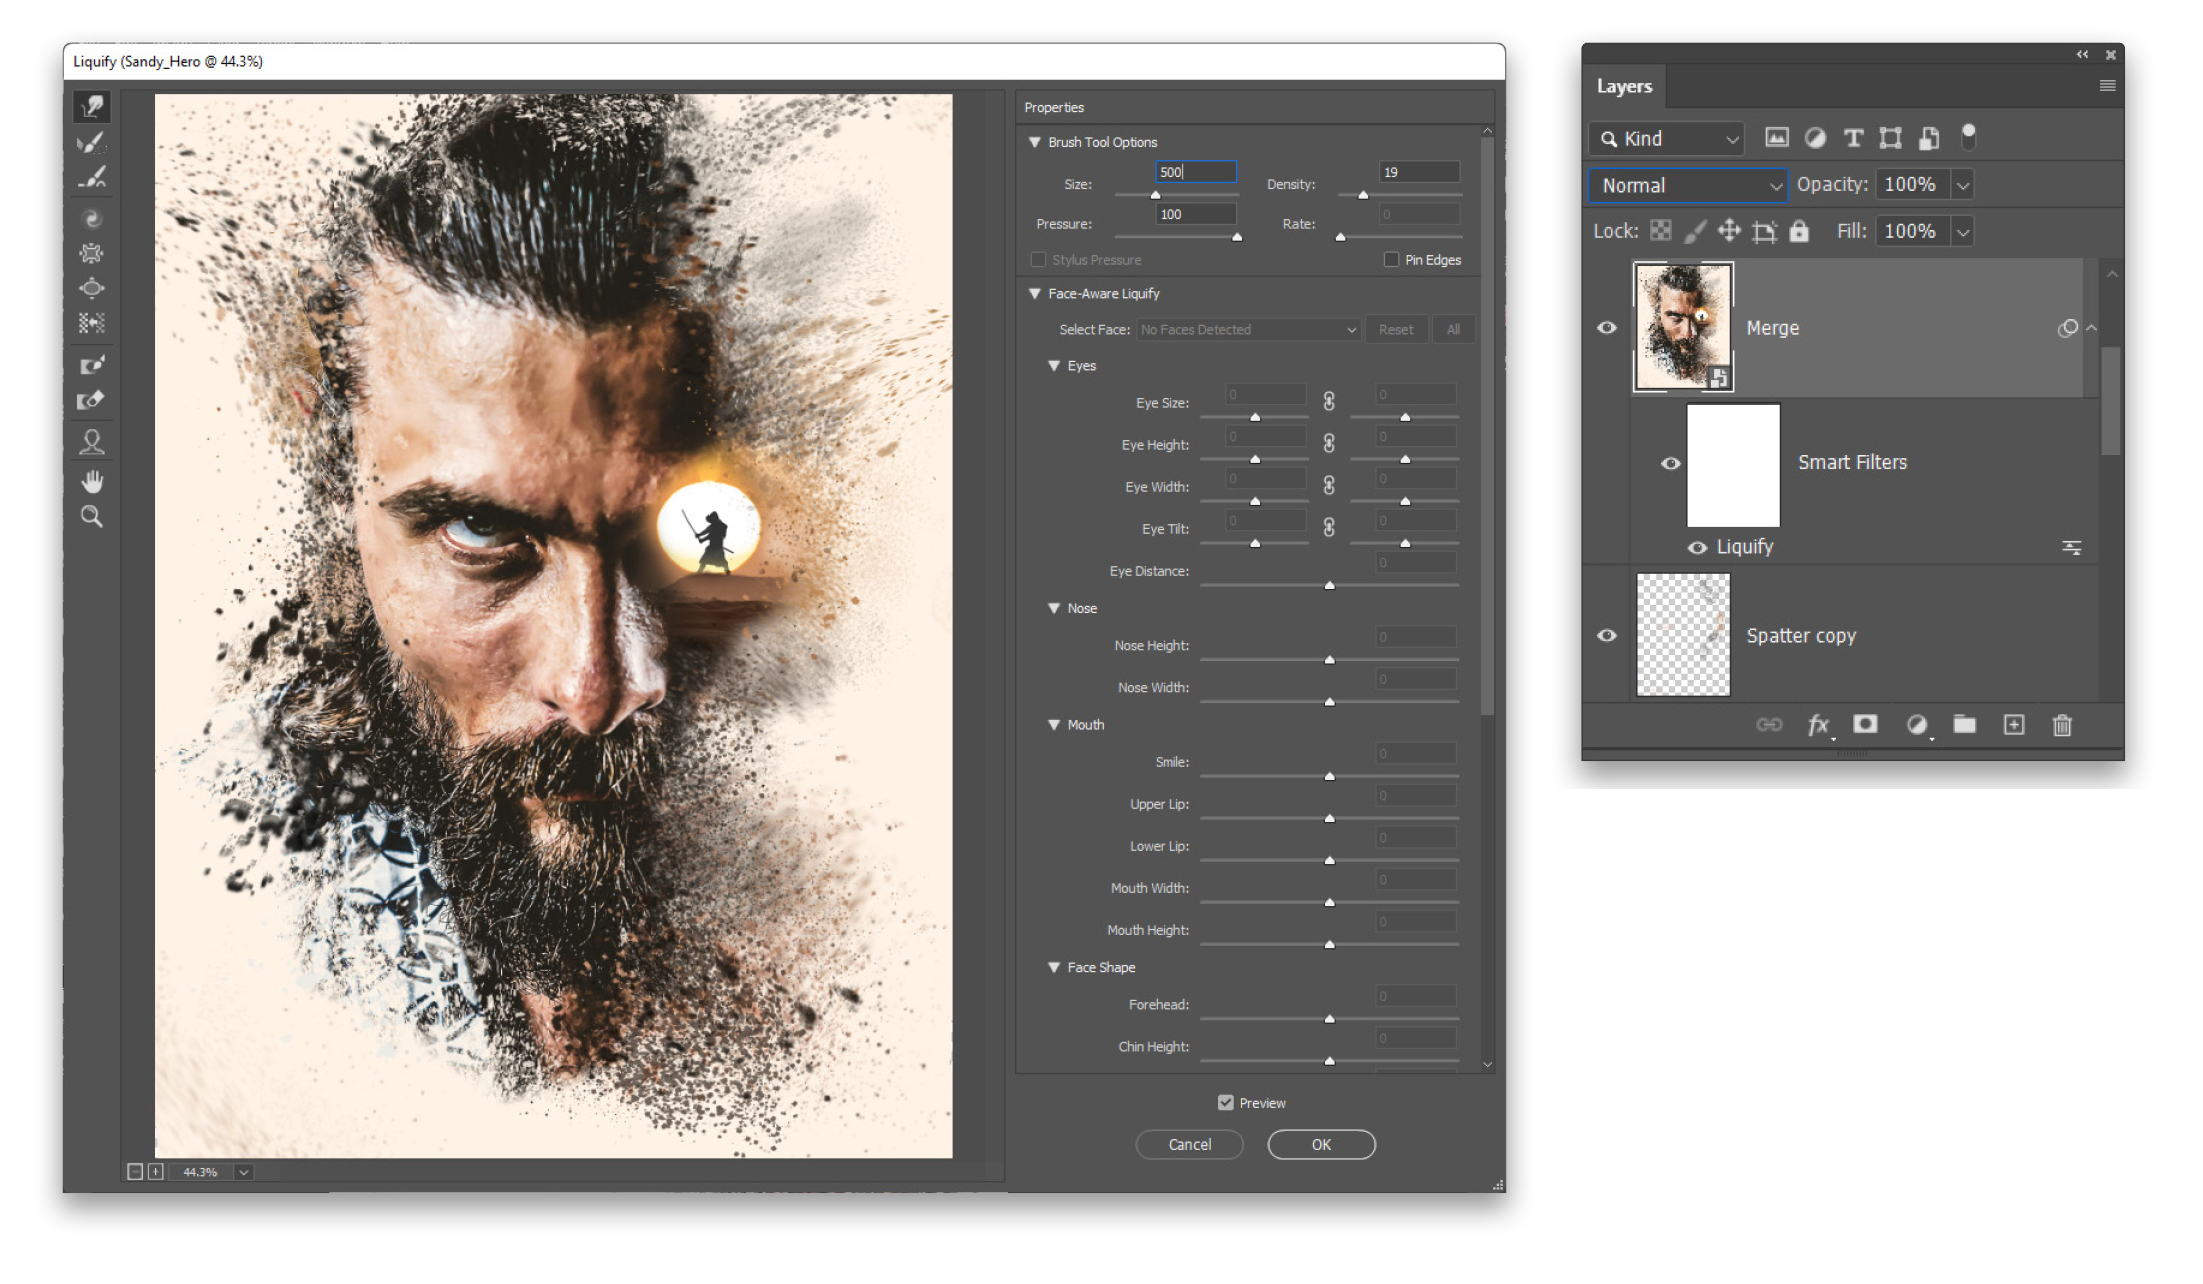
STEP 13: Go to the top layer in the layer stack, hold down the Option (PC: Alt) key, and go
to Layer>Merge Visible to create a merged layer at the top of the layer stack. Then go to Filter>
Convert for Smart Filters to create a smart object of the merged layer. Open the Filter>Liquify filter and use the Forward Warp tool (W), with the brush set at a large Size of 500 px and the Density at 19, to gently pull out some of the sand areas to add even more movement to them. The intent is to create the effect of sand being blown in the wind. Make small movements with the brush to build up the effect. Click OK when done.
STEP 14: After applying the Liquify filter, go to Filter>Camera Raw Filter. In the Basic panel, set the Texture to +64, Clarity to +38, and Vibrance to +41. In the Effects panel, set the Vignetting to +30, and click OK. Then enjoy your Obi-Wan inspired sand-swept samurai effect!
Crafting fun grunge effects with these custom brushes is just one example of how to create unique image treatments. These same techniques can be applied to brush sets of different themes like clouds, fluids, patterns, or even your own brushes. There are endless possibilities for making these effects your own.

About Photoshop User and KelbyOne
Photoshop User magazine comes out digitally 12 times a year and is part of KelbyOne, the leading educational resource for Photoshop, Lightroom, and photography. Pro members have access to more than 900 video courses and 100 back issues of Photoshop User. To learn more about KelbyOne, click here.