[This article originally appeared in the August 2022 issue of Photoshop User, the Magazine for Lightroom and Photoshop Users. To learn more about Photoshop User and to sign up to read the latest issue for free, click here.]
By Lesa Snider
Skywriting is an incredible, yet vanishing art. So few can do it: it’s self-taught, takes great skill, plus the pilot can’t see what she’s writing. Today, you’ll learn how to perform digital skywriting using a free, cloud-shaped brush and a type layer. With zero risk to life and limb, you can add this beautiful art to any photo. Read on!
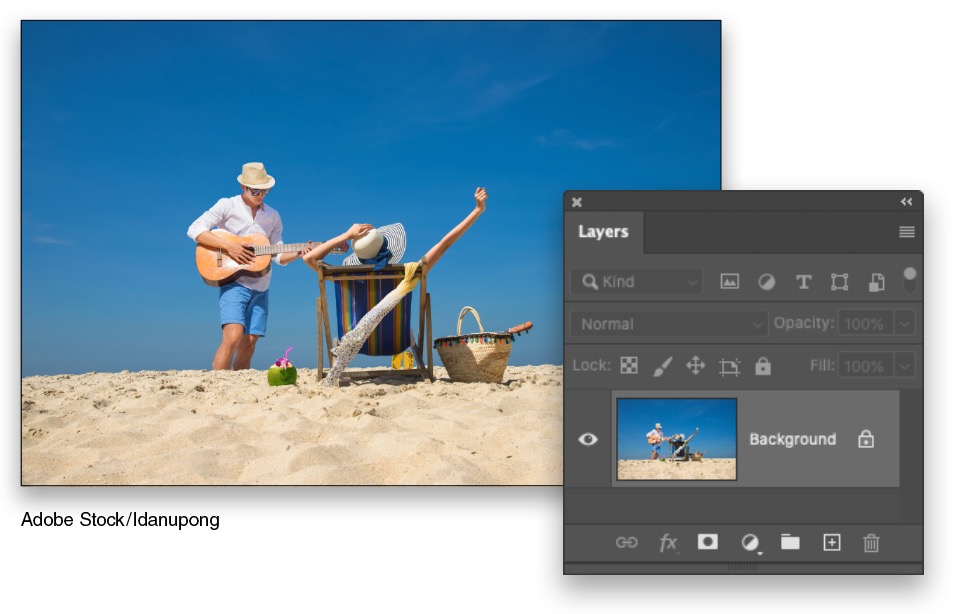
STEP ONE: Choose File>Open and navigate to the photo you want to use, such as this beach scene photo from Adobe Stock. (If you’re starting in Lightroom instead, select a thumbnail in the Library module and then choose Photo>Edit In>Adobe Photoshop 2022.) A photo with lots of clear blue sky and few (if any) clouds works best.
If you’d like to download the low-res watermarked version of this image to follow along, click this link, log in with your Adobe ID, and click the Save to Library button. Double-click the image in the Libraries panel (Window>Libraries) to open it in Photoshop.
To make it easier to work with the image, increase the resolution of the practice file. (We normally don’t recommend enlarging images, but this is only for practice purposes.) Go to Image>Image Size, turn on the Resample checkbox, select Preserve Details 2.0 from the Resample drop-down menu, set the Resolution to 300 ppi, and click OK.
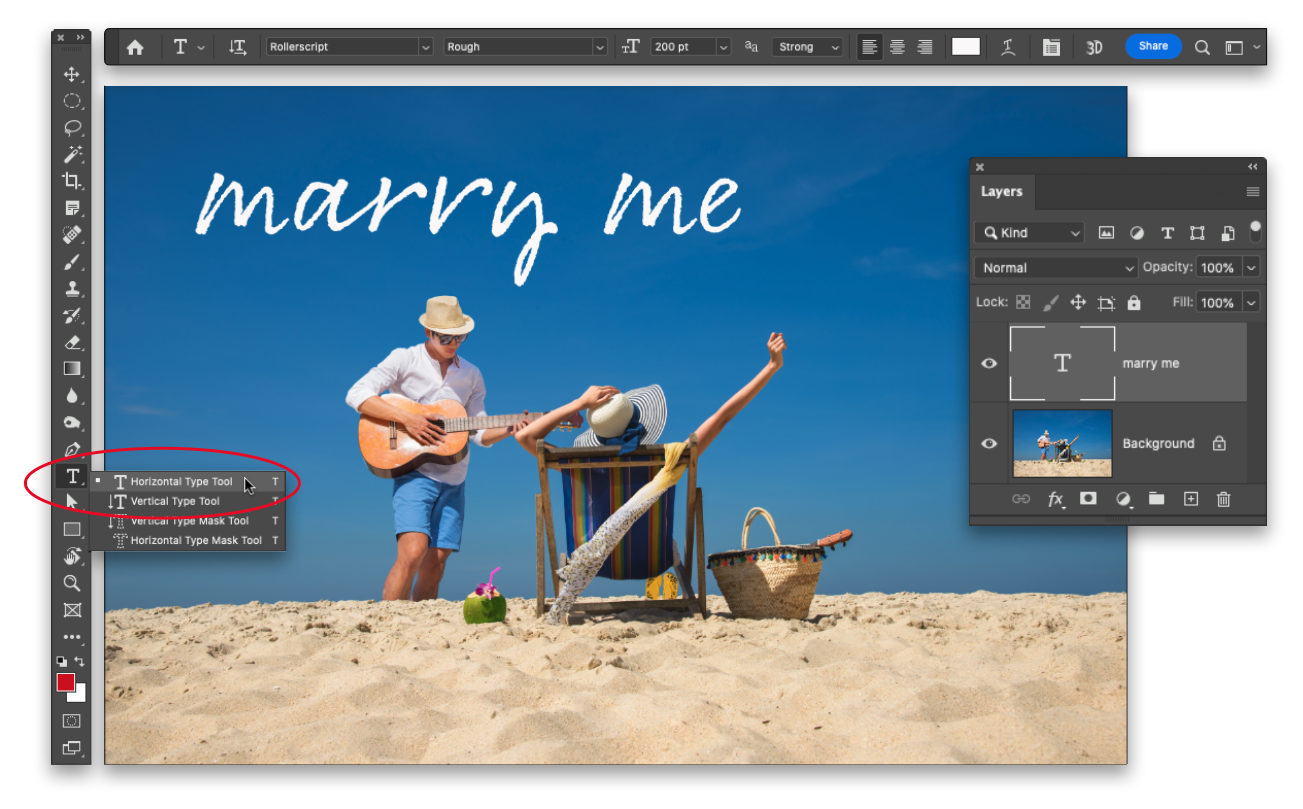
STEP TWO: Press T to grab the Horizontal Type tool (circled). In the Options Bar, choose a rather thin yet handwritten-looking font. Rollerscript Rough from Adobe Fonts was used here. To activate an Adobe Font, go to Type>More from Adobe Fonts and, when the website opens, search for the font you want to use. Click its Activate Font switch to sync it with Photoshop.
Set the size to around 200 points in the Options Bar; don’t worry about the color because you’ll create an outline of the text in the next step. Click near the top of the photo to create a Type layer, and then use your keyboard to enter “marry me,” all in lowercase (because a pilot would have a hard time creating all capital letters). Select all the letters with the Type tool, and in the Properties panel (Window>Properties) make sure the tracking (space between letters) is set to 0.
STEP THREE: With the type layer active in your Layers panel, choose Type>Create Work Path. This creates a vector-based outline of the text. Click the Eye icon to the left of the Type layer (circled) to turn off its visibility.

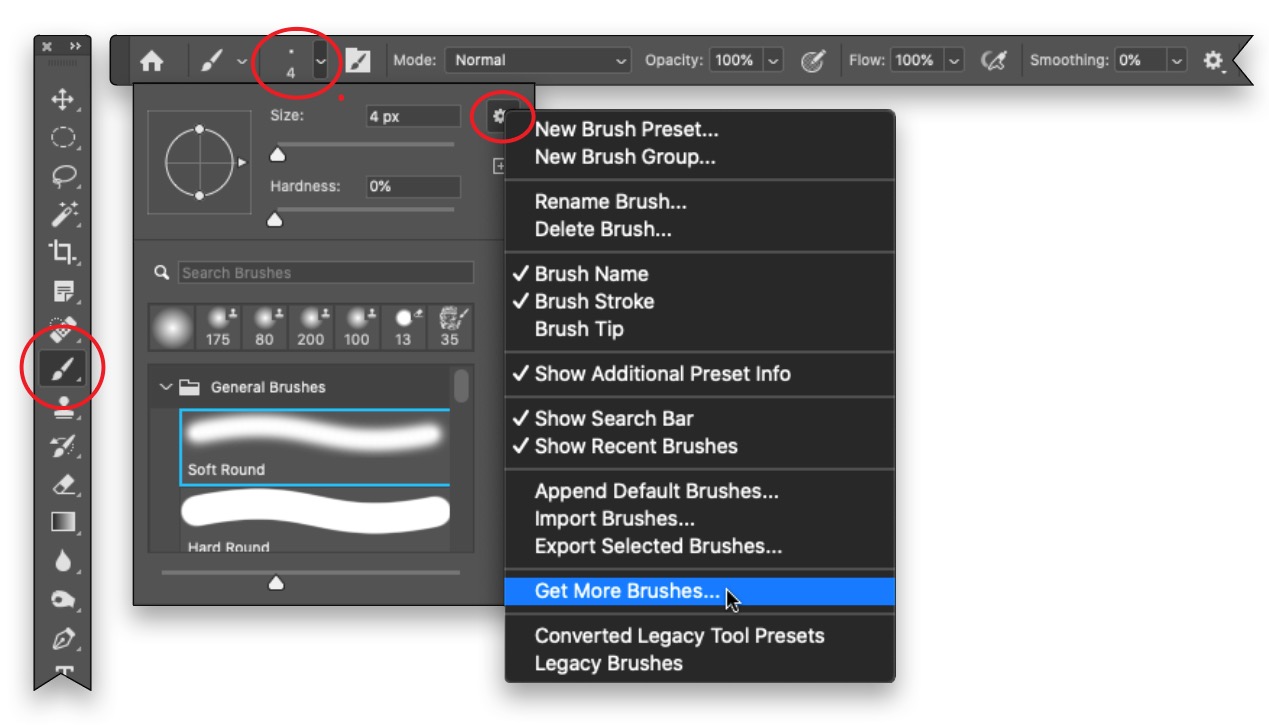
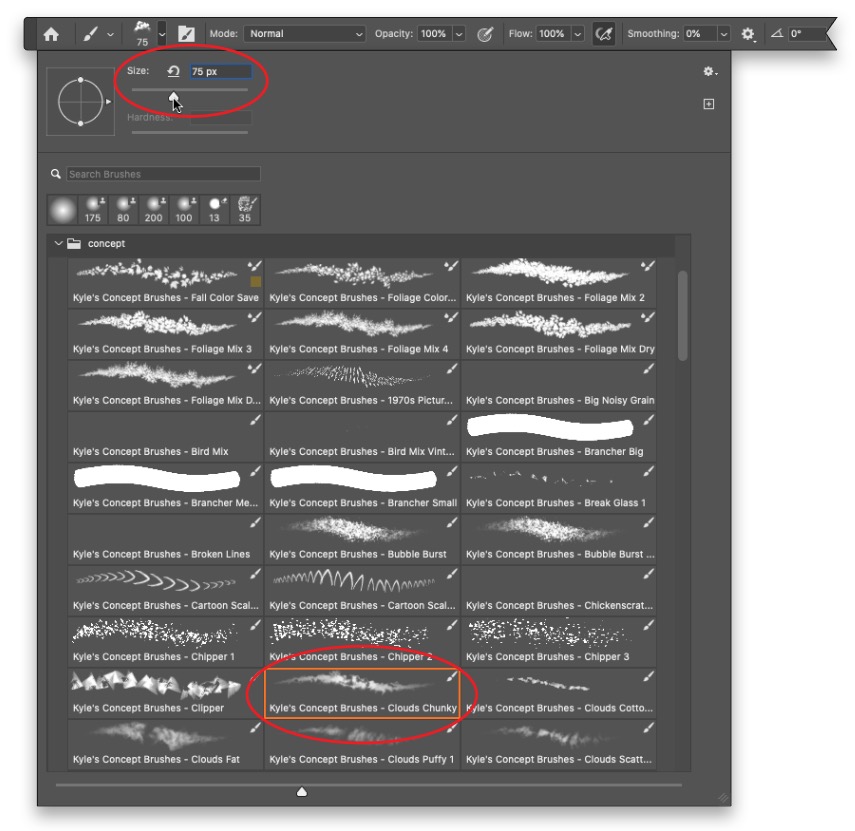
STEP FOUR: Press B to grab the Brush tool (circled) and, in the Options Bar, click the down-pointing triangle (also circled) to the right of the brush preview thumbnail to open the Brush Preset Picker. Click the gear icon in the panel that opens (circled) and choose Get More Brushes.
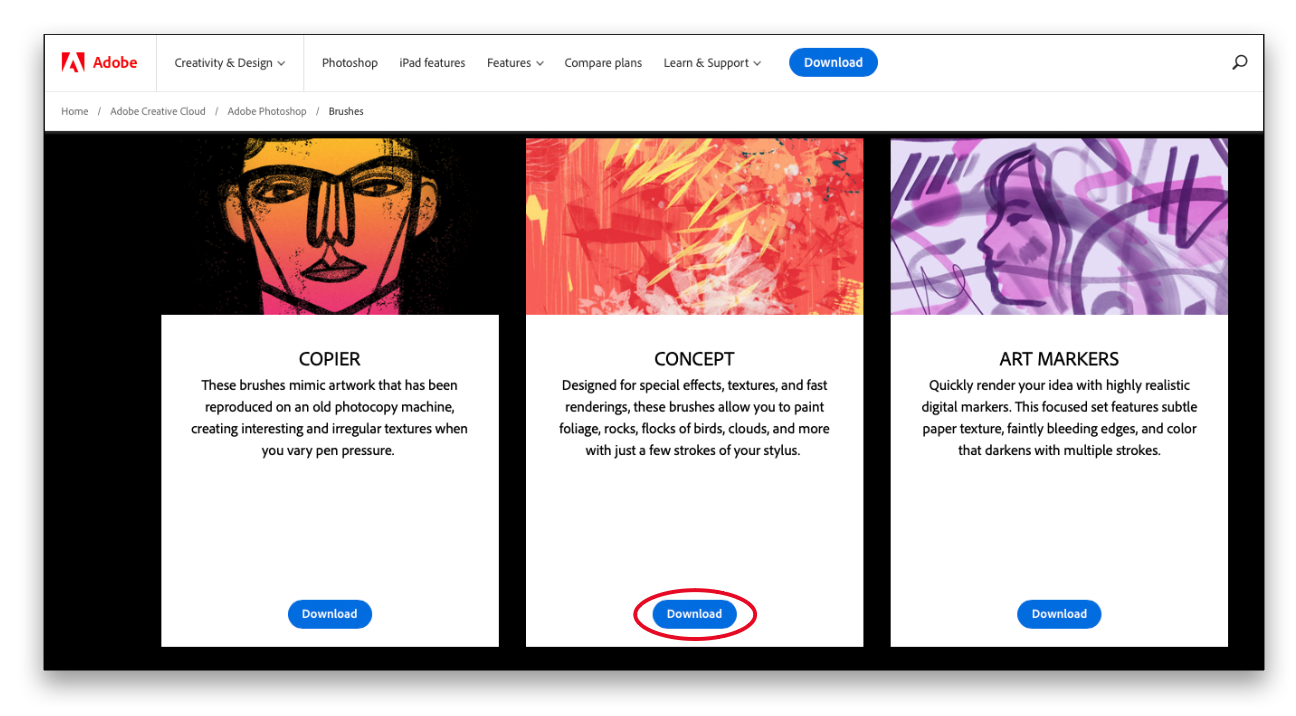
STEP FIVE: In your web browser that opens, scroll down to the set of Kyle T. Webster brushes named Concept and click Download (circled).
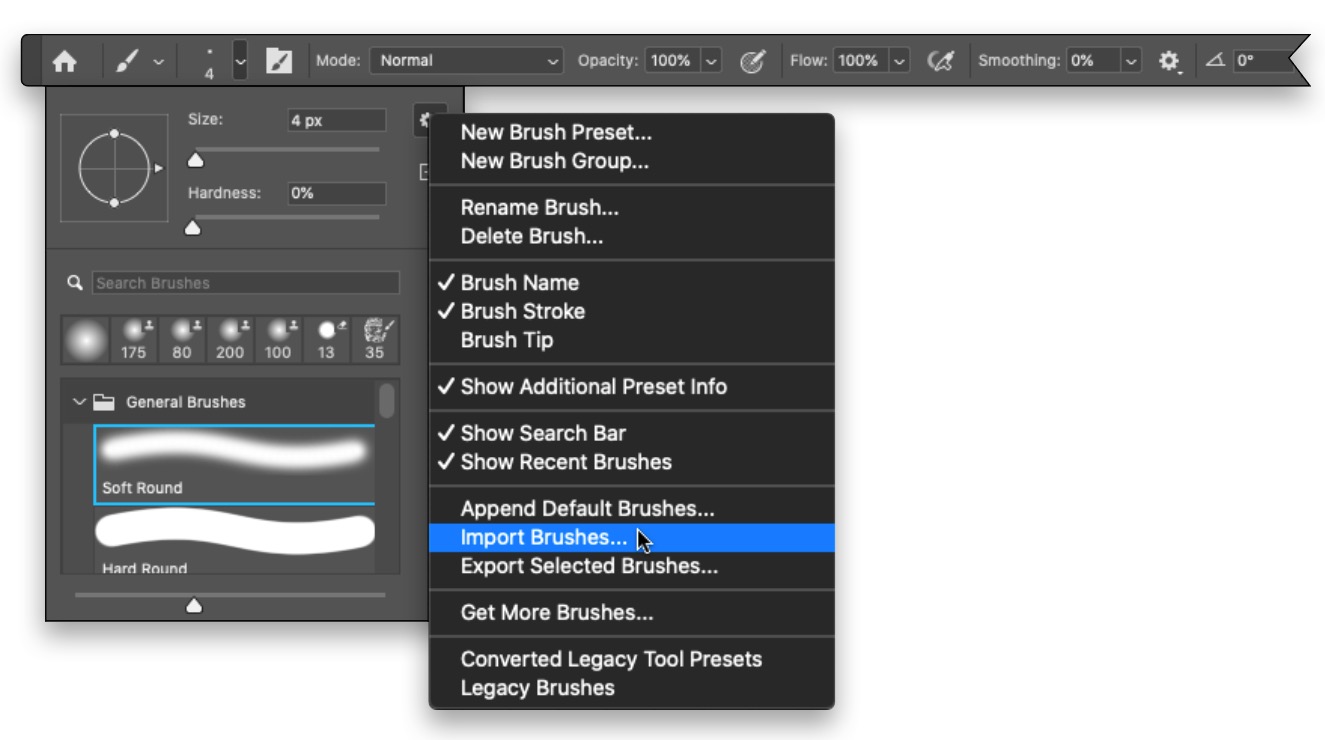
Back in Photoshop, open the Brush Preset Picker again, click the gear icon, and then choose Import Brushes.
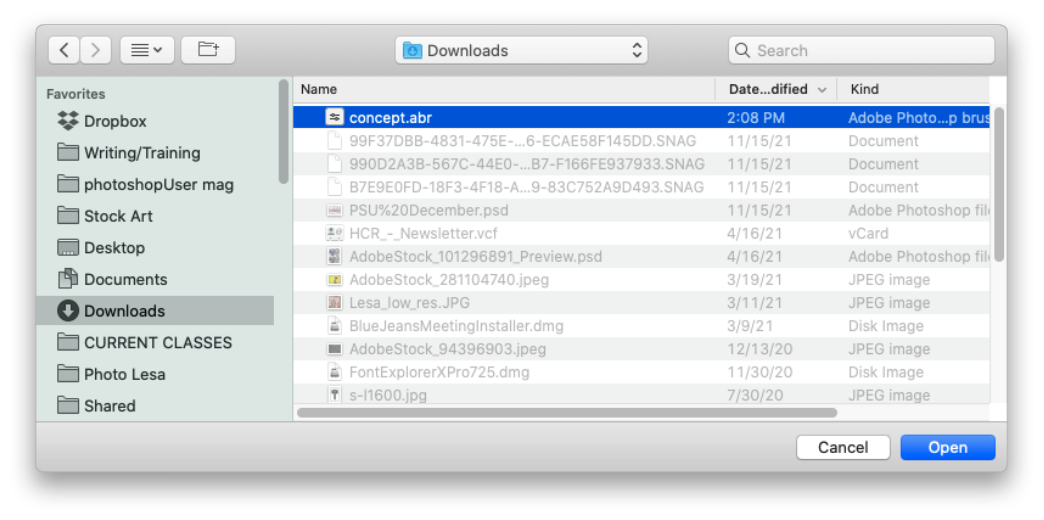
In the dialog that opens, navigate to your downloads folder, choose the file named “concept.abr,” and then click Open. (Alternatively, you can open your Downloads folder, locate the file named “concept.abr,” and then double-click it to automatically load it into Photoshop.)
STEP SIX: Back in the Brush Preset Picker, scroll down to the bottom of your list of brushes, expand the folder named Concept, and click the brush named Clouds Chunky (circled). At the top of the Brush Preset Picker, set the size to around 75 pixels (also circled).
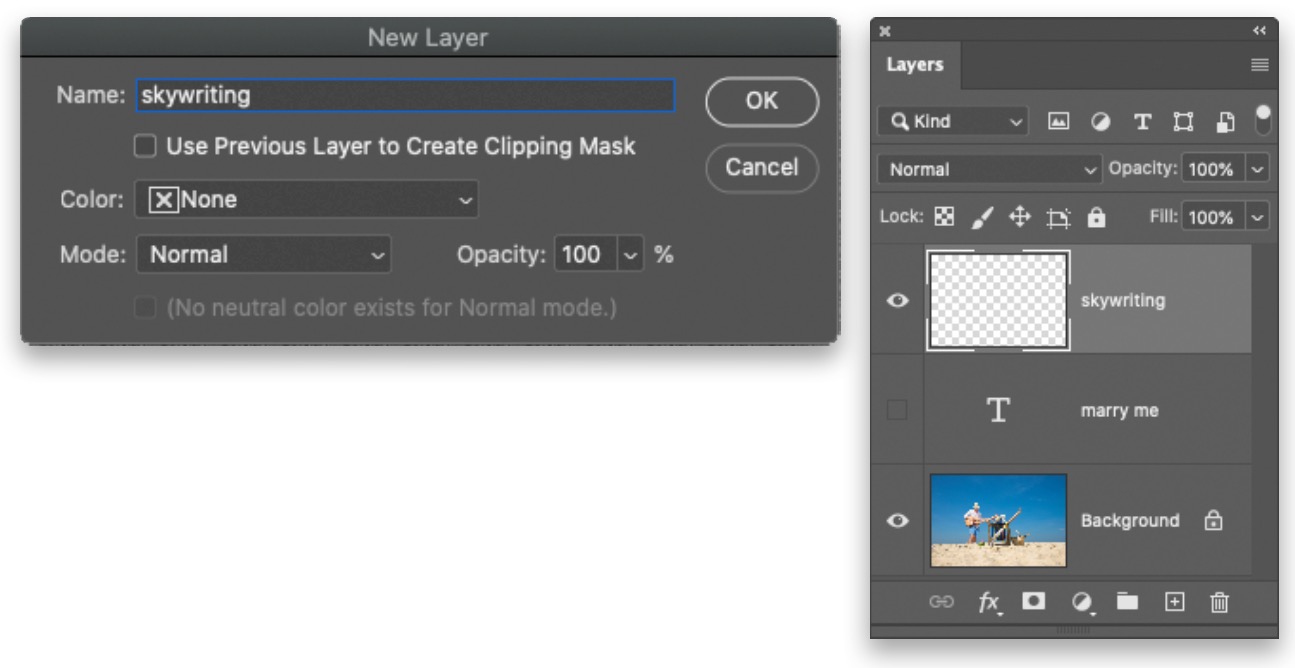
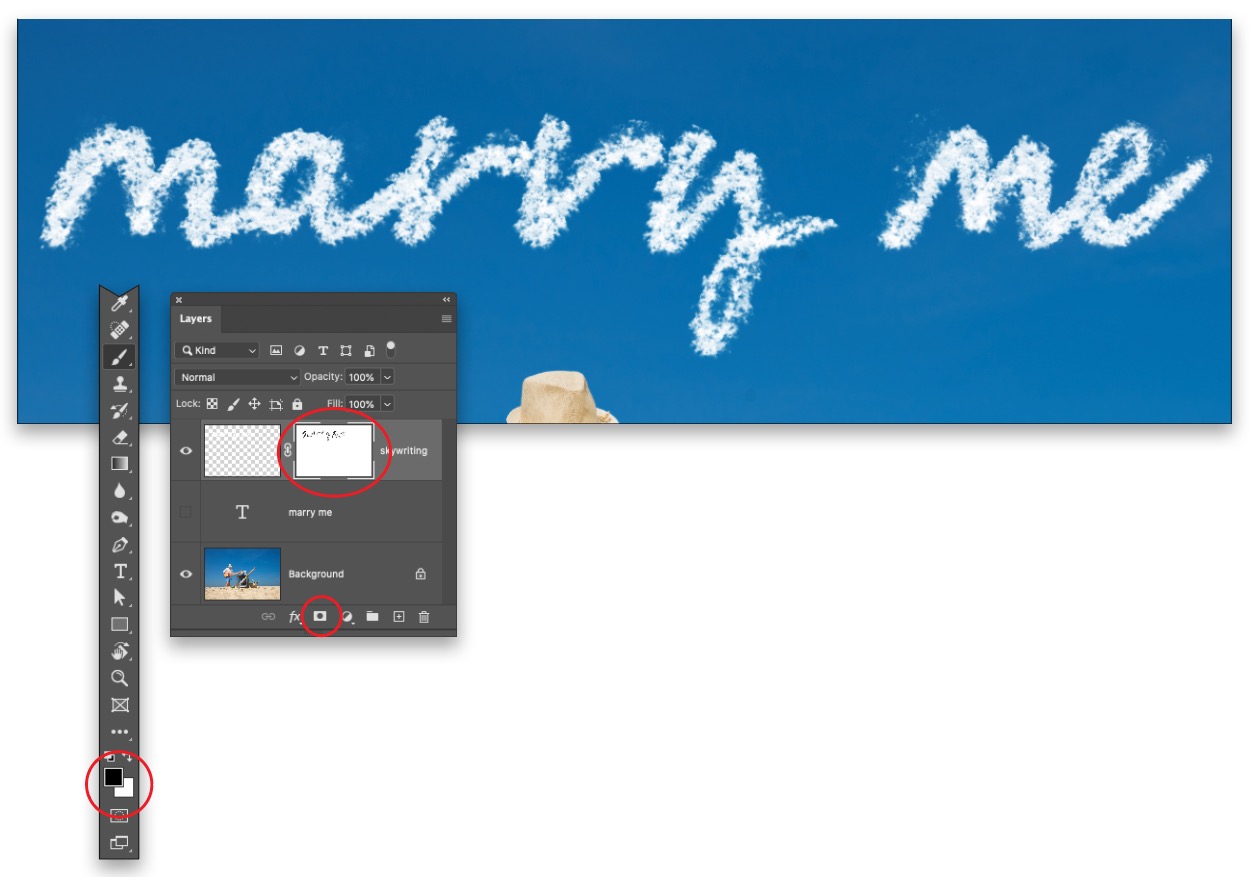
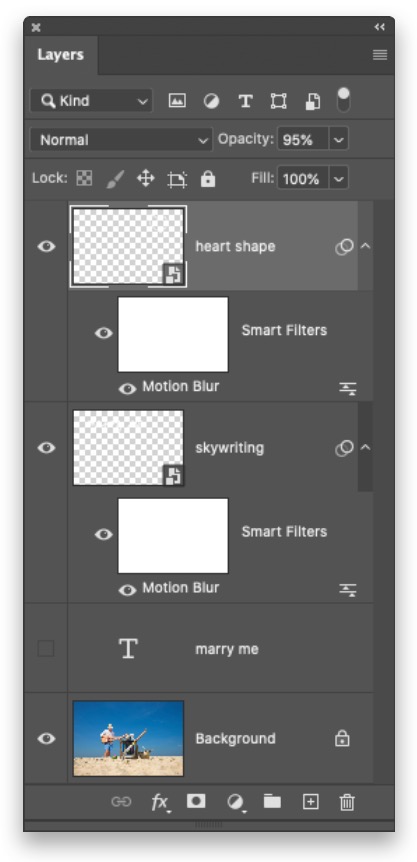
STEP SEVEN: Create a new layer for the skywriting you’re about to make. To do that, choose Layer>New>Layer, and in the Name field, enter “skywriting.” Click OK.
STEP EIGHT: Press D on your keyboard to set the color chips at the bottom of the Toolbar (circled) to the default colors of black and white. Press X to flip-flop them so white is on top. That’s the color that will be used in the next step.

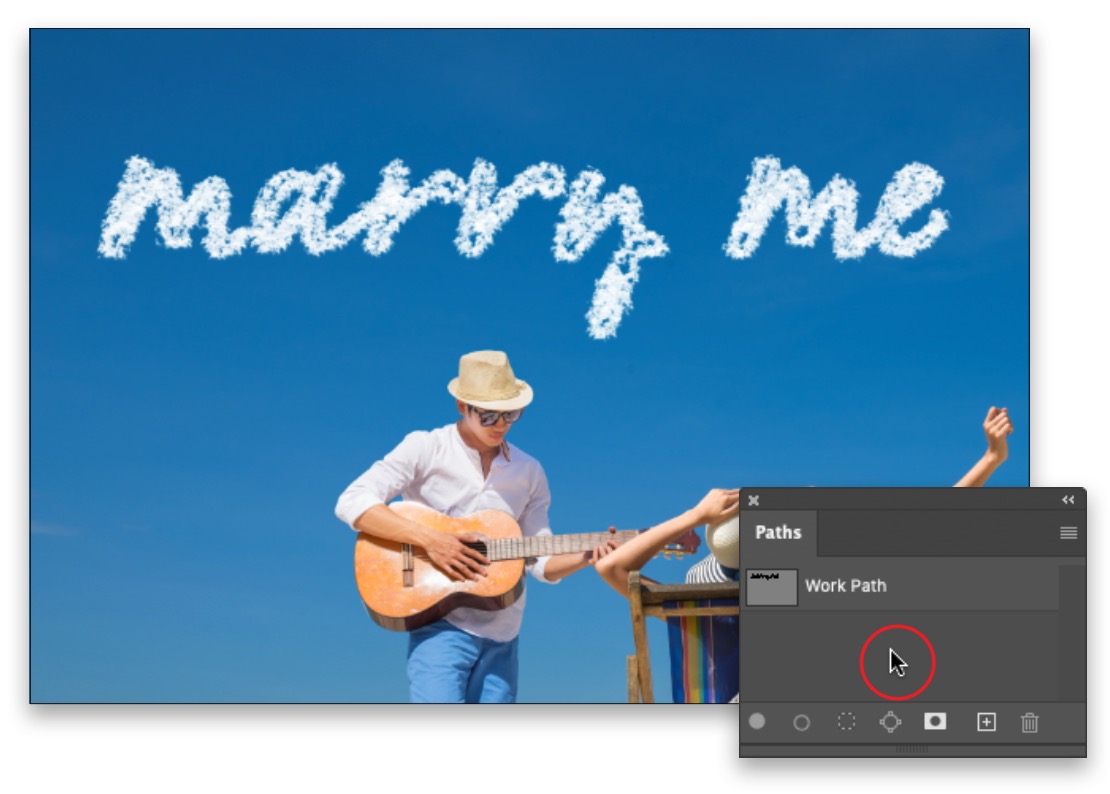
STEP NINE: Choose Window>Paths. In the panel that opens, the Work Path you created earlier should be activated (it’ll be a lighter gray than the panel background). Click the flyout menu at the upper right (circled; it looks like four lines), and then choose Stroke Path. In the dialog that opens, choose Brush from the Tool drop-down menu and click OK.

Back in the Paths panel, click an empty area of the panel (also circled) to deactivate the work path so you can see the skywriting better.
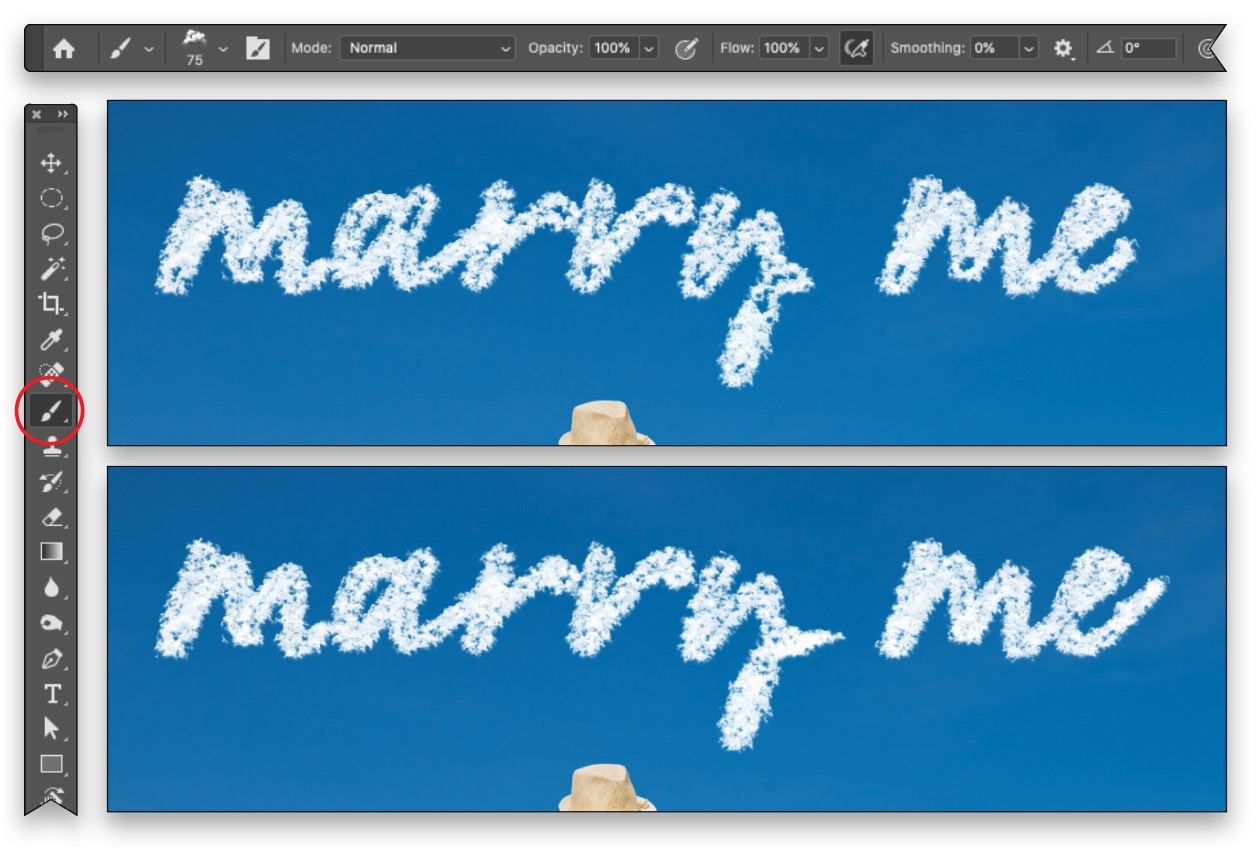
STEP 10: Fine-tune the skywriting by filling in the letters. With the Brush tool still active in the Toolbar (circled), mouse over to a letter and click multiple times, or click and drag, to fill it in. You can also create more of a tail on the “y” and the “e.”
Tip: To zoom in/out of your document, press Command-+/– (PC: Ctrl-+/–).
STEP 11: To make some letters thinner, less perfect, and more realistic to actual skywriting, and to open up the holes in the “a” and “e,” you can hide some of the cloud outline with a layer mask. To do that, click the circle-within-a-square icon at the bottom of your Layers panel (circled). With the layer mask active in your Layers panel (also circled), press X on your keyboard to flip-flop the color chips at the bottom of the Toolbar so black is on top (circled). Now click or drag atop any areas you want to hide. Use the Left and Right Bracket keys ([ ]) on your keyboard to decrease and increase brush size, respectively.
Tip: If you hide too much, press X again so white is on top and click or drag across that area to reveal it. In the realm of layer masks, painting with black conceals and white reveals.
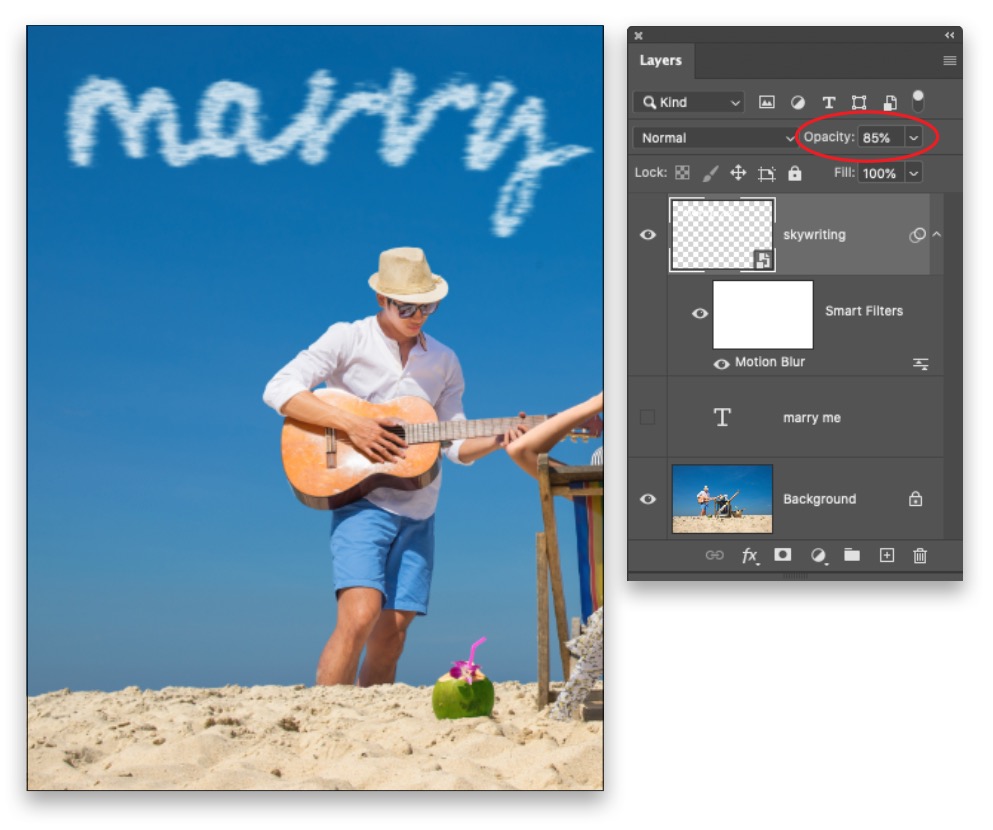
STEP 12: To blur the letters, as the wind would do, choose Filter>Convert for Smart Filters; notice the new badge on the layer in the Layers panel (circled). Then choose Filter>Blur>Motion Blur. In the dialog that opens, choose an Angle for some fake wind (0° was used here) and set the Distance to around 40 pixels. Click OK.

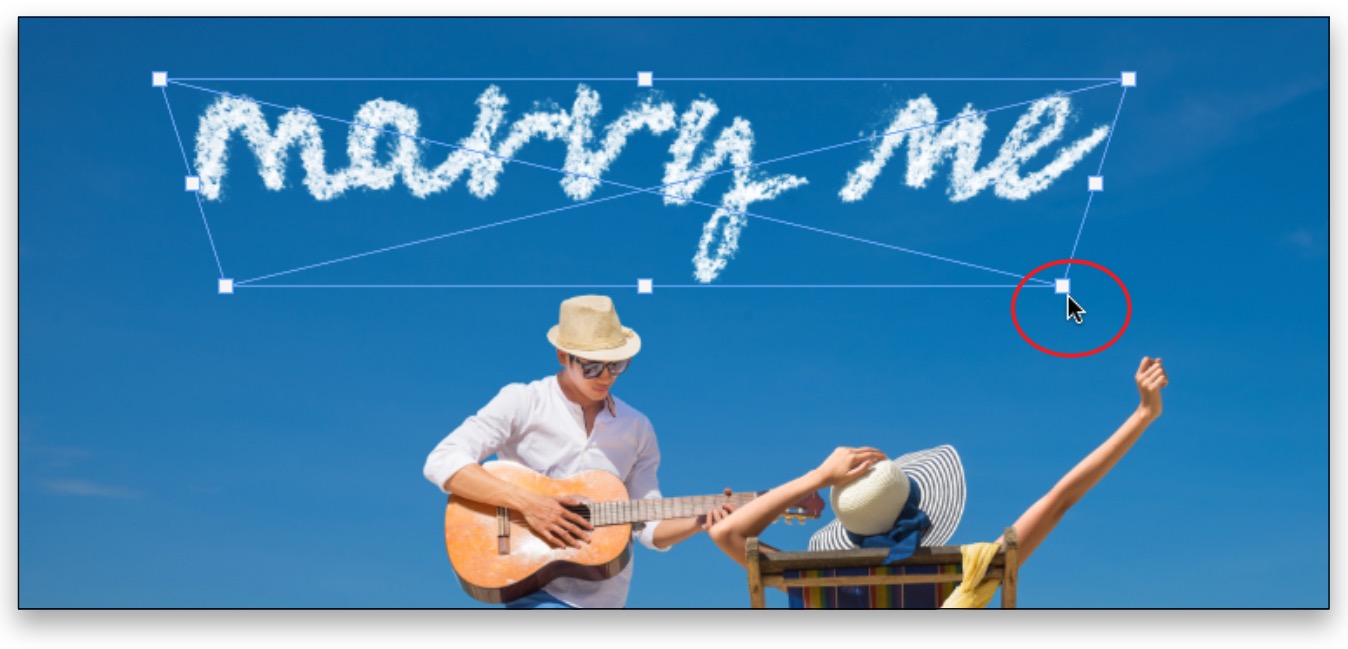
STEP 13: To add a bit of perspective, press Command-T (PC: Ctrl-T) to summon Free Transform. In the dialog that lets you know Smart Filters will be turned off, click OK. Right-click within the bounding box that appears and choose Perspective.
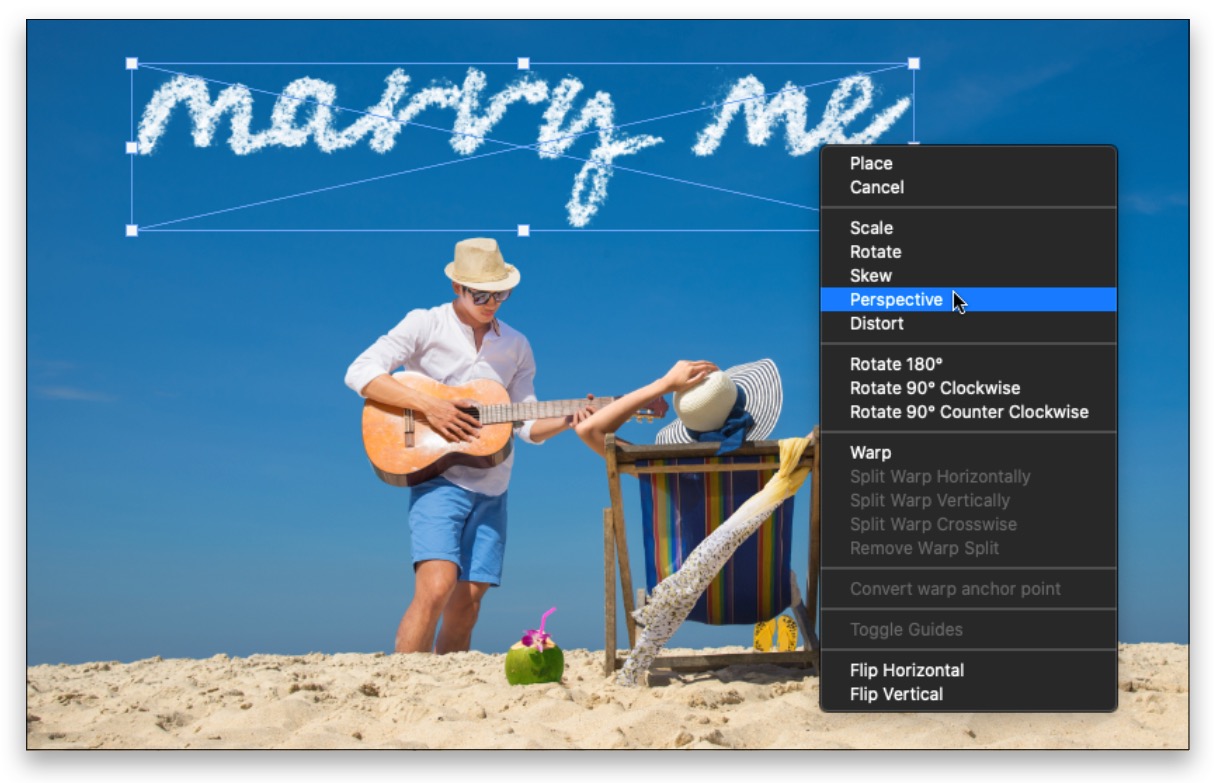
Next, click-and-drag the lower-right corner point (circled) leftward just a little and press Enter.
STEP 14: Lower the Opacity setting at the top of the Layers panel (circled) to around 85%.
STEP 15: You can also apply the same technique to a path drawn with a shape tool. In the example shown here, the Custom Shape tool (nested with the Rectangle tool [U] in the Toolbar) was used on a new layer to create a heart. To do that, create a new layer, activate the shape you want to use in the Custom Shape Picker in the Options Bar, and set the Tool Mode menu at the far left of the Options Bar to Path. Click-and-drag to draw the shape, and then use the Paths panel to stroke the path with the Brush tool as you did earlier in Step Nine (there’s no need to create a work path this time). Then follow the remaining steps in the technique.
Tip: The heart shape can be found in the Custom Shape Picker by expanding the Legacy Shapes and More folder, followed by the All Legacy Default Shapes folder, and finally the Legacy Default Shapes folder. If you don’t see the Legacy Shapes and More folder, open the Shapes panel (Window>Shapes), click on its flyout menu at the top right, and select Legacy Shapes and More to automatically load that set of shapes.
Here’s the final image, after using the Move tool (V) to scoot the text and the heart over to the right.

Until next time, may the creative force be with you all!
About Photoshop User and KelbyOne
Photoshop User magazine comes out digitally 12 times a year and is part of KelbyOne, the leading educational resource for Photoshop, Lightroom, and photography. Pro members have access to more than 900 video courses and 100 back issues of Photoshop User. To learn more about KelbyOne, click here.