If you are new to Photoshop, you hate the pen tool. If you have been using Photoshop for awhile, you love it. Why is this? Well, let me show you a few tips that might help you fall in love with your pen tool.
The pen tool or Bezier as it is called in some circles is a great feature. It allows you to be really bad at drawing by hand because you can get curves and lines close to perfect, and then adjust them afterwards if you need to. Let’s start with the basics.
Select your pen tool and get a clean canvas. This is how the pen tool works.
1. When you click once, you start a new anchor point, or a point of junction.
2. If you draw the line out (you don’t have to hold the button), it creates a straight line.
3. If you click again somewhere and let go immediately, it creates a sharp angle.
4. If you click again somewhere, hold the button down and “pull” the mouse, you create a rounded curve.
5. When you have created all the anchor points you desire, you can select the direct selection tool. It’s a white arrow in the tool bar above the pen, and make adjustments to the path you have created.
For the most part, that’s it. There are a few other details to the pen tool, but the basics are exactly that.
Somebody told me an analogy awhile back and it really made a difference for me. Imagine your pen tool is a car. The edge of the object you are drawing is a road that you are driving down. Now every time you come to a curve, you have to hold the button down and steer towards that curve. That will create a pretty close approximation for what you want to do. Remember that if the turn is abrupt, you just click and let go so that it is a sharp angle.
The other thing that should help you is practice. Nobody masters that pen tool on the first try. You have to experiment and make mistakes to get it right. It’s sort of like riding a bike. It takes awhile, but once you get it, you never forget.
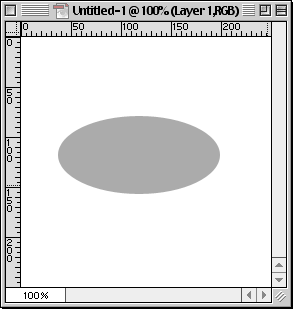
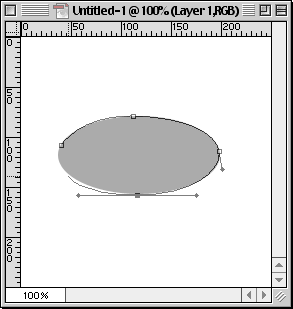
Below I have created a oval shape and then traced around it with the pen tool.

Notice the points at which I made anchors. Keep that driving analogy in mind when you do so. Now these points and curves are not perfectly precise, but that’s OK, because I can go back and make some minor adjustments if I need to.

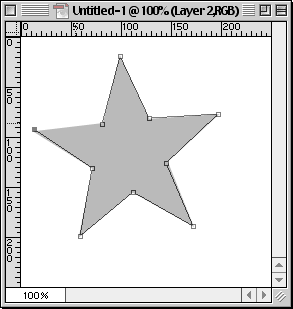
Here I have made a star with sharp edges and did the same thing, only I clicked and let go at the anchor points to make sharp angles.

To give you something to play around with, I have created a few objects for you to trace. Just save this image, bring it into Photoshop and then have at it. If you can trace these perfectly, you are off to a great start.


Mhm .. Have yet to try it, however; A good pen-tool tutorial .:)
Thank You so much for some great advice!
ahmm what other photoshop uses pen tool besides adobe photoshop??
i need to know plz.. email me..
could you plz tell me what other photoshop uses pentool other than adobe photoshop..
plz email me..
thank you.. GB
I noticed my Photoshop Elements did not have a pen tool, is it possible to download the pen tool? If so, where? Please email me back. Thanks.
slow brightness scientists rays time
Hi all..
I have a weird question – I have tried all websites for pen tools tutorials – and simply cannot find the answer!………driving me mad…..HOW DO I CHANGE THE STROKE THICKNESS??
In illustrator – childs play…photoshop?…