I’m having trouble with this in CS3, when I create the adjustment layer, I cant change the color, I set it to any color and it will just switch back to either black or different shades of grey. Its extremely frustrating, have you heard of this problem with CS3 before?
i m using CS2 for the PC and it refuse to let me add a filter to my filled pic or some thing else can we add any thing more pls advice me … i have just join this line so i need u r help
I think this is a great tutorial, but I can’t get through it all. After the liquify effect is applied, there seems to be a commercial, and it never finishes the tutorial. How do I finish it?
Hi, migz here
firstly i would just like to say that all the advise, tips and methods are extremely awesome
to the full extent of the word and I’d just like to thank everyone for the efforts the put into this site and all the help it offers.
I’m a first year student to become a graphic designer one day (hopefully), and all these things are very helpful, and as much as i love it i cant always access it when I need or want to because of internet issues, so I’d just like to know if you guys (and ladies if any present) can suggest where i can find these tutorials in a text form so i can save it on my computer for later help and reference.
Hi cool tutorial, love what you have done and i also created too but it look more realistic, instead of using a color fill i use for each image hue saturation with the orange color and it looks a lot better thanks
i had a lot of fun playing with this effect .
just out of curiosity, does anybody know if a tutorial on this website or others with a jell-like liquid effect? kind of like molten metal.
Hi, how are you?
I’m a beginner and have sony vegas editing soft and want to add fire effects and other 3d’s on my video titles.
Do I need aditional software for special effects? Is there any free downloading sites to get those effects, please?
For a REALLY awesome effect to further this, go into your channels and Crt click the blue and fill that selection with yellow. Then, shut off this new layer, and do the same with the green channel, filling it with orange. Adjust the blend mode as necessary.
I need to write a quote in fire, I cant figure out how to do this I need it for school its a proje ct, Your on a mac and im not so its a lil different in some ways


I’m having trouble with this in CS3, when I create the adjustment layer, I cant change the color, I set it to any color and it will just switch back to either black or different shades of grey. Its extremely frustrating, have you heard of this problem with CS3 before?
I’m using CS for the PC and it refuses to let me add a filter to my filled rectangle layer. Any advice?
I have NEVER used CS3 before I got it today and I was able to follow every instruction and did complete a wonderful masterpiece thanks to this video!
Awesome tutorial…thank you!!!
i m using CS2 for the PC and it refuse to let me add a filter to my filled pic or some thing else can we add any thing more pls advice me … i have just join this line so i need u r help
warm regards
Pankaj Sharma
I 1/2 learn alot of stuff from dis Sylized Fire Effect and I want 2 learn more things. I love to do stuff dat contains a compter.
Thanks!
very neat effect! thank you!
this is a very good tutorial!!corey is an excellent narrator and well paced!
thanks so much!!
:]
you are the MAN!!!!! 😛 ..thanx
If you are a Windows user, to fill in the box grey you use Shift + F5.
Nice one… yet again… For those in doubt, Shift+F5 or Shift+Delete does the same.
Keep it up…
Márcio Guerra
I think this is a great tutorial, but I can’t get through it all. After the liquify effect is applied, there seems to be a commercial, and it never finishes the tutorial. How do I finish it?
Hi, migz here
firstly i would just like to say that all the advise, tips and methods are extremely awesome
to the full extent of the word and I’d just like to thank everyone for the efforts the put into this site and all the help it offers.
I’m a first year student to become a graphic designer one day (hopefully), and all these things are very helpful, and as much as i love it i cant always access it when I need or want to because of internet issues, so I’d just like to know if you guys (and ladies if any present) can suggest where i can find these tutorials in a text form so i can save it on my computer for later help and reference.
thanx
Migz d(”,)b
Awsome i finished it and it was very interesting.
THX!
I cant add plastic wrap . :’s
Thx alot man i love how it looks
Thank you so much for this tutorial… You are great and my effect its great thanks for that…
But, I dont know why i have some tools unavailable… but its good anyways… Thank youuuu
Hi cool tutorial, love what you have done and i also created too but it look more realistic, instead of using a color fill i use for each image hue saturation with the orange color and it looks a lot better thanks
Very awesome tut!
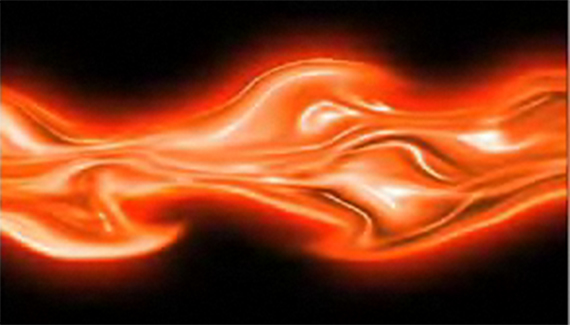
my fire looks awesome! and now I can go check out your Alpha Layers tut and make something even cooler!
very cool tutorial!!
i had a lot of fun playing with this effect .
just out of curiosity, does anybody know if a tutorial on this website or others with a jell-like liquid effect? kind of like molten metal.
thanks for the tutorial and great job as always
I have Adobe After Effects CS3 and I have a problem with the fire…. It doesnt move I press play. Please help by replying!!!
im having the same problem as logan. It is very anoying. I am also using CS3 on Vista.
Help me. Thanks
this was all really good but i got to the levels part and i dont know how to get it up… really frustrating!!!!!!
i found it… just point it out next time 😀
Hi, how are you?
I’m a beginner and have sony vegas editing soft and want to add fire effects and other 3d’s on my video titles.
Do I need aditional software for special effects? Is there any free downloading sites to get those effects, please?
Have a nice day,
Peter.
Sweet, gave me some good ideas on what to do! thanks.
Excellent work mate….keep them coming, all the best….
Ride On
Firewood? lol – nice touch. This is a great tutorial, as usual Corey. 🙂
its good , very nice
I am using CS2 and when I go to use the artistic filters near the end of the tutirial, they are unavailable to me (faded out). Little help?
For a REALLY awesome effect to further this, go into your channels and Crt click the blue and fill that selection with yellow. Then, shut off this new layer, and do the same with the green channel, filling it with orange. Adjust the blend mode as necessary.
Hi, i just wanted to say that this tutorial is awesome, and here is what i came up with after doing this:
http://i280.photobucket.com/albums/kk163/radio538goeroe/goeroedingcopyklein.png
It’s my nickname 🙂
Im using ps 7.0 and it doesn’t have fiber 🙁
Im using P.S. 7.0 and it doesnt have the fiber filter so what should I do?
thx, dude really nice tutorial, i experimented with the graphic u get after motion , i got very cool results out of it , ty
There is a complete tutorial on to how to add fire effects on any text, which is explained in a very simple language along with the visualizations. SEE MORE: http://www.techarena.in/guide/22504-adding-fire-effect-text-photoshop-tutorial.htm
I need to write a quote in fire, I cant figure out how to do this I need it for school its a proje ct, Your on a mac and im not so its a lil different in some ways
Awesome tutorial, thanks!
Superb work.. reaaly g8 job.. m new 2 d world of PS n m lovin it much much more than anything… Loved ur work to much.. thanks 4 everything.
great tutorial! too bad that my PS crashes when I use motion blur 🙁 well, I came up with a ghost though 😀
New to photoshop and have CS3 – excellent tutorial easy to follow and generate other uses – Thanks
As, always another great tutorial. Really appreciate all the ideas and info. you put out there. Your tutorials are the ones I always look for.
Just practical and nice.
Thanks a lot!