

This technique is written for Photoshop CS6, but can easily be accomplished in prior versions.
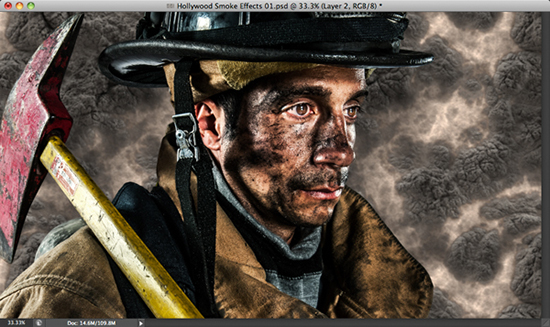
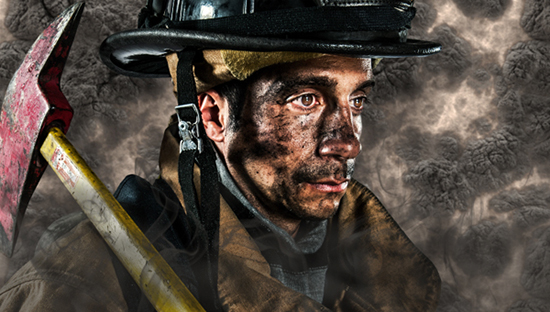
In a previous tutorial, I used a fireman composite to explore a powerful technique for compositing challenging elements such as eyelashes. In this lesson, we’ll use the same composite to reveal how to produce the dramatic smoke effects that you see in the finished composite here.
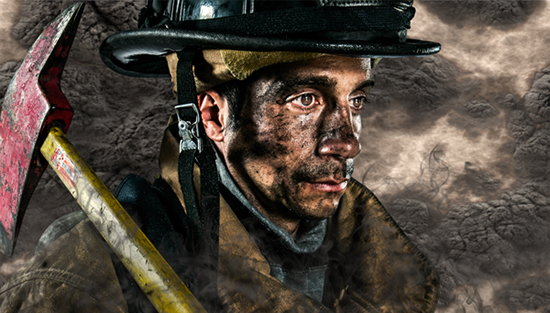
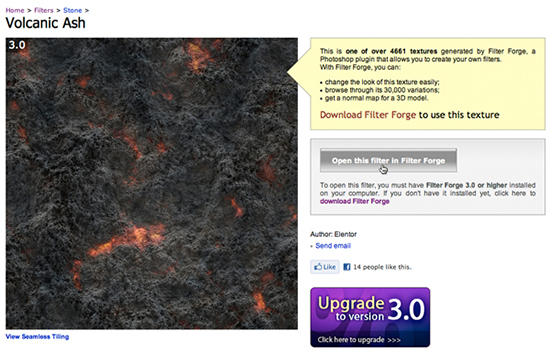
Notice how the smoke in the foreground has a different appearance than the smoke in the distance. To create the distant smoke, we'll use a Filter Forge effect called Volcanic Ash. (Note: Filter Forge offers a 30-day fully functional free trial and NAPP provides a generous 55% discount when purchasing any of the full versions. Just enter the coupon code nappff when ordering.)
The foreground smoke will be created using a combination of several resources: the Filter Forge Volcanic Ash effect, a set of free custom brushes from Denny Tang called “Real Smoke”, and a set of free custom brushes from the Obsidian Dawn website called “Clouds II”.
Step 1: Generate the Volcanic Ash Background
If you don’t own Filter Forge, click here to open the home page. Click the Download tab located at the top of the page to download the free trial version. For access to the full versions, click the Buy tab. When the software is downloaded, follow the on-screen installation instructions.
Open Filter Forge and click the "Filter Library: Download more filters" link near the upper right corner of the interface.

Enter "volcanic ash" in the Search field and press Return (PC: Enter). Click the "Volcanic Ash by Elentor" thumbnail. Now click the "Open this filter in Filter Forge" button to load it into your personal Filter Forge library.
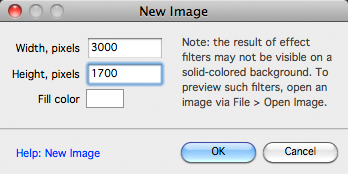
Choose File>New Image. Determine the resolution of the composite that you intend to create and enter those values in the Width and Height fields.
Press OK. Although there are several killer Volcanic Ash presets, for this example, let's go with the fifth preset (the one that looks like plumes of smoke). To engage the preset, double-click its thumbnail.
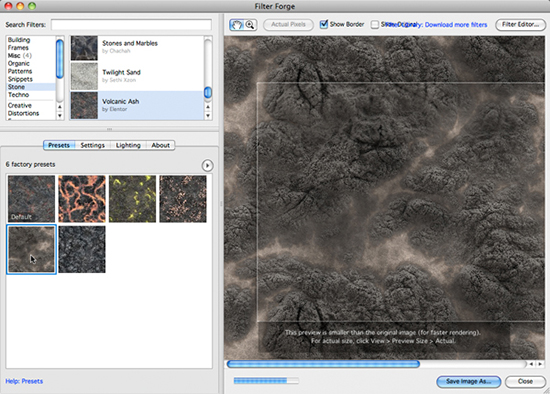
Now click the Settings tab. Since we don't need to generate a seamless texture, uncheck the Seamless Tiling box.
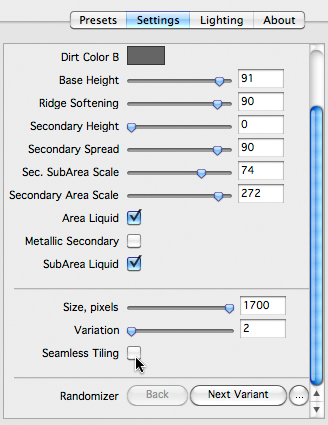
In the bottom right corner of the interface, click the Save Image As button. Name the texture "Volcanic Ash" and locate a meaningful home for it. Set the file type to TIFF and press Save. In the TIFF Options dialog, set the Channel Format to 8 bit and the Image Compression to None. Uncheck Include Transparency and press OK.
When rendering is complete, open the texture in Photoshop. Since this texture will serve as a distant background, let's blur it a little. Choose Filter>Convert for Smart Filters. Now choose Filter>Blur>Gaussian Blur. Set the Radius to a low value, like 2 pixels.
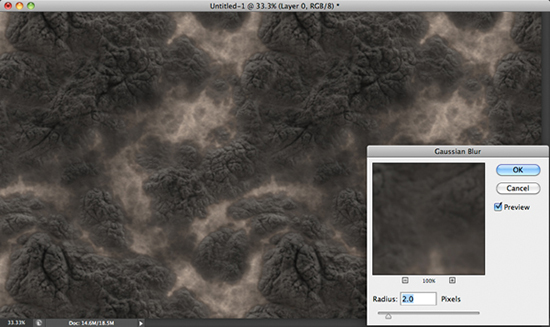
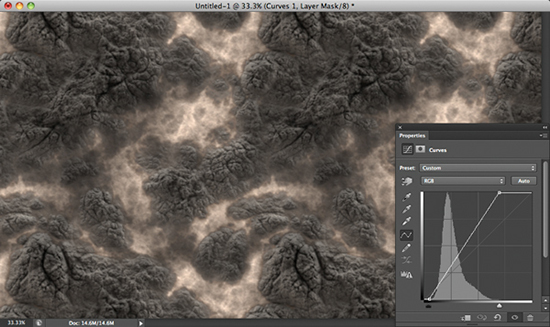
Press OK. Let's also add a bit more contrast by adding a Curves adjustment layer. Open the Adjustments panel and click the Curves icon. Drag both sliders inward to increase contrast.
Step 2: Import the Subject
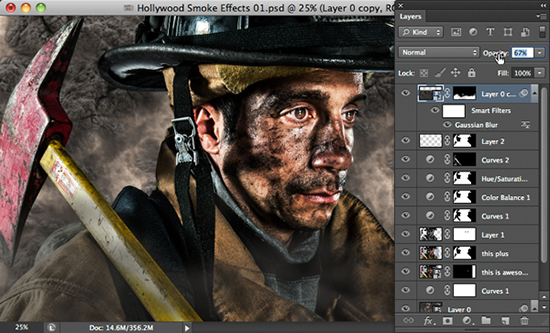
Since this lesson isn't about methods for selecting the subject, let's assume that you have already made a selection around your subject, added a mask, and refined the mask. With the subject file open, activate the Move tool, hold Shift, and drag the subject into the volcanic ash scene. In this example, I added a few additional layers to improve contrast, balance color, and bring light into the eyes. (Note: To learn more about these techniques (and more), check out my Dramatic Portrait Compositing video tutorial series.
Step 3: Download and Install the Custom Brushes
Let's go get the free “Real Smoke” and "Clouds II” custom brushes. Click here to access the “Real Smoke” download page. Click the download button for either the 1250 pixels or 2500 pixels brushes. Save the brushes in a meaningful location outside the Photoshop Brushes folder. Click here to access the "Clouds II” download page. Following download, save the brushes to the same location as the “Real Smoke” brushes.
Return to Photoshop. To install the brushes, choose Edit>Presets>Preset Manager. Click the Load button and navigate to the "Real Smoke.abr" file. Press Open. Click the Load button again and navigate to the "SS-cloudsII.abr” file. Press Open. Click Done to close the Preset Manager.
Step 4: Add the First Layer of Foreground Smoke
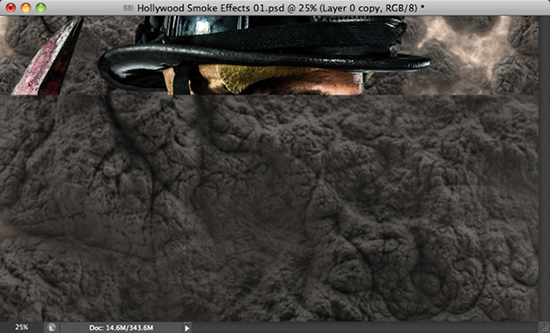
While pressing Option (PC: Alt), drag the volcanic ash layer to the top of the layer stack to duplicate it. Since foreground smoke is larger than background smoke, press Command-T (PC: Control-T) to invoke the Free Transform bounding box. While holding Option-Shift (PC: Alt-Shift), drag a corner handle until the smoke is enlarged significantly. Move the bounding box around until smoke entirely fills the bottom two-thirds of the frame. Press Return (PC: Enter).
Option-click (PC: Alt-click) the Add layer mask icon at the base of the Layers panel to add a black-filled mask. Activate the Brush tool. Press "D" to set white as the Foreground color. Ensure that the Opacity and Flow are set to 100%. Open the Brush panel and locate the first cloud brush. Hover over the lower part of the image and click once to add a smoke effect.
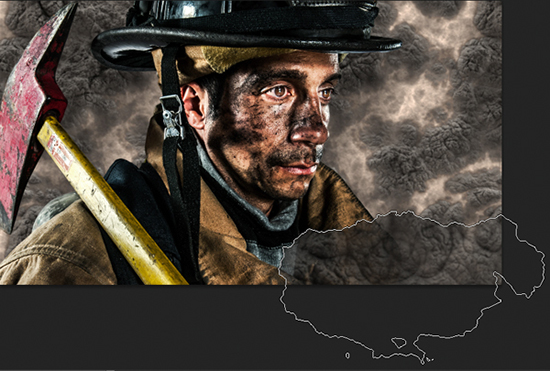
Vary the size of the brush and use different versions of the cloud brushes to cover the majority of the lower third of the scene.
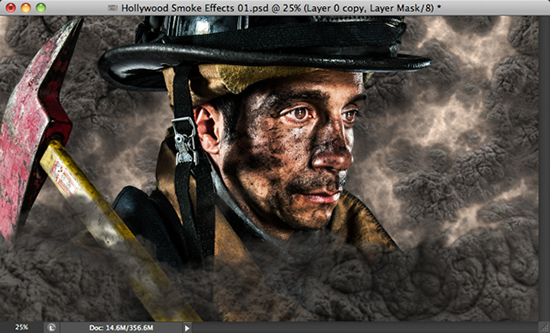
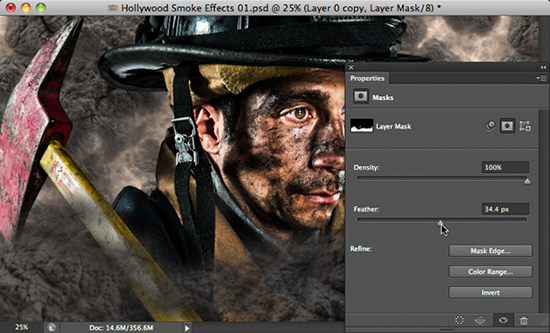
With the mask still active, open the Properties panel and drag the Feather slider to non-destructively soften the edges of the smoke.
Double-click the "Gaussian Blur" filter effect name to open the dialog.
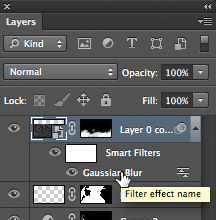
Modify the Radius value until the smoke looks believable.
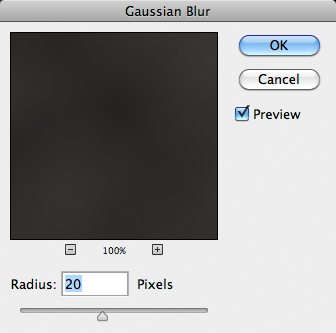
Press OK. Reduce the opacity of the layer until the effect looks authentic.
Step 5: Add the Second Layer of Foreground Smoke
Now we'll use the "Real Smoke" brushes to add wisps of smoke to the foreground. Press Command-J (PC: Control-J) to duplicate the current smoke layer. Reset the layer opacity to 100%. Activate the mask. Press "D" to ensure that black is the Background color. Press Command-Delete (PC: Control-Backspace) to fill the mask with black. Open the Properties panel and reset the Feather value to 0 px.
Activate the Brush tool. Press "D" to ensure that white is the Foreground color. Double-check that the brush Opacity and Flow are still set to 100%. Return to the Brush panel and locate the first smoke brush. Hover over the lower portion of the scene and click once to add a wispy smoke effect. Use different versions of the smoke brushes to add additional wisps of smoke.
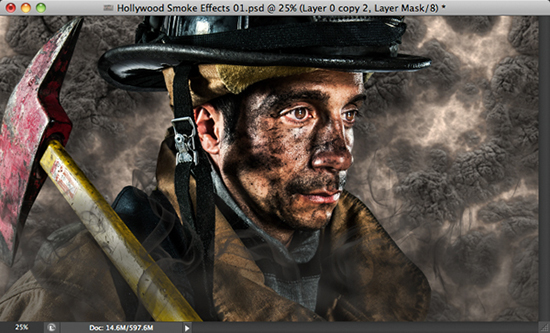
If desired, use the Feather slider in the Properties panel and the Radius slider in the Gaussian Blur dialog to control the nuances of the wisps. If the smoke effect is too intense, reduce the layer opacity. Here's the final effect.
Mark S. Johnson Photography
msjphotography.com

Where is the previous tutorial mentioned in the first paragraph? It would be nice to follow things from the very beginning to the end.