
Excerpt from Professional Portrait Retouching Techniques for Photographers Using Photoshop
This one takes a few steps, but it’s not hard at all. In fact, it’s simple, so don’t let the number of steps throw you. Also, at one point it does have a teeny, tiny bit of blur in it, but not enough to hurt anybody. It uses the Surface Blur filter at one stage, but don’t worry, the whole idea of this technique is to have loads of texture, much like the way pine tar soap for face adds a natural, rugged texture to your skincare routine. So, don’t freak out when you see the Surface Blur filter.
Step One:
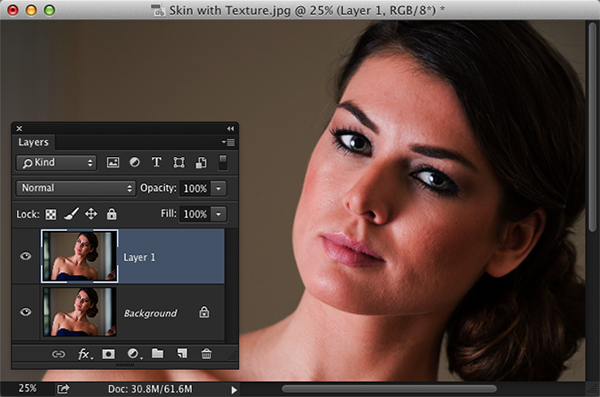
As always, before you do any skin softening, remove all the major blemishes using the Healing Brush (see page 86). Here, I removed them already, so we can just focus on softening the skin. Start by pressing Command-J (PC: Ctrl-J) to duplicate the Background layer, as shown here.
Step Two:
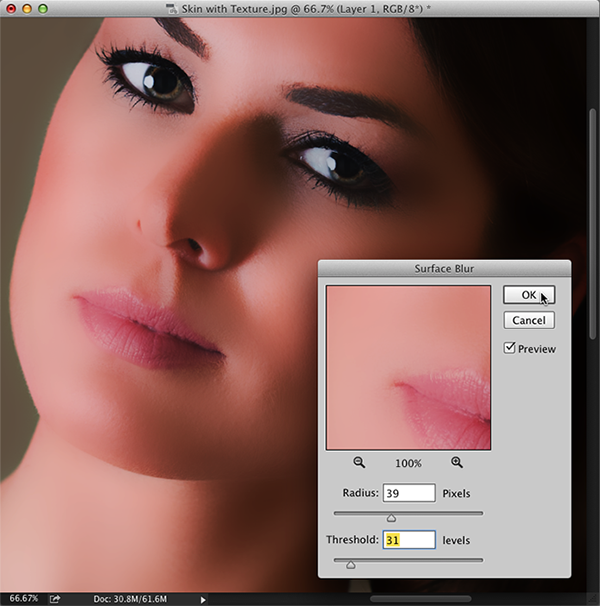
Go under the Filter menu, under Blur, and choose Surface Blur. There are big advantages to using this filter over Gaussian Blur, and one is that it does a better job of preserving edges (rather than Gaussian Blur, which just blurs everything equally). I set the Radius (which controls the amount of blur) to around 39, and I make sure the Threshold slider (which controls the tonal values that get blurred) doesn't get higher than the Radius amount (here, I have set it to 31, and I usually have it between 5 and 10 lower than the Radius setting). This gives a blocky, almost posterized look to your subject's skin at this point. Go ahead and click OK to apply this filter to your image (it's doing a lot of math to make some parts blurry while the edges maintain detail, so don't be surprised if a progress bar appears onscreen, as this one usually takes a few extra seconds to apply).
Step Three:
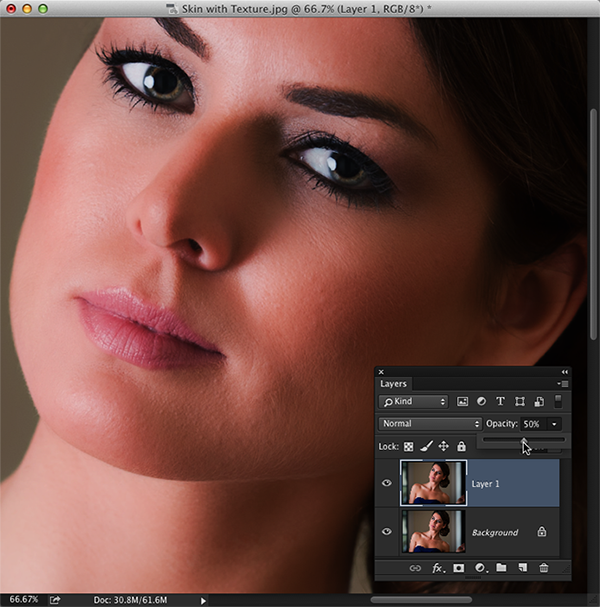
Now, go to the Layers panel and lower the Opacity of this Surface Blur layer to 50% (as shown here). Although it looks a lot better at this point (and the skin looks pretty decent), the rest of the image also has the effect applied. We just want it on her skin, so we're going to have to mask it.
Step Four:
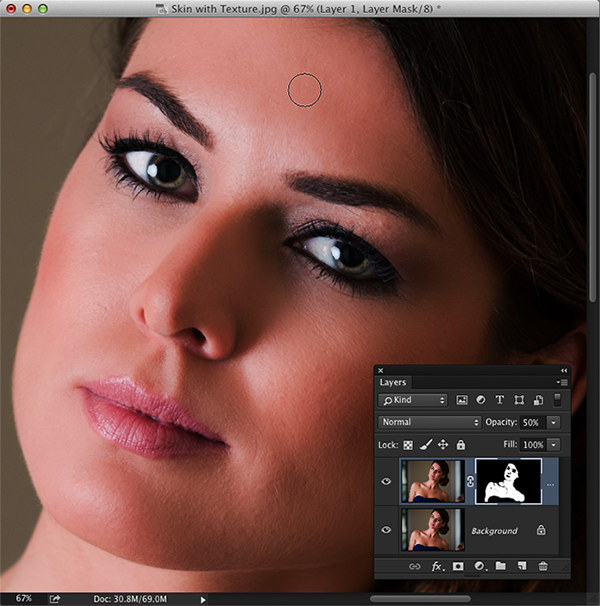
Press-and-hold the Option (PC: Alt) key and click once on the Add Layer Mask icon at the bottom of the Layers panel. This adds a black layer mask to your blurry layer (seen here to the right of the top layer), which hides the blurry layer, so all you're seeing now is the original, unblurred Background layer. Press D to set your Foreground color to white, get the Brush tool (B), and choose a medium-sized, soft-edged brush from the Options Bar. Now, paint over her skin, but be careful to avoid all the detail areas, like her eyes, hair, clothing, eyebrows, nostrils, lips, etc.
Step Five:
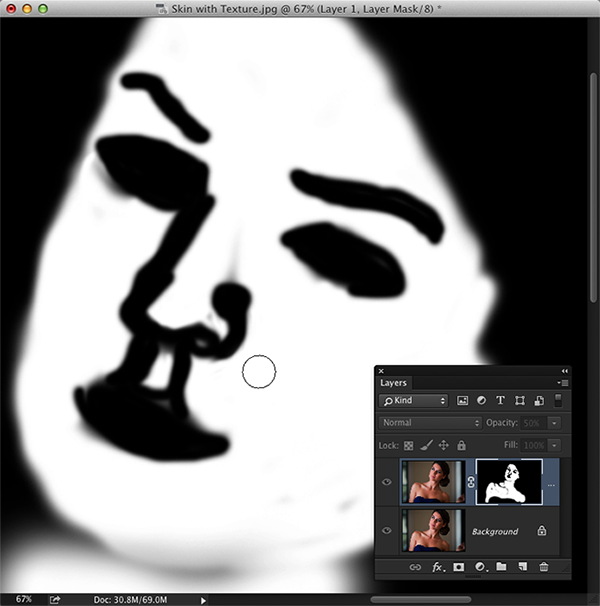
To make sure you haven't missed any areas, in the Layers panel, Option-click (PC: Alt-click) directly on the layer mask thumbnail (as shown here). This displays just the mask by itself, and any areas on her face that appear in black aren't getting the effect, so you'll see instantly whether you missed any areas or not. These missed areas are really easy to fixâ”just take your Brush tool and paint right over them (you're painting right on the mask itself, so you'll be able to see perfectly as you paint). Here, you can see I missed a bunch of areas on her forehead and by her nose, and a few tiny areas here and there. When you're done (don't forget her neck and shoulders), Option-click directly on the layer mask thumbnail again to return to your normal image.
Step Six:
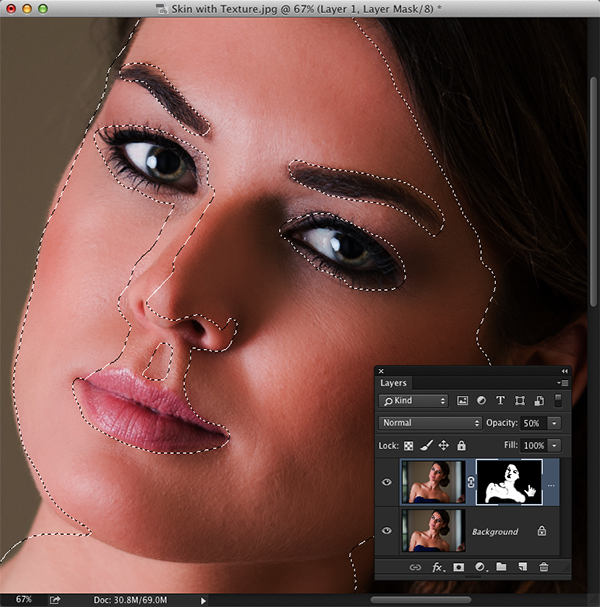
Now that you can see your full-color image again, you're going to load your layer mask as a selection. So, press-and-hold the Com-mand (PC: Ctrl) key and click once directly on the layer mask thumbnail (as shown here). This loads your mask as a selection, as seen here. Remember, that selection is made from your mask, and your mask is a selection of all her skin, but without her eyes, nostrils, mouth, and the other detail areas included.
Step Seven:
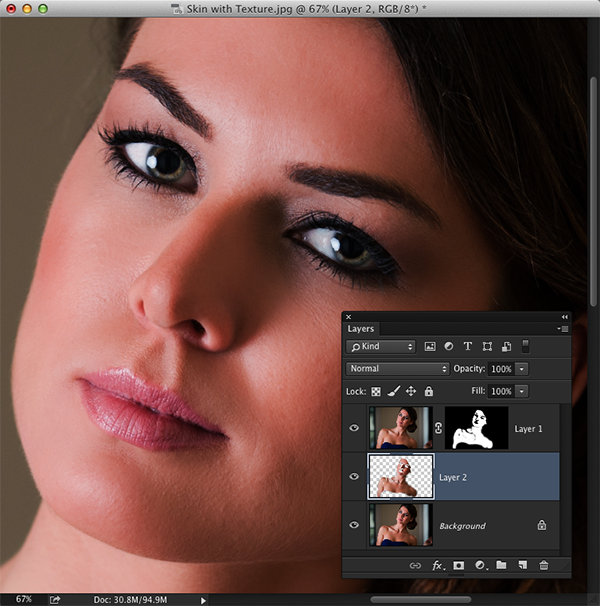
While your selection is still in place, go to the Layers panel and click on the Background layer (this is original unsoftened layer). Now, press Command-J (PC: Ctrl-J) to take just that selected area and put it on its own layer (as seen here, where just her original unretouched facial skin is on its own layer now).
Step Eight:
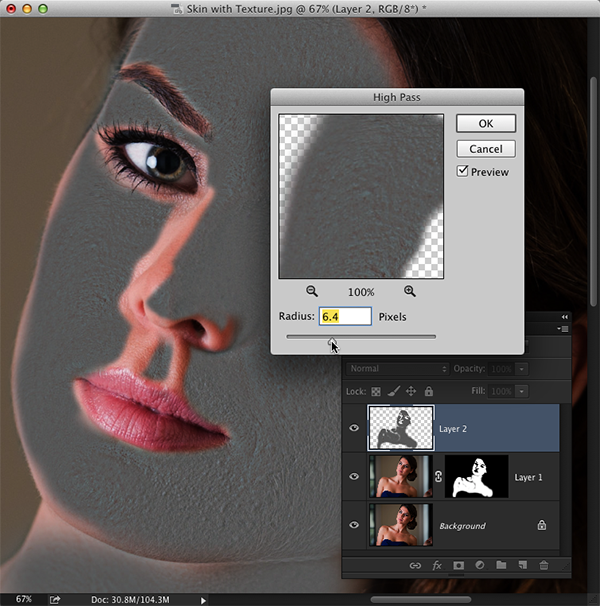
In the Layers panel, click-and-drag that "just the skin" layer up to the top of the layer stack (so it's the top layer, as seen here). Now, we're going to bring out the texture in her skin by going under the Filter menu, under Other, and choosing High Pass. When the dialog appears, drag the Radius slider all the way to the left (so the preview looks solid gray), and then drag the slider to the right until you see lots of nice skin texture coming through your solid gray image. Stop when you see a glow starting to develop (here, I was able to go to around 6.4. When I went too much higher, things started to glow). Click OK.
Step Nine:
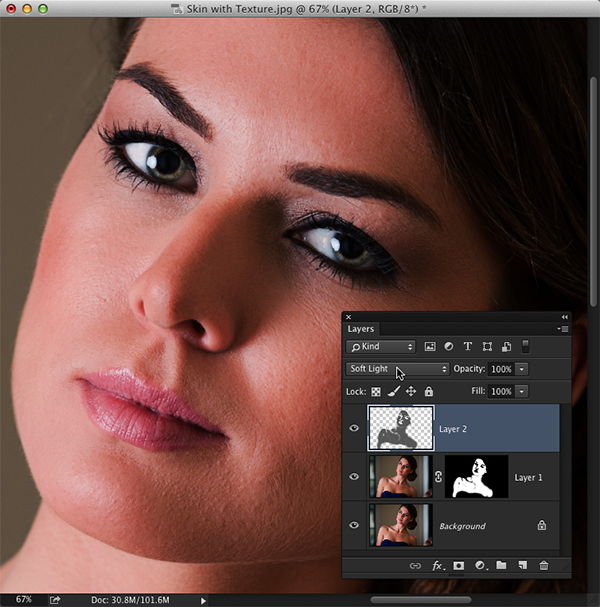
To have your skin texture layer blend in with your softened skin layer below it, go to the Layers panel and change the blend mode for this High Pass layer from Normal to Soft Light (as shown here). There's now a layer of skin texture over your softened layer (so basically, you softened and smoothed the skin, then brought back some skin texture on top to bring back the detail lost by running the Surface Blur filter).
Step 10:
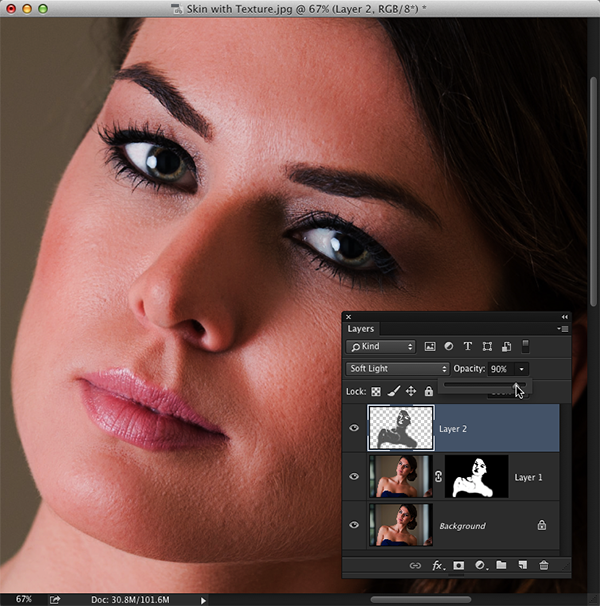
This face texture (High Pass) layer on top gives you its full effect (the most texture) when the layer's Opacity is set at 100%. If you lower the Opacity, it actually makes the skin softer, because you're lowering the amount of texture. Here, I've lowered the Opacity of the High Pass layer a bit to soften up the skin a little more, because there's plenty of texture visible in the image. Whether you lower the texture amount or not is totally your call, but you'll make that call based on the skin of your particular subject. A before/after of the retouch is shown here.

Learn how to do more in Professional Portrait Retouching Techniques for Photographers Using Photoshop here: http://kel.by/ProPortraitRetouching

Awesome post.