Removing Eye Veins
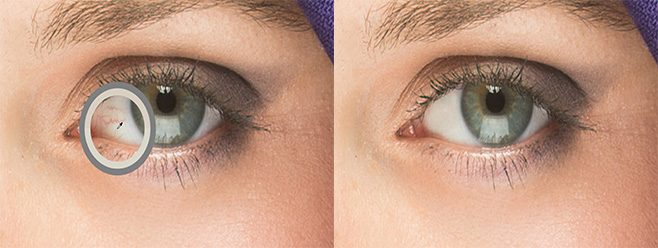
Excerpt from Photoshop for Lightroom Users
Technically, you can remove some eye veins while you're in Lightroom using the Spot Removal tool, but if you've ever tried it, it's pretty tricky and the results areâ¦wellâ¦let's say there's a reason we almost always jump over to Photoshop for a retouch like this. The only time I'd consider doing it in Lightroom alone is if your subject had just one single red vein, and unfortunately that rarely happens, so it's handy to know this technique.
Step One:
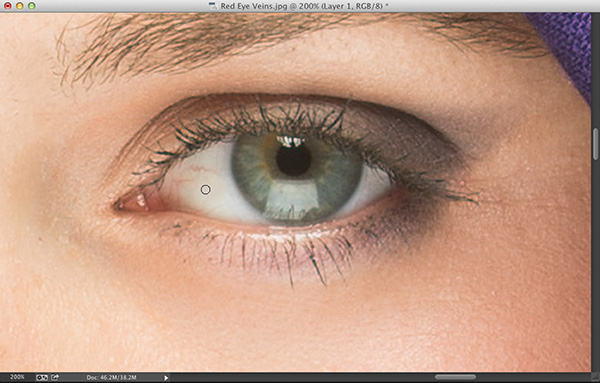
Here's the image we're going to retouch in Photoshop. We'll need to zoom in tight (to at least 100%) to really see what we're working on, so grab the Zoom tool (Z) and zoom in on the eye on the right (you can see this in the next step). Then, click on the Create a New Layer icon at the bottom of the Layers panel to create a new blank layer. We're going to do our retouching on this empty layer, so later we can add a filter on top of it that will add texture back into the areas we retouched to make them look more realistic.
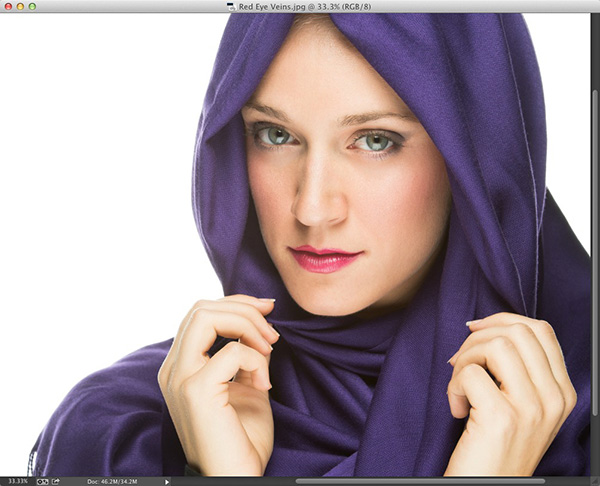
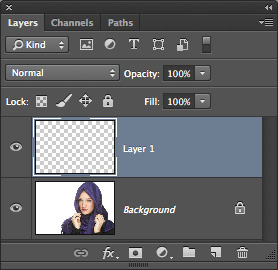
â”CREDIT: ©SCOTT KELBY
Step Two:
You're going to remove these red veins using the Brush tool (with temporary help from the Eyedropper tool). So, get the Brush tool (B), then press-and-hold the Option (PC: Alt) key and your cursor will temporarily switch to the Eyedropper tool, so you can steal any color in your image and make it your Foreground color. You're going to want to click the Eyedropper tool right near the red vein you want to remove (as shown here, where I'm clicking it right below the vein I want to remove). A large circular ring appears around your Eyedropper tool when you clickâ”the inside of the ring shows the exact color you just sampled and the outside of it is a neutral gray to help you see the color without being influenced by surrounding colors.
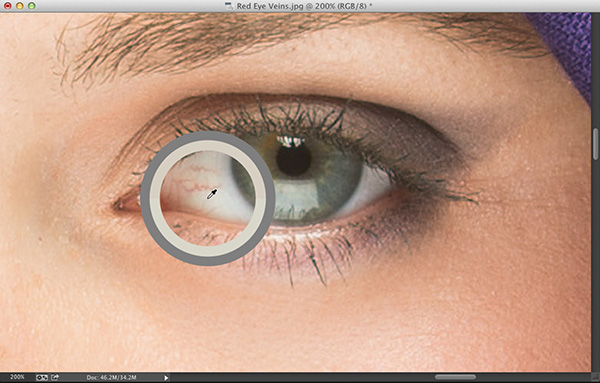
Step Three:
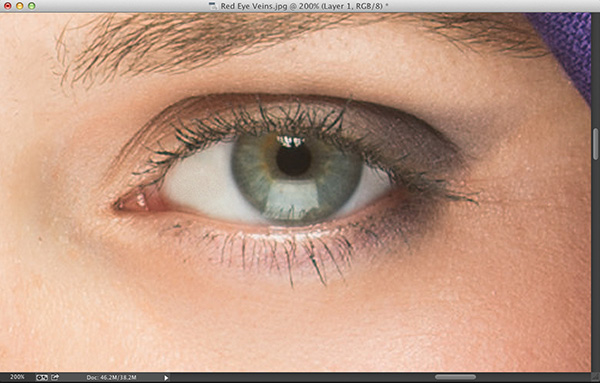
Let go of the Option (PC: Alt) key to return to the Brush tool, set your brush Opacity (up in the Options Bar) to 20%, and choose a small, soft-edged brush that's just a little bit larger than the vein you want to remove from the Brush Picker. Now, just start painting a few strokes right over the vein and, in just moments, it's gone! Remember, at 20% opacity, the paint builds up, giving you a lot of control as you build up your paint over the vein, so don't be afraid to go over the same stroke more than once. Since the eye itself is a sphere, the shading changes as you move across it, so be sure to sample again near what you're painting over as you're removing these veins to make sure the color and tone stay right on the money (I resampled about 10 or 12 times during this retouch).

Step Four:
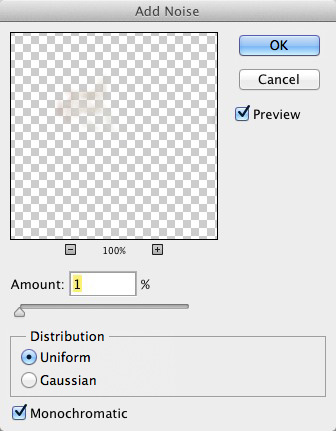
Lastly, to keep the whites of the eyes from looking pasty after your retouch, we're going to add a tiny bit of noise to your retouch layer. So, go under the Filter menu, under Noise and choose Add Noise. When the filter dialog appears, choose an Amount of 1%, click on the Uniform radio button, and turn on the Monochromatic checkbox. Click OK to add this texture to your retouch. Although it's subtle, it does make a difference.
Learn how to do more in Lightroom and Photoshop here: http://kel.by/J3c2o0.

