

Adobe keeps slipping fun new features into each new release of Photoshop CC. In a recent release, they quietly unveiled a Flame filter that can be used to create everything from candlelight to dramatic flame-thrower bursts to flaming type. In this tutorial, we'll use the Flame filter to give type a scorched neon appearance. Before we get started, it's worth mentioning that this filter is in its first iteration. For now, the interface is clunky and a bit slow, but with enough user experimentation, stunning effects are possible.
Step One: Create a New File
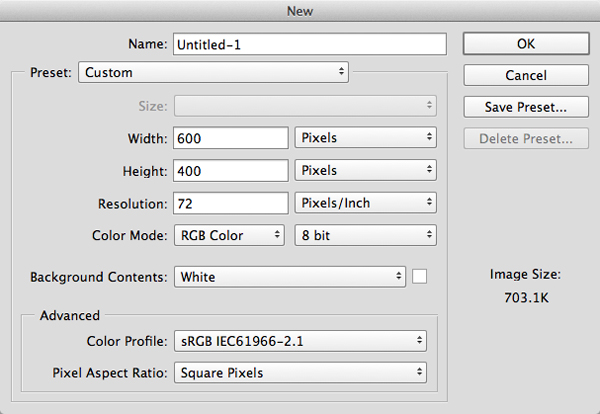
Choose File>New. For the sake of speedy editing, create a small 600×400 pixel, 72 ppi, 8-bit document with a white background. Because flame effects show up best on black, press Command-I (PC: Ctrl-I) to invert the background to black.
Step Two: Add Type
Press D then X to set white as the Foreground color. Select the Type tool (T) and in the Options Bar, choose a fairly narrow typeface, such as Arial Regular. Click in the document window and type the word "INFERNO" in all caps. In the Options Bar, click the large checkmark icon to commit the edit.
If the type is too small or large, press Command-T (PC: Ctrl-T) to invoke Free Transform. While holding Shift, grab a corner handle and scale the type until it fills most of the document, and press Enter to commit the transformation. To center the word, press Command-A (PC: Ctrl-A), activate the Move tool (V), and click the Align Vertical Centers and Align Horizontal Centers icons in the Options Bar. Press Command-D (PC: Ctrl-D) to deselect.

Step Three: Convert the Type to a Work Path
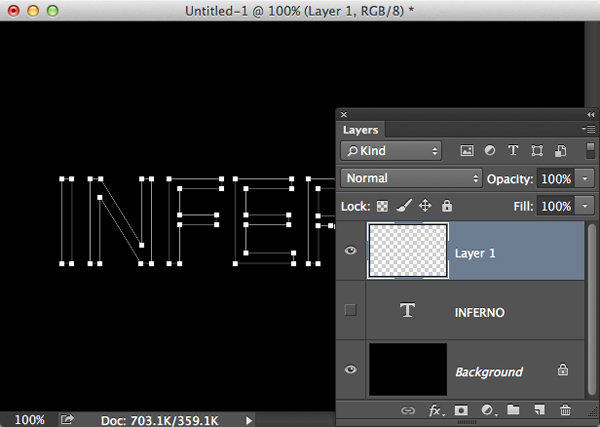
The Flame filter only works with paths, so we need to convert the type to a path. Choose Type>Create Work Path. In the Layers panel, click the Eye icon to the left of the INFERNO type layer to switch off its visibility. Click the Create a New Layer icon at the bottom of the Layers panel. This is the layer that will take the flame effect.
Note: Keep in mind that the Flame filter also works with paths created by the Pen tool and with custom shapes applied as a path. Imagine the possibilities!
Step Four: Apply the Flame Effect
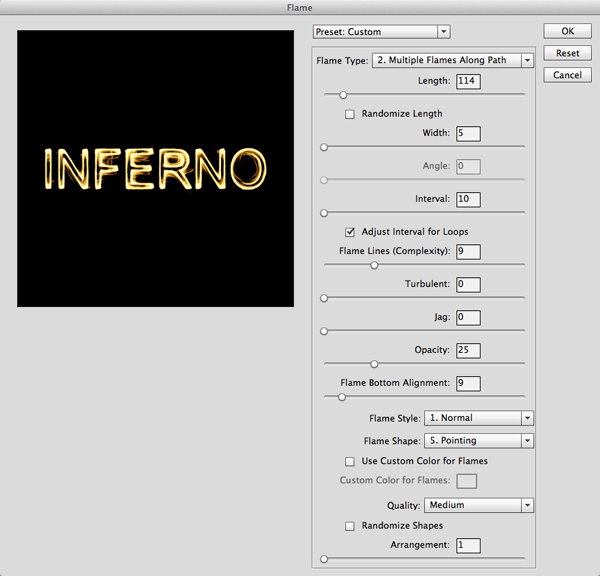
Choose Filter>Render>Flame. If you see an alert dialog warning that the path is longer than 3,000 pixels, click OK to dismiss the dialog. To accomplish the look we're after, set the Flame Type to Multiple Flames Along Path and the Length to 114. Set the Width to 5 and the Interval to 10. Check the Adjust for Interval Loops box and set the Flame Lines (Complexity) to 9, Turbulent to 0, the Jag to 0, the Opacity to 25, and the Flame Bottom Alignment to 9. Set the Flame Style to Normal, Flame Shape to Pointing, Quality to Medium, uncheck Randomize Shapes, and set the Arrangement to 1. Based on your choice of typeface, you may need to adjust settings a bit differently. If things go awry, don't hesitate to click the Reset button and start over.
Click OK and wait a moment while the filter renders. When it's done, open the Paths panel (Window>Paths) and click off of the Work Path.

Step Five: Pop Details with Layer Styles
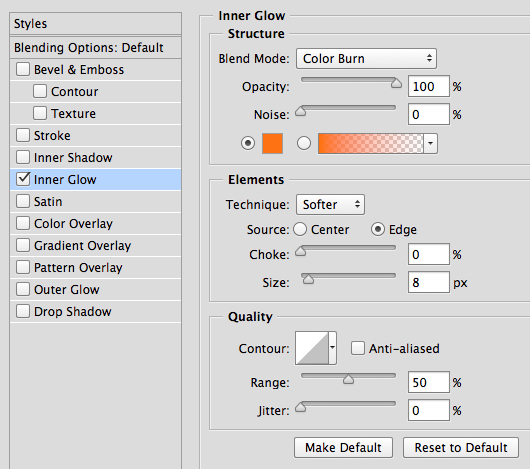
The effect looks impressive, but it can benefit from a little embellishment using layer styles. Choose Layer>Layer Style>Inner Glow. Set the Blend Mode to Color Burn and the Opacity to 100%. Click on the yellow color swatch, choose a rich orange color (R:255, G:114, B:0), and click OK to close the Color Picker. Set the Size to 8 px.
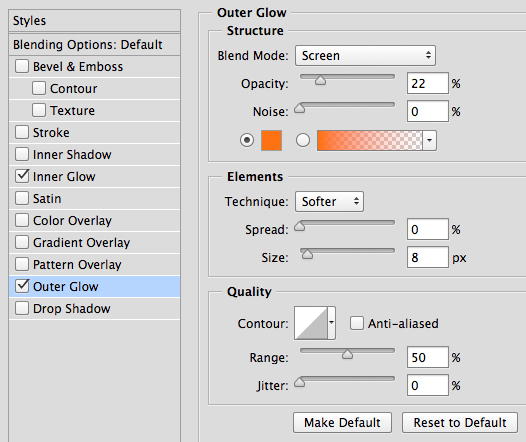
Click the words "Outer Glow" under the Styles list on the left. Set the Blend Mode to Screen and the Opacity to 22%. Click the yellow color swatch, choose the same rich orange color (R:255, G:114, B:0), and click OK to close the Color Picker. Set the Size to 8 px.
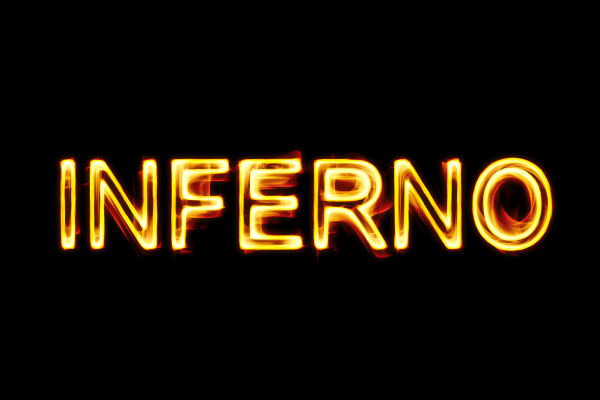
Click OK to close the Layer Style dialog and apply the effects. Here's the completed scorched neon effect.
I encourage you to experiment freely with the Flame filter to see what kind of exhilarating effects you come up with. Have fun!
Mark S. Johnson Photography
msjphotography.com
