
Using the Path Blur in Photoshop
Path Blur is the fourth of five blur filters in the Blur Gallery available in Photoshop CC and later. It enables you to add motion effects along a path to images. This tutorial will show you how to use the Path Blur filter to add some interesting motion effects to an image, and then we'll show you how to use multiple paths with the smart filters mask to create a speed motion effect.
Tutorial Assets
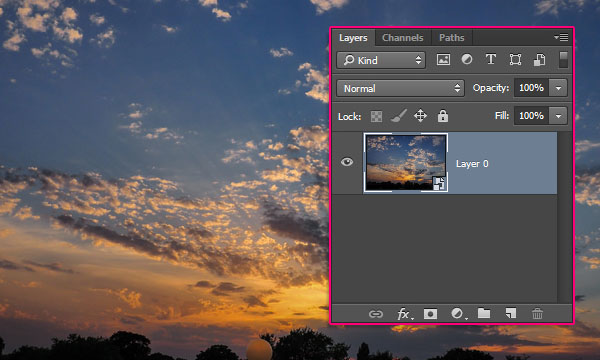
1. Glorious clouds by archangel12
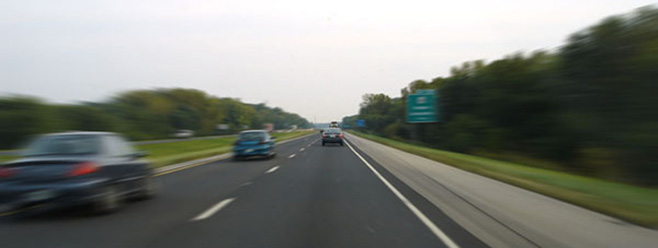
2. Interstate 65 by hibino
Working with the Path
STEP ONE: Open the Glorious clouds image, Right-click its Background layer, and choose Convert to Smart Object. Alternatively, you can select that layer and go to Filter>Convert for Smart Filters. This is an optional step, but smart objects are great when using filters, as they make the applied filters editable at any time, as well as create smart filter masks that can help with modifying and cleaning up the final results.
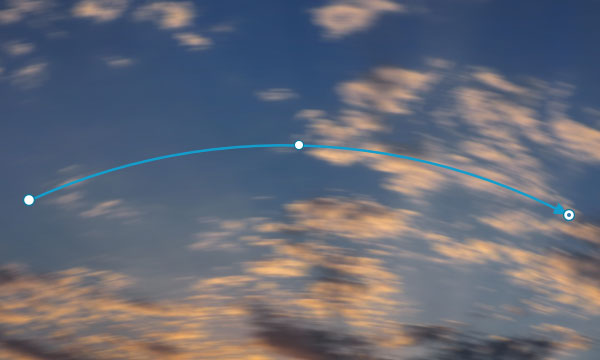
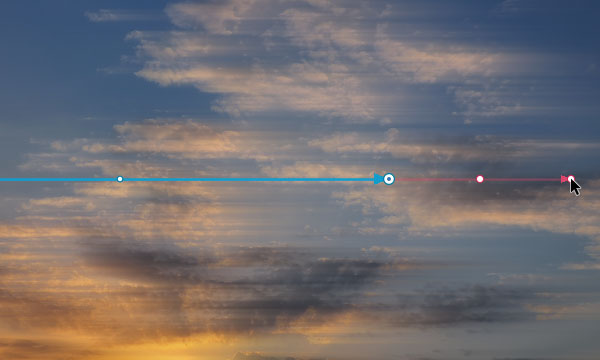
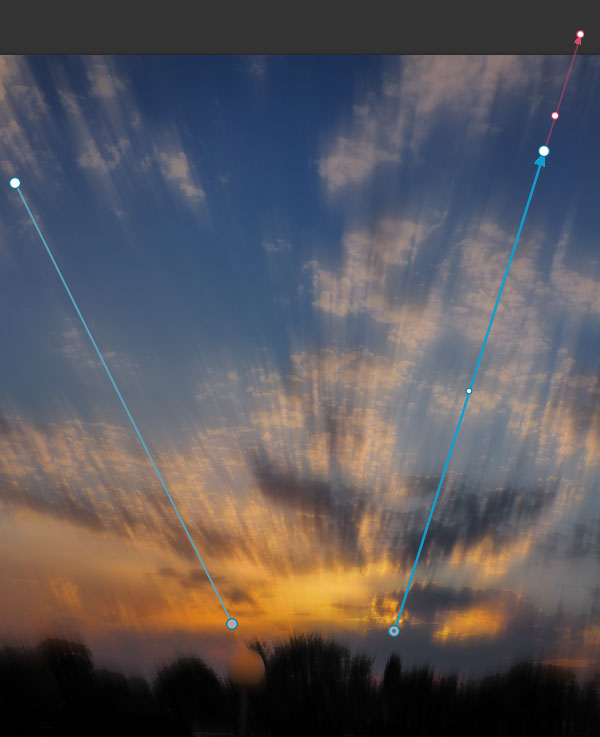
STEP TWO: Go to Filter>Blur Gallery>Path Blur to enter the Blur Gallery. The effect of the default filter values on the image will be previewed in the preview area. A path with two end points is automatically added to the image. Notice the arrow at one end of the path. The arrow determines the direction of the blur.
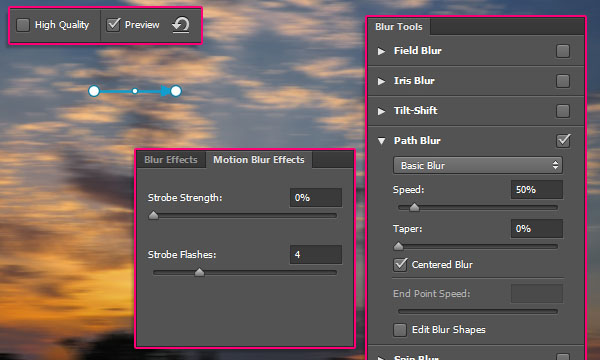
STEP THREE: At the right of the screen, there are two panels: The main Blur Tools panel at the top, with the Path Blur controls and options, and the Motion Blur Effects panel at the bottom with the Strobe settings.
STEP FOUR: There are a couple more controls in the Options Bar that might come in handy, as well. High Quality controls the rendering quality of the preview. If this box is checked, the preview might be rendered a bit slower, depending on your device. When checked, Preview shows the result of any changes in the blur filter's settings. When unchecked, you can view the original image without any blur. Tip: You can press the P key to turn the Preview on and off. Click the Remove All Pins icon (curved arrow) in the Options Bar to remove all the blur pins on the image.
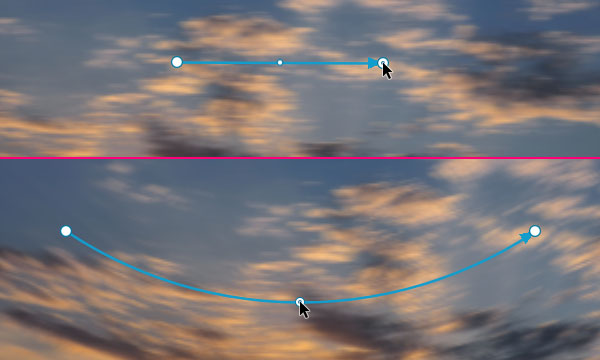
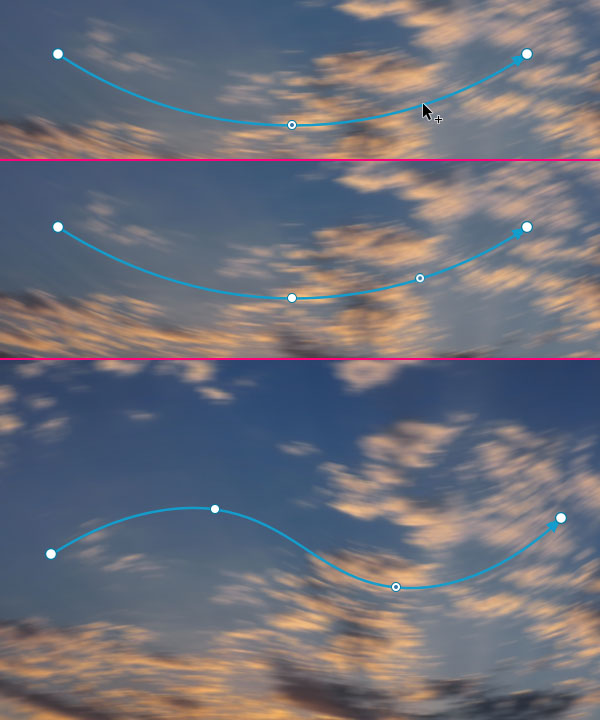
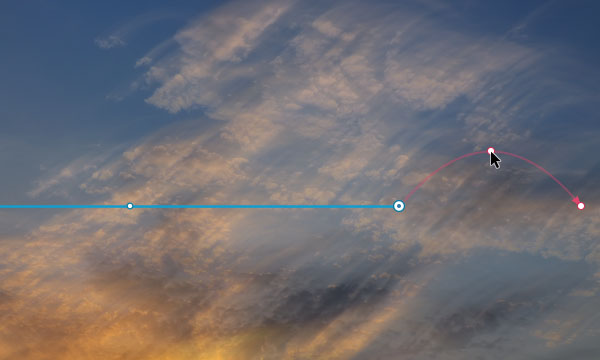
STEP FIVE: You can click-and-drag the end points to reposition them, which will result in changing the blur's direction. You can also click-and-drag the midpoint to adjust the path's shape, which will result in adjusting the shape of the motion applied. Click along the path to add as many points as you like. Each point can be then selected and moved around to adjust the shape.
To delete a point, click it to select it, then tap the Delete (PC: Backspace) key. If an end point is selected, the whole path will be deleted when you press Delete (PC: Backspace).
STEP SIX: To move the Path around, press-and-hold the Command (PC: Ctrl) key, then click-and-drag the path where you want to place it, and release all.
STEP SEVEN: The Speed value in the Blur Tools panel determines the amount of path blur applied to the image. It's important to keep in mind that this value is global, so it affects all the paths you add to the image. To change the Speed value, drag the slider or by enter a value between 0% and 500% manually.
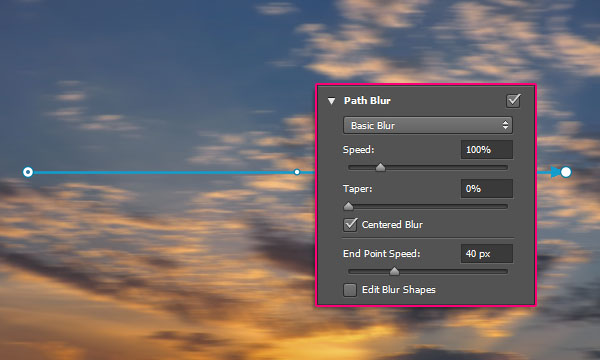
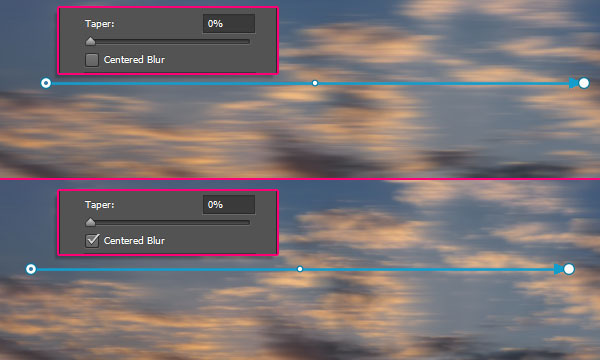
Taper also affects the image globally. A higher value lets the blur trail off gradually.
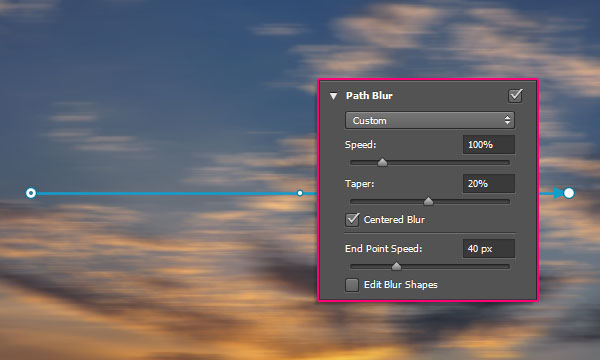
The Centered Blur option blurs the pixels on either side, so it creates a more stable effect.
If it's unchecked, however, you can get a more fluid and directional effect.
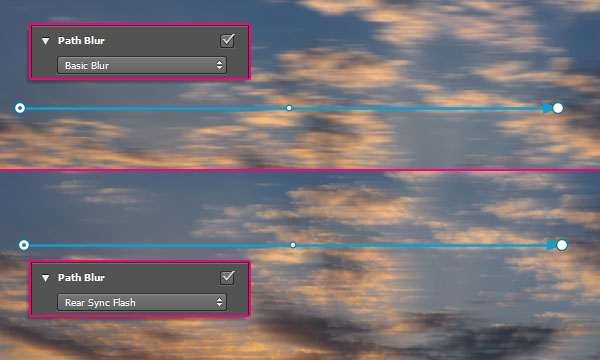
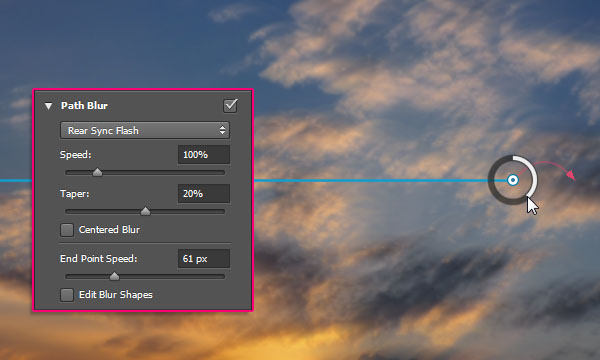
You can also choose between applying a Basic Blur and a Rear Sync Flash blur. The Rear Sync Flash blur simulates the effect of a flash fired at the end of an exposure.
To apply the blur to the photo, click OK in the Options Bar or press Enter.
Working with the End Points
STEP ONE: As mentioned before, the Speed setting is global. What you can do to control the blur amount is adjust the End Point Speed values. Click on an end point to select it, then make sure to check the Edit Blur Shapes box in the Blur Tools panel. You'll notice two red arrows appear at the ends of the path. Those control the end points independently. To change the Speed value of an end point, drag the End Point Speed slider, or enter a value manually.
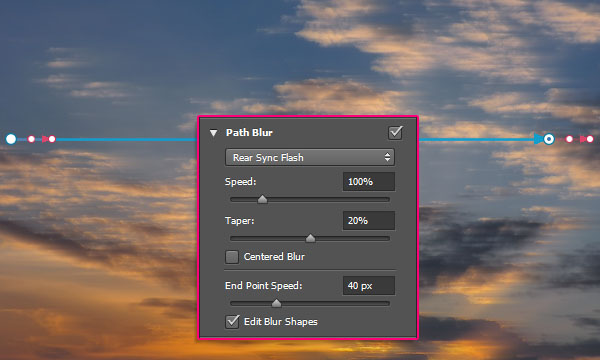
You can also click-and-drag the red arrow's point to change the End Point Speed value.
STEP TWO: To further change the Blur Shape for an end point, click-and-drag its center point. Keep in mind that you can't add more points along the end point's line like you did for the main path.
STEP THREE: If the Edit Blur Shapes box is unchecked, you can hover an end point then click and drag the ring that appears to change the End Point Speed value. Dragging clockwise will increase the speed while dragging counterclockwise will decrease it.
Working With Multiple Paths
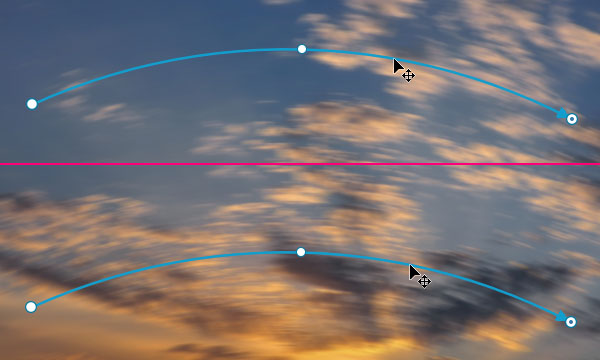
You can add as many paths as you like to any image you have. In general, paths are added to either get a blur with a different direction, to limit or remove the blur for certain areas, or both.
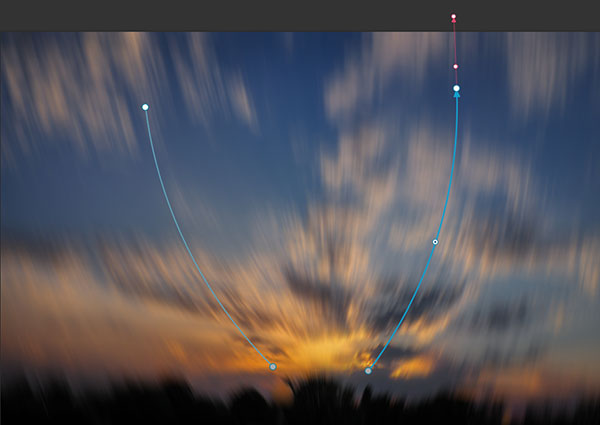
STEP ONE: To add a new path, place the cursor where you want the path to start, click once, then move the mouse cursor and click to add the rest of the points along the path until you get the result you want. As long as you're still clicking-and-dragging, the path will be continuously modified. To end the path, place the cursor inside the end point until you get the arrow with a pin below it, then click. Alternatively, you can press the Esc key.
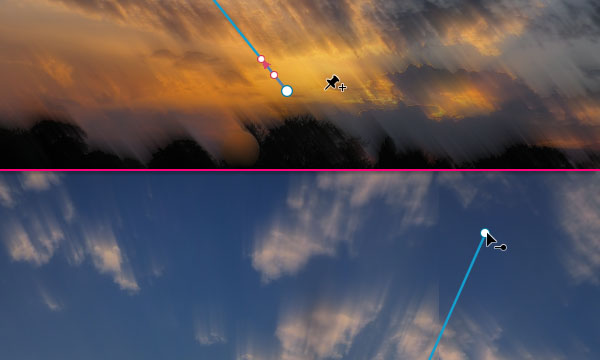
STEP TWO: Once you create the path, you can adjust the end points as you like. In this image, the End Point Speed values for the lower end points of each path are set to 0 px, and the upper end points are set to values greater than 100 px.
Tip: Press-and-hold the H key to temporarily hide the paths. Release the key to show them again. Press the P key to turn the Preview on and off.

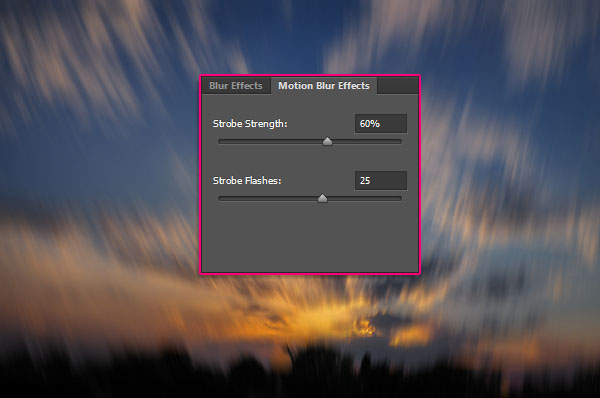
STEP THREE: There are two more options in the Motion Blur Effects panel. Strobe Strength determines how much blurring is displayed between strobe flash exposures, and controls the balance between ambient light and the virtual strobe flash. Strobe Flashes controls the number of exposures of the virtual strobe flash.
If the Strobe Strength is set to 0%, then only continuous blur is shown. If it's set to 100%, then the strobe flashes are produced in full strength but no continuous blur is displayed between flash exposures. Any other value in between produces a mixture of individual strobe flashes along with continuous blur.
As you can see, there are plenty of options to control the Path Blur filter's effect, making it a powerful filter.
Creating a High-Speed Motion Effect
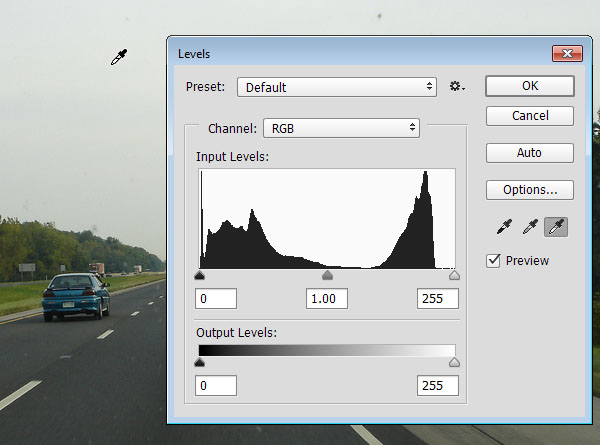
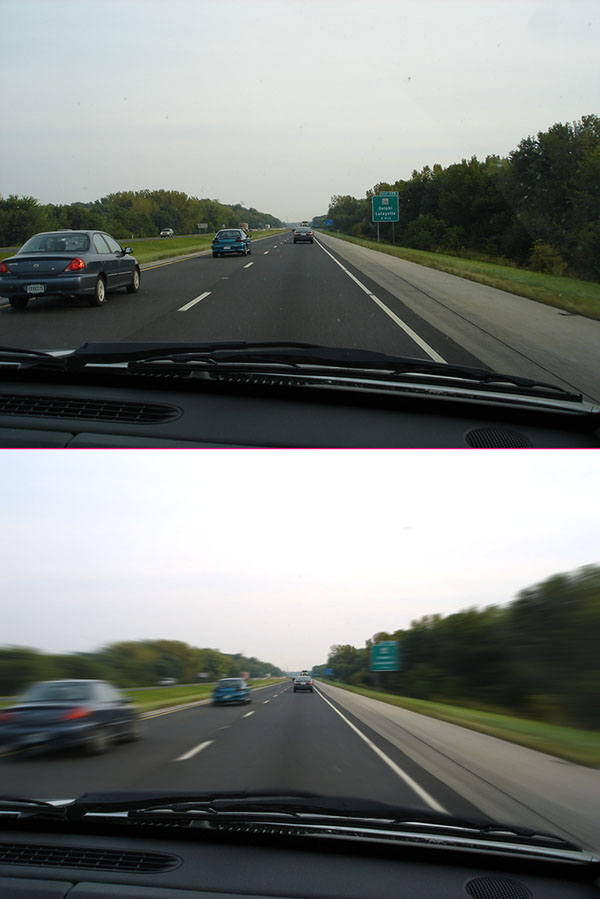
STEP ONE: Open the Interstate 65 image, and go to Image>Adjustments>Levels. Click the white eyedropper icon, click somewhere in the sky part of the image, and click OK. This will brighten up the image a little bit. Convert the image to a smart object.
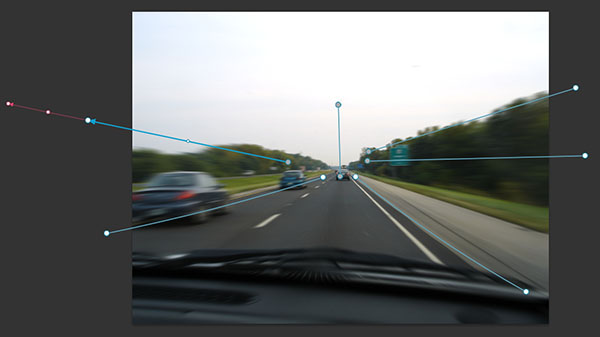
STEP TWO: Go to Filter>Blur Gallery>Path Blur. Now we need to create a couple of paths to blur the sides of the road (see image). You should end up with paths that start close to each other at the center, then spread apart at the edges. The trick here is to adjust those paths' End Point Speed values in a way that makes the blurring almost nonexistent at the center, but quite strong at the sides. (Note: You might need to add a vertical path in the center and set both End Point Speed values to 0 px.) Click OK in the Options Bar or press Enter to apply the blue.
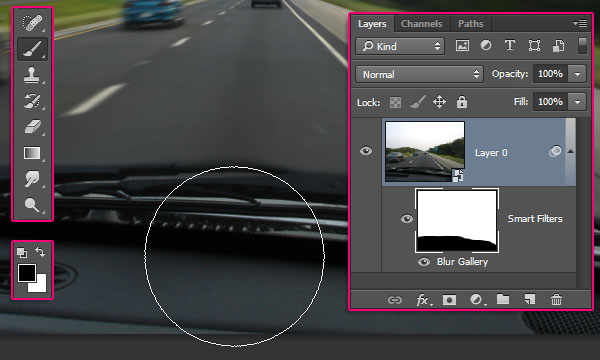
STEP THREE: Because the blur affects the whole image, the dashboard of the car from which the photo was taken is also blurred. To fix that, we're going to use the smart filters mask. Click the Smart Filters thumbnail in the Layers panel, select the Brush tool (B), and press D then X to set the Foreground color to black. Use a large, soft-edged brush to remove the blur from the dashboard and wiper arm. If you remove too much blur (say from the road), press X to change the Foreground color to white, paint to add the blur back to that part of the image. Press X again to switch the Foreground color back to black.
This is where converting the image into a smart object comes in handy, as you can control the final result and clean it up neatly.
This tutorial covered the basics of the Path Blur filter, and explained a couple of different ways of using it for various images and purposes. I hope you enjoyed the tips and tricks and found the tutorial helpful.
