

I love Disney animation movies, and I almost always love the logos that are created to support these feature films. They're clever and creative and they always make me want to try and re-create them using Photoshop. The Disney animation movie Planes is no different. Even though the logo uses basic design elements, it has a very "Air Force" look and feel while still maintaining a light, fun factor.
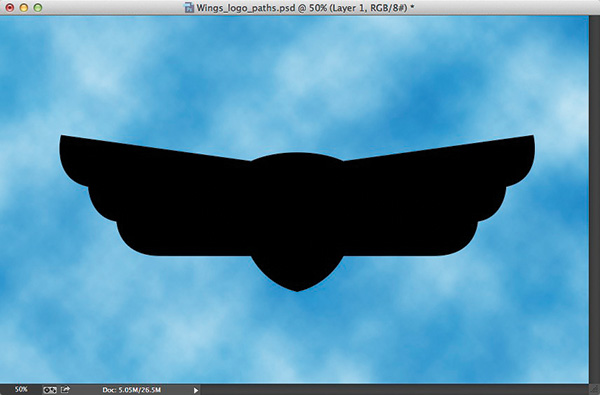
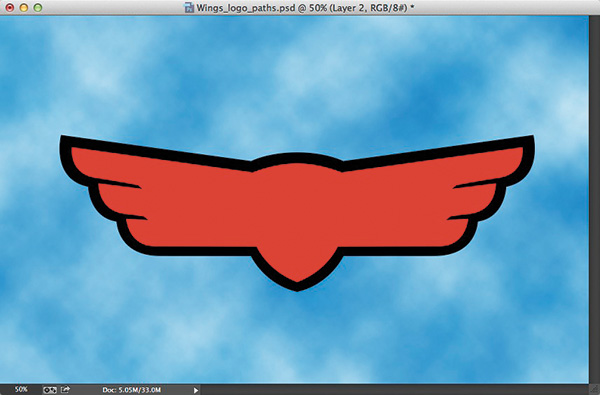
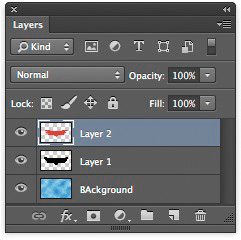
STEP ONE: Open the Wings_logo_paths.psd. Create a new layer (Layer 1) by clicking on the Create a New Layer icon at the bottom of the Layers panel. Now, press D to set the Foreground color to black and the Background color to white. Command-click (PC: Ctrl-click) on the thumbnail for Path 1 in the Paths panel (Windows>Paths) to make it a selection. Press Option-Delete (PC: Alt-Backspace) to fill the selection with black. Press Command-D (PC: Ctrl-D) to deselect. Click on the Foreground color swatch, choose red as the color (R:252, G:14, B:23), and click OK. Create a new layer (Layer 2). Command-click (PC: Ctrl-click) on Path 2 in the Paths panel to make it a selection. Press Option-Delete (PC: Alt-Backspace) to fill the selection with red. Deselect.
[ Download the file used in this tutorial by clicking here. * All files are for personal use only.]
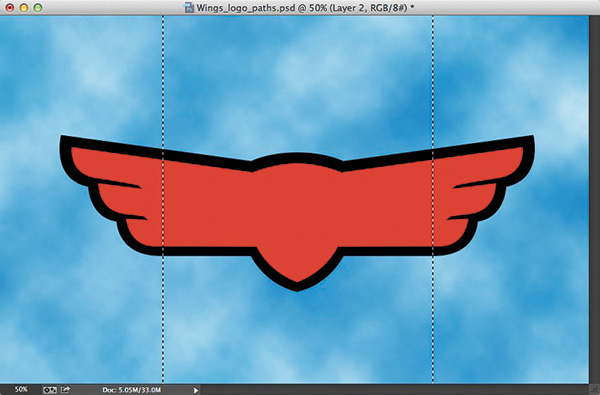
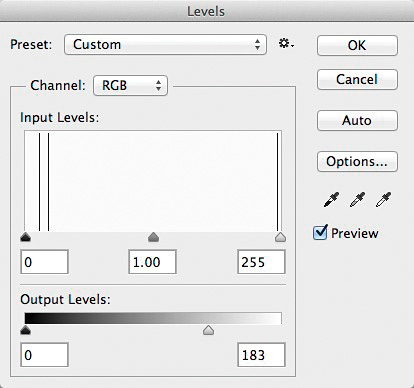
STEP TWO: Choose the Single Column Marquee tool (under the Rectangular Marquee tool [M]) and click once to make a selection on the left side of the wing. Hold the Shift key to add to the selection and make a selection on the right side of the wing. Press Command-L (PC: Ctrl-L) to bring up the Levels dialog. Move the Highlight Output Levels slider (on the lower right) to 183, and click OK. Deselect.
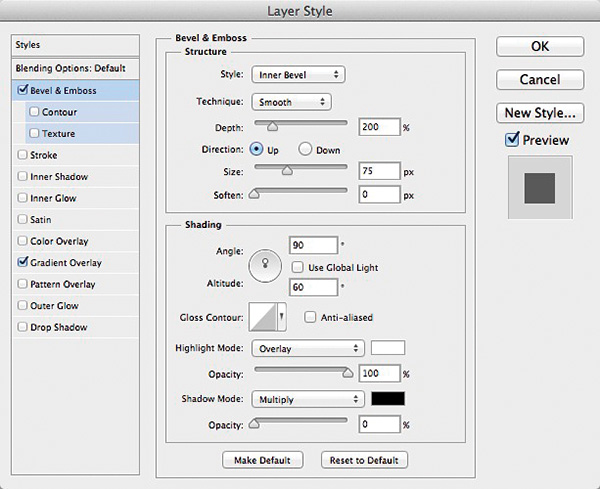
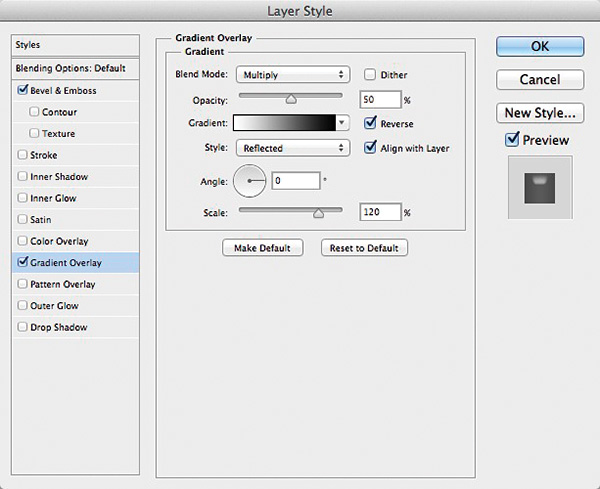
STEP THREE: Click on the Add a Layer Style icon (Æ’x) at the bottom of the Layers panel and choose Bevel & Emboss. Enter 200% for Depth and 75 px for Size. Uncheck Use Global Light and enter 90° for Angle and 60° for Altitude. Choose Overlay as the Highlight Mode, raise the Highlight Mode Opacity to 100%, and lower the Shadow Mode Opacity to 0%. Now, choose Gradient Overlay from the Styles list on the left side of the Layer Style dialog. Choose Multiply as the Blend Mode, enter 50% for Opacity, check the Reverse box, choose Reflected as the Style, and enter 0° for Angle and 120% for Scale. Click OK to apply the layer styles.

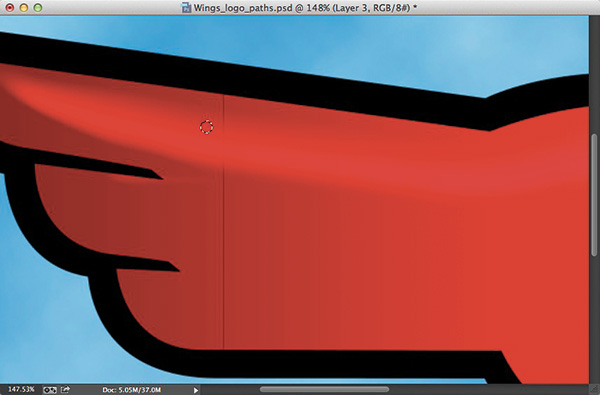
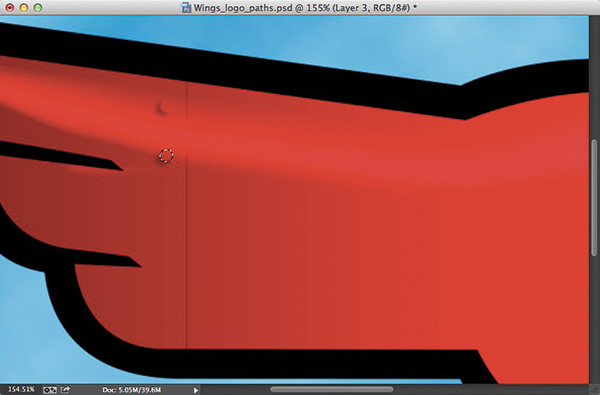
STEP FOUR: Add a new layer (Layer 3). Choose the Elliptical Marquee tool (under the Rectangular Marquee tool [M]). While holding the Shift key (to constrain the selection), click-and-drag a small circular selection on the left side of the wing just to the left of the dark vertical line we created in Step Two. Fill the selection with the red Foreground color. Click the Add a Layer Style icon and choose Drop Shadow. Simply click OK to apply the default settings. Now, while pressing Shift-Option-Command (PC: Shift-Alt-Ctrl), click-and-drag the selection down to duplicate the rivet. Repeat until you've created rivets on both sides of the dark vertical line (release the Shift key to copy your first rivet to the right side of the dark vertical line). Create rivets on the right side of the wing, as well.

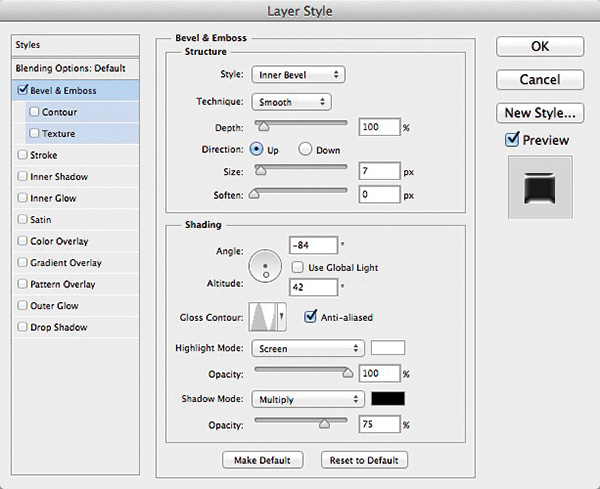
STEP FIVE: Choose a light blue for the Foreground Color (R:112, G:166, B:204), and add a new layer (Layer 4). Command-click (PC: Ctrl-click) on Path 3 in the Paths panel and fill the selection with the light blue. Click on the Add a Layer Style icon and choose Bevel & Emboss. Enter 100% for Depth and 7 px for Size. Uncheck Use Global Light and enter -84° for Angle and 42° for Altitude. Click on the down-facing arrow next to the Gloss Contour thumbnail and choose Ring. Enter 100% for the Highlight Mode Opacity and click OK.


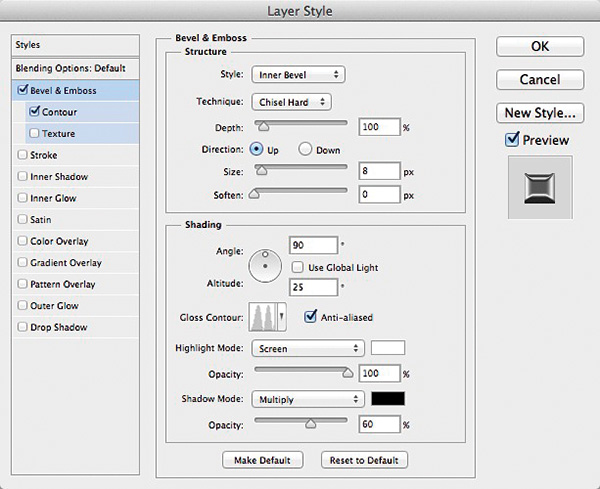
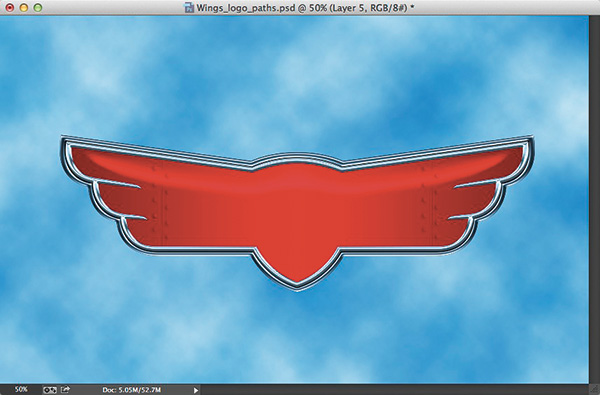
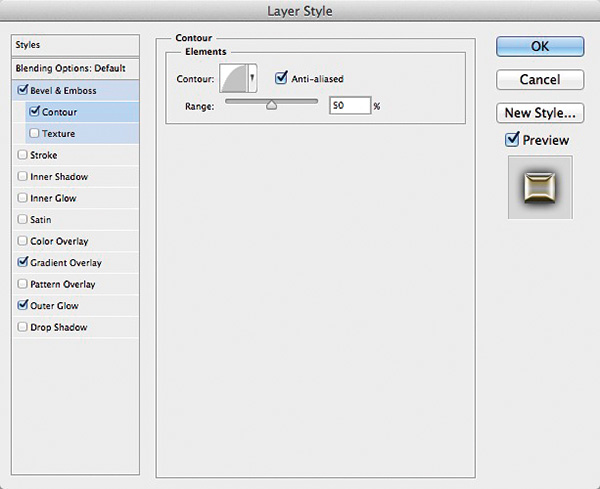
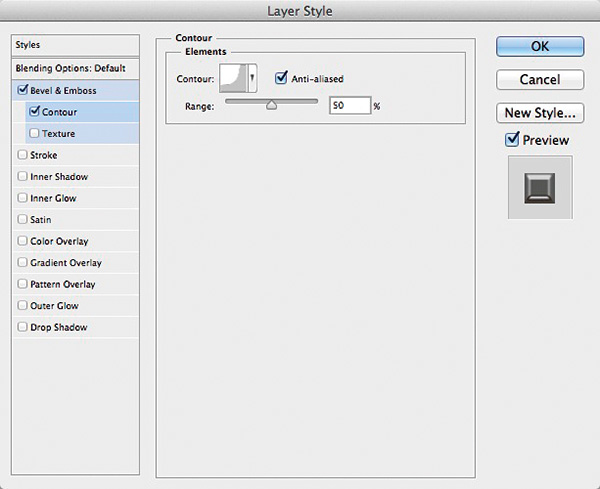
STEP SIX: Choose an even lighter blue for the Foreground color (R:168, G:215, B:243), and add a new layer (Layer 5). Command-click (PC: Ctrl-click) on Path 4 and fill the selection with the blue. Click on the Add a Layer Style icon and choose Bevel & Emboss. Set the Technique to Chisel Hard, and enter 100% for Depth and 8 px for Size. Uncheck Use Global Light and enter 90° for Angle and 25° for Altitude. Click on the down-facing arrow next to the Gloss Contour thumbnail and choose Ring - Double. Enter 100% for the Highlight Mode Opacity and 60% for the Shadow Mode Opacity. Choose Contour from the Styles list under Bevel & Emboss. Set the Contour to Half Round, but don't click OK yet.
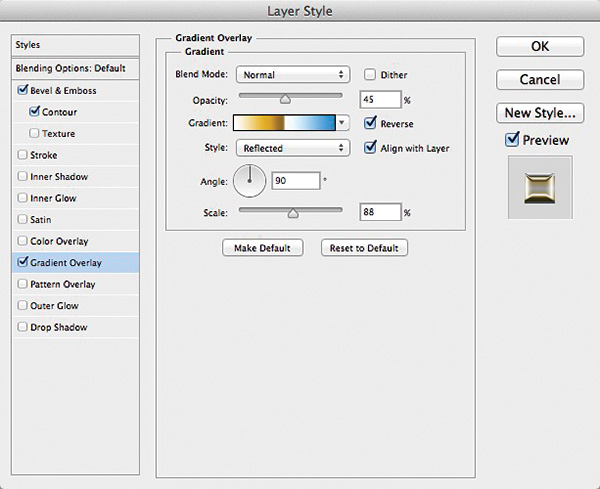
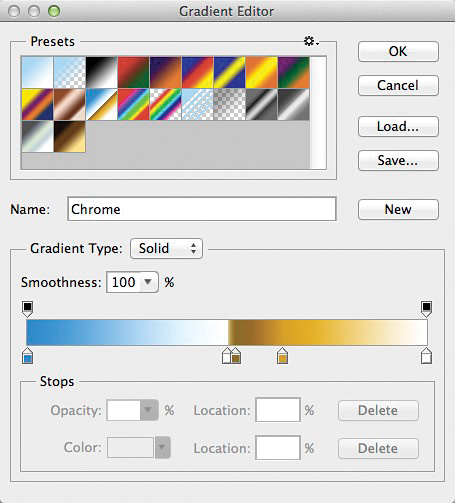
STEP SEVEN: Choose Gradient Overlay from the Styles list. Click on the Gradient thumbnail to open the Gradient Editor, choose the Chrome preset, and click OK. Lower the Opacity to 45%, check the Reverse box, choose Reflected as the Style, and enter 88% for Scale.

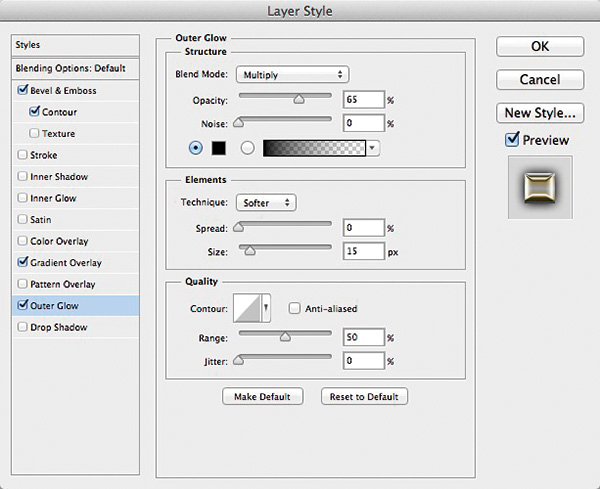
STEP EIGHT: Now, choose Outer Glow from the Styles list. Choose Multiply as the Blend Mode, and lower the Opacity to 65%. Click on the yellow color swatch, choose black as the color, and click OK. Enter 15 px for Size and click OK to apply the layer styles.

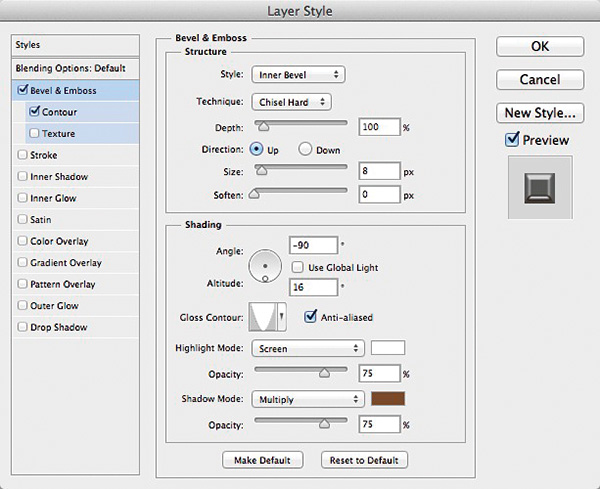
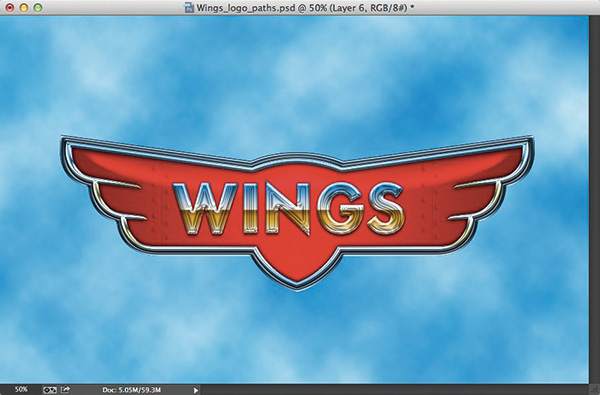
STEP NINE: Choose the Gradient tool (G) from the Toolbox. Click on the Gradient thumbnail in the Options Bar, choose the Chrome preset, and click OK. Add a new layer (Layer 6). Command-click (PC: Ctrl-click) on Path 5. Hold the Shift key, and click-and-drag a linear gradient from the top toward the bottom of the selection. Click on the Add a Layer Style icon and choose Bevel & Emboss. Set the Technique to Chisel Hard, and enter 100% for Depth and 8 px for Size. Uncheck Use Global Light and enter -90° for Angle and 16° for Altitude. Click on the down-facing arrow next to the Gloss Contour thumbnail and choose Cone - Inverted. Click on the Shadow Mode color swatch, choose a light-brown color (R:127, G:72, B:35), and click OK to close the Color Picker. Choose Contour from the Styles list under Bevel & Emboss. Choose Cove - Deep for the Contour, but don't apply the style yet.
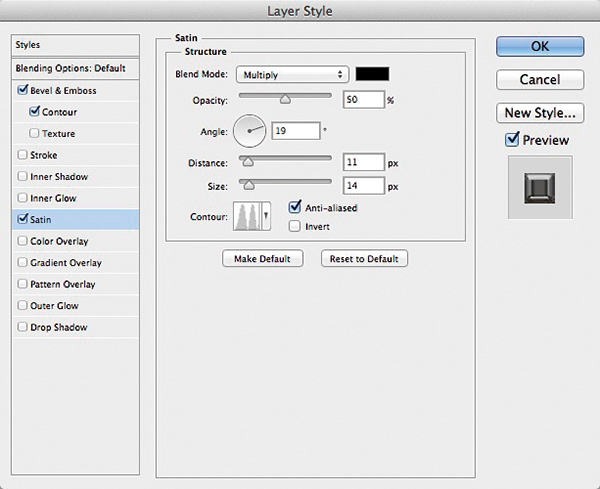
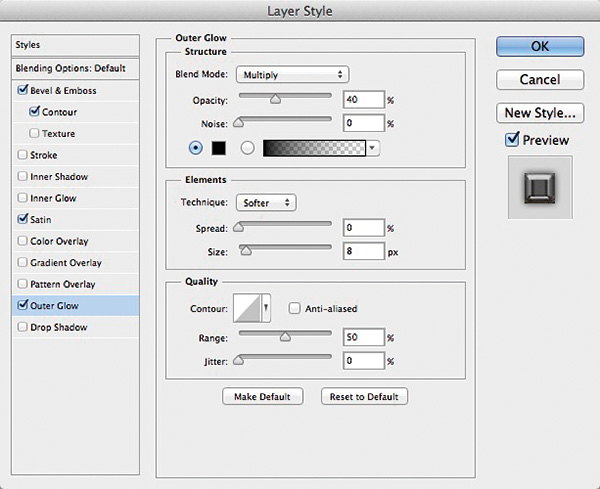
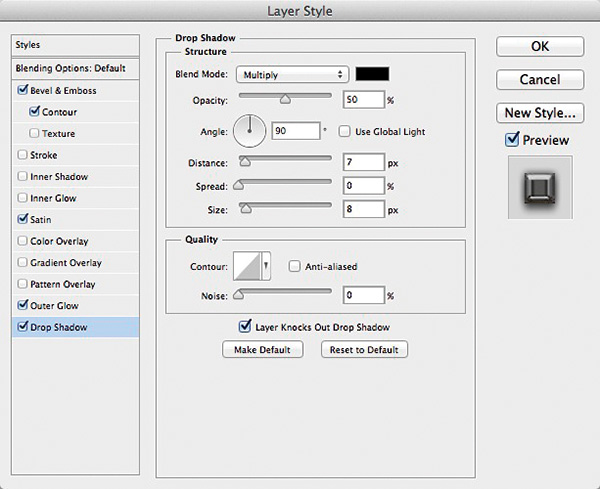
STEP TEN: Choose Satin from the Styles list. Click on the down-facing arrow next to the Contour thumbnail and choose Ring - Double. Choose Outer Glow from the Styles list. Choose Multiply as the Blend Mode and enter 40% for Opacity. Click on the color swatch, choose black, and click OK. Enter 8 px for Size. Choose Drop Shadow from the Styles list. Lower the Opacity to 50%; uncheck Use Global Light; and enter 90° for Angle, 7 px for Distance, and 8 px for Size. Click OK to apply the layer styles.
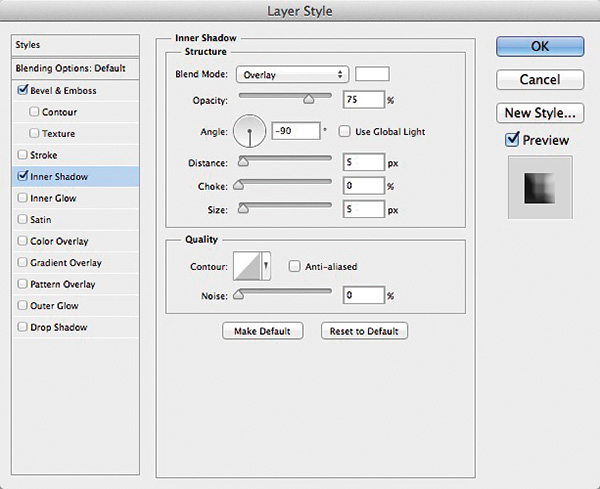
STEP ELEVEN: Change the Foreground color to a darker blue (R:104, G:135, B:177). Choose the Gradient tool, and click on the Gradient thumbnail in the Options Bar. Choose the Foreground to Background preset, and click OK. Add a new layer (Layer 7). Command-click (PC: Ctrl-click) on Path 6 in the Paths panel. Hold the Shift key, and click-and-drag a gradient from the center toward the top of the selection. Click on the Add a Layer Style icon and choose Bevel & Emboss. Choose Smooth as the Technique and enter 150 for both Depth and Size. Choose Inner Shadow from the Styles list. Choose Overlay as the Blend Mode, click on the color swatch, choose white as the color, and click OK. Uncheck Use Global Light and enter -90° for Angle. Don't click OK yet.

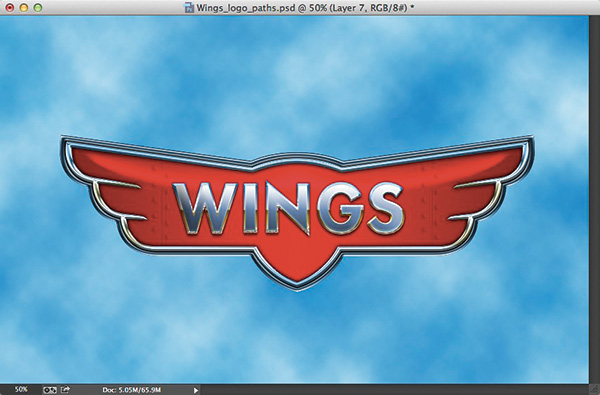
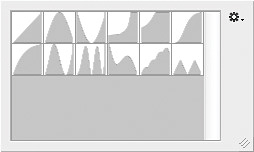
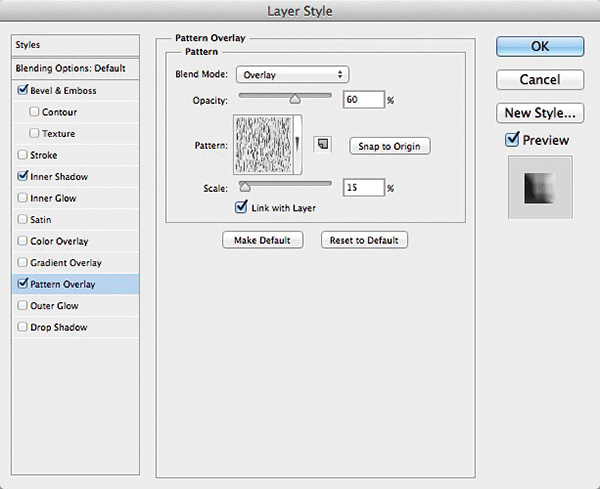
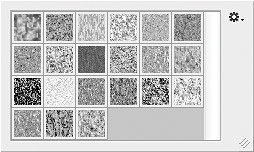
STEP TWELVE: Choose Pattern Overlay from the Styles list. Choose Overlay as the Blend Mode and lower the Opacity to 60%. Click on the Pattern thumbnail, click on the gear icon at the top right of the Pattern Picker, and select Texture Fill at the bottom of the menu. Click OK to load this set of patterns, and choose Bark. Enter 15% for Scale. Choose Outer Glow from the Styles list, and change the Blend Mode to Multiply. Click on the color swatch, choose a blue color (R:104, G:131, B:163), and click OK. Click OK to apply the layer styles. Deselect.

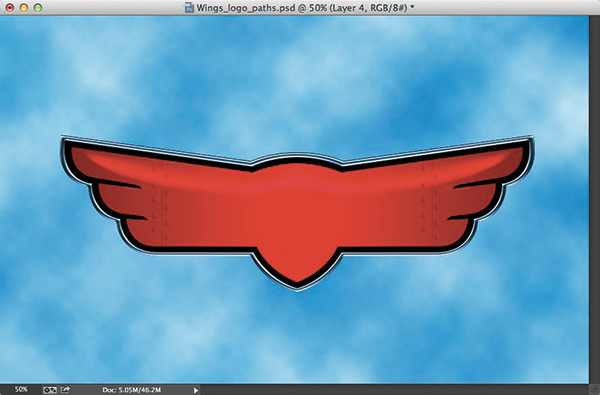
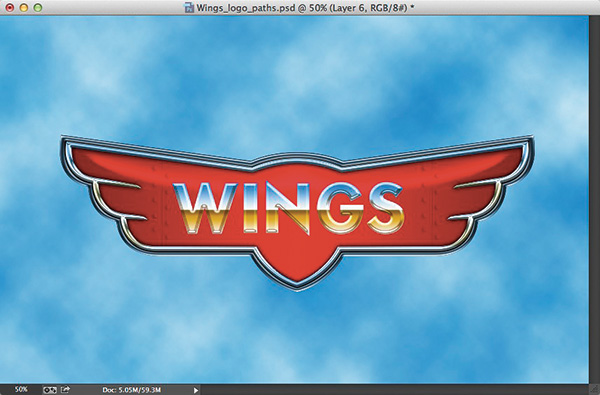
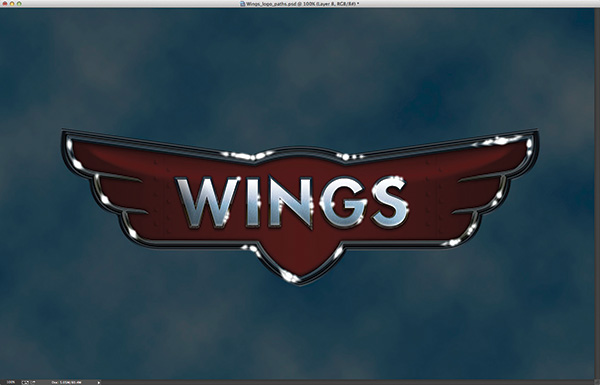
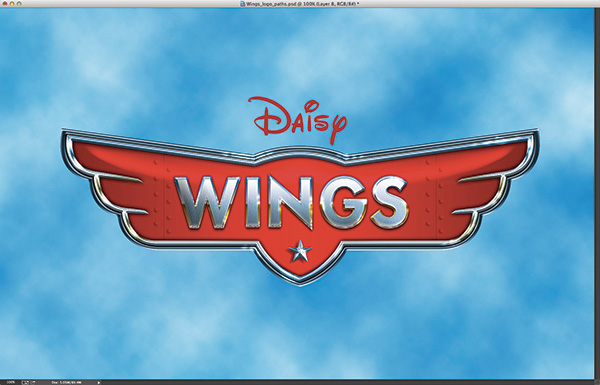
 STEP THIRTEEN: Add another new layer (Layer 8). Change the layer blend mode to Overlay in the Layers panel. Choose the Brush tool (B). Using a small, soft-edged brush set to white, paint some highlight areas over the chrome edges of the wing and sides of the letters (see example). We've added some text and a small star to complete the effect.
This article is courtesy of Photoshop User magazine, the official publication of KelbyOne, which provides quality online education for creative people. For more information, visit KelbyOne.com.

Thank you! Great lesson!