

Hollywood films, such as the recent Boxtrolls, are wonderful examples of how to achieve a dramatic moody look through the use of carefully directed light and shadow, the play of warm and cool colors, and subtle inclusion of atmospheric effects like mist. In today's tutorial, we'll use Photoshop's blend modes, filters, and masks to transform a portrait from mundane to mysteriously enchanting.
Step 1: Add Richness to the Overall Scene
Open a scene that contains a foreground subject in front of a background. Click the Create a new layer icon at the base of the Layers panel. Press D to set the default Foreground and Background colors. Press Option-Delete (PC: Alt-Backspace) to fill the layer with black. Change the blend mode to Soft Light. Notice how the scene is darker and more saturated. If the effect is too strong, reduce the layer's opacity until it looks good.
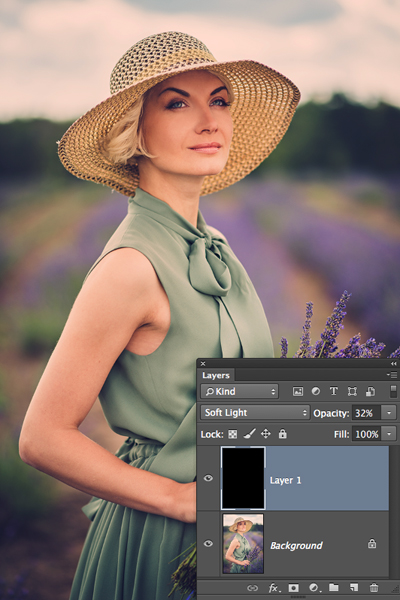
CREDIT: ©Nejron Photo/Shutterstock
Step 2: Paint Accent Light
Some of the most dramatic lighting is created by bouncing light off a metallic reflector and into targeted regions of the subject. We'll mimic this look with a pair of layers set to different blend modes. Click the Create a new layer icon. Set the blend mode to Overlay. Press D to set the default Foreground and Background colors. Press X to swap white to the foreground. Use a soft-edged brush set to 10 or 20% opacity to build light into strategic regions such as the eyes, lips, upper cheeks, interior of the hat, and the lavender bundle. As you paint, imagine that you are adding drama to the scene.
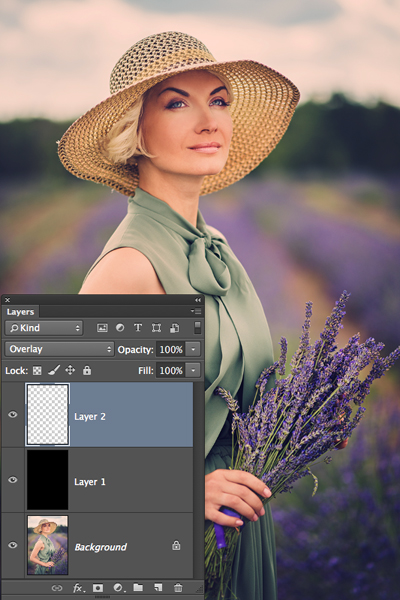
Now let's add more diffused, hazy looking light in select regions. Click the Create a new layer icon. Set the blend mode to Soft Light. Ensure that white is still the foreground color. Use a soft-edged brush set to low opacity to add faint, diffused light to key areas that already contain light, such as the spot where the model's hat exhibits transparency just above her eye.
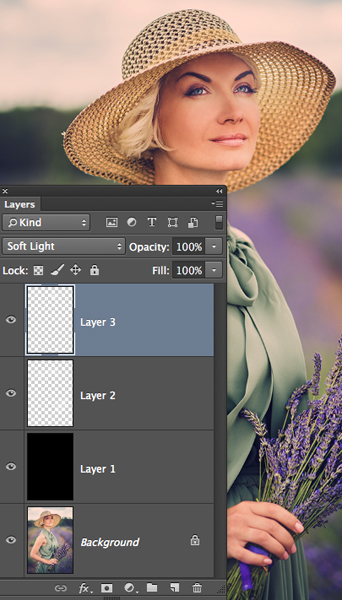
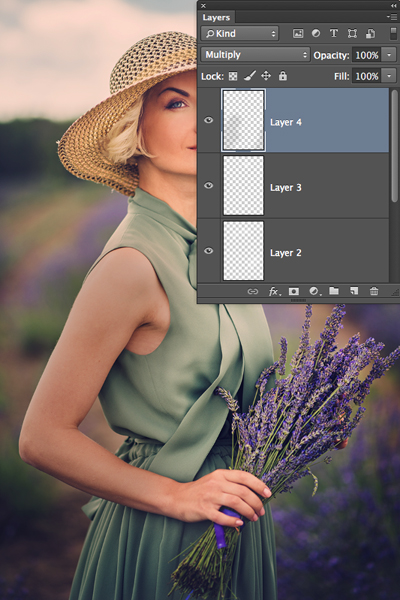
Step 3: Paint Shadow
Since the human eye tends to visit bright areas and ignore dark areas, let's paint shadow into less important regions. Click the Create a new layer icon. Set the blend mode to Multiply. Tap X to set black as the Foreground color. Use a soft-edged brush set to 10 or 20% opacity to paint shadows into areas such as the model's arm and the lower corners.
Step 4: Paint Warm Light
Warm light in strategic foreground areas will further attract the viewer's eye. Click the Create a new layer icon. Set the blend mode to Color. Click the Foreground color chip. Choose a vibrant orange color with values close to R: 255, G: 174, and B: 0. Click OK. Use a soft-edged brush set to 5 or 10% opacity to add subtle warm light to the area around the eyes.
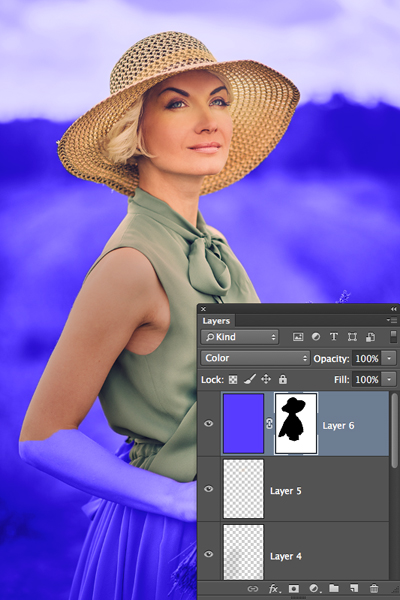
Step 5: Add Cool Background Light
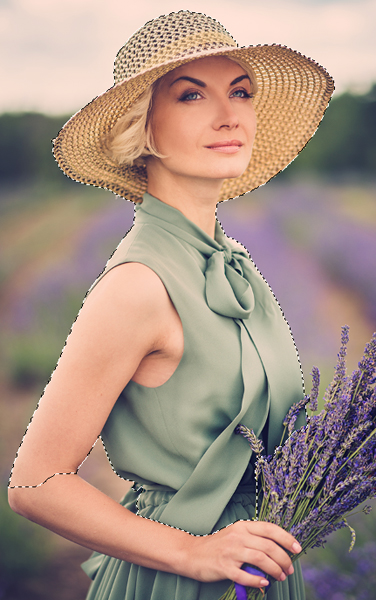
Cool light in the most distant parts of the scene implies distance and creates a pleasing cool/warm background/foreground juxtaposition. Click the Create a new layer icon. Set the blend mode to Color. Click the Foreground color chip. Choose a bold purplish-blue color with values close to R: 88, G: 60, and B: 255. Click OK. Press Option-Delete (PC: Alt-Backspace) to fill the layer with cold light. To isolate the light to the distant background, we'll need to select the model. While holding Option (PC: Alt), click the layer visibility (eyeball) icon next to the Background layer. Activate the Background layer and choose the Quick Selection tool. Paint over the subject to select her body from roughly the elbow up. Don't worry about selecting the below-waist region or the lavender bundle. If you overpaint, press Option (PC: Alt) and paint undesired selection areas away.
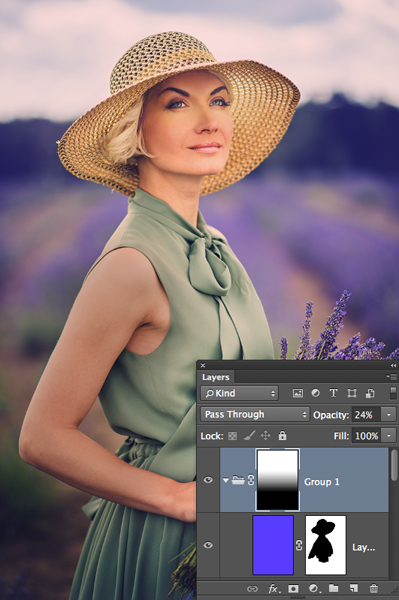
While holding Option (PC: Alt), click the layer visibility icon next to the Background layer to restore visibility to all layers. Activate the top (blue) layer and click the Add layer mask icon at the base of the Layers panel. Press Command-I (PC: Control-I) to invert the mask.
To fade the effect so it affects only the distant lavender field, the trees, and the sky, we'll create a group, add a mask, and apply a gradient to the mask. With the blue layer active, press Command-G (PC: Control-G) to add the layer to a group. Click the Add layer mask icon. Activate the Gradient tool. Ensure that black is the Foreground color. In the Options Bar, open the Gradient picker and choose Foreground to Transparent. Ensure that the Linear Gradient option is selected. Drag a gradient from the model's elbow to her neck. Drop the group's opacity to around 25% to make the cooling effect less intense.
Step 6: Add Subtle Mist
Let's finish the look by adding a subtle mist effect. Click the Create a new layer icon. Since the new layer is deposited in the cool blue group, drag the layer up and out of the group. Press D to set the default Foreground and Background colors. Choose Filter>Render>Clouds. Change the blend mode to Screen. Press Command-T (PC: Control-T) to invoke Free Transform. While holding Option (PC: Alt), drag the far right handle outward to stretch the mist horizontally. Now, drag the upper center handle upward to stretch the mist vertically.
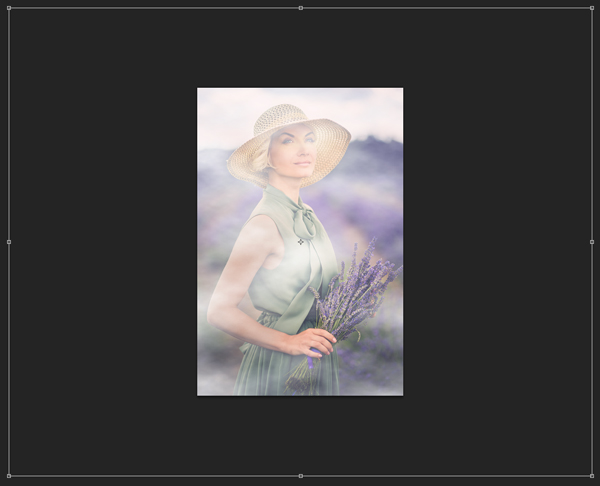
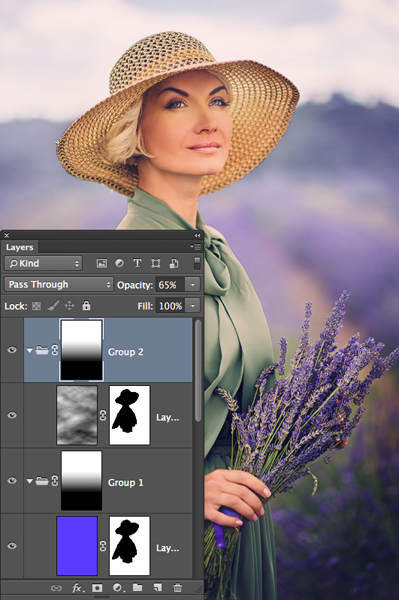
Press Return (PC: Enter). Since the mist should not obscure the model, Option-drag (PC: Alt-drag) the mask for the cool blue layer to the mist layer. Press Command-G (PC: Control-G) to add the layer to a group. Option-drag (PC: Alt-drag) the mask for the cool blue group (Group 1) to the mist group (Group 2). Reduce the group's opacity to make the mist effect more faint.
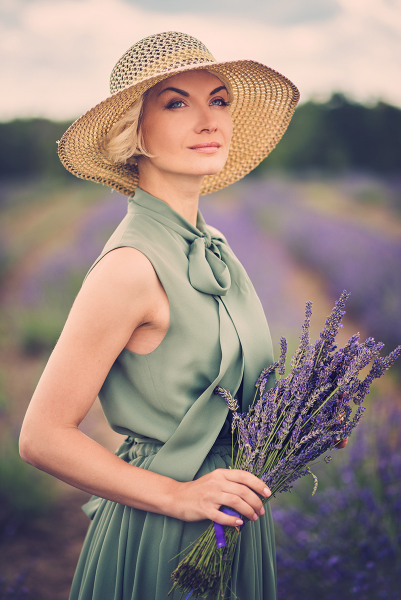
Here's a look at the original imageâ¦

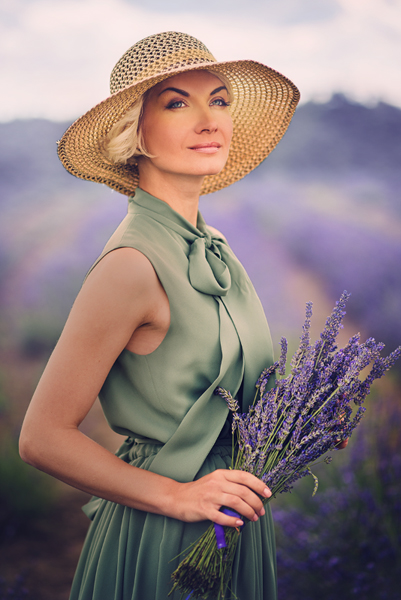
â¦and here's the completed dramatic effect.
Mark S. Johnson Photography
msjphotography.com
