Putting A Frame On Peripheral Vision

Panoramic cameras have been around almost as long as photography itself. In high school, I began my career as a perennial sophomore by running from one end of my class behind the group to appear a second time in the picture, taken with an archaic Cirkut camera with a slowly rotating lens.
We see panoramas constantly through peripheral vision. Our fascination with panoramic photos lies in the ability to examine details in an ultrawide, framed view, something peripheral vision can’t provide.
Indeed, before the first panoramic camera appeared in 1843, cycloramic paintings were one of the big tourist attractions of the 19th century. Two of the most famous surviving cycloramas are at Gettysburg battlefield and in Atlanta, Georgia.
Panoramic photography is enjoying a new tide of popularity through digital cameras with several applications available to “stitch” consecutive views together into a single, nearly seamless image. Additional, virtual reality software has made possible panoramas that can be scrolled on-screen.
I made my first panorama in 1960 by pasting together 18 consecutive b&w prints together to create a 260 degree (don’t ask why, I don’t know) view of Honolulu harbor. This yellowing monster is nearly 4 feet long and impossible to display.
When Layers appeared in Photoshop, I resumed my love affair with panoramas and although I’ve tried several stitching applications, Photoshop remains my favorite tool for creating these unusual images.
Shooting For Panoramic Images
Purists claim a “perfect” panorama must be made with a tripod equipped with a rotating, leveling head to ensure the film plane is perpendicular to the subject. While this technique does produce images with less distortion, the equipment can be expensive and cumbersome to set up.
My approach to shooting panoramas is a bit more relaxed, using a hand-held camera and matching each adjacent view using the LCD monitor of my camera. Nor do I hold with the concept that panorama shots must be level. Many of my best have been shot from high places looking down. Extreme distortion may result but that’s why Photoshop has Image Transform.
I’m not trying to fool anyone into thinking what he’s looking at is a single image from the camera. I am trying to create an impression of a peripheral vision view with interesting detail. The three-image panorama of Niagara Falls at the beginning of this column is a good example.
The one important rule to follow is to overlap each adjacent image. I try for about one-third overlap from frame to frame.
Do a dry run through your views to determine where the center of your viewfinder should be for each image. Look for natural places for overlap: vertical buildings, poles and other structures are good.
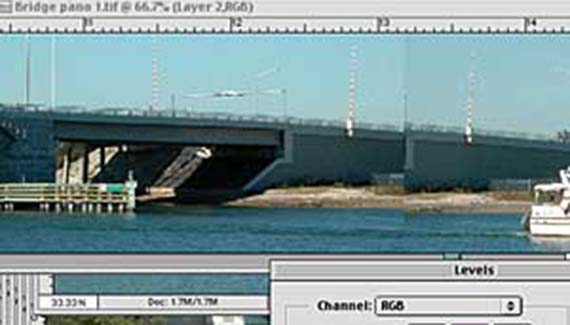
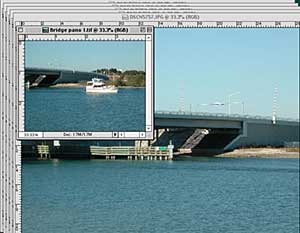
It’s natural but not necessary to shoot from one end to another. In the example I’m using in this “how to,” the boat came through the bridge just as I finished my dry run so that was the first shot. I built the rest of the panorama from that.
Many digital cameras have a special exposure mode for panoramas, shooting each frame with the same exposure of the first picture. I’ve used this feature on my Nikon 990 and don’t find it too useful.
After you’ve made your exposures, review them in the LCD in Play mode. Don’t be afraid to try to reshoot a single image if, for some reason, it’s not a good shot.
Creating A Panorama In Photoshop
Once you’ve downloaded your images from camera/card to your computer, segregate the panorama images into a folder of their own. As a Mac user, I review mine in Cameraid and rename them (Pano 1, Pano 2, etc.).

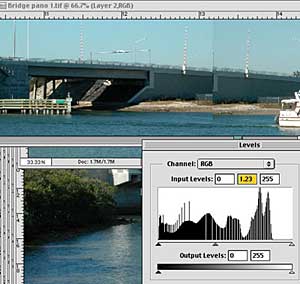
Step 1: In Photoshop, open all the files (or one of the end images if you’re not using version 6.0). Estimate how long you want your finished panorama to be and then perform an Image>Image Size to create an image with the right vertical measurement. I used 3 inches in this example.
Use Command (PC-Control)-J to send the image to a layer of its own, then select the background layer and delete it (Command (PC-Control)-Delete).

Step 2: Then go to Image>Canvas Size and set the base point to one end or the other (I used the right) and set a new width for the canvas. Be generous although the file size may grow huge: you’ll crop the finished image. I chose 18 inches for my width. It’s not a bad idea to give yourself a little wiggle room top and bottom on the canvas.
Perform a “Save As” and rename the file.

Next week, we’ll complete the steps in creating a basic panorama.
Last week’s column on Carol Rollick’s scanned flower arrangements stirred a wave of response from readers and other botanical scanner artists. I’ve no doubt that dozens of people across the country are building background boxes for their scanners and hoping the crocuses will pop through the snow.
One of the more interesting responses came from Ellen Hoverkamp of West Haven, CT, who does beautiful scans and sells them as greeting and note cards. Take a look at Ellen’s spectacular work at http://www.myneighborsgarden.com
Ellen’s website then linked me to Mark Charneski’s Fresh Flower Scans (http://www.geocities.com/TheTropics/Island/6801/mark/marks.html) where the artists offers free downloads of blossoms for personal use only.

