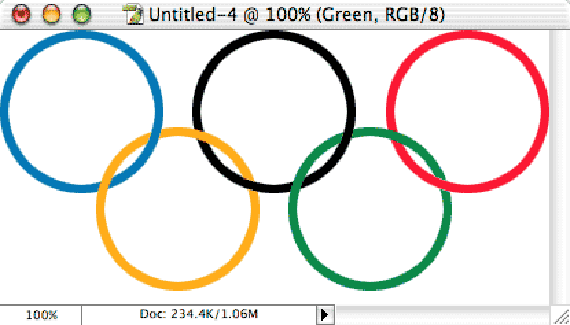
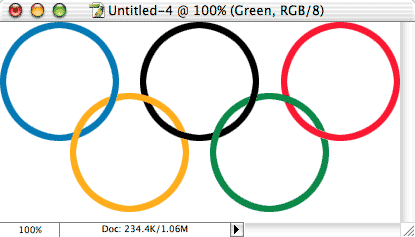
Sometimes you need to make it appear that the content of one layer appears both in front of and behind another layer. One example is the Olympic rings. The rings appear to be linked, with each ring “passing through” another. Here’s an easy way to handle that problem.
CREATING THE OLYMPIC RINGS:
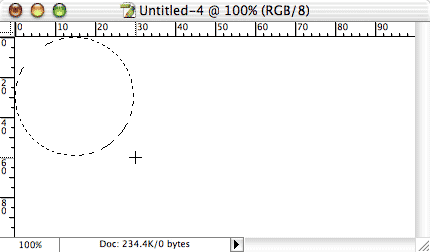
We’ll start with a new blank image. I’m working with a 400 pixel by 200 pixel RGB original. Add a new layer (don’t work on the “Background” layer). In the Toolbox, select the Elliptical Marquee tool. Hold down the Shift key (to ensure that the selection is perfectly round) and drag a circle from the upper-left corner of your image. The circular selection should be about 30% the width of your canvas.
TIP: Press Command-R (Mac) or Control-R (Windows) to show the Rulers. Control-click (one-button mouse) or right-click (multi-button mouse) on one of the Rulers and select Percent.
[OPTIONAL: You can name each of the layers in your artwork according to the content, in this case we can use the color of each ring. Double-click the name in the Layers palette and type the new name, then press Enter or Return on the keyboard.]
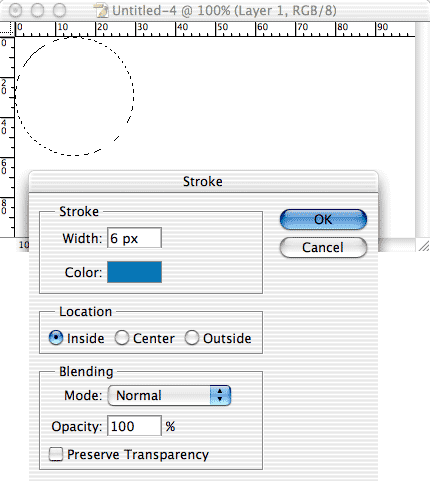
Select the color for the first of your rings. Use the menu command Edit> Stroke. Select an appropriate width (I’ll use 6 pixels) and select Inside. Leave the blending mode set to Normal and the opacity at 100% (unless, of course, you’re creating a special effect for a more elaborate piece of artwork). Click OK.
Click the New Layer button at the bottom of the Layers palette to add a new layer. With the selection tool still active, Shift-drag the active selection to the right, into the upper-center of the image. (When dragging, the Shift key constrains the drag to 45-degree angles. In this case, it makes sure that the next Olympic ring is perfectly aligned with the first.) Make the foreground color black (the color of the upper-center ring) and again use the Edit> Stroke command.
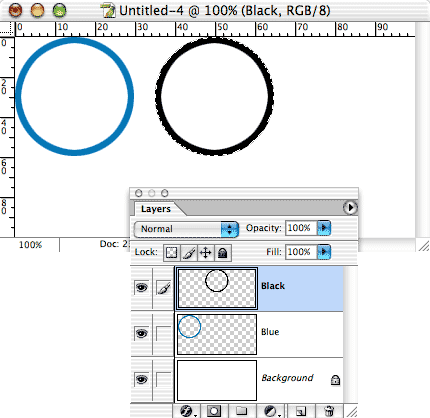
Add a new layer, Shift-drag the selection, and stroke with the appropriate color until you’ve created all five of the Olympic rings.
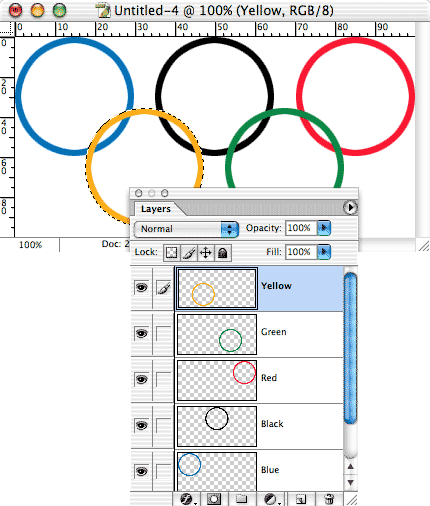
INTERLEAVING THE LAYERS:
Now that the rings are created, each on a separate layer, it’s time to link them.
In the Olympic rings, the yellow ring appears to be in front of the bottom of the blue ring, but behind the blue ring to the right, linking the two rings. In this example, the yellow ring is on a layer above the blue ring, so it appears in front of the blue ring. To make the yellow ring appear to be going through the blue ring, we’ll simply erase a small part of the yellow ring.
To ensure that we make a very precise erasure, we’ll start with a selection. In the layers palette the yellow ring’s layer is the active layer (because that’s where we want to erase), but we can Command-click (Mac) or Control-click (Windows) on the thumbnail of the blue layer to select that layer’s content.
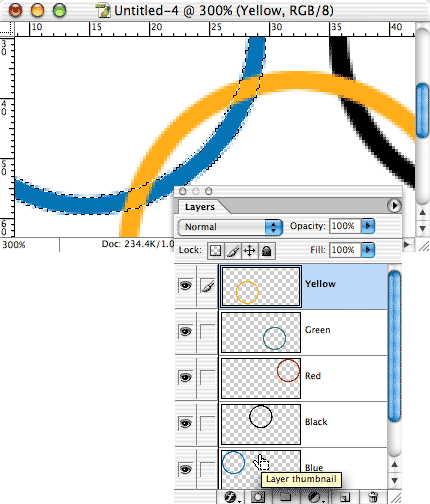
Now, using the Eraser tool and just about any size brush or the Eraser’s Block option, we can quickly –and, thanks to the selection, very precisely– erase only that part of the yellow ring that falls directly over the blue ring.
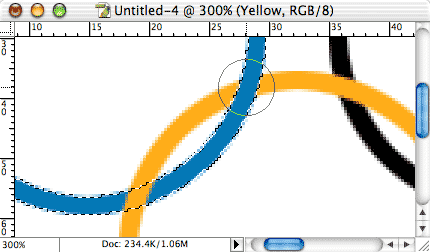
With the yellow layer still active in the Layers palette, Command-clicking or Control-clicking on the black ring’s layer makes another selection, enabling us to precisely erase the area where the yellow ring should appear to be passing behind the black ring.
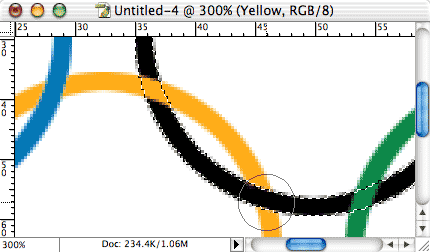
Leaving the selection active, we can click on the green layer in the Layers palette (to make that layer active) and quickly erase the area where the green ring should appear to pass behind the black ring. Leaving the green layer active and Command-clicking or Control-clicking on the red ring’s layer enables us to create the final “link” with one more click of the Eraser tool.
THE IMPORTANT LESSON:
When elements of your artwork are on separate layers, you can make one layer active, make a selection of another layer’s content, then erase the active layer to make it appear to be “behind” the selected layer.

