
This tutorial will show you how to use layer styles and some fireworks images to achieve a glossy, glittering gold text effect.
Tutorial Assets
1. Elsie Swash Caps
2. Polka Dot Pattern – white black by Aless1984
3. Fireworks0023 by C©sar Vonc: Fireworks0023_3, Fireworks0023_12, Fireworks0023_40 (Small)
4. Noisy pattern by Mladjan Antic
5. Free Pack 6000 photoshop gradients by Supertuts007 (Load the CHROMES.grd, DIALS.grd, and Goldmedal.grd files)
STEP ONE:
Choose File>New to create a new 1000×700 pixel document, and click OK. Click the Foreground color swatch at the bottom of the Toolbox, set the color to #665521, and click OK. Click the Background color swatch, set it to #1f150b, and click OK. Choose the Gradient tool (G), click the gradient thumbnail in the Options Bar, choose the Foreground to Background gradient, click OK to close the Gradient Editor, then click the Radial Gradient icon in the Options Bar.
Click-and-drag from the center of the document to one of the corners to create the background gradient. Click the Layers panel flyout menu, choose Duplicate Layer, and click OK and duplicate the Background layer.
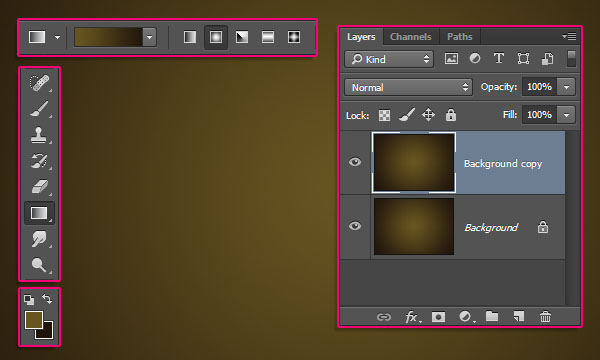
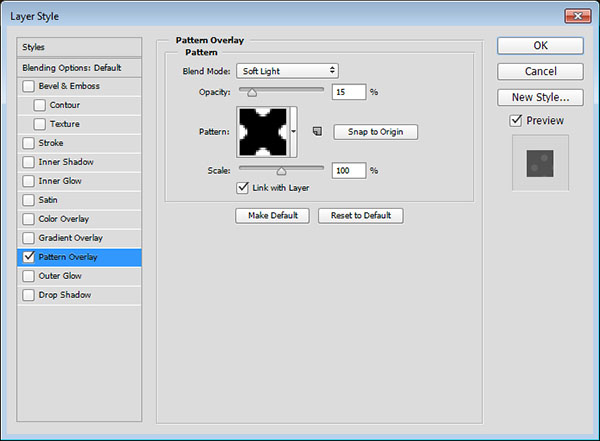
Double-click to the right of the Background copy layer name to open the Layer Style dialog. Choose Pattern Overlay from the Styles list on the left. Set the Blend Mode to Soft Light and Opacity to 15%. Now click the down-facing arrow next to the Pattern thumbnail, then click the gear icon, and choose Load Patterns from the list. Navigate to the Dots_whiteblack.pat download file and click Open. Scroll down in the Pattern thumbnails to Muster 36 and click to select it as the pattern. This will add a subtle polka dot pattern to the background.

STEP TWO:
Choose the Type tool (T), click the Foreground color swatch, choose #ac813d as the color, and click OK. In the Options Bar, set the font to Elsie Swash Caps Black and the size 200 pt. In the Character panel (Window>Character), set the Kerning to Optical. Now enter the text on separate layers. Select all three layers in the Layers panel and click the Align Horizontal Centers and Align Vertical Centers icons to line up your text.
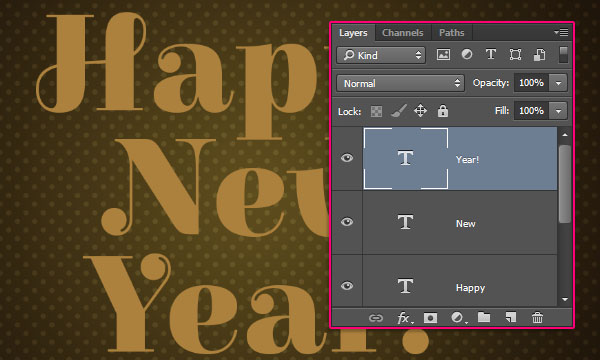
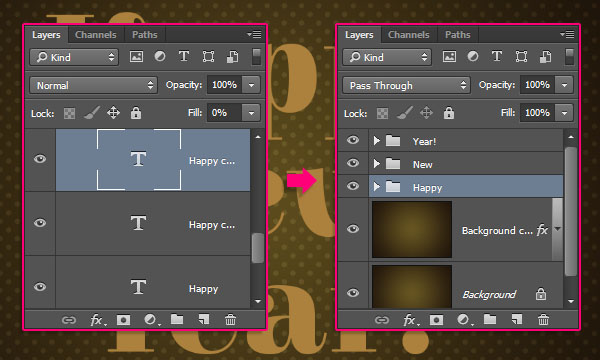
Duplicate each text layer twice, and change each second copy layer's Fill value to 0%. Now select all the layers for each line of text (e.g., all the layers for Happy) and click the Create a New Group icon at the bottom of the Layers panel to put each line in its own group. Click the group name and rename each group.
STEP THREE:
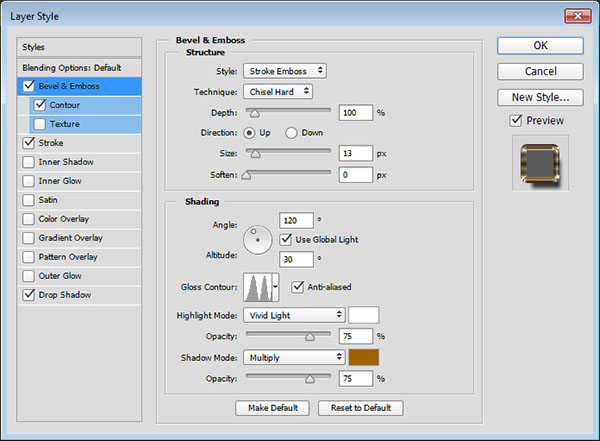
Double-click the original Happy text layer to open the Layer Style dialog. Choose Bevel & Emboss from the Styles list on the left, set the Style to Stroke Emboss, Technique to Chisel Hard, and Size to 13 px. Now click the down-facing arrow next to Gloss Contour and choose Ring - Double. Check the Anti-aliased box, set Highlight Mode to Vivid Light, click the Shadow Mode color swatch, choose #9f6100 as the color, and click OK to close the Color Picker.
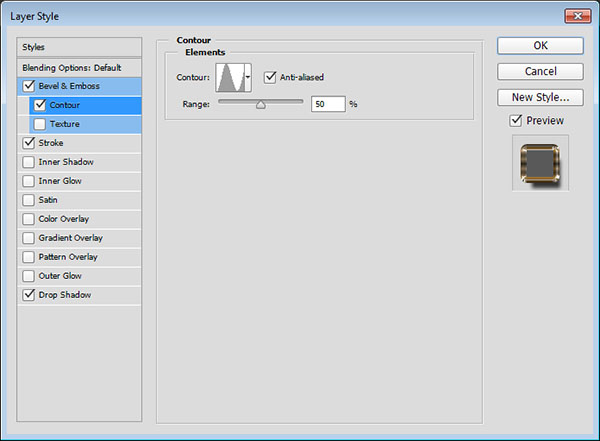
Choose Contour from the Styles list. Click the down-facing arrow next to the Contour thumbnail, choose Ring, then check the Anti-aliased box.
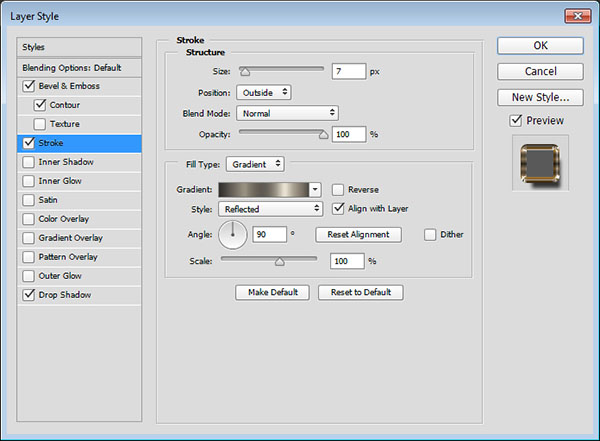
Click Stroke from the Styles list. Set Size to 7 px, Fill Type to Gradient, Style to Reflected, and Angle to 90°. Click the Gradient thumbnail, then click the Load button. Navigate to the 6000 Free Gradients download, select CHROMES.grd, DIALS.grd, and Goldmedal.grd, and click OK. Scroll down the thumbnails and choose the stove pipe 70 gradient fill.
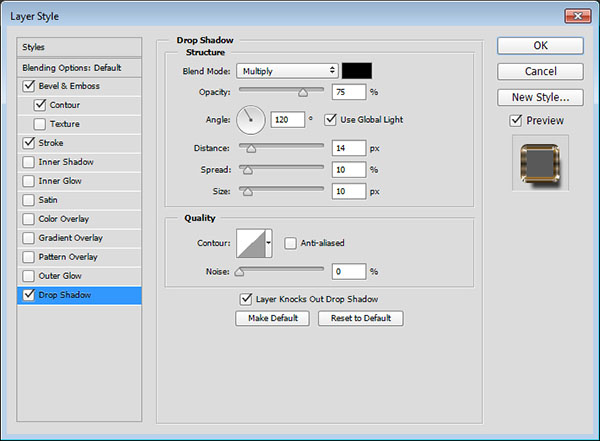
Now choose Drop Shadow from the Styles list. Set the Distance to 14, Spread to 10%, Size to 10 px, and click OK to apply the layer style. This will style the outer stroke part.

Right-click the styled layer and choose Copy Layer Style. Command-click (PC: Ctrl-click) the other original text layers, Right-click on either of them, and choose Paste Layer Style.

STEP FOUR:
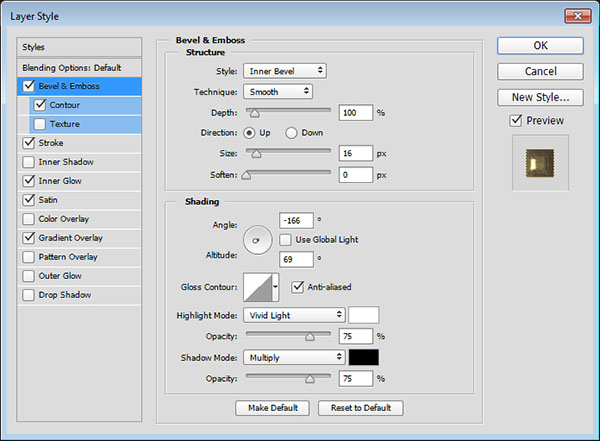
Double-click the Happy copy text layer to open the Layer Style dialog. Choose Bevel & Emboss on the left, set Size to 16 px, uncheck Use Global Light, set Angle to -166°, Altitude to 69°, and Highlight Mode to Vivid Light.
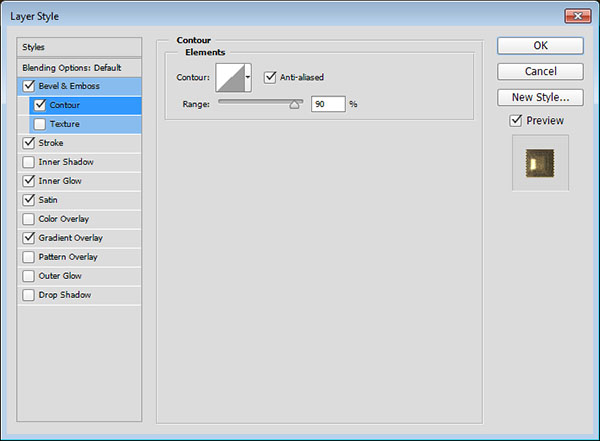
Choose Contour from the list on the left, check the Anti-aliased box, and set the Range to 90%.
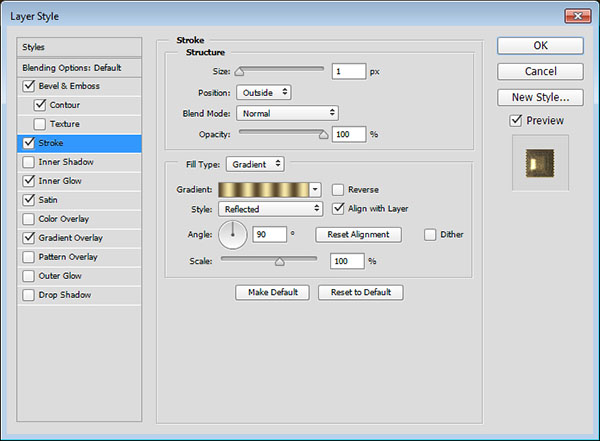
Click on Stroke in the list on the left. Set Size to 1 px, Fill Type to Gradient, Style to Reflected, and Angle to 90°. Click on the Gradient thumbnail, choose the Golden Dial Top X11 gradient, and click OK to close the Gradient Editor.
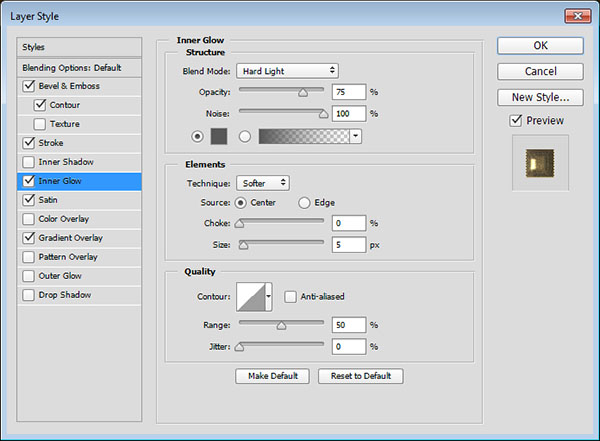
Now choose Inner Glow from the Styles list. Set the Blend Mode to Hard Light and Noise to 100%. Click the yellow color swatch, choose #585858, and click OK to close the Color Picker. Back in the Layer Style dialog, set the Source to Center.
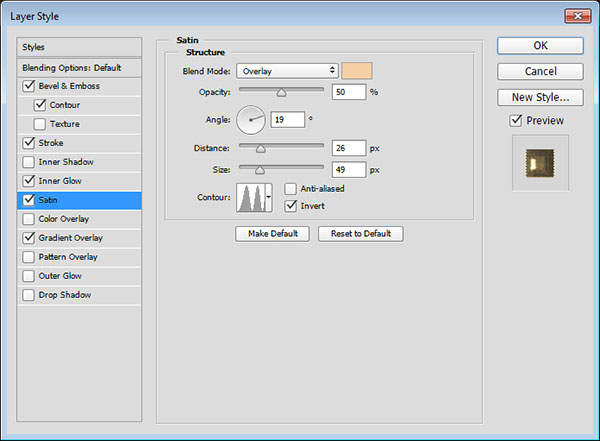
Select Satin from the list. Set the Blend Mode to Overlay, click the color swatch, choose #f4cfa3, and click OK to close the Color Picker. Set the Distance to 26 px, Size to 49, click the down-facing arrow next to the Contour thumbnail, and choose Ring - Double.
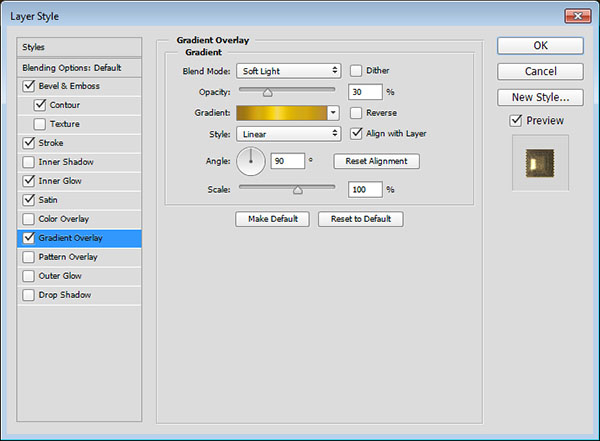
Finally, choose Gradient Overlay from the list. Set the Blend Mode to Soft Light and Opacity to 30%. Click the Gradient thumbnail, select the Gold Label 160 gradient, click OK to close the Gradient Editor, and click OK again to close the Layer Style dialog.
This will style the main glossy part of the effect. As before, copy-and-paste the layer style to the other two first copy text layers.

STEP FIVE:
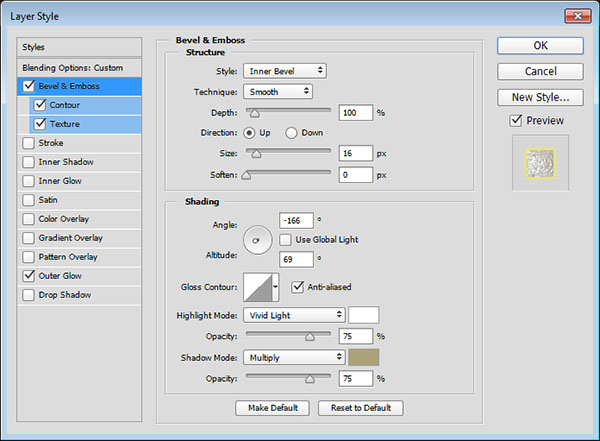
Double-click the Happy copy 2 text layer to open the Layer Style dialog, and choose Bevel & Emboss from the list. Set Size to 16 px, uncheck Use Global Light, set the Angle to -166°, Altitude to 69°, check the Anti-aliased box, and set Highlight Mode to Vivid Light. Click the Shadow Mode color swatch, choose #aba277, and click OK to close the Color Picker.
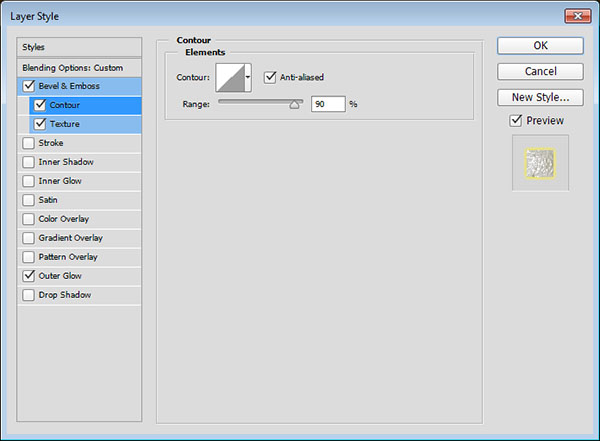
Choose Contour from the list on the left, check the Anti-aliased box, and set Range to 90%.
Select Texture from the Styles list. Set Pattern to Noisy (from the download files), and Depth to 500%.
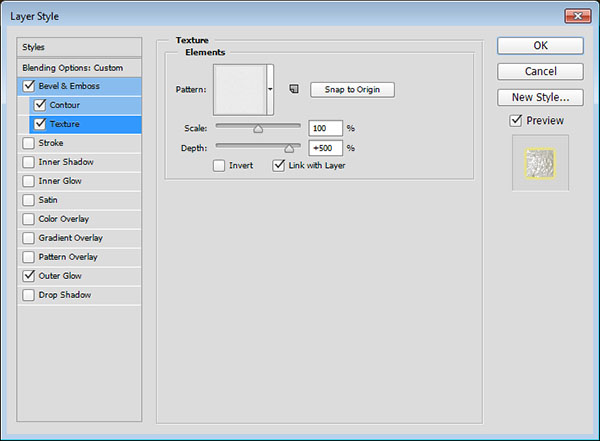
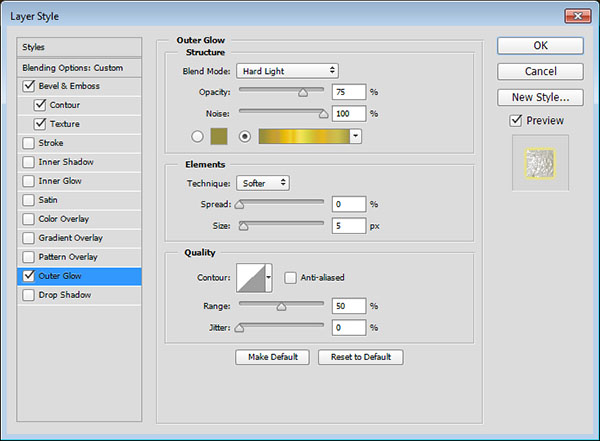
Now choose Outer Glow from the list, set Blend Mode to Hard Light, and Noise to 100%.
Click the gradient thumbnail in the Structure section, select the Gold Label 215z gradient, click OK to close the Gradient Picker, and click OK again to close the Layer Style dialog.
This will style the glittering part of the text. Copy-and-paste the layer style to the other copy 2 text layers.

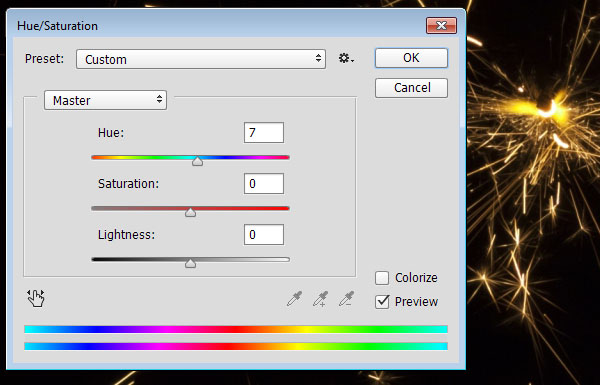
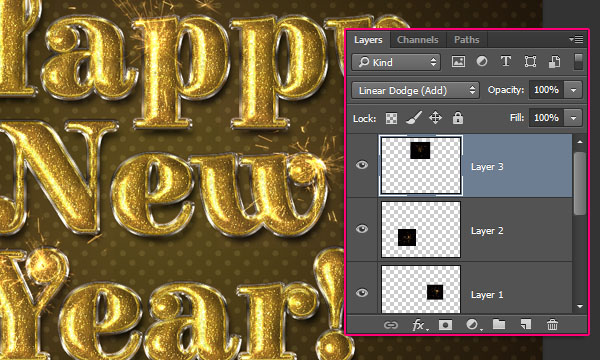
STEP SIX: Open the Fireworks Image 3 download file, choose the Move tool (V), and click-and-drag it into your working document. Make sure it's at the top of the layer stack. Go to Image>Adjustments>Hue/Saturation, change the Hue value to +7, and click OK to close the Hue/Saturation dialog.
In the Layers panel, change the blend mode to Linear Dodge (Add).
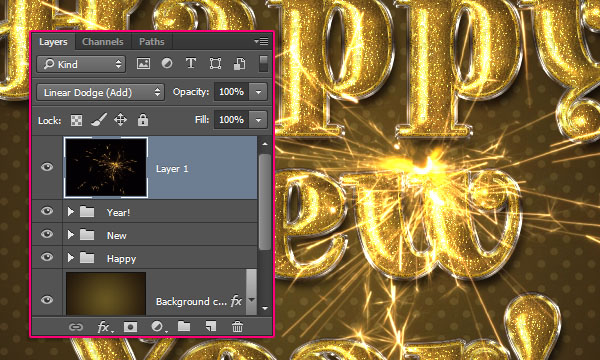
Choose Edit>Free Transform, resize and rotate the image as needed, place it on top of one of the letters, and press Enter to accept the changes transformation. Repeat Step Six for the rest of the Fireworks images.
Here's the final result. The many layer styles help create the glossy, shiny, and glittering effect, while the fireworks images add a nice touch to the final result. I hope you enjoyed the tutorial and found it helpful.