
Focus On Sharpening, Part 1

It’s generally understood in the Photoshop world that almost every image can benefit from judicious sharpening. Popping into the Unsharp Mask filter isn’t your only option. Understanding sharpening can help you make the right choices.
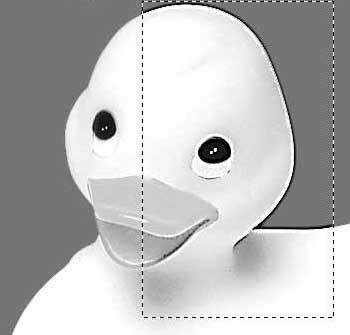
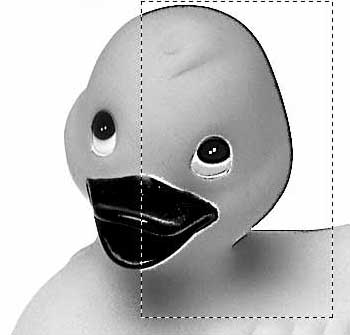
We sharpen images to improve the detail, making them seem more “in focus.” This is especially important after resampling a picture to change its size or resolution. The resampling process computes the color values of neighboring pixels and averages them, which reduces the contrast along edges. Sharpening increases the contrast where different colored pixels meet. To get a look at how it works, the now-ubiquitous rubber ducky has been placed on a highly-contrasting background and a ridiculously-high level of sharpening has been applied.

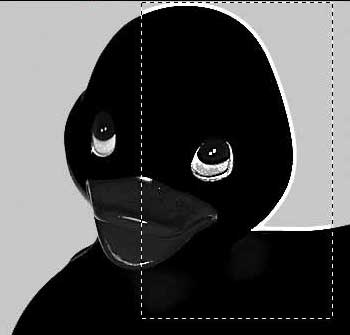
As you can see, sharpening has increased the contrast along the edges. This extreme application of sharpening has created strong contrast along the edges of the image. When we zoom in to 800%, we can see that two separate halos have been created, one on either side of the edge between the duck and the background. On one side, a light halo is created, on the other a dark halo has been added. This “double-haloing” is the core of sharpening in Photoshop.
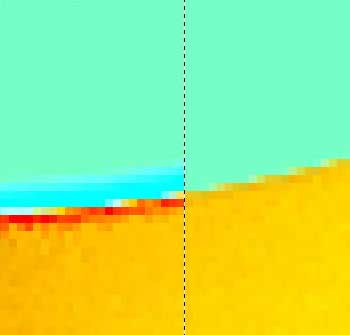
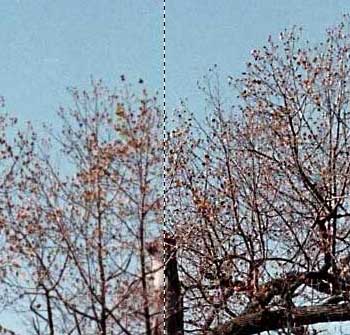
Another example of sharpening, this one far more realistic, shows how the double-haloing can effectively be used to make even very busy areas of detail “snap” and jump away from the background. Compare the left (unsharpened) and right (sharpened) sides of this image.
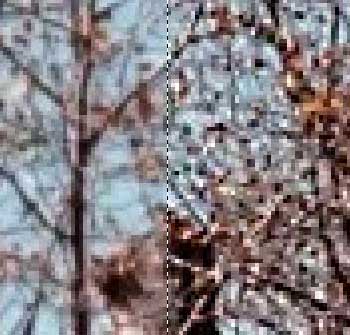
Zooming in, we can see that Photoshop had few straight lines to follow in creating the light and dark halos. The amount of detail and the fineness of that detail result in halos that are, in some cases, actually a lightening and darkening of the pixels that make up the detail. The branches and twigs that are hardly more than a pixel or two wide are themselves lightened and darkened to increase the contrast.
We know that sharpening increases contrast among pixels that already are contrasting. By increasing the existing contrast, edges and details are made to stand out. Let’s go back to our original sample and see how this is done, using the color channels. Pictured below are, in order, the Red, Green, and Blue channels after the large amount of sharpening was applied.
When we look at the Red channel, we see that the sharpening was accomplished with a dark halo in the background and a light halo on the duck. That is the result of the difference in the red component of the yellow duck and the lack of red in the background. (In RGB, yellow is created with red and green.) Because of that lack of red in the background, the red component was darkened. Because the red component of the duck was much darker, a light halo was created on that side of the edge.
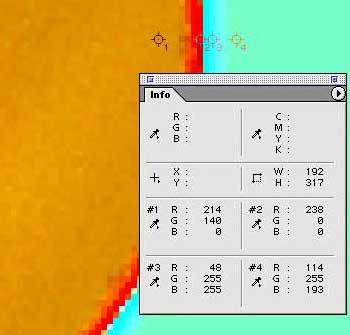
The Green channel shows less of a difference between the duck and its background, although the difference is still substantial. Both light and dark halos were created, with the light halo on the background side of the edge and the dark halo on the yellow side. (The background has a higher percentage of green.) Zooming in and using the Eyedropper tool to place color samplers shows the halo.
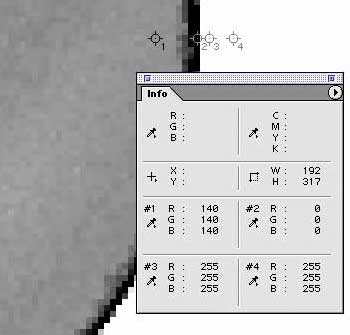
The color samplers range from the yellow duck (#1) to the dark halo (#2) to the light halo (#3) to the background (#4). The actual grayscale values at each point in the Green channel are shown in the Info palette.
The Blue channel shows a distinct light-colored halo along the background-side of the edge. Because the yellow of the duck has no blue component (it consists entirely of red and green), there can be no dark halo - the area is already completely black in the Blue channel.
When we return to the composite channel, we can see how the halos created on the individual color channels are combined. Remember that this was an example of extreme sharpening. The red halo, which we certainly would not want in a final image, is an unwanted by-product.
Later in this series we’ll look at ways to avoid some sharpening problems (including colored halos) and how you can sharpen using the color channels to control what parts of the image are sharpened. The next installment, however, will look at the Sharpen filters and the Sharpen tool.

I produce posters amd press pix to publicise theatre productions. Both newspapers and poster printers normally rquire a resolution of at least 300dpi. On the other hand, I have to send pix by e-mail so I need to get them to a size below 500kb. Will photoshop help me to do this? Will it help me to create pix of 300dpi which are also 500kb? Or is this impossible?