This tutorial will show you how to use Photoshop’s layer styles and some simple brush settings to create a fancy, golden text effect.
Tutorial Assets
1) FoglihtenNo07 font.
2) Free Tileable Leather Patterns by WebTreatsETC.
3) gradient-shapes for Photoshop ilnanny (Load the Tracks.grd and the CHROMES.grd files).
4) You’ll also need to load a default Photoshop brush set. So go to Edit > Presets > Preset Manager, and choose Brushes from the Preset Type drop down menu. Then click the little arrow to the right of the Preset Type drop-down menu, and click Square Brushes near the bottom of the pop-up menu. When the dialog box appears after that, just click Append, and you'll get the Square Brushes set.
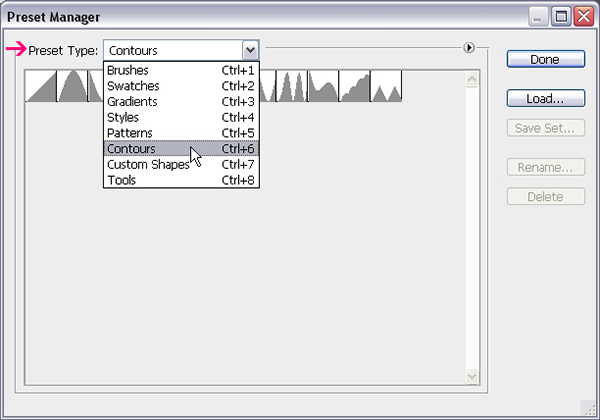
Loading the Contours
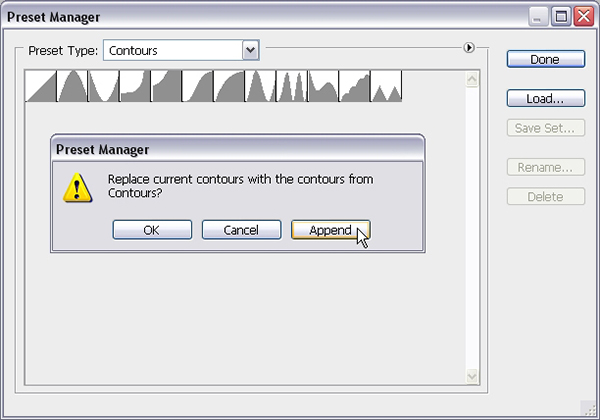
You might need to load the Contours used in some of the Layer Styles below. To do so, go to Edit > Preset Manager, and choose Contours from the Preset Type drop down menu.
Click the small arrow in the top right corner, and choose Contours.
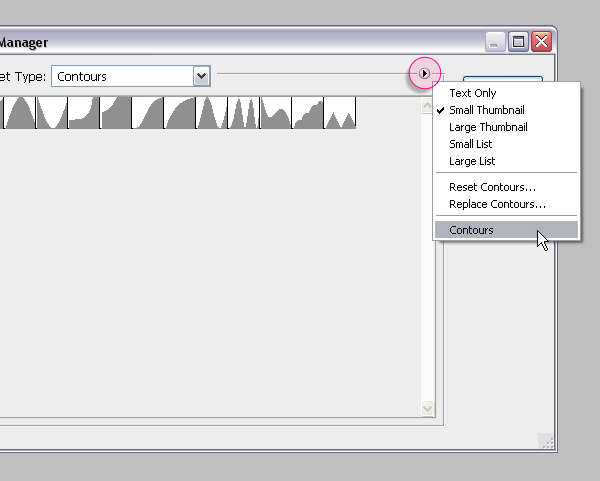
Click Append to add the new contours to the existing ones.
Step 1
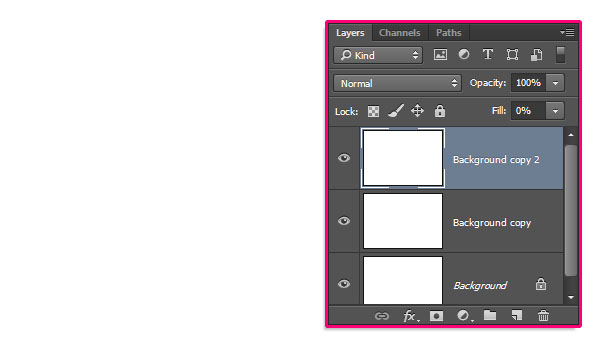
Create a new 950 x 650 px document. Duplicate the Background layer twice, and change the second copy’s Fill value to 0.
Double click the first copy Background layer to apply a Gradient Overlay effect with the following settings:
Check the Dither box
Style: Radial
Scale: 150%
Click the Gradient box to create the gradient using the colors #4a4a46 to the left and #282929 to the right.
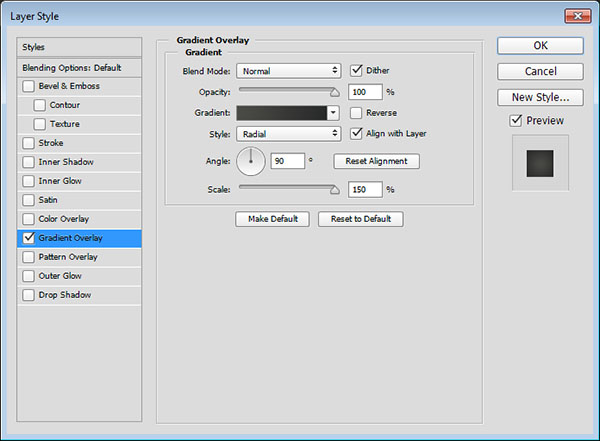
This will add a simple gradient fill to the Background.

Double click the second copy Background layer to apply a Pattern Overlay effect with the following settings:
Blend Mode: Soft Light
Pattern: webtreats_brown_leather.jpg
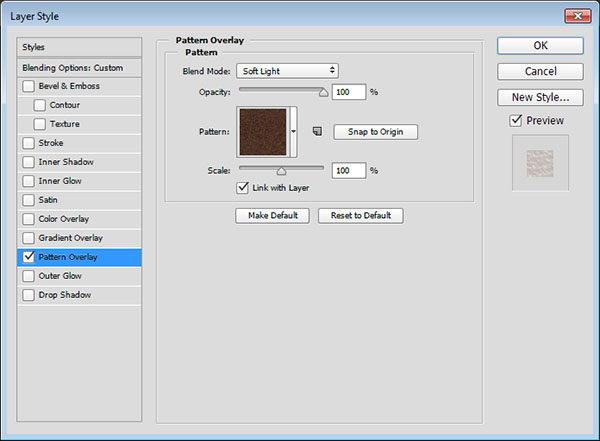
This will add the leather texture to the gradient background fill.

Step 2
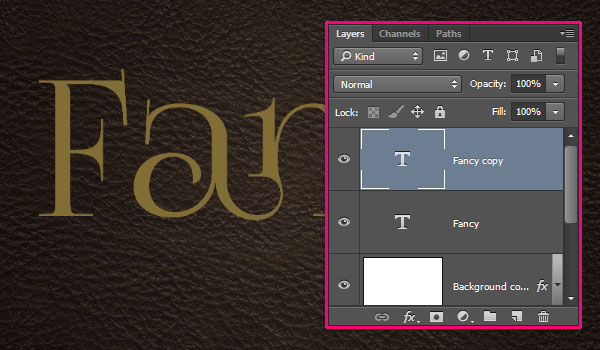
Create the text using the font FoglihtenNo07, the color # 816d36, and the font Size 250 pt.
Under the Character panel (Window > Character), make sure to click the Standard Ligatures icon, then duplicate the text layer.
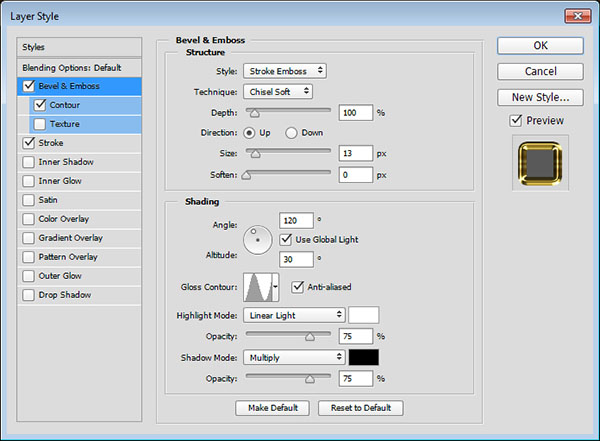
Double click the original text layer to apply the following Layer Style:
– Bevel and Emboss
Style: Stroke Emboss
Technique: Chisel Soft
Size: 13
Gloss Contour: Ring
Check the Anti-aliased box
Highlight Mode: Linear Light
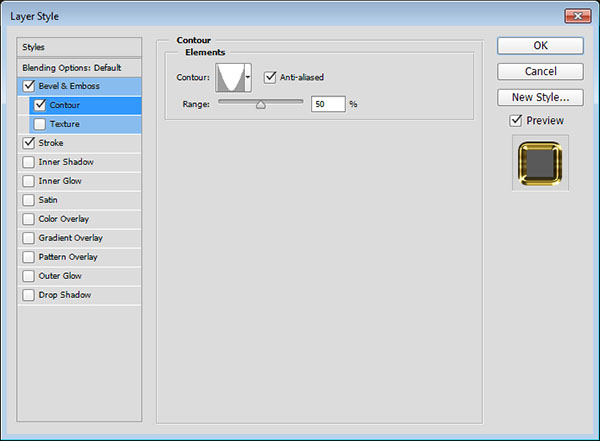
– Contour
Contour: Cone – Inverted
Check the Anti-aliased box.
– Stroke
Size: 10
Fill Type: Gradient
Style: Reflected
Angle: 90
Use the Gold Rail G2 gradient fill

This will create the stroke.
Step 3
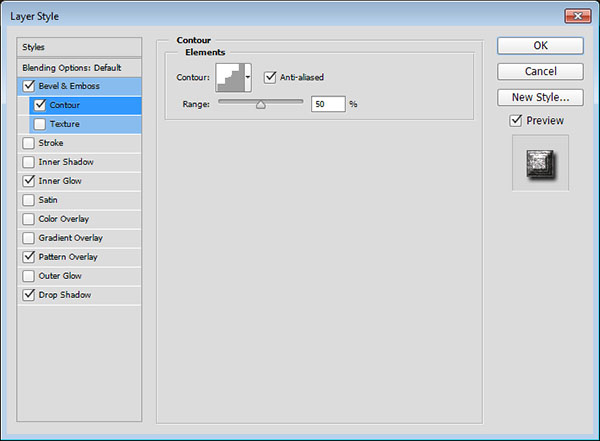
Double click the copy text layer to apply the following Layer Style:
– Bevel and Emboss
Technique: Chisel Hard
Size: 10
Check the Anti-aliased box
Highlight Mode: Vivid Light

– Contour
Contour: Steps
Check the Anti-aliased box.
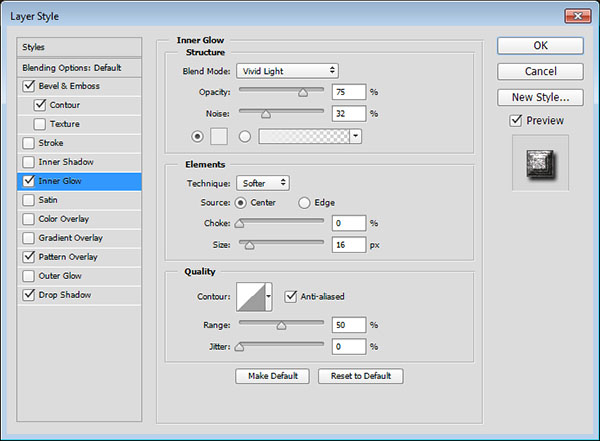
– Inner Glow
Blend Mode: Vivid Light
Noise: 32
Color: #ececec
Source: Center
Size: 16
– Pattern Overlay
Blend Mode: Soft Light
Opacity: 80%
Pattern: webtreats_grey_leather.jpg

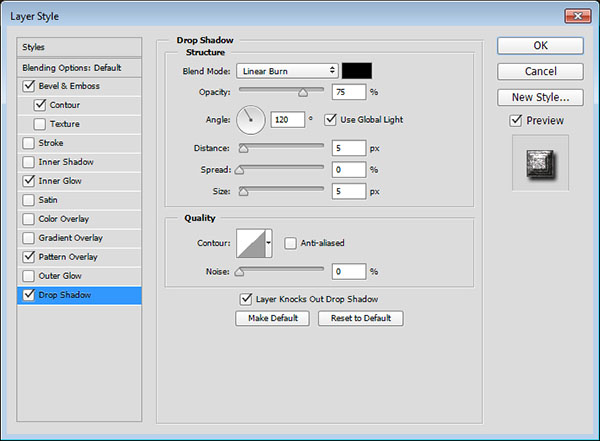
– Drop Shadow
Blend Mode: Linear Burn
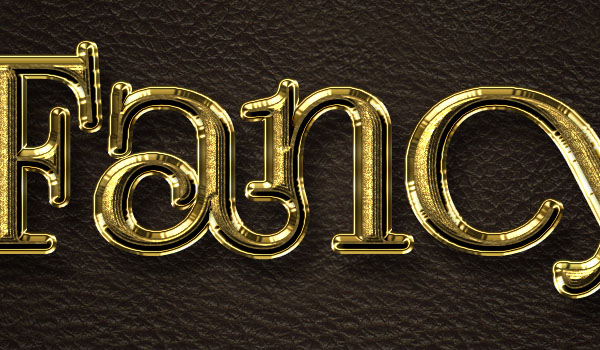
This will style the text.
Step 4
Select both text layers, duplicate them, place the copies below the original text layer, then go to Layer > Merge Layers.
Rename the merged layer to Shadow, and change its Fill value to 0.
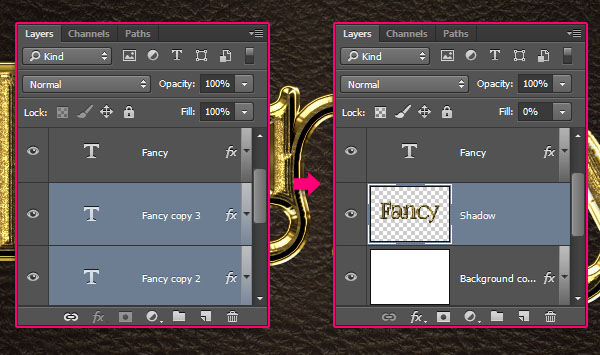
Double click the Shadow layer to apply a Drop Shadow effect with the following settings:
Opacity: 51%
Distance: 26
Size: 18
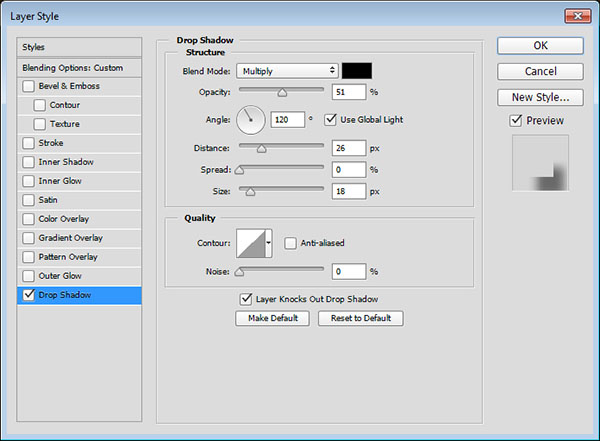
This will apply the shadow to the text and stroke, giving the effect more depth.
Step 5
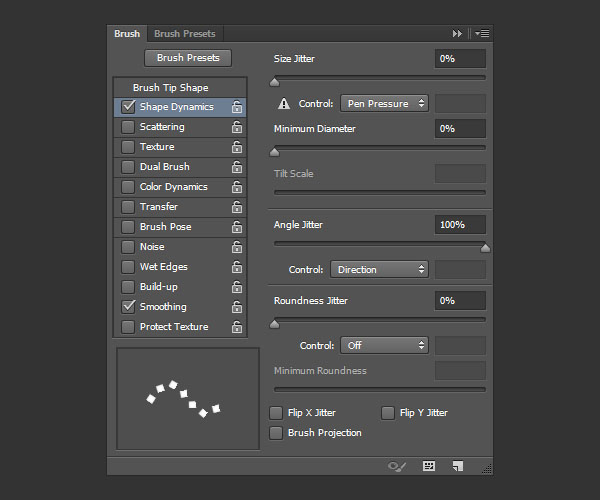
Pick the Brush Tool, open the Brush panel, and choose the Hard Square 7 pixels tip. Then, modify its settings as shown below:
Brush Tip Shape
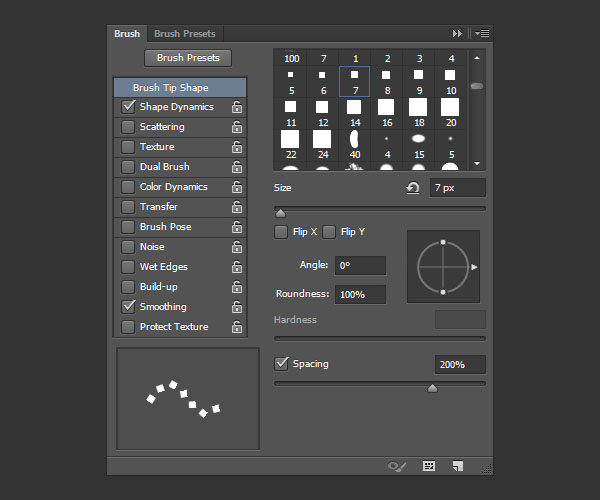
Shape Dynamics
(Make sure to set the Size Jitter’s Control value to Pen Pressure).
Step 6
Right click any of the text layers and choose Create Work Path.
Create a new layer on top of all layers, call it Diamonds, and pick the Direct Selection Tool.
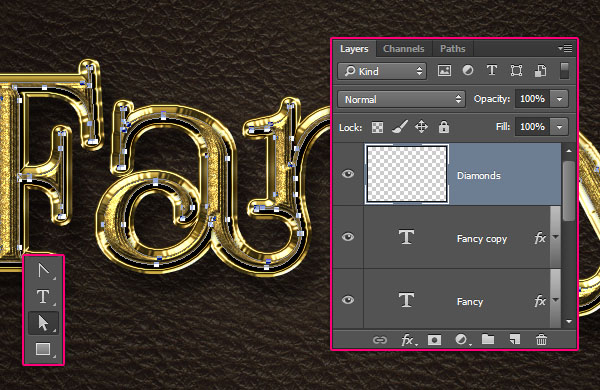
Right click the work path, and choose Stroke Path. When the Stroke Path box appears, choose Brush from the Tool drop down menu, and check the Simulate Pressure box.
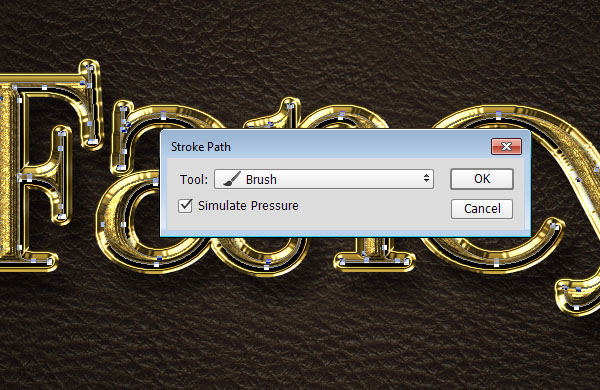
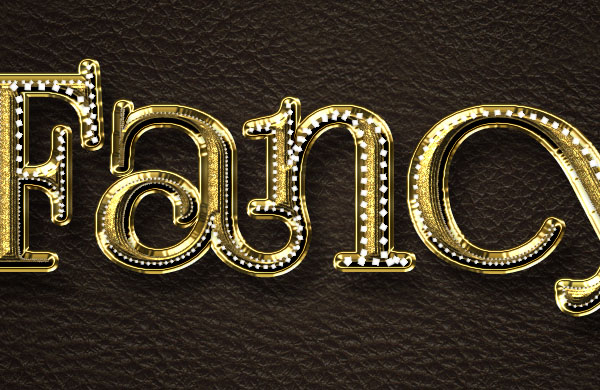
This will create the diamonds stroke. Hit the Enter/Return key to get rid of the work path.
Step 7
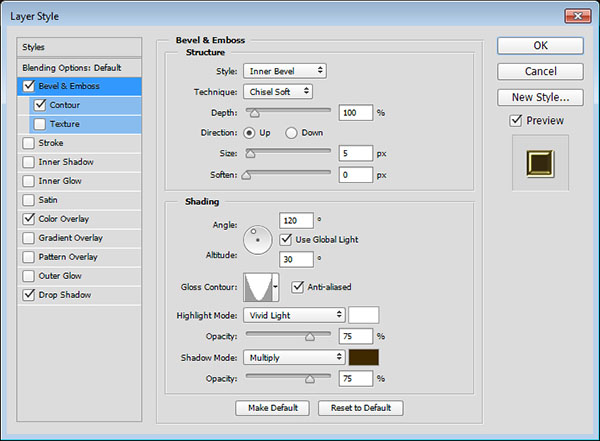
Double click the Diamonds layer to apply the following layer style:
– Bevel and Emboss
Technique: Chisel Soft
Gloss Contour: Cone – Inverted
Check the Anti-aliased box
Highlight Mode: Vivid Light
Shadow Mode – Color: #3e2900
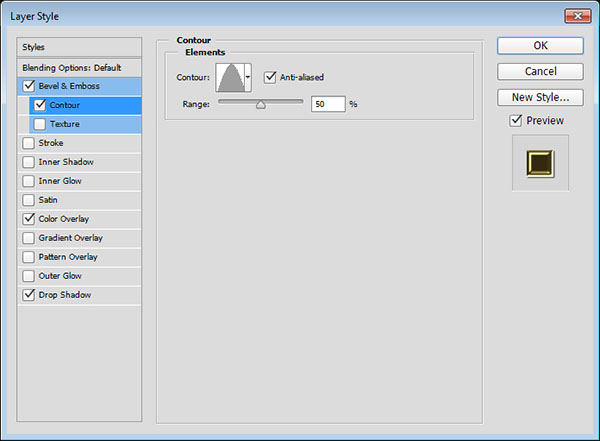
– Contour
Contour: Cone
Check the Anti-aliased box.
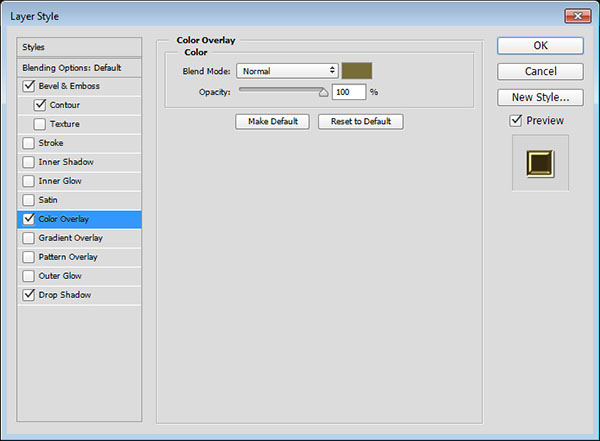
– Color Overlay
Color: #776d38
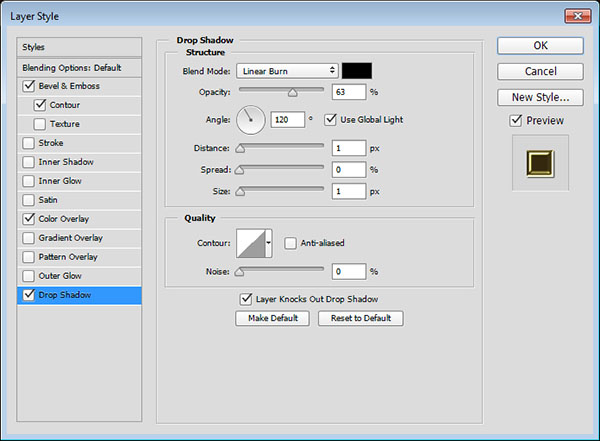
– Drop Shadow
Blend Mode: Linear Burn
Opacity: 63%
Distance: 1
Size: 1
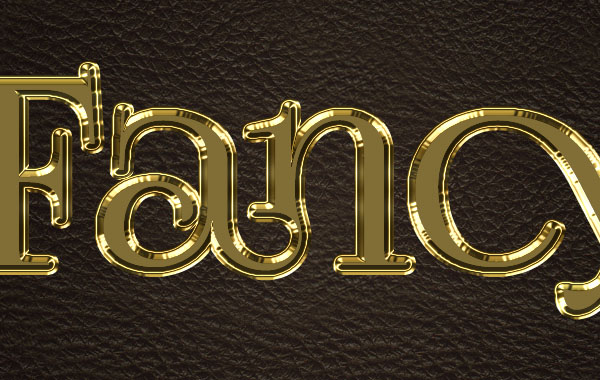
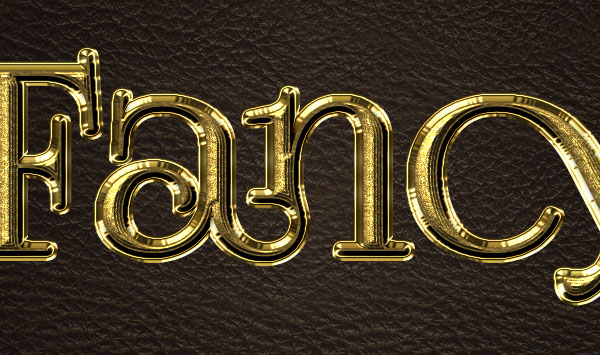
This will style the diamond stroke. And you’re done!

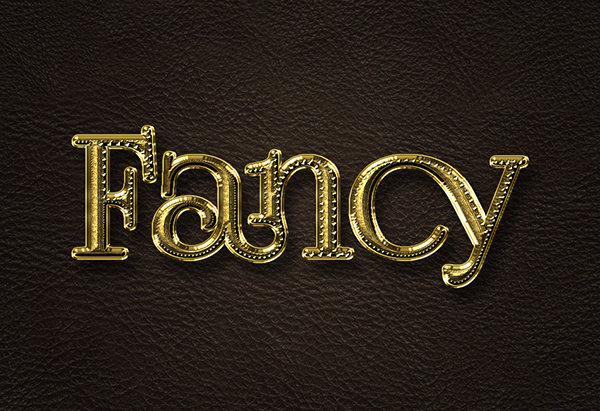
Conclusion
This is the final result. Using multiple layer styles, and modifying brush settings, can help create a fancy text effect pretty quickly!
Hope you enjoyed the tutorial and found it helpful.