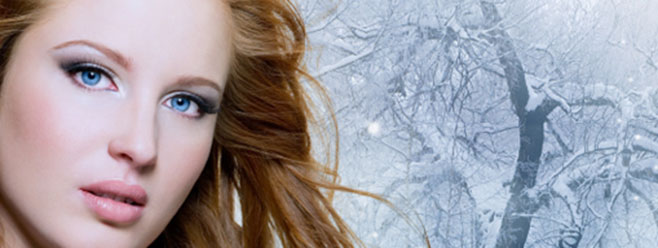
This technique is written for Photoshop CS6, but can be accomplished in prior versions.
Compositing wispy strands of hair is tricky business. In today's tutorial, we'll explore strategies for capturing and compositing models that make the process uncomplicated and fun.
Let's begin with several recommendations for successfully capturing a subject:
• Light the model with three lightsâ¦a main light, and two edge lights with modifiers (such as egg crate grids) that create noticeable rim light along the edges of the subject.
• Use a seamless white backdrop.
• It's best to shoot medium to dark-haired models on a white or very light gray background. To accomplish this, either move the model close to the seamless white backdrop and/or light the backdrop.
• It's best to shoot light-haired models on a dark gray background. In this scenario, it's crucial to add rim light along the edges of the hair. To achieve a dark gray background, move the subject farther away from the backdrop.
Let's examine which blend modes are best to use based on the model's hair color in relation to the density of the background:
• Best-case scenario -
If the hair is dark and the background is white or very light gray, Multiply blend mode works extremely well (as you'll see in a moment).
• Other workable, but less-desirable scenarios -
If the hair is light and the background is medium to dark gray, Screen and Overlay blend modes have potential.
If the hair is dark and the background is medium to dark gray, Hard Light, Multiply, and Overlay blend modes have potential.
Now let's explore how to put this knowledge to use in a real-world wispy-hair compositing situation.
(Note: Both images used in this tutorial are courtesy of Shutterstock).
Step 1: Select the Subject, Add a Mask, and Import into the Background
In this example, the subject was selected using the Quick Selection tool, a mask was added, and the subject was imported into the background scene with the mask intact. Notice how the edges of the model's hair look like she received a haircut from a five-year old.
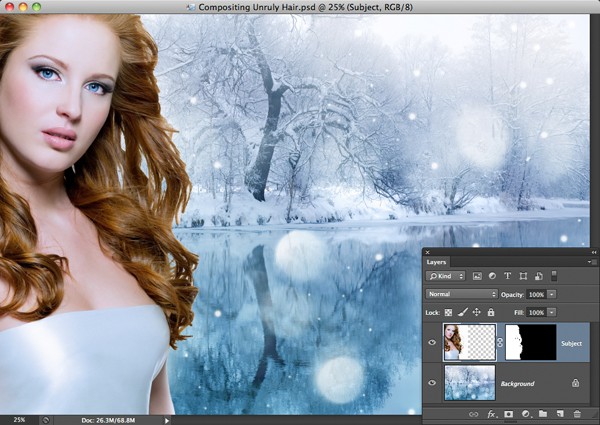
Step 2: Use Refine Mask to Begin Bringing Believability to the Hair
Activate the subject layer and press Command-J (PC: Control-J) to duplicate the layer. Name the duplicate layer "Refine Mask Hair." Turn off visibility for the original subject layer.
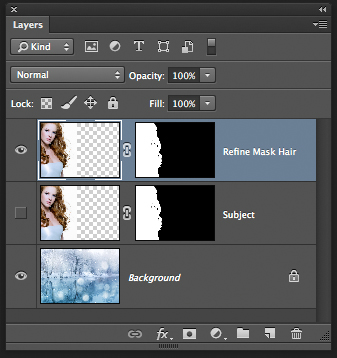
Activate the "Refine Mask Hair" layer mask thumbnail and choose Select>Refine Mask. Set the View menu to On Layers (L). Drag the Radius slider far to the right (in this example, all the way) until small wisps of hair appear. Notice how the hair looks much better, but still not believable.
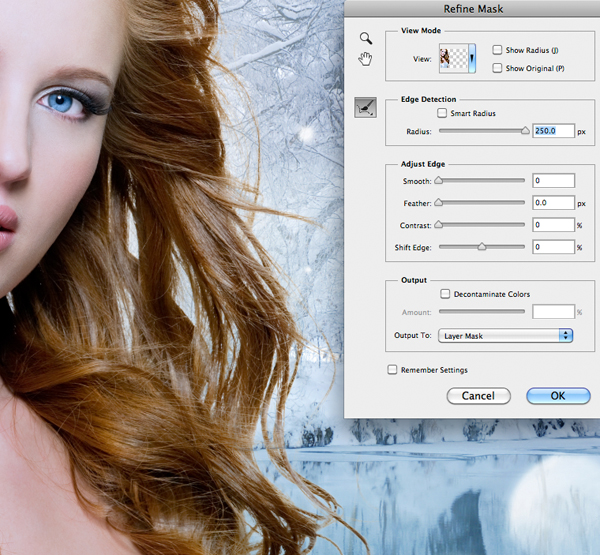
Set the Output To menu to Layer Mask and press OK.
Step 3: Use a Blend Mode to Further Tame the Wisps
Now is when we will put a blend mode to work to finish the process. Activate the subject layer. Press Command-J (PC: Control-J) to duplicate it. Name the duplicate layer "Blended Hair." Turn on the layer's visibility. Right-click on the "Blended Hair" layer mask and choose Delete Layer Mask.
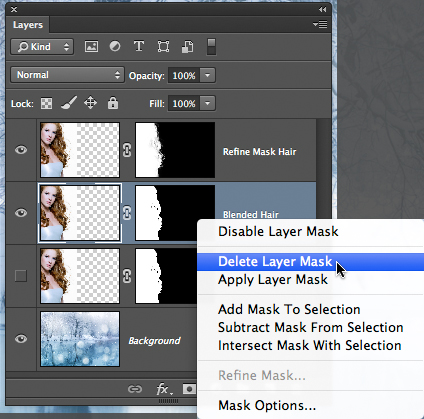
Since this is a dark-haired model in front of a white backdrop, change the blend mode from Normal to Multiply. Wow! Notice how this immediately solves the hair edge problem and produces a completely believable blend.
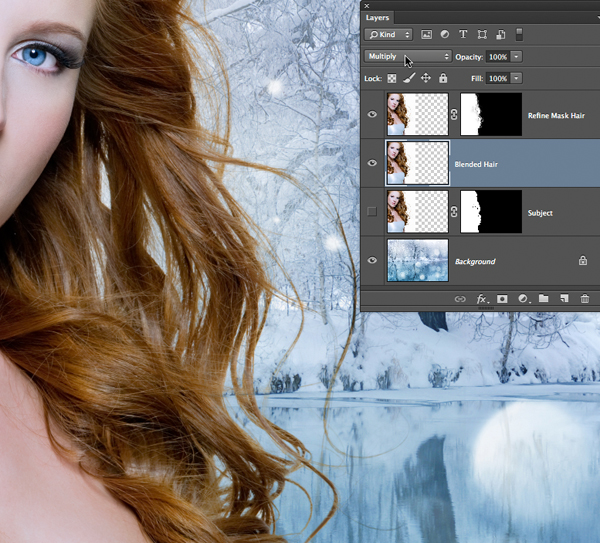
Note: Keep in mind that different model/backdrop scenarios require different blend modes. For advice on which ones to use, see the introduction. In this scenario, the job is done, but in cases of other blend modes you may have to add a mask to the "Blended Hair" layer and paint away light gray areas. If masking alone does not work, consider opening the Layer Style dialog and using the Blend If sliders to blend away gray areas. Remember to hold Option (PC: Alt) while dragging the inner half of a Blend If slider to produce a smoother blend.
Step 4: Fix the Subject's Hairless Edges
The original subject layer contains the best mask for the model's hairless edges (e.g. arms, legs, and clothing). To put this mask to use where we need it, turn on visibility for the original subject layer. Activate its mask and grab a soft-edged black brush at 100% opacity. Using a large brush, paint over the hair so that only the "Blended Hair" and "Refine Mask Hair" layers are having an effect in this critical region.
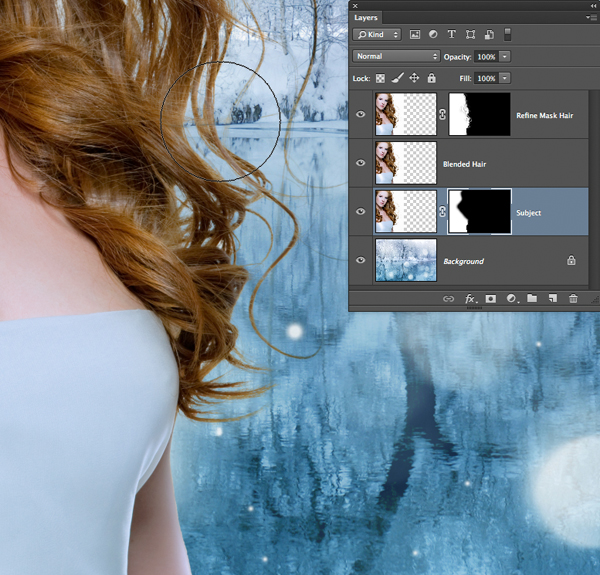
Here's the unrefined lookâ¦
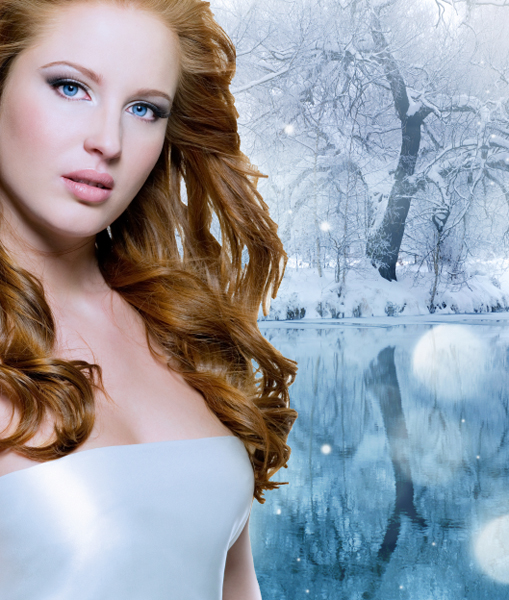
â¦and here's the finished look.
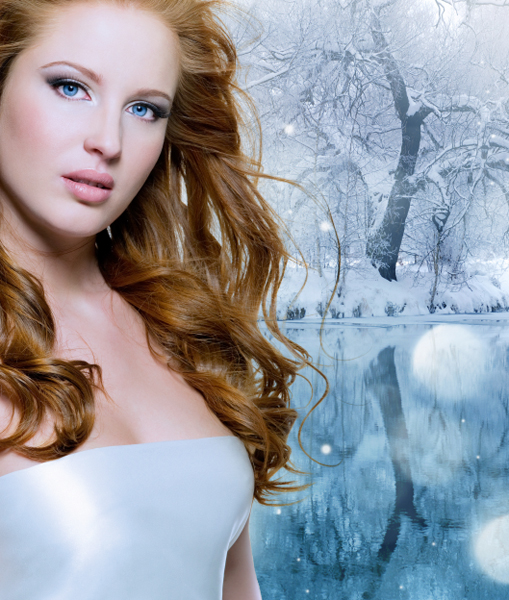
To learn all of the compositing secrets that lead up to this more advanced tutorial, take a peek at my Dramatic Portrait Compositing video tutorial series.
Mark S. Johnson Photography
msjphotography.com

