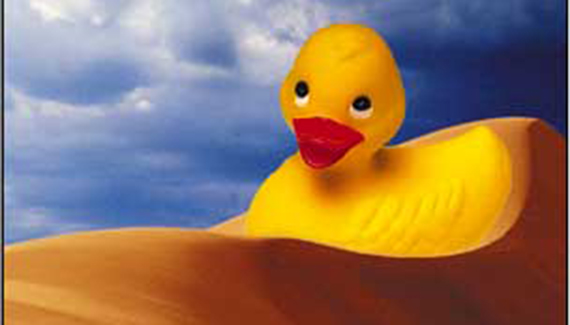
Photoshop’s Quick Mask mode enables you to create smooth transitions between images on different layers with extraordinary control. Perhaps even easier in many cases is a gradient layer mask.
We’ll work with a couple of pieces of stock art, Dune and Ducky. They can be found in the Samples folder installed by default with Photoshop 6. To put Ducky on a transparent background, Option-double-click (Alt-double-click) the layer named Background in the Layers palette and rename it. Use the Magic Wand to select the white background and delete it. (In the Options Bar, select Contiguous so that you don’t also delete the whites of Ducky’s eyes.)
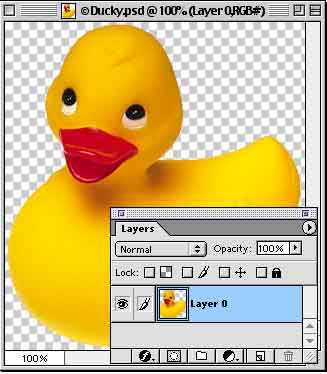
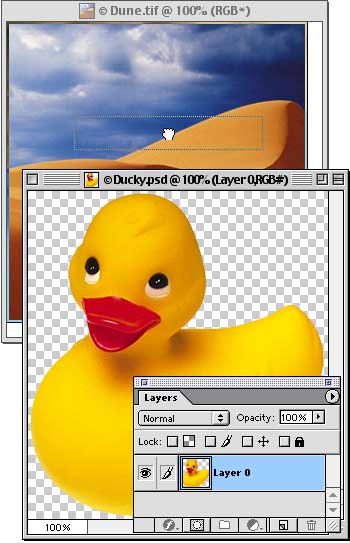
To move Ducky into the desert, simply drag the layer from the Layers palette onto the Dune image window and release the mouse button. Holding down the Shift key centers the new layer.
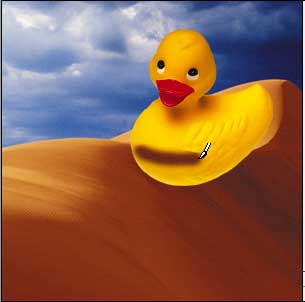
Ducky can now be scaled and positioned. In the final image, we want to show Ducky swimming in the dunes, so we’ll use Edit> Free Transform to position him (or her?) like this:
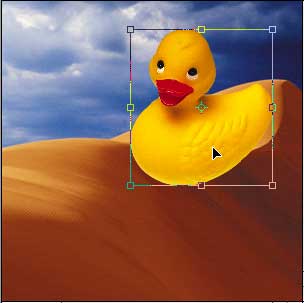
Pressing Return/Enter accepts the transformation and we can begin the task of blending Ducky into the dunes.
We’ll be deleting part of the bottom of Ducky, to make it appear that it is behind the nearest dune crest. Rather than an abrupt edge, we’ll want to soften the transition. Let’s start by reducing the opacity of the top layer so that we can see the lower layer and dragging a selection with the Lasso tool. This gives us something from which to work.
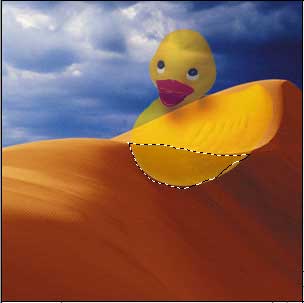
Pressing Q on the keyboard takes us into Quick Mask mode, where we can clean up the selection and create a softer transition. Quick Mask mode allows you to use selection and painting tools, along with filters and other commands, to create an Alpha channel.
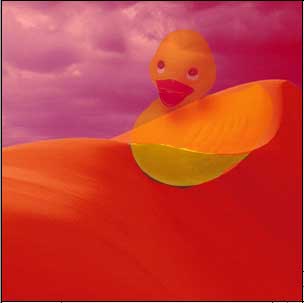
Alpha channels, or masks, are for these purposes, saved selections. Unlike a selection made with, for example, the Rectangular Marquee tool, masks can have up to 256 levels of “selection.” Unfeathered selections have pixels that are within the selection and pixels that are outside the selection. With such selections, whatever you do (filter, delete, colorize, etc) is either applied to a pixel (inside the selection) or not applied (outside the selection). With masks, any filter or other action applied can be applied fully, not at all, or up to 254 additional levels of “applied.”
We can paint with black to add to the mask, the protected area of the image (covered with a translucent red overlay in Quick Mask mode). We can also use the Eraser to remove parts of the mask, and so expose parts of the image.
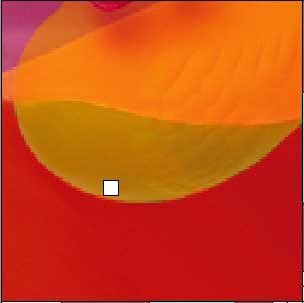
Using a soft brush with the Paintbrush tool along the top of the selection will give us a better transition from the bottom of the duck to the top of the dune. On the other hand, we can use the block eraser at the bottom, where we want the entire duck to disappear. This doesn’t have to be precise, because it can be easily adjusted later.
After exiting Quick Mask mode (press Q again), we can restore the opacity of the tope layer and, making sure that layer is active, use the Delete or Backspace key to remove the selection.
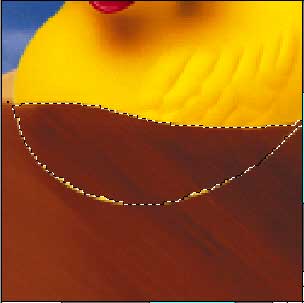
The Eraser cleans up the little bits of leftover duck at the bottom, and we have a smooth composite.
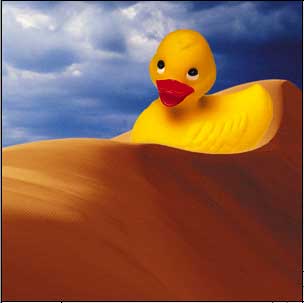
There’s one thing that we like to avoid whenever possible, and that’s destroying original pixels. If you take a look at the top layer’s thumbnail in the Layers palette, you can see that we’ve deleted the bottom portion of the duck. If we needed to move the duck, we might have to recreate portions of that area with the Clone Stamp tool.
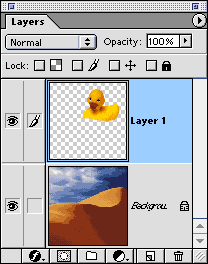
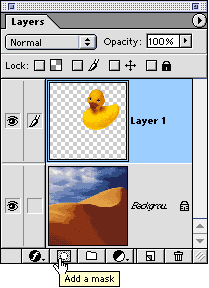
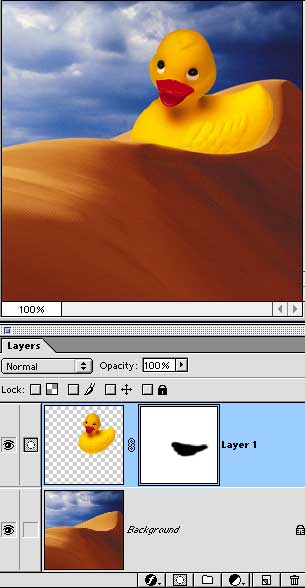
Instead, we can use a layer mask rather than Quick Mask mode. Layer masks hide pixels on a layer, so you don’t have to delete them. The mask can be changed or removed at any time, and the original pixels remain. Add a mask to a layer by clicking the button at the bottom of the Layers palette.
Click on the mask in the layers palette to make it active.
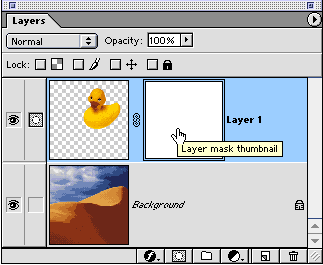
Paint with black as the foreground color to hide parts of the image, use white to restore areas to visibility, use shades of gray to make areas of the image partially visible.
Same result, but with the layer mask, we’ve not actually deleted any pixels from Ducky.
If we want to create an animation, we can duplicate the layer, reposition Ducky, and edit the layer mask using painting and selection tool.
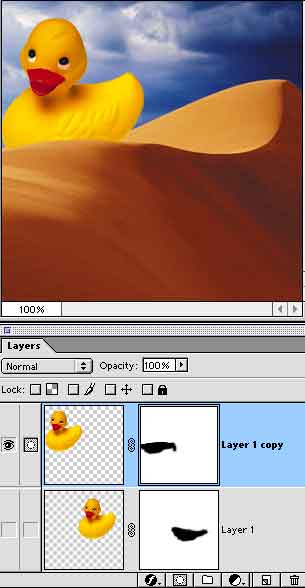
Notice the difference in the position and shape of the layer mask in the Layers palette. By duplicating the layer, moving the content, and editing the layer mask, we’ve altered the image without deleting pixels.


Thanks for the tip….I know this is basic information but I am new to photoshop… This will come in handy, Thanks Mike/ezdate123
I AM SOOO NEW TO PHOTOSHOP BUT HEARD IT WAS AN AWESOME PROGRAM. I HAVE RECENTLY PURCHASED THE ADOBE MASTER COLLECTION CS3 AND SO TOTALLY LOST. NOT REALLY FAMILIAR TO WHAT PROGRAM DOES WHAT AND HAVE TRIED UNSUCCESSFULLY FOR TWO WEEKS TO “LAYER” OR COMBINE IMAGES!
THIS HAS HELPED A LITTLE BUT I STILL DON’T KNOW HOW TO OPEN THE SECOND IMAGE W/OUT CLOSING THE FIRST IF THAT MAKES SINCE…
HEELLLPPP!!! THANKS
I was at a small town festival a few years back and took some photos of little yellow duckies similar to the one in this tutorial… I thought it was my photo…I guess they made a bunch of these ducks… anyway, great tutorial for photoshop…i curently upload my photos to the royaltyfreestockphotogallery.com website. I have had trouble with istock just with the sign up application… has anyone else experienced that…Lou