
The blur filters in Photoshop are just the ticket for simulating movement in a photo. Not only does this increase visual interest, but it's also a useful effect for stock photographers. By using smart filters, your original remains unharmed and you get an automatic mask that you can use to hide the motion from parts of your photo.
STEP ONE:
To get your subject moving, open an image and activate the pertinent layer(s). If your document consists of multiple layers, click to activate one of the layers and then Shift-click another layer to activate all the layers in between, or Command-click (PC: Ctrl-click) to activate noncontiguous layers. Next, choose Filter>Convert for Smart Filters.
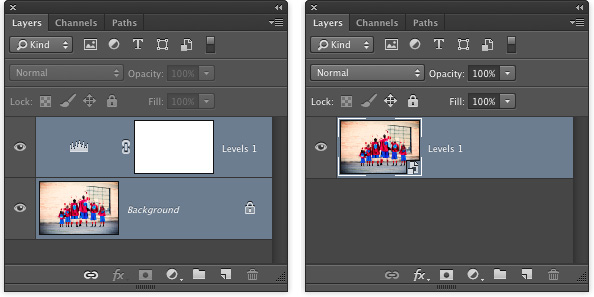
When you do, Photoshop tells you it's about to create a smart object from the active layers, which you can think of as a protective wrapper; that way, the filter happens to the wrapper instead of the image (click OK to close the dialog). If at any point you need to edit the original layer(s), double-click the smart object's layer thumbnail and Photoshop opens the original layers in a temporary document. When you're finished making changes, save the temporary document by pressing Command-S (PC: Ctrl-S), close it, and your changes are updated in the original document.
STEP TWO:
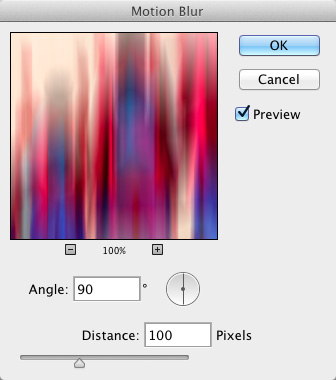
Trot back up to the Filter menu and choose Blur>Motion Blur. In the resulting dialog, adjust the Angle setting to make the blur go in the direction you want. For example, to create a perfectly vertical blur, set the angle to 90°. To adjust the strength of the blur, drag the Distance slider right for more blurring or left for less (a setting of 100 Pixels was used here). Click OK when you're finished.
STEP THREE:
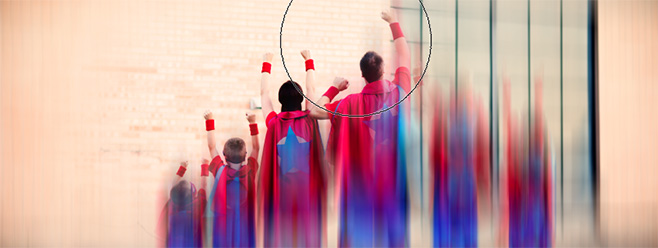
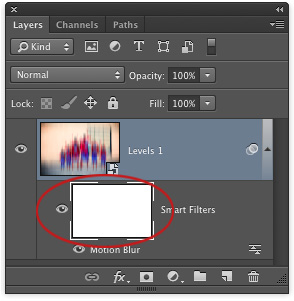
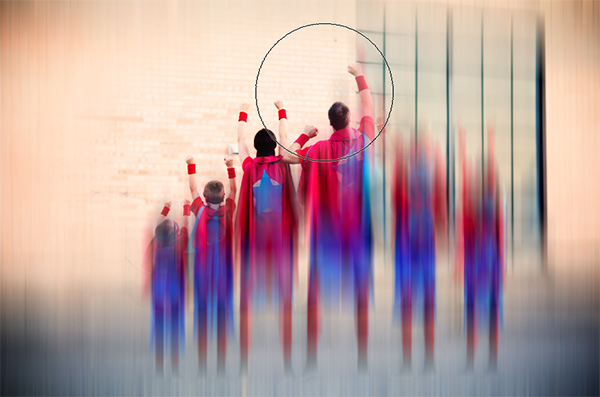
To hide the motion from parts of your photo, such as our super family's heads, mouse over to your Layers panel and click to activate the Smart Filters mask, the large white thumbnail beneath the smart object. Once it's active, the mask thumbnail will have tiny white brackets around it.
STEP FOUR:
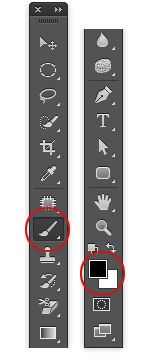
To hide the blur, you need to paint with black inside the mask, so press D to set the color swatches at the bottom of your Toolbox to the default of black and white, respectively, and then press X until black hops on top. A helpful way to remember what color to paint with inside a mask is the rhyme, "black conceals and white reveals."
STEP FIVE:
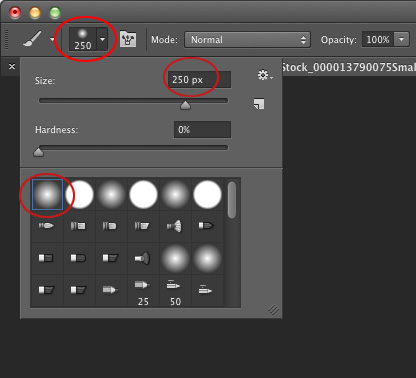
Press B to grab the Brush tool, and from the Brush Preset Picker near the far left of the Options Bar, choose a soft-edged brush. Set the size to about 250 px. Tip: You can press the Left Bracket key ([) to decrease brush size, or the Right Bracket key (]) to increase brush size.
STEP SIX:
Mouse over to your image and paint in a gentle arc across the super family's heads. If you reveal too much of the original image, press X to swap color swatches so white is on top, and then repaint that area to reveal the blur.
STEP SEVEN:
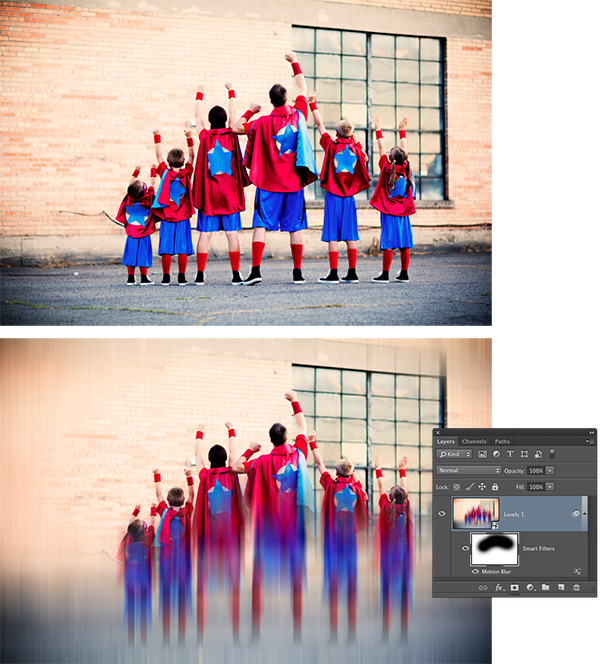
Choose File>Save As and pick Photoshop from the Format drop-down menu to save a master copy of your document. To edit the blur amount later on, simply open the document and double-click the filter's name in your Layers panel to reopen that filter's dialog. Here are the before and after images and the Layers panel.
RADIAL BLUR
Another useful technique, especially for stock photography (much more so than the Motion Blur filter), is to use the Radial Blur filter to create a zoom effect. Here are two examples downloaded from iStockphoto.com (both have been downloaded well more than a thousand times).
CREDIT(top image): ISTOCKPHOTO, RANPLETT, IMAGE #405800
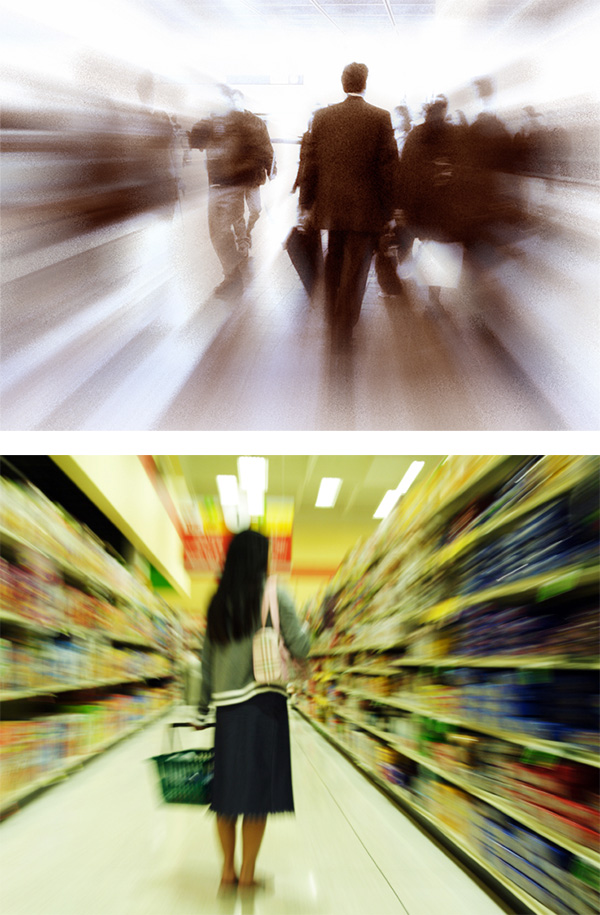
CREDIT(bottom image): ISTOCKPHOTO, AREKMALANG, IMAGE #2483218
To create this effect, follow the steps above, though choose Radial Blur in Step Two instead of Motion Blur. In the resulting dialog, set the Amount to 35, the Blur Method to Zoom, and Quality to Best. Click-and-drag in the filter's preview area to reposition the blur center (the point at which the zoom emanates). In this image, that's the boy's head. If you don't get the positioning right the first time, double-click the Radial Blur filter in your Layers panel to reopen the filter's dialog.
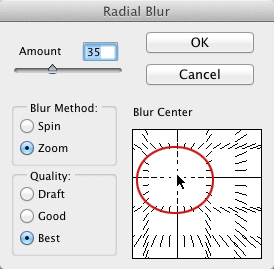
Use the Smart Filters mask to hide the blur from the little boy's head as described above.
CREDIT: ISTOCKPHOTO, IMGORTHAND, IMAGE #20242004
As you can see, adding motion to the right image can make a big impact. Not only does this give photographers another product to sell, either to their own clients or as a stock shot, but it also helps designers capture attention in ads.
This article is courtesy of Photoshop User magazine, the official publication of KelbyOne, which provides quality online education for creative people. For more information, visit KelbyOne.com.
