By Ross Shain
If you enjoy exploring lighting and special effects in your edits and would like to do more in Lightroom without jumping to Photoshop, this tutorial might be for you. Boris FX Optics is a unique plugin, literally packed with creative options. Optics can be used for subtle lighting and color grades to full blown Marvel film style photo manipulations. Here, I’ll show how Optics can be used to add cinematic lens flares, particles and chromatic aberrations to make your shots stand out. The tutorial was done with Optics in Lightroom Classic, but the same steps will work with Photoshop, or the Optics standalone application.
if you’d like to follow along, I’ve provided a quick screen recording that you can pause, rewind and follow at your own pace. (You can download this source image from Unsplash.) And if you don’t own Optics, you can download and install the free 15-day trial to follow along.
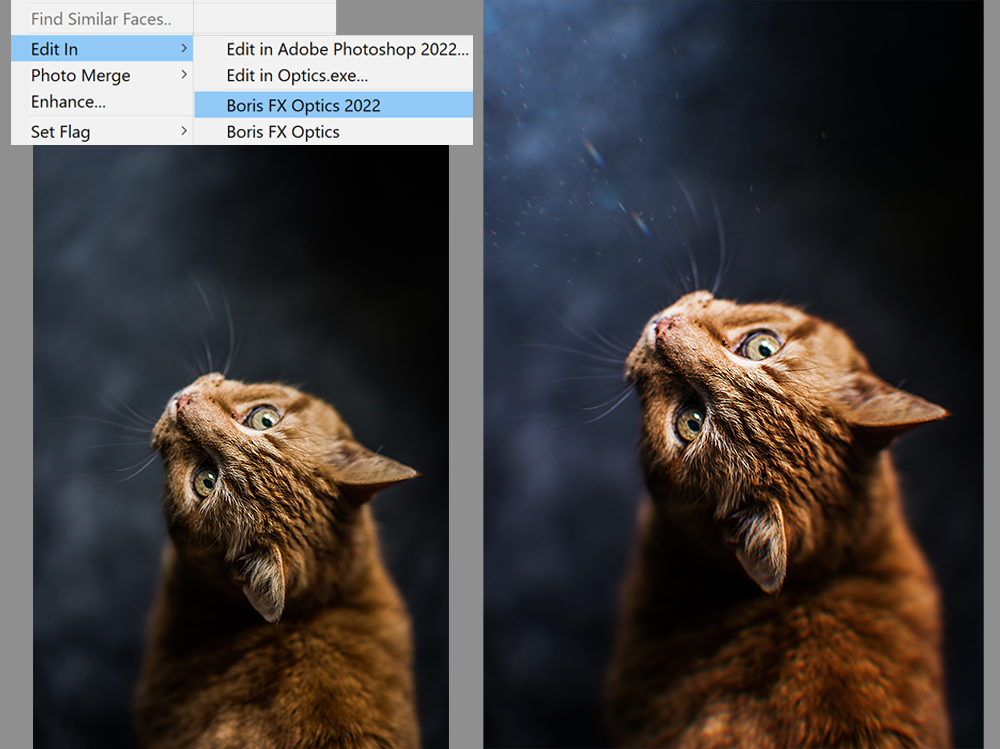
Launching Optics
Apply Optics in Lightroom classic by selecting Photo>Edit in>Boris FX Optics.
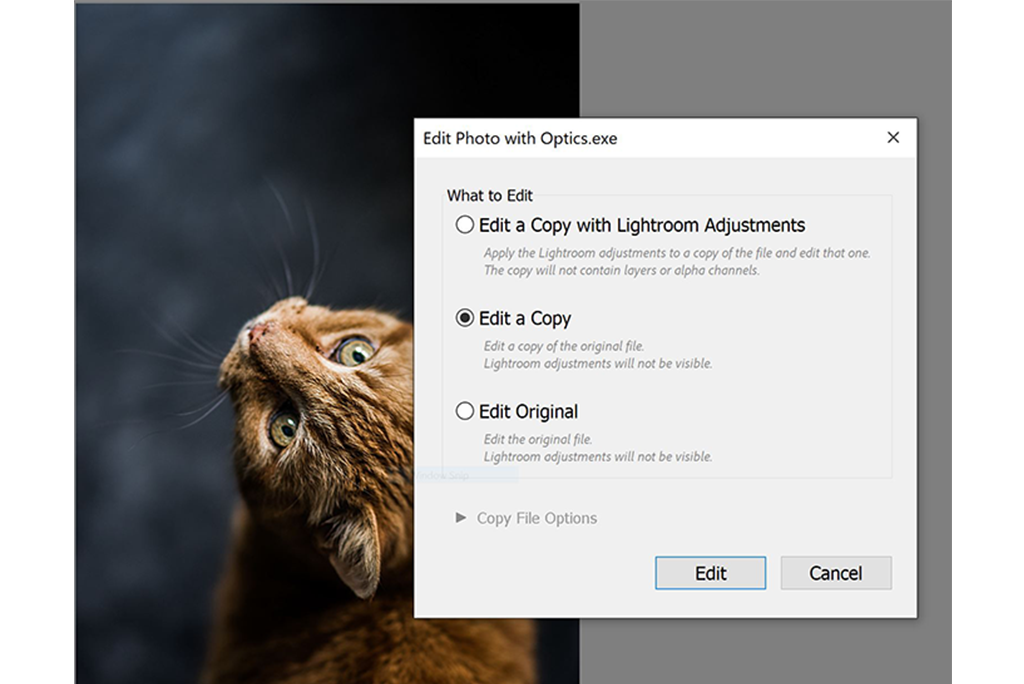
I recommend, choosing Edit a Copy.
Adding Light Effects
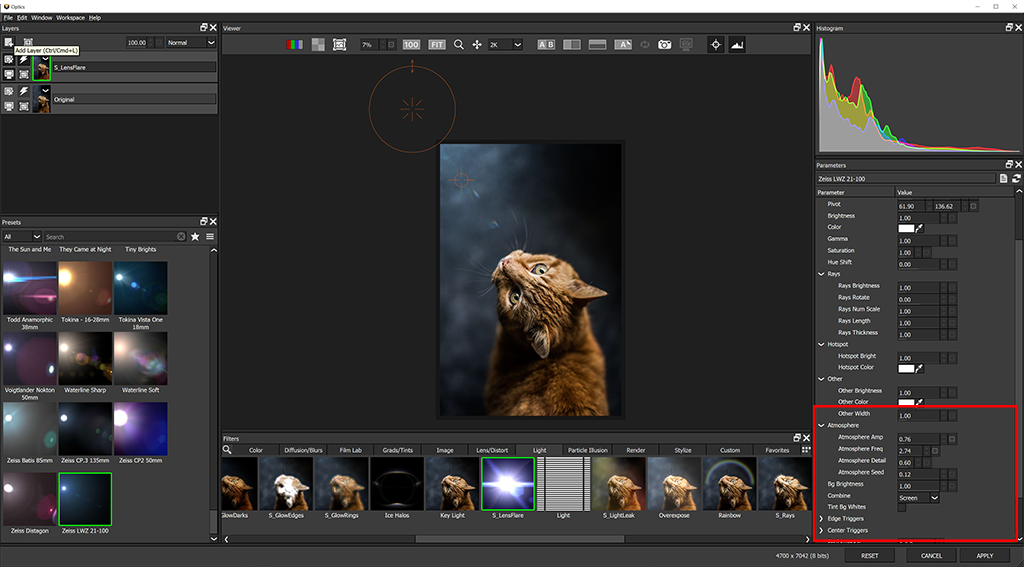
Optics has its own interface with a layer system on the upper left and effect categories below the image. We’ll start by choosing the Light category and selecting S_LensFlare effect. This will add the Lens Flare effect to our image and we can choose from the flare presets in the lower left. Optics ships with 126 Lens Flare presets and all can be edited, customized and saved.
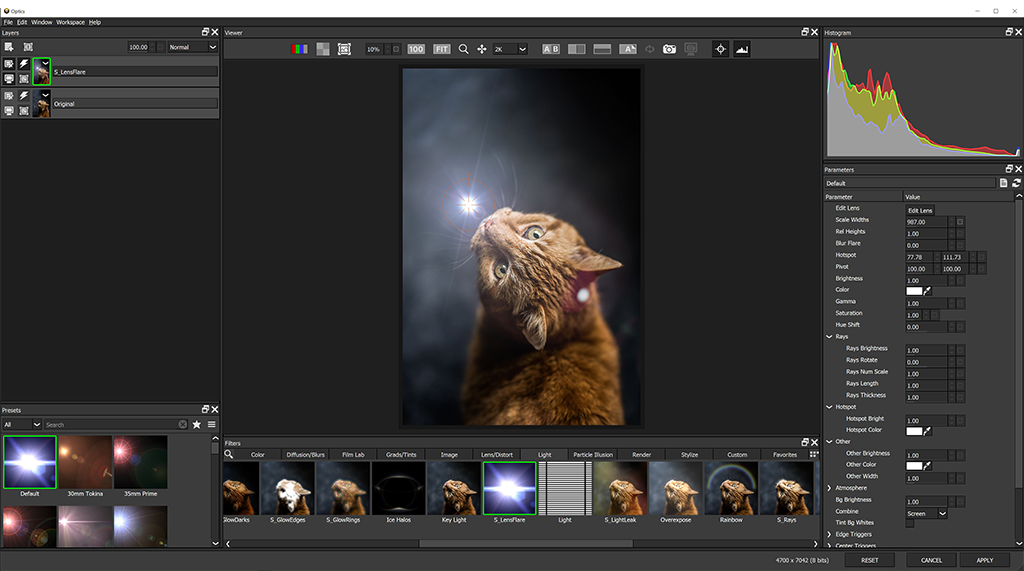
Position the lens flare by clicking on the center of the flare and drag. You can also position the pivot, or adjust the position sliders on the right in the Parameters window.
I chose the Zeiss LWZ flare prest and positioned the flare to the top lext of the image. To zoom the image canvas in/out, use the middle mouse scroll wheel OR short cut keys I + O.

To add a smoky feel to the lens flare, twirl down the Atmosphere tab in the parameter window. Increase the Atmosphere Amplitude and Frequency settings to your liking.
Optics allows you to stack and edit unlimited effect layers. Next, we will Add a New Layer, by selecting the Add Layer icon in the upper left or using shortcut key (CMD/CTRL + L).
Particles for Dummies?
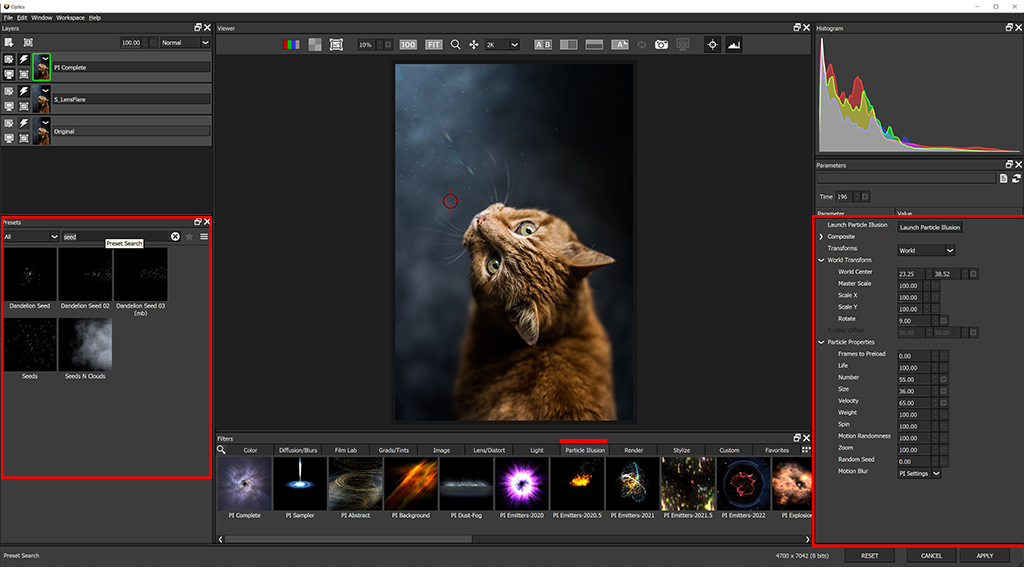
Now, to add more depth and atmosphere, we will explore the Particle Illusion category. Here you will find hundreds of environmental effects like smoke, clouds, explosions, fireworks, and so much more. The particle effects are generated by a powerful animation engine but the interface hides much of the complexity typically found in 3D animation tools.
Particle effects are broken into sub categories (Clouds, Water, Fireworks, etc), but if we want to search them all, choose PI Complete. We can scroll through the presets or use the search window.
I’ll type “Seed” in the search window to find a floating dust particle emitter. I will position the emitter to the upper left to accentuate the lighting effect. Particles properties such as position, number, and size can be edited in the Parameter window, making Optics such a value add compared to buying overlays or stock images. Its addictive making your own effects libraries.
More Light Effects
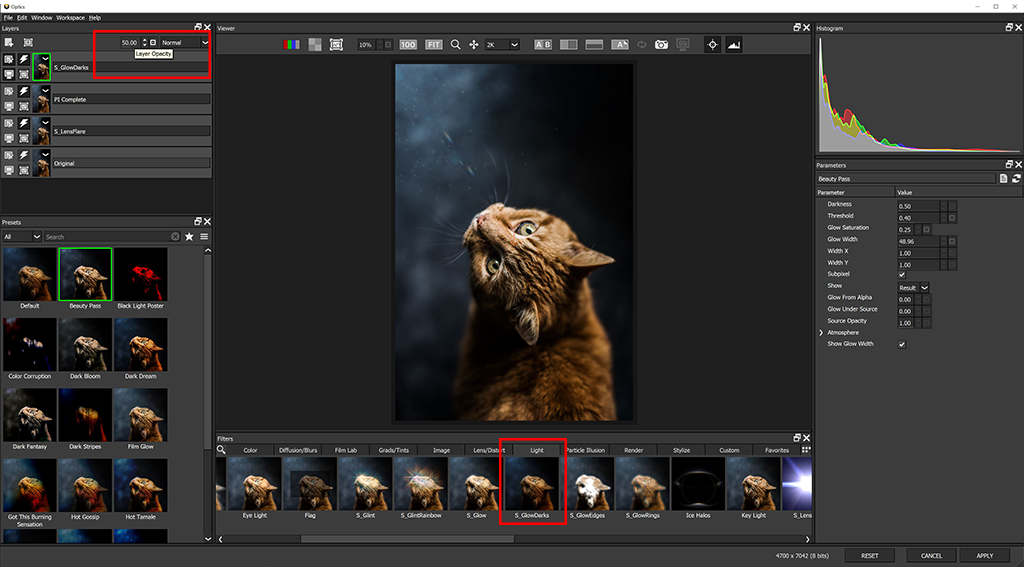
We can add a new layer again (CMD/CTRL + L) and continue to explore effects. In the Light category, one of my favorite effects is S_GlowDarks which adds a beautiful, diffused glow to the darks — all in one effect. I chose a preset called “Beauty Pass”, then dialed the layer’s opacity down in the upper left. Every layer in Optics has blending modes and masks for combining and isolating effects.
Finalizing the Look with Film Lab
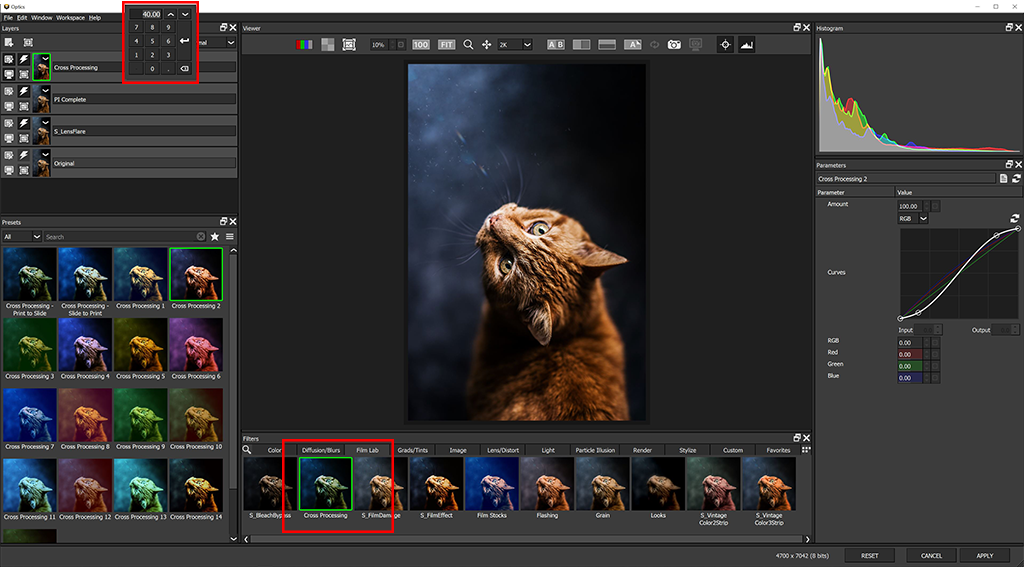
Once I am happy with my lighting or effects, I typically use the effects found in the Film Lab category to add grain and a color grade. You can find hundreds of color, black & white, and historical film process presets in the Film Stocks effect. I chose the Cross Processing effects and preset “Cross Processing 2”, then dialed the opacity for this effect down to 40 in the layer opacity.
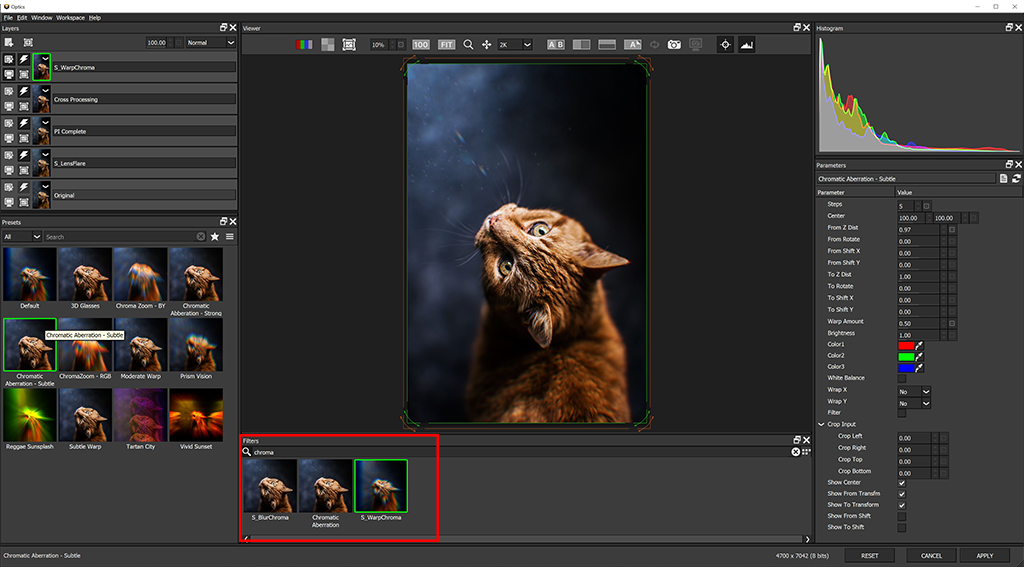
Final Touch: Chromatic Aberrations
Lastly, to really make digital images look more like film, I like to apply “chromatic aberrations” to add a little color fringing and movement. There are a couple ways to do this in Optics, but I like the “Chromatic Aberration – Subtle” preset which is found in the S_WarpChroma effect.
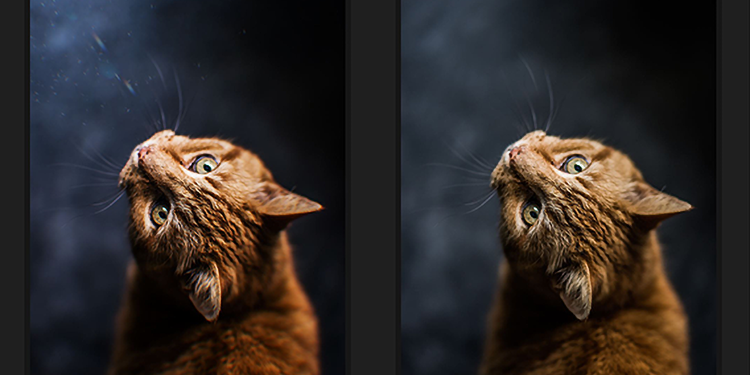
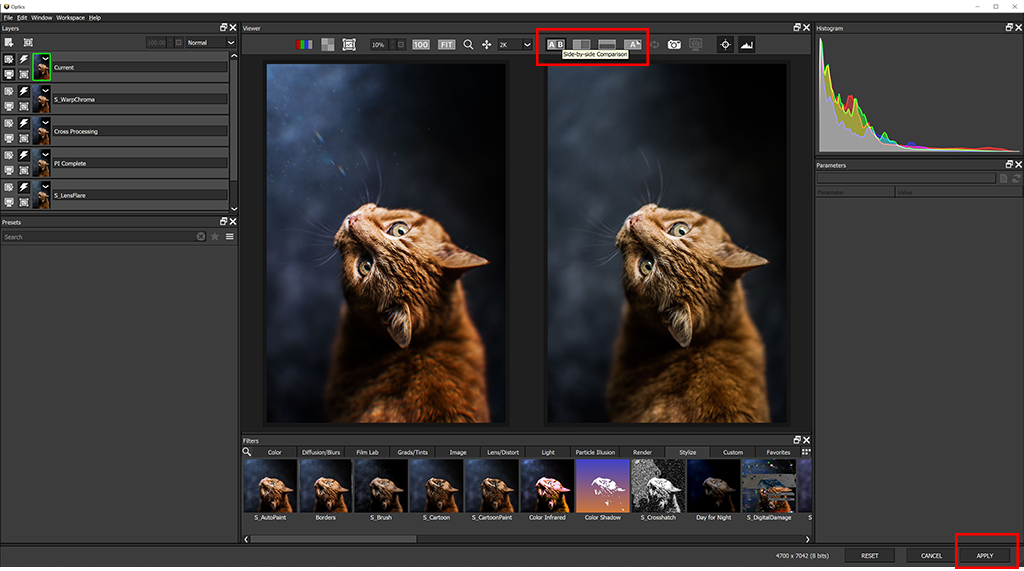
Comparing and Exit:
Above the viewer, find compare modes to view the before/after images with “side by side” or “split screen” options. Optics is always procedural, meaning you can simply double click on any effect layer to edit the corresponding parameters.
If you are happy with your your image edit in Optics, simple select the Apply button in the lower right OR go to File>Exit, short cut key (CTRL/CMD + Q) and select Save.
More About Optics:
I hope you enjoyed this Optics tutorial. If you’d like to learn more, here are a couple useful links:
For a limited time, take 25% off Optics!
Optics is available to purchase OR choose an annual or monthly subscription plan.
Visit Boris FX and enter code on checkout: Kelby25