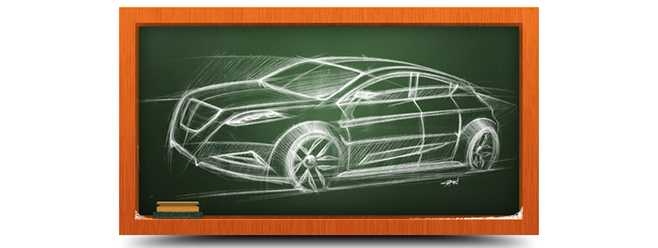
In order to make this action works in any language, we need to make some steps using the menus (instead shortcuts) so we can fully control the names of every single layer we make.
Before starting the tutorial, please download this sketch image made by Nallur Chandra Prasad. Any sketch image will work, but to follow the tutorial exactly as showed you will need the mentioned resource.
1) Open Photoshop and go to File > Open. Locate the sketch image you just downloaded and click OK.

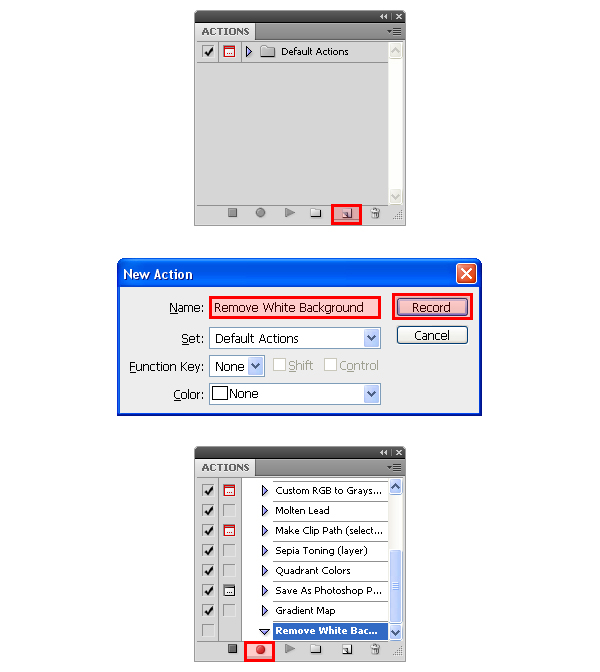
2) If you do not have the Actions Panel visible, go to Window > Actions. Click on the Create New Action icon and set the name to "Remove White Background". Click Record. From now on, every step we make will be recorded, so please follow the instructions exactly in order to make the action works in any language.
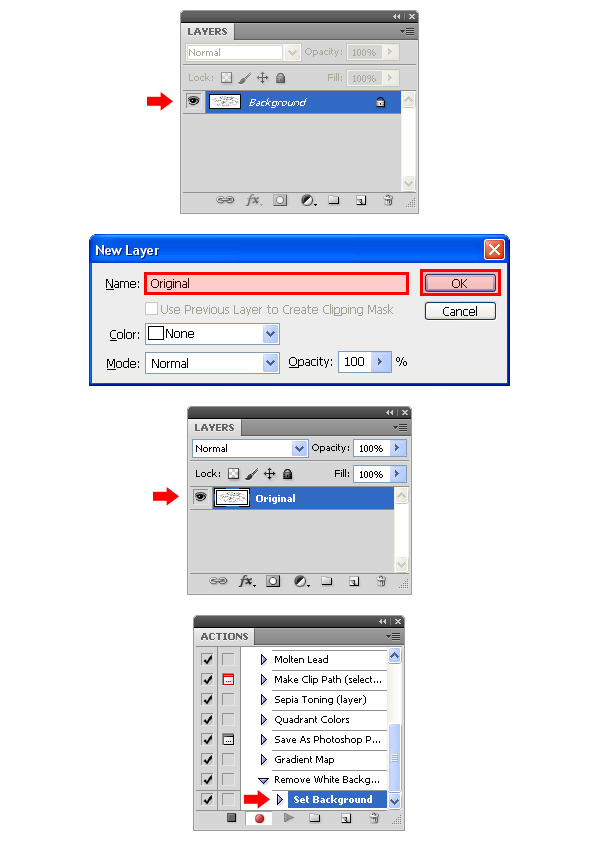
3) In the Layers panel, double click over the "Background" layer. In the new window, set the name to "Original" and click OK. You will notice that the action is already recording this in the Actions Panel.
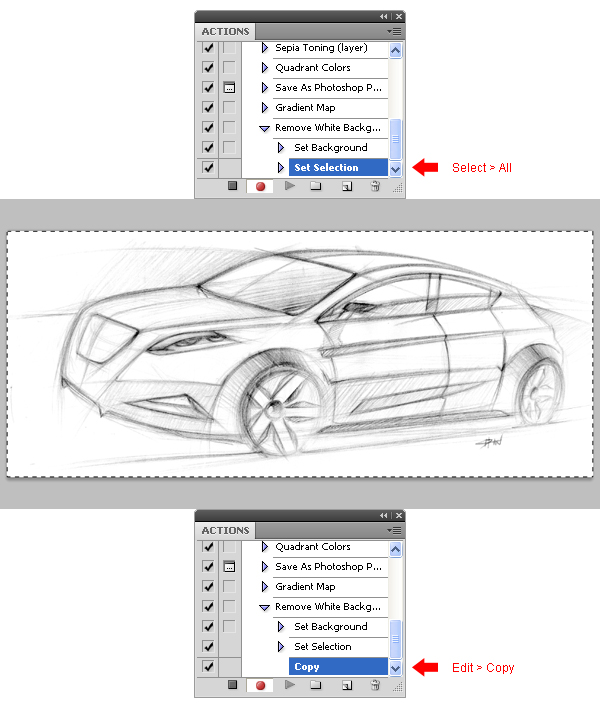
4) Go to Select > All. Now go to Edit > Copy.
5) If you do not have the Channels Panel visible, go to Window > Channels. Click on the "Create new channel" icon.
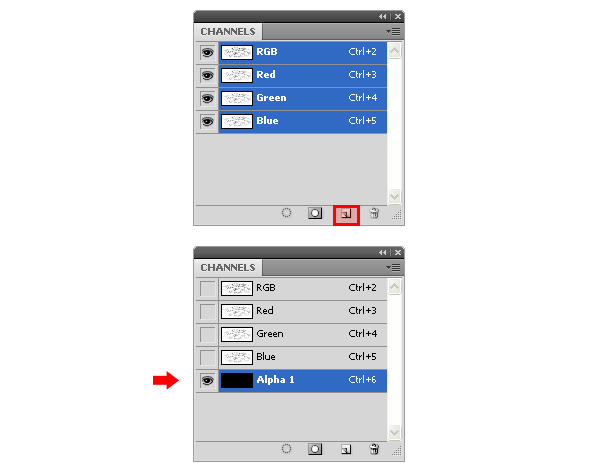
Double click over the channel´s name, and set the name to "Alpha".
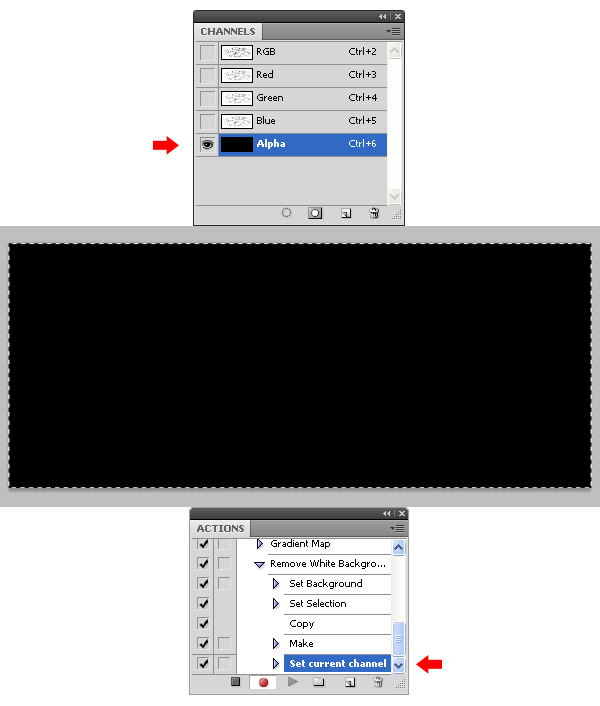
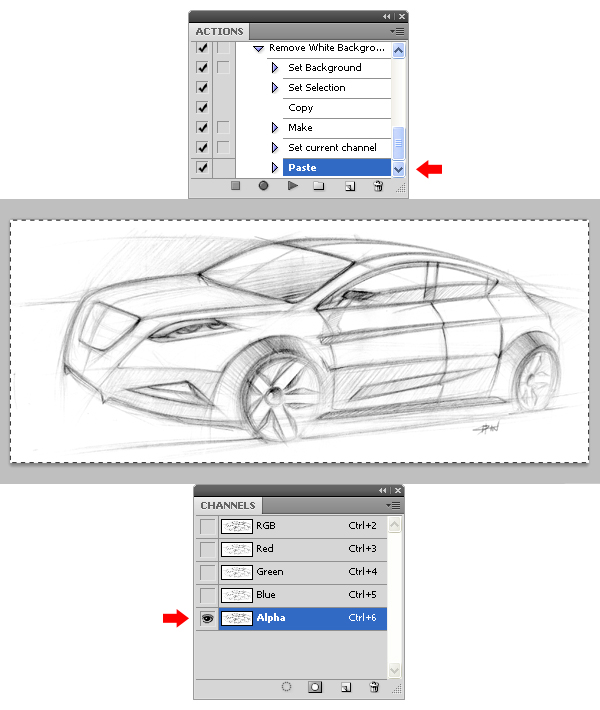
6) Go to Edit > Paste.
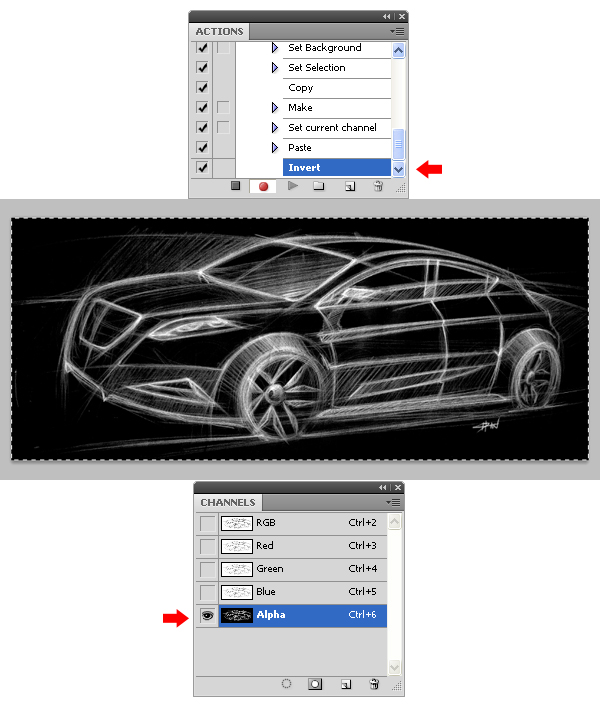
7) Go to Image > Adjustments > Invert.
8) Go to Select > Load Selection. In the new window set the Channel source to "Alpha", and in Operation select "New Selection". Click OK.
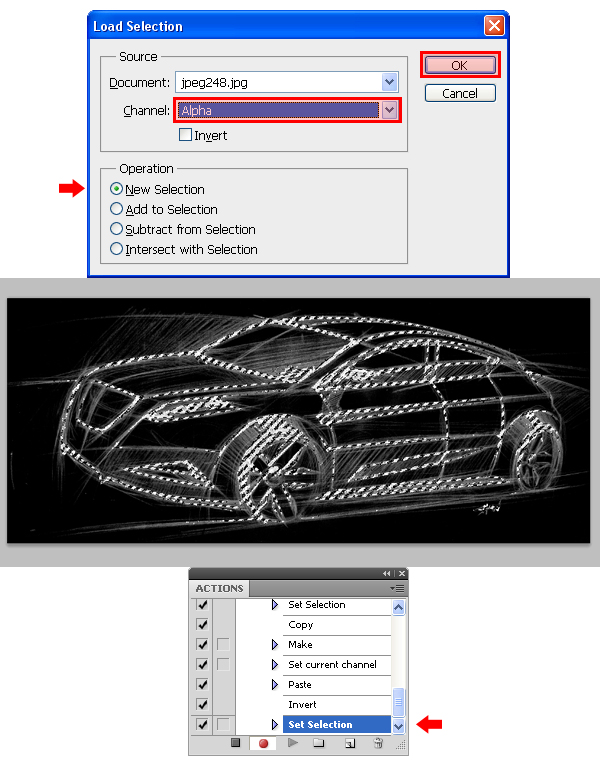
9) Go to Layer > New > Layer and set the name of the new layer to "Sketch Copy". Click OK.
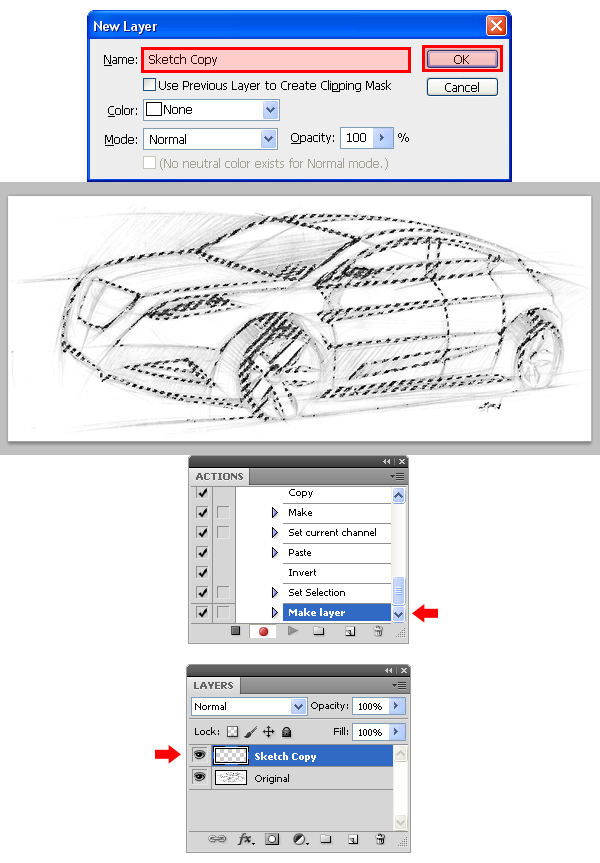
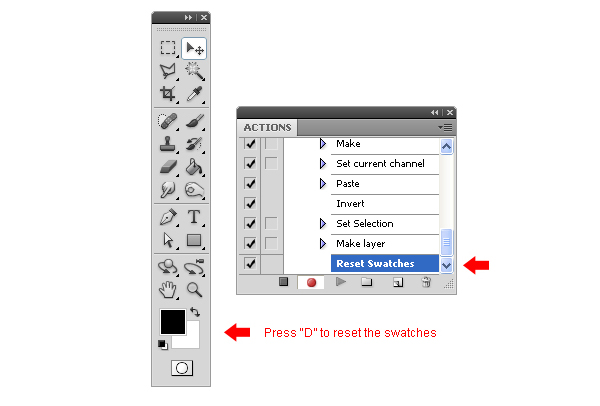
10) Press "D" on your keyboard to reset the swatches.
11) Go to Edit > Fill. On Contents set use to "Foreground Color" and click OK.
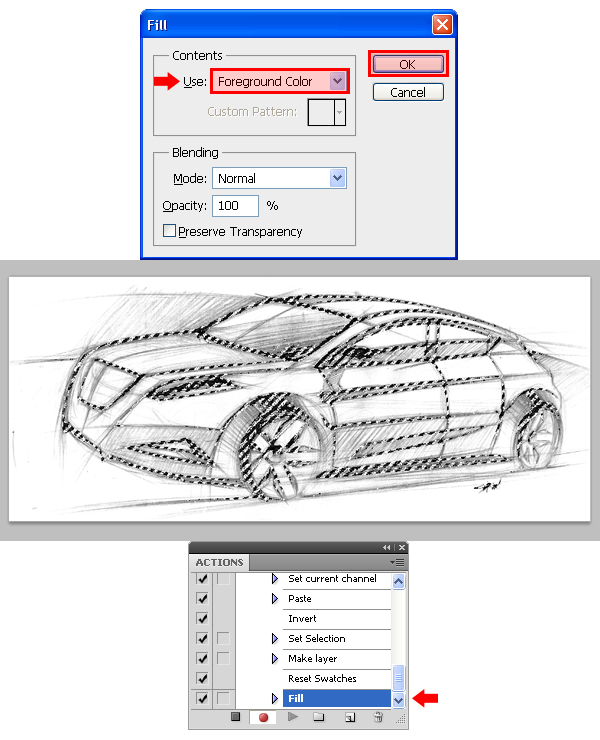
12) Again, go to Edit > Fill and set Contents to "Foreground Color". Click OK.
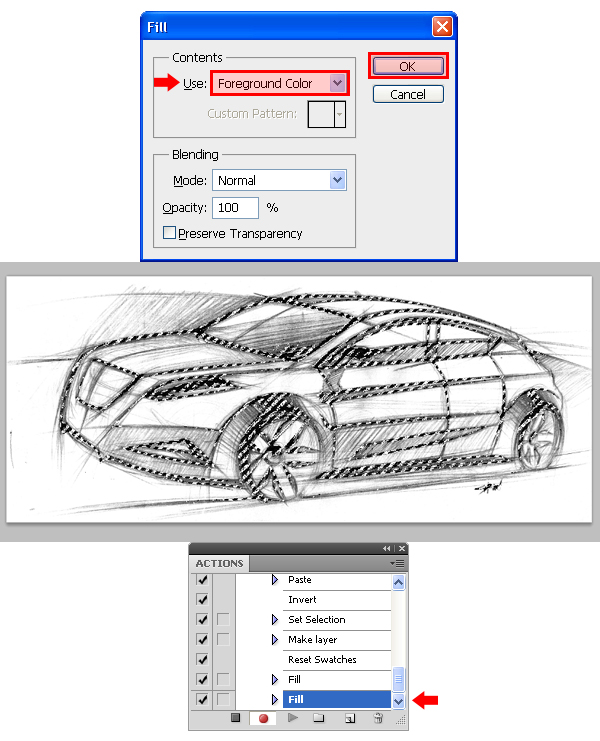
13) Go to Select > Deselect.
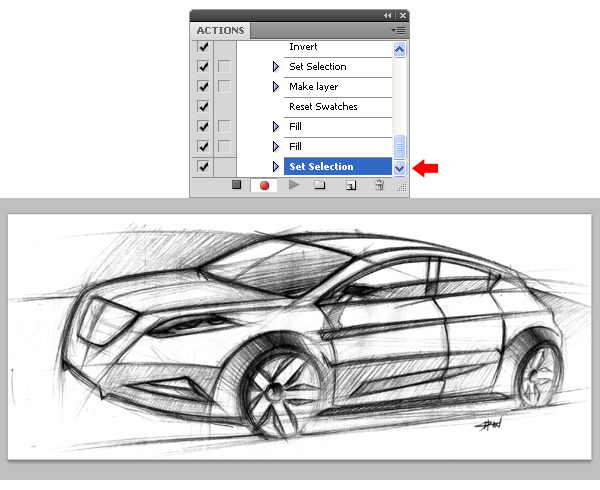
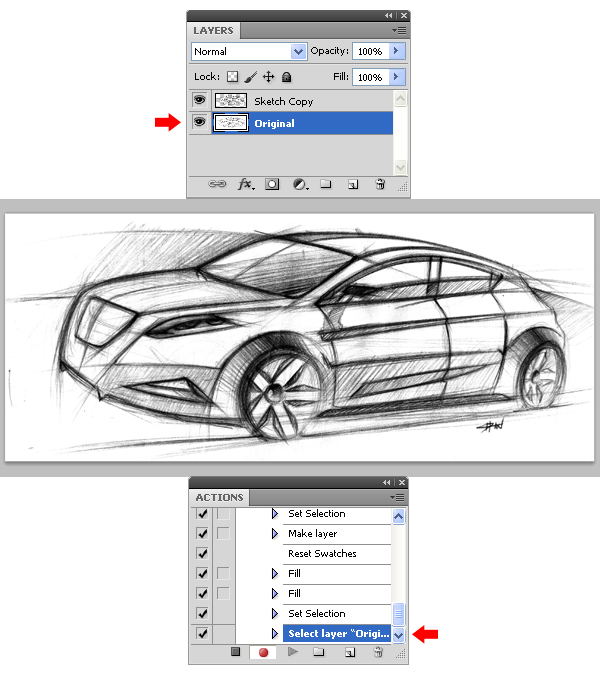
14) On the Layers Panel, select the "Original" layer.
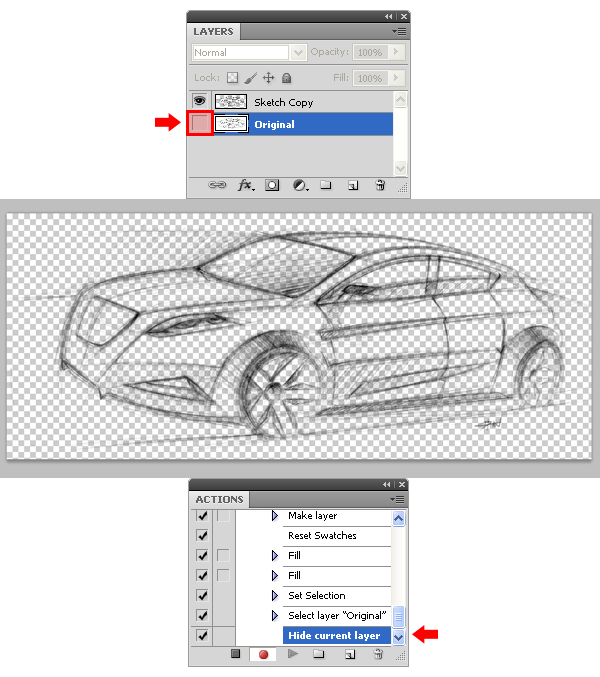
15) Click over the eye icon in order to hide this layer.
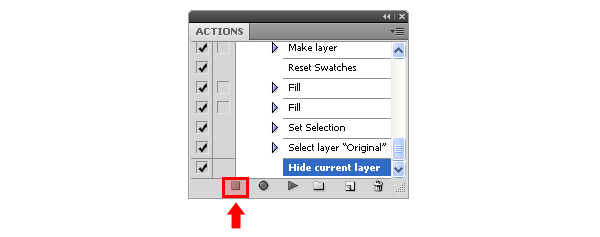
16) Finally, in the Actions Panel, click on the "Stop playing/recording" icon.
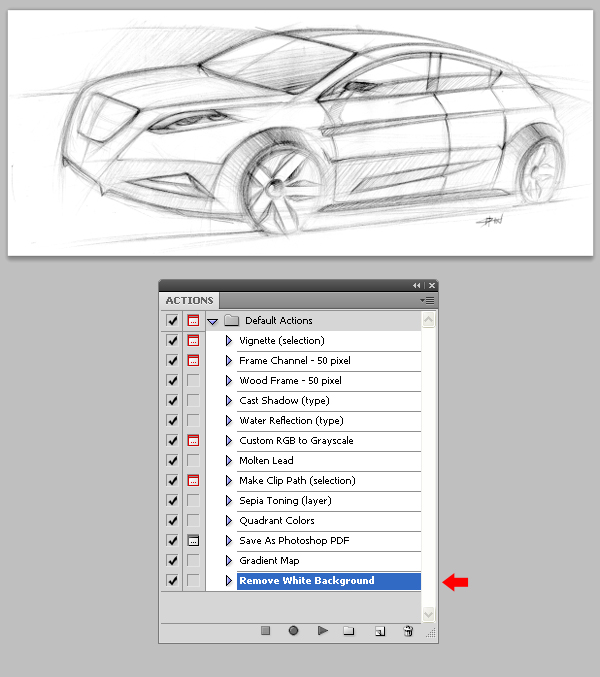
17) Now that you finish recording your action, you can go ahead and test it. Close all opened documents and open your image (we will use the same sketch). Once opened, go to your Actions Panel, and select the recently created "Remove White Background" action.
Click on the Play icon and let Photoshop do the work for you.
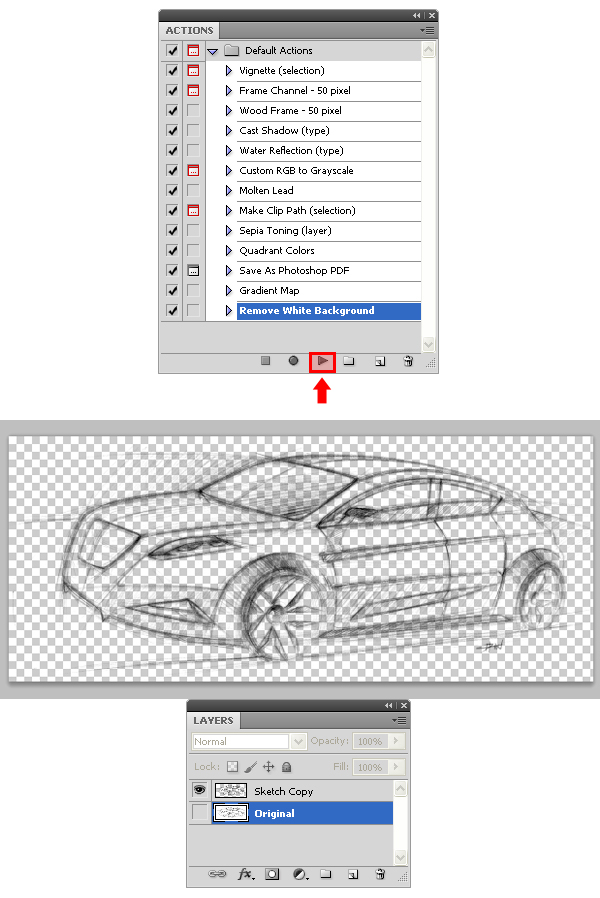
Now that you have tested the action, you can go ahead and have some fun changing a few settings on the "Sketch Copy" layer to achieve a different effect.
For example, you can change the layer´s color, add a drop shadow or even apply a color gradient to it, by using some layer effects. Let´s do some changes on the "Sketch Copy" layer to achieve easily a new look & feel.
1) First, select the "Sketch Copy" layer to make it active.
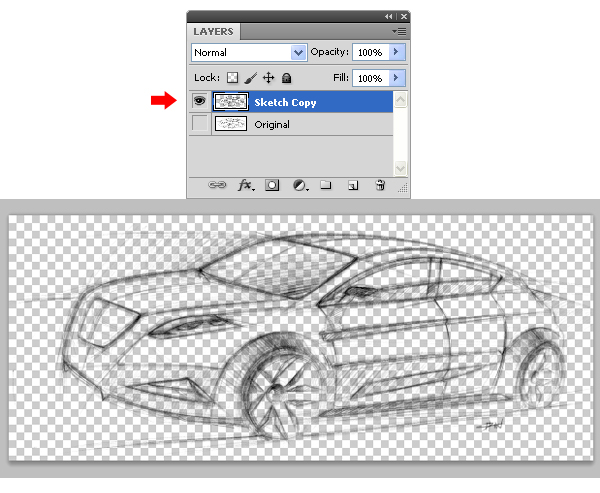
2) Go to Layer > Layer Style > Color Overlay. Click over the small color rectangle and in the new window set the color to #FFFFFF. Click OK to apply the color and click OK again to apply the effect.
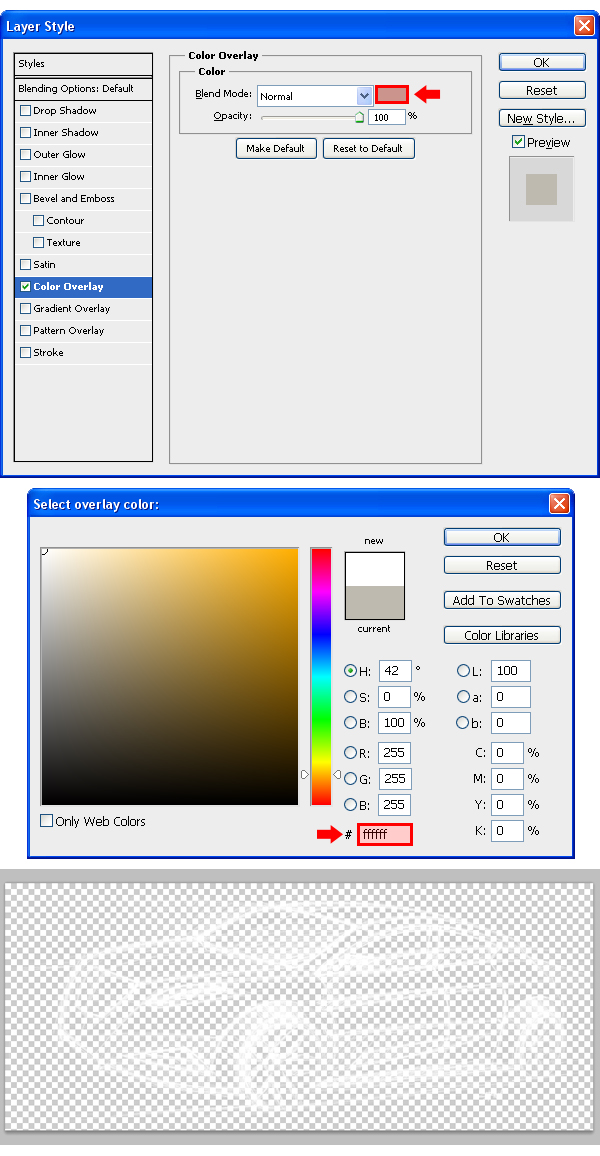
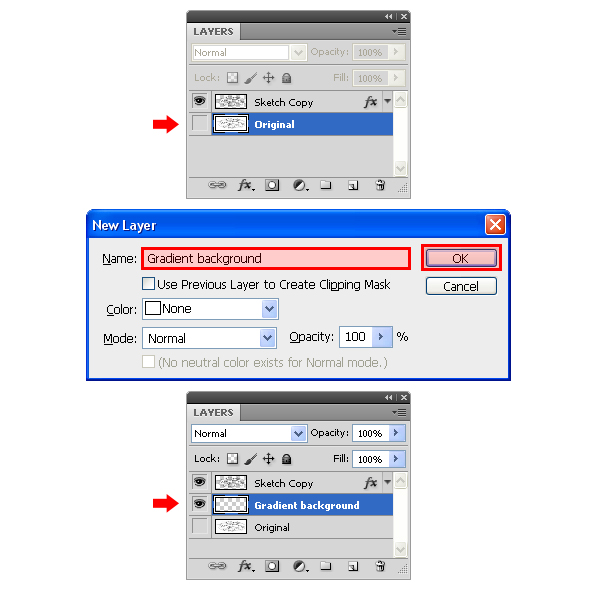
3) Click Over the "Original" layer and go to Layer > New > Layer. In the new window, set the name to "Gradient background" and click OK.
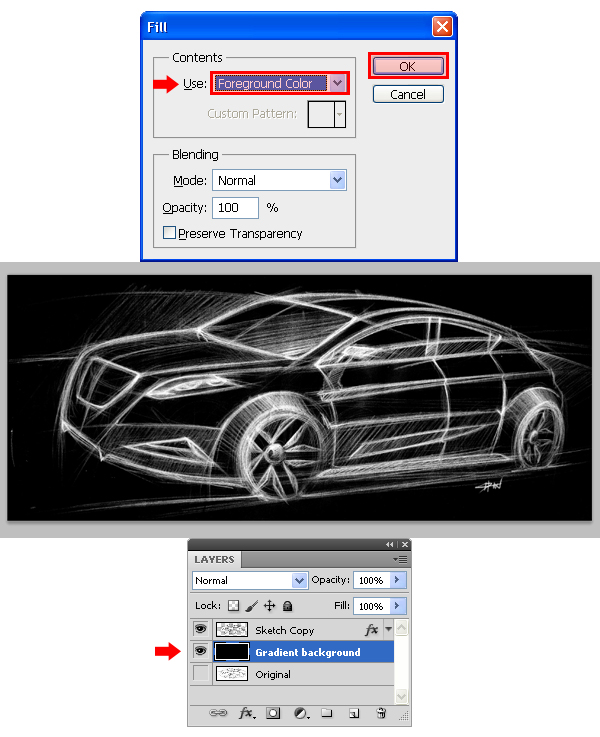
4) Go to Edit > Fill and set Contents to "Foreground Color". Click OK.
5) Go to Layer > Layer Style > Gradient Overlay. In the dialog window, click over the gradient thumbnail in order to open the Gradient Editor.
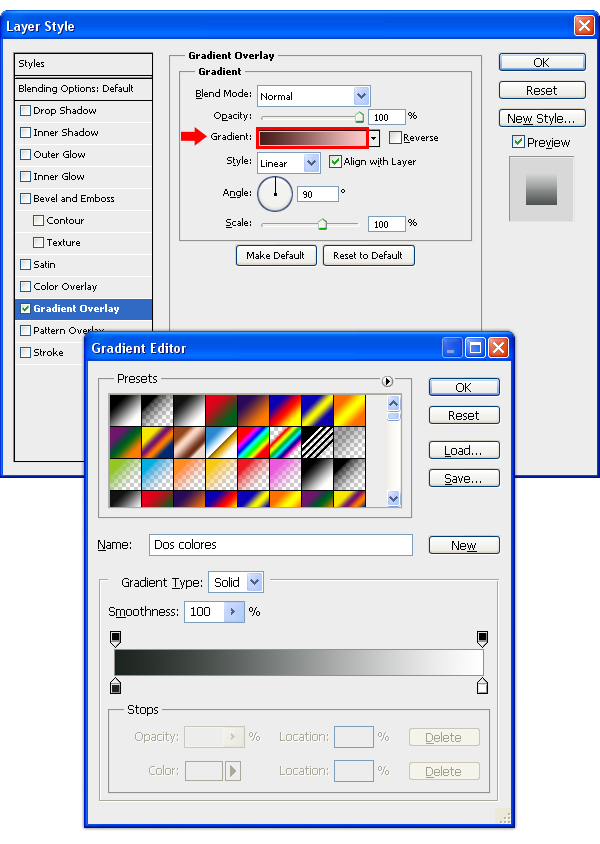
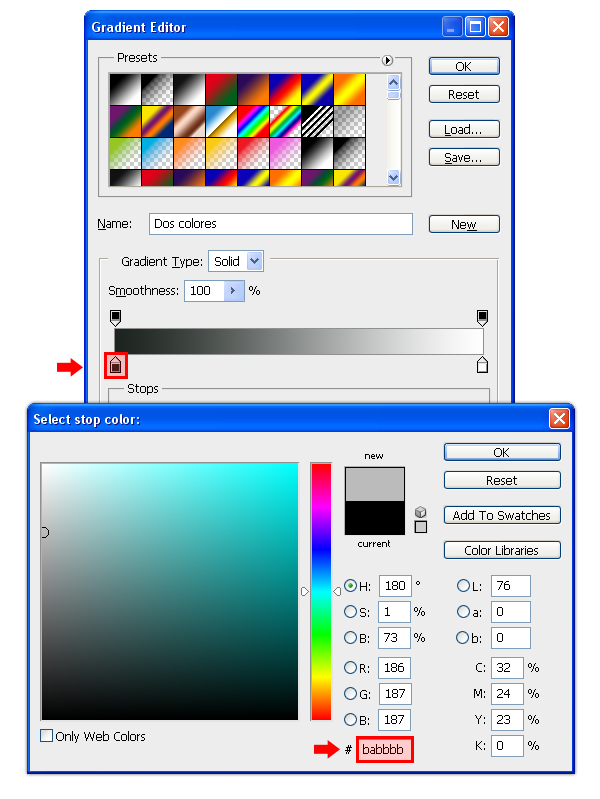
6) Double click over the small black color indicator and in the new color selection window set the color to #BABBBB and click OK.
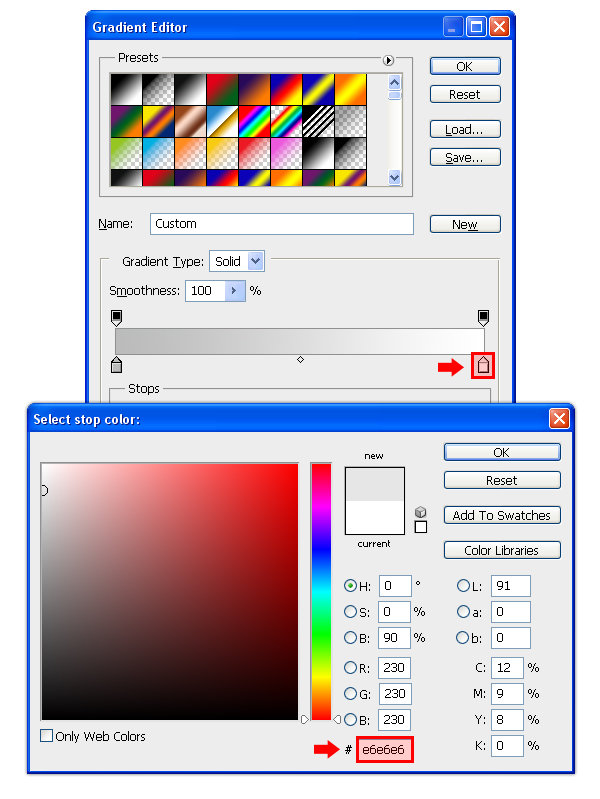
7) Now, double click over the small white color indicator and in the new color selection window set the color to #E6E6E6 and click OK.
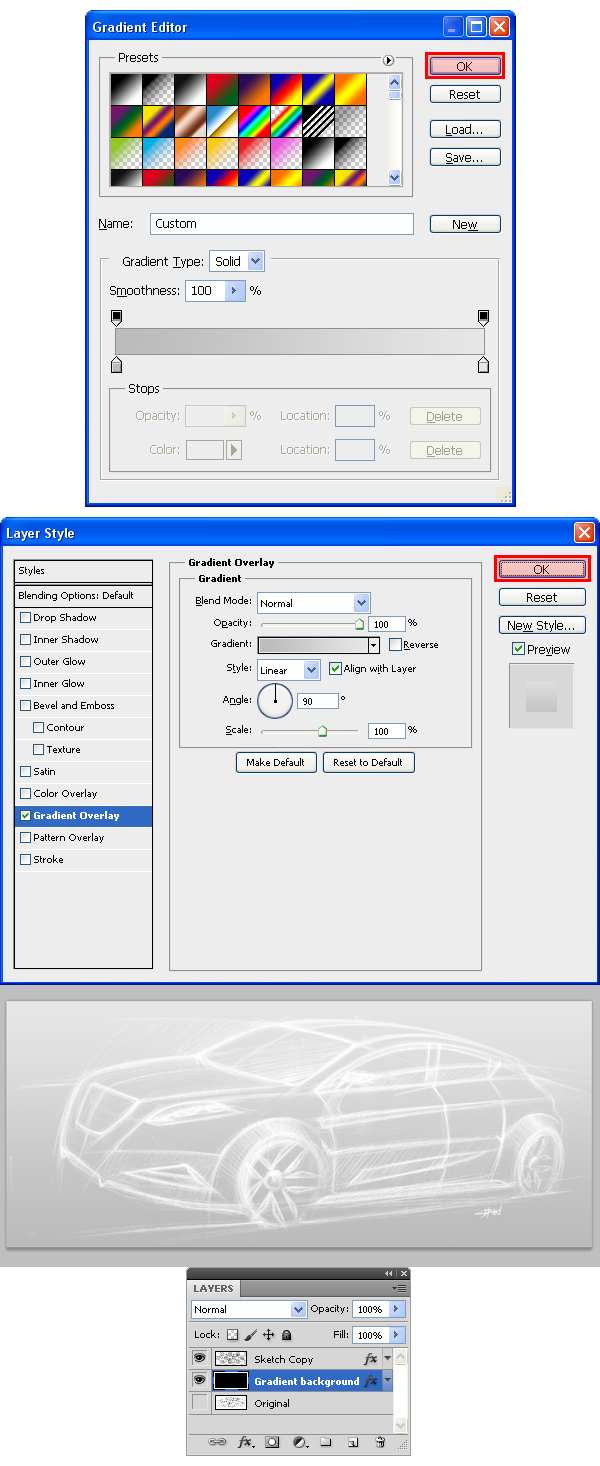
8) Click OK to apply the gradient and click OK again to apply the effect.
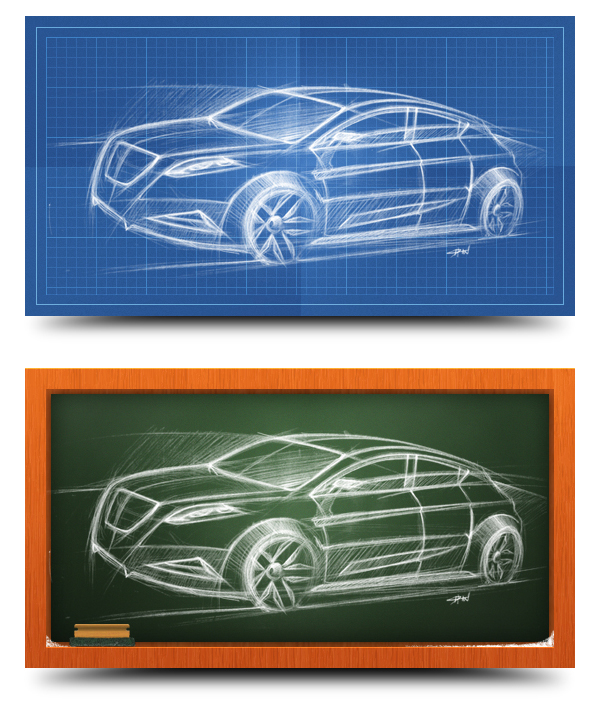
As you can see, it is easy to achieve a new look once you have removed the background; and with the new "Remove White Background" action you have just made, it is even easy and quick to remove it and work on your sketches to achieve a completely new look. Take a look at the following examples, find inspiration and bring your sketches alive easier without the background.


I don’t normally comment on things, but I have been looking for a way to remove the background from my scanned, pencil-shaded drawings forever, and your tutorial was the only thing that’s worked for me. Thank you so much for posting this!
So helpful, thank you.
Just came across your tutorial and it is excellent! Keep up the good work!
Amazing! I work at a small printer and mostly “make changes” to existing work. What a breath of fresh air to take an architect’s sketch, reverse it and use it for a historical poster! Thank you!