CloudFlare provides web performance and security solutions, enhancing site speed and protecting against threats.
Service URL: developers.cloudflare.com (opens in a new window)
cf_ob_info
The cf_ob_info cookie provides information on: The HTTP Status Code returned by the origin web server. The Ray ID of the original failed request. The data center serving the traffic
session
__cfseq
Sequence rules uses cookies to track the order of requests a user has made and the time between requests and makes them available via Cloudflare Rules. This allows you to write rules that match valid or invalid sequences. The specific cookies used to validate sequences are called sequence cookies.
session
cf_clearance
Whether a CAPTCHA or Javascript challenge has been solved.
session
_cfuvid
The _cfuvid cookie is only set when a site uses this option in a Rate Limiting Rule, and is only used to allow the Cloudflare WAF to distinguish individual users who share the same IP address.
session
__cflb
When enabling session affinity with Cloudflare Load Balancer, Cloudflare sets a __cflb cookie with a unique value on the first response to the requesting client. Cloudflare routes future requests to the same origin, optimizing network resource usage. In the event of a failover, Cloudflare sets a new __cflb cookie to direct future requests to the failover pool.
session
__cf_bm
Cloudflare's bot products identify and mitigate automated traffic to protect your site from bad bots. Cloudflare places the __cf_bm cookie on End User devices that access Customer sites that are protected by Bot Management or Bot Fight Mode. The __cf_bm cookie is necessary for the proper functioning of these bot solutions.
session
__cfruid
Used by the content network, Cloudflare, to identify trusted web traffic.
session
cf_chl_rc_m
These cookies are for internal use which allows Cloudflare to identify production issues on clients.
session
cf_chl_rc_ni
These cookies are for internal use which allows Cloudflare to identify production issues on clients.
session
cf_chl_rc_i
These cookies are for internal use which allows Cloudflare to identify production issues on clients.
session
__cfwaitingroom
The __cfwaitingroom cookie is only used to track visitors that access a waiting room enabled host and path combination for a zone. Visitors using a browser that does not accept cookies cannot visit the host and path combination while the waiting room is active.
session
cf_use_ob
The cf_use_ob cookie informs Cloudflare to fetch the requested resource from the Always Online cache on the designated port. Applicable values are: 0, 80, and 443. The cf_ob_info and cf_use_ob cookies are persistent cookies that expire after 30 seconds.
session
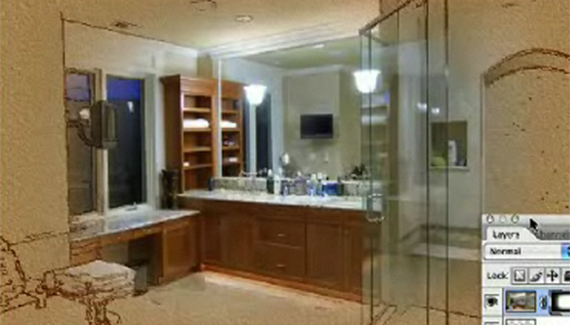



By far one of the best and most creative uses for Photoshop.
a very nice effect and very well explained
Really nice, not to hard to follow. I love these types of effects.
A very nice software and very handy to use. Creating new visualize effect will definetly enhance my creativity.
these natural and artistic effects are simply gr8……thanks alot …..very nicely xplained 🙂
There are still a lot of us who have dial-up.
This tutorial was useless.
How about words and pictures -disjointed words are not helpful!!!
I thought that it may just be one or two which were slow to load.
This site has so much potential, particularly for a teacher of digital graphics!!!
great tutorial, just awsome thanks
The effect looks really cool and the way you guys explain is really commendable.
Thanks for sharing your knowledge with novice like us.
Dial up?
Seriously?
YOU HAVE ISSUES!
very very nice .thanx for sharing…
Excellent and helpful movie for learners who want to learn through videos. It shows that how much
Excellent, creative and very goods idea. Thanx.
wow. i always wanted to know how they did that =o! this is awesome
great tut for using in local commericals for tile and interior design.
wow, i’m a total beginner to photoshop and i’m really REALLY glad i came across your videos on the internet.
thanks for sharing these techniques! 😀
Great Tutorial. However, I am having a hard time with one aspect. When it comes to using the gradients ( ) I am only allowed to apply to either the top, left, right or bottom. One only. I am unable to use the gradient on more than one. How do you fix that? Help! I’m at a loss!
Lee
Lee, you missed the part (about halfway through) where he selected the gradient tool as black to transparent. Not black to white.
You are brillaint – thank you so much – now if only i knew how to make a black to transparent gradient as it appears i dont have one
When you live 6.5 miles from town and it takes 20 minutes to get to town because of the narrow and twisty roads, and where the forest ceiling is so thick you can only see the stars from your gravel driveway, you are greatfulto have dial-up.
Thanks Corey, for a novice like me your videos are easily understood and I am learning so much by following the tutorials……My children are really impressed by what I am creating….Never too old to learn new tricks….
Great tutorial! But I have one problem, when I want to make the overlay from the gradient tool, it doesnt show the lines (Something further than the middle of the movie). Does anyone knows why this is happening?
very cool tutorial you have there…
I used it to make some real cool effects on my images..
Thanks…
Lee: You are probably using a gradient that is going from black to white (or vise versa) You need to use a gradient that goes from black to transparent.
Also make sure you have the transparency box checked to the right.
Thank you for these tutorials. I don’t have Photoshop, I have Photoshop Elements. It takes a few adaptions to figure out how to achieve some of your steps, but it can be done. Your videos give them the basics, I just improvise….and learn things I’d never have found on my own. Much thanks.
Great tutorial, thanks! I found an adaptation if you don’t like the pixel-y look that the “Fill” can cause in the selection step: If you use “Stroke” instead, you can thicken the lines, and fill in the spots. Hope that helps someone 🙂
Beautiful effect!
I loved every steps of that tutorial! Thank you so much for your good work
gisèle
Hello,
I am unable to access the video ‘photo to drawing’ located at this web address “(insert the link here)”. Is it possible to send me the video directly or to post again so I can access it?
Thank you very much,
Rodrigo
Fantastic!!! help me for art disign,thankssssss