
"Simulate volumetric effects"â¦what? Those just sound like a bunch of big, fancy words. In plain English, what exactly is a volumetric effect?
Put simply, a volumetric effect represents what happens to a subject when it exists in a semi-transparent substance such as fog, smoke, or murky water.
Okay. So what does this have to do with aâ¦what did you call itâ¦depth mask?
Here's where things get pretty darn cool. A depth mask is a basic grayscale image that allows us to easily simulate the gradual disappearance of a subject over distance as it is obscured by fog, smoke, dust, or water.
Really, that's possible?
Yes! Now please give me the honor of showing how amazing this is.
Note: Although we'll create our own depth mask in today's tutorial, it's worth mentioning that the new PixelSquid website is loaded with 360-degree stock images and every one of them contains a high-quality built-in depth mask.
Special Note: PixelSquid is so excited for the MSJPhotography audience to experience the uniqueness of their 360-degree models that they are generously offering DOUBLE the free credits to the first 100 people who sign up via the following link…giving those who are quick to act $40 in free credits versus the regular sign up incentive of $20 in free credits: https://www.pixelsquid.com/promotions/msj_tutorial
Images courtesy of Shutterstock (Fish: Copyright Kletr #79415710, Ocean: Copyright Rengizzz #98243516) and PixelSquid (Submarine: Copyright 3d_molier #S100024702).
Step 1: Open a Basic Photo Composite
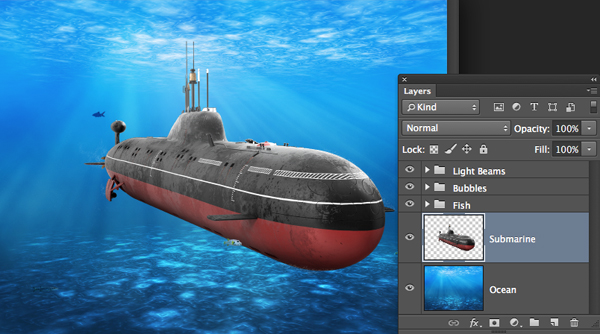
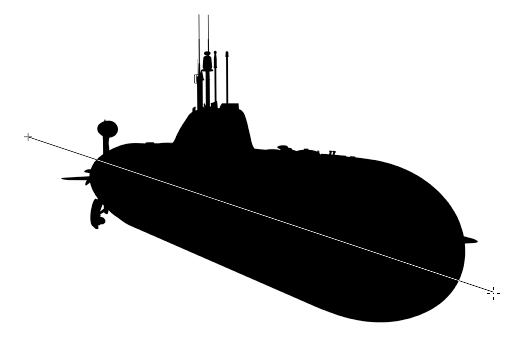
Open a file with a background layer and a subject that's been extracted and is on its own layer. To appreciate this effect, choose a background that features fog, mist, smoke, dust, or water.
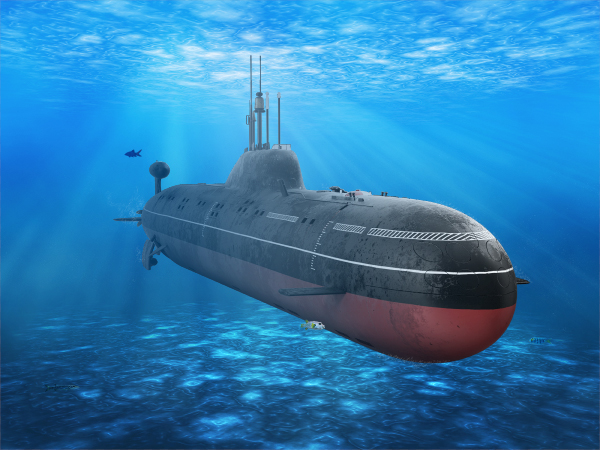
In this submarine example, notice how the sub currently doesn't look like it's submersed in water. If it were, the more distant parts of the sub would be covered by a larger volume of water and would be more obscured by blue. In addition, since blue water quickly filters out the red wavelength, the red paint would grow gradually less intense over the distance of the sub. A depth mask will allow us to accomplish these tasks and realistically "submerse" the sub.
Step 2: Create a Depth Mask
Before we start, it's helpful to understand how a depth mask works. A depth mask assigns a grayscale value to each pixel based on its proximity to the camera, so the further away an element, the lighter the pixel, and the closer an element, the darker the pixel. Now that we understand the basic principle of a depth mask, let's create one.
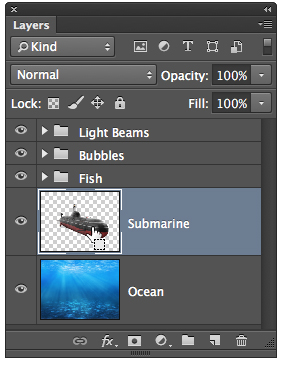
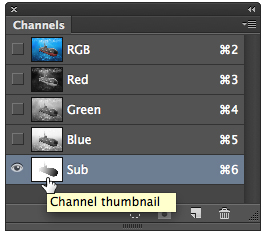
Command-click (PC: Control-click) on the sub layer thumbnail to pull a selection.
Choose Select>Save Selection. Name it Sub and press OK to deposit the selection in the Channels panel. If the Channels panel is not already open, choose Window>Channels. Eliminate the marching ants with Command-D (PC: Control-D). In the Channels panel, click on the word Sub to activate the channel.
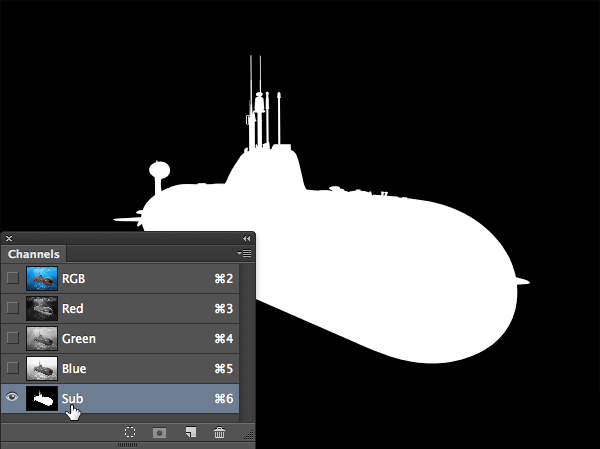
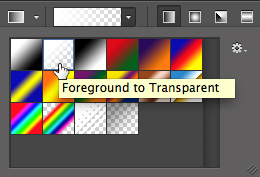
Press Command-I (PC: Control-I) to invert the channel. To create the depth mask, we'll run a Linear gradient through the sub. Activate the Gradient tool. Press D to set white as the Foreground Color. In the Options Bar, open the Gradient picker and choose the Foreground to Transparent option.
Ensure that the Linear Gradient icon is selected and drag a gradient from just beyond the sub's stern (rear) to just beyond the bow (front).
Step 3: Desaturate the Red Color Over a Distance
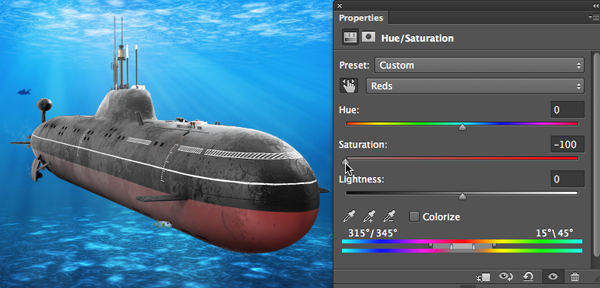
Now we'll drain the red color over a distance using the depth mask. In the Channels panel, Command-click (PC: Control-click) on the Sub thumbnail to load the depth mask as a selection.
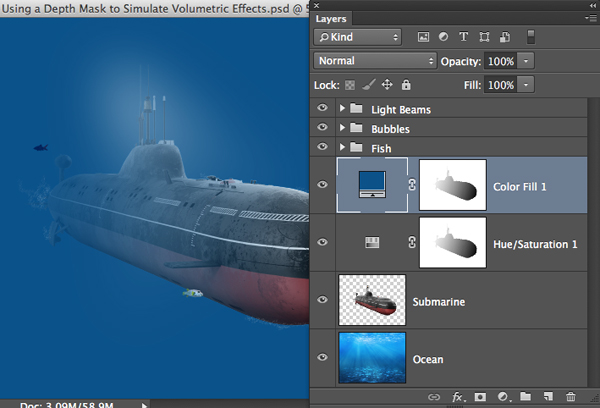
Still in the Channels panel, click the letters "RGB" to safely exit the Channels panel. If the Adjustments panel is not open, choose Window>Adjustments. Click on the Create a new Hue/Saturation adjustment layer icon. In the Properties panel, select Reds from the pull-down and drag the Saturation slider completely to the left. Because of the depth mask, notice how this drains more color from the distant part of the sub than it does from the close part. Cool!
Step 4: Obscure the Sub with Blue Water Over a Distance
Now let's gradually obscure the sub over a distance with blue water using the same depth mask. Activate the Hue/Saturation layer thumbnail (not mask) and choose the Eyedropper tool. Click to sample a dark blue color from the ocean.
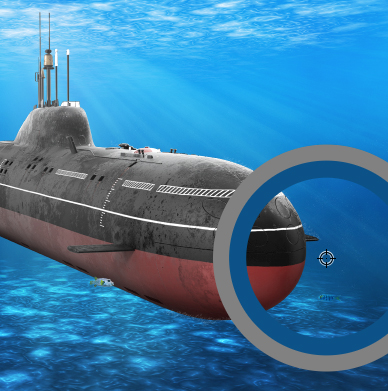
Command-click (PC: Control-click) the Hue/Saturation adjustment layer mask to load the depth mask as a selection. Choose Layer>New Fill Layer>Solid Color. Press OK. Since we previously selected the dark blue color, click OK.
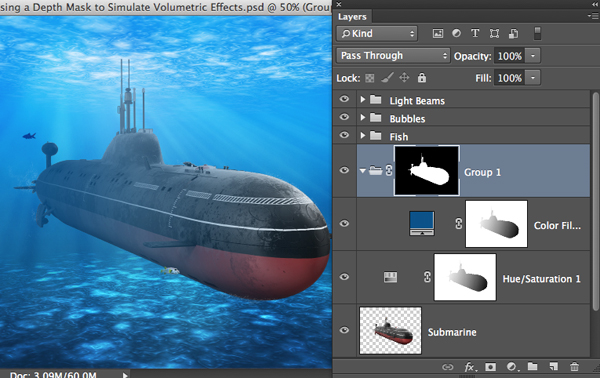
To remove the uniform blue color from around the sub and reveal the ocean water, press Command-G (PC: Control-G) to add the Solid Color layer to a group. Command-click (PC: Control-click) the Submarine layer thumbnail to load it as a selection. Click the Add layer mask icon at the base of the Layers panel. This adds a mask to the group containing the Solid Color layer. Notice how the sub now appears to be obscured by more and more water over a distance.
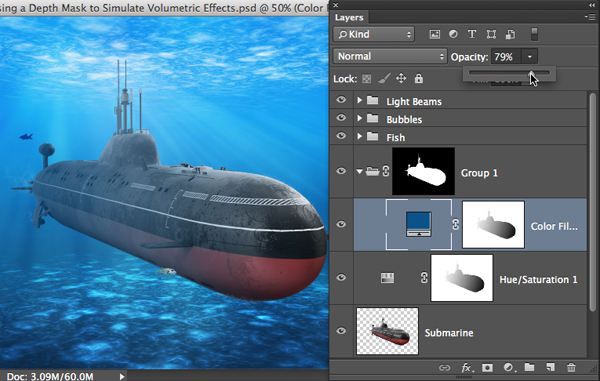
If the amount of obscuration is too much, reduce the opacity of the Solid Color layer.
Here's a look at the "Before" imageâ¦
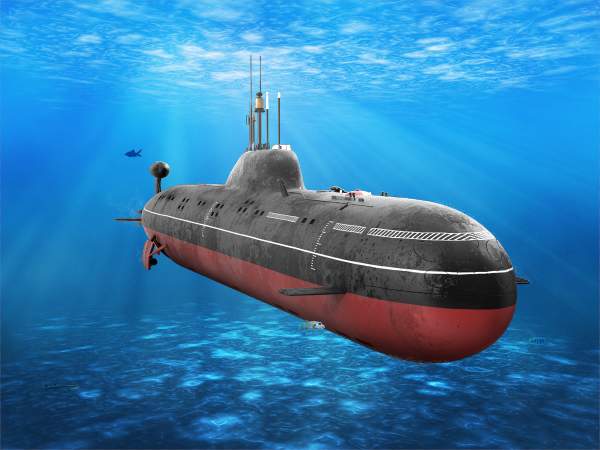
â¦and here's the "After."
Much more realistic! Yippee!
Mark S. Johnson Photography
msjphotography.com
