

This tutorial will show you how to create and modify a simple brush tip, and use it along with some layer styles to create a shiny lines text effect.
Tutorial Assets
1) Intro Regular font.
2) Celestial Background 48 by FrostBo.
3) Free Pack 6000 photoshop gradients by Supertuts007 (Load the CHROMES.grd file).
Step 1
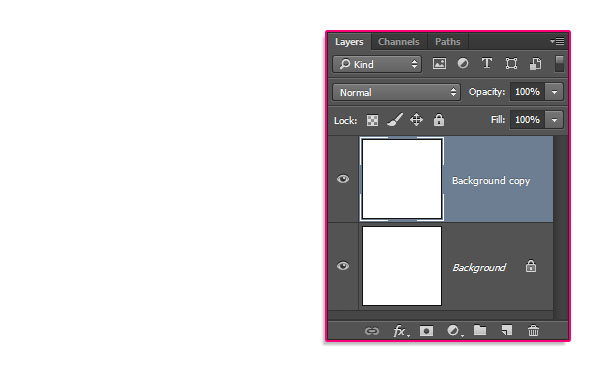
Create a new 1280 x 1280 px document, and duplicate the Background layer.
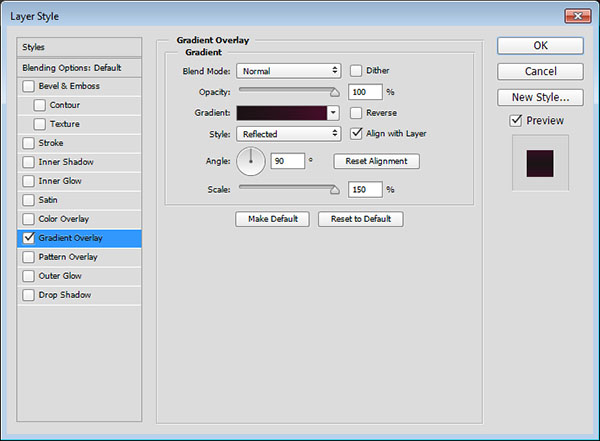
Double click the Background copy layer to apply a Gradient Overlay effect using the following settings:
Style: Reflected
Scale: 150%
Click the Gradient box to modify the gradient fill
Create the gradient using the colors #1b1315 to the left and #460d28 to the right. Then, click one of the Color Stops you have, select the Midpoint, and change its Location value to 60%.
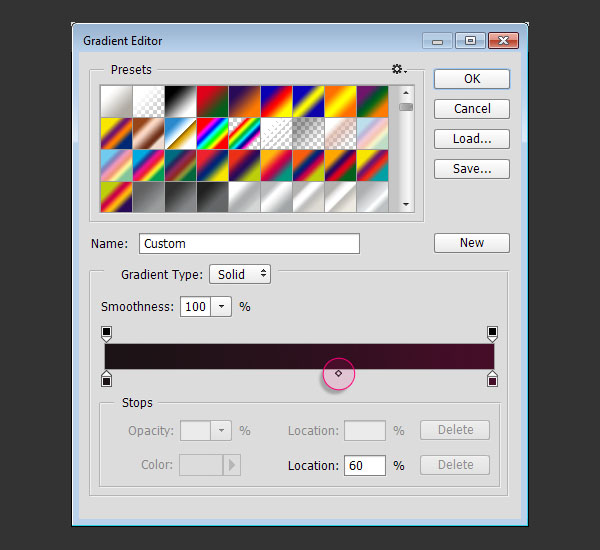
This will create the Background gradient fill.

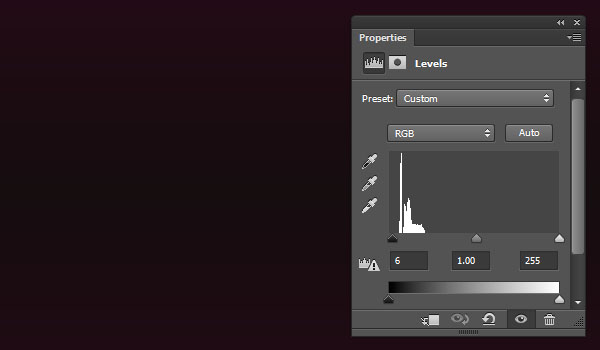
Click the Create new fill or adjustment layer icon at the bottom of the Layers panel and choose Levels.
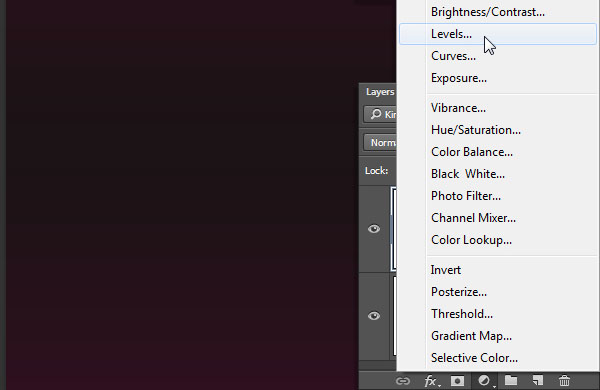
Change the Shadows value to 6 to darken up the Background a little bit.
Step 2
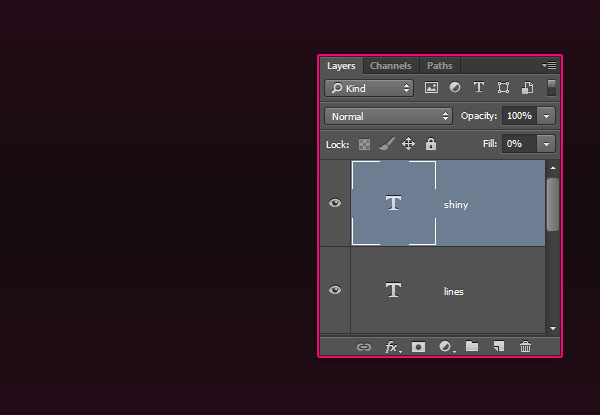
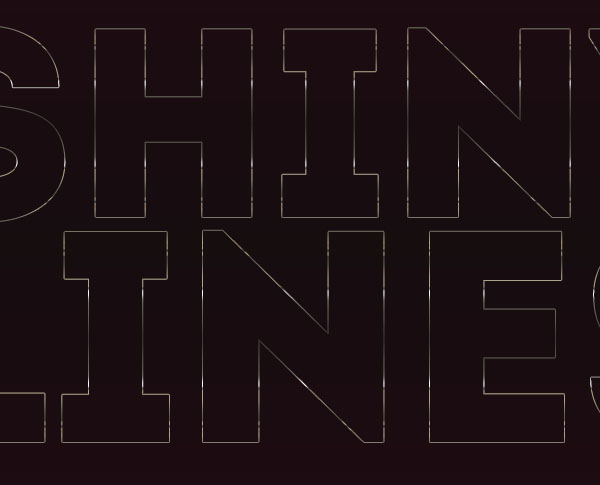
Create the text, each line in a separate layer, using the font Intro Regular. Use any Size you like, and you can also use different values for each line of text if you like. Here, the first line’s font Size is 268pt, and the second’s is 300pt.

Change each text layer’s Fill value to 0.
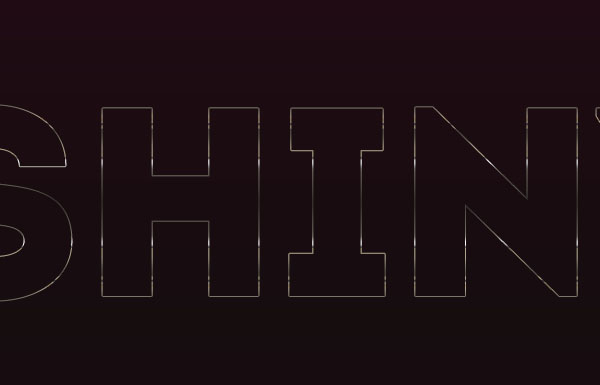
Double click the first text layer to apply a Stroke effect with the following settings:
Size: 1
Fill Type: Gradient
Style: Reflected
Angle: 90
Use the faucet 160 gradient fill.
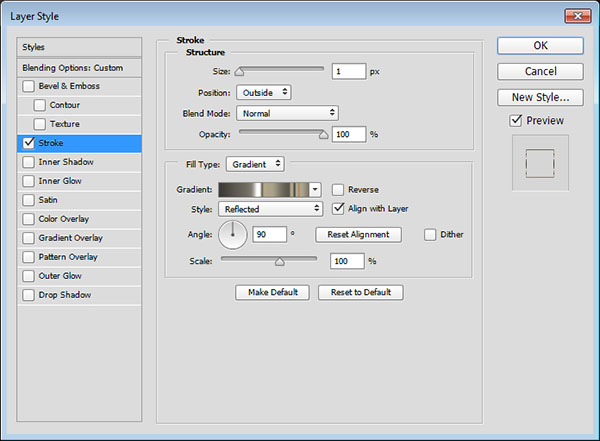
This will style the outer stroke part.
Right click the styled layer, choose Copy Layer Style, the select the other text layers you have, right click any of them, and choose Paste Layer Style.
Step 3
Create a new 500 x 500px document, pick the Rectangle Tool, and make sure that the Shape option is active in the Options bar.
Then, click once inside the document to get the Create Rectangle box. Set the Width to 5 and the Height to 300, and click OK.
Keep in mind that the Height should be long enough to fill the text you have vertically. You can also play around with the Width value to get thicker or thinner lines.
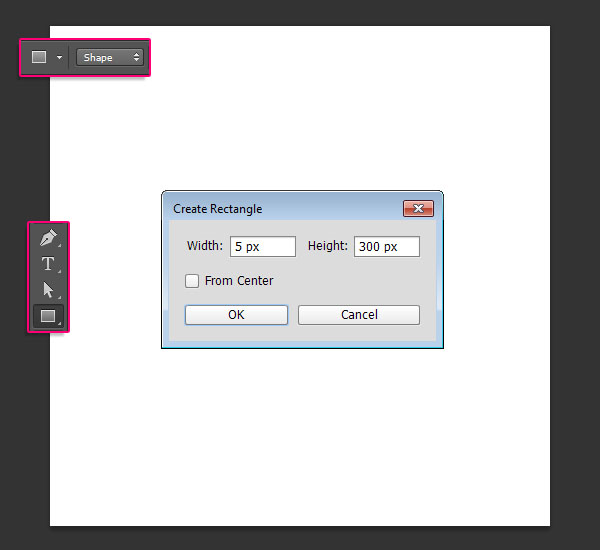
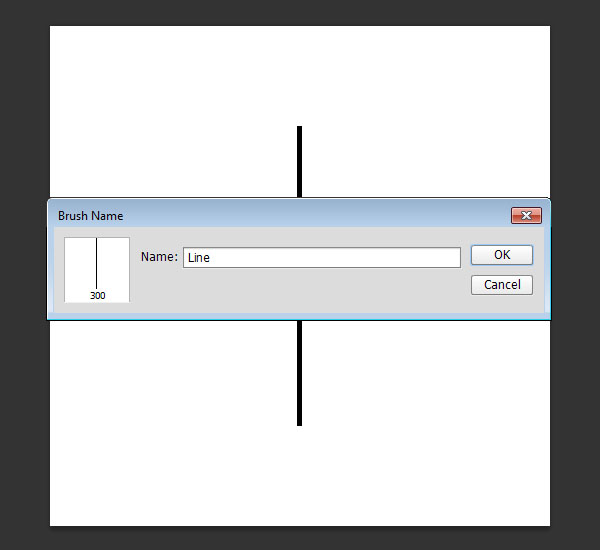
Make sure that the rectangle’s color is Black, then go to Edit > Define Brush Preset, and type in a name for the brush.
Step 4
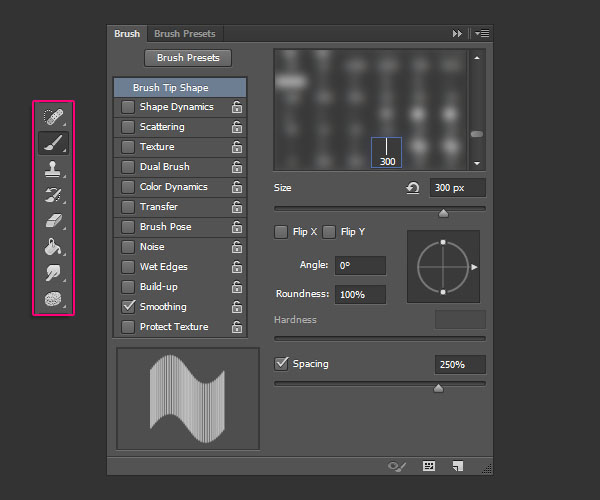
Go back to the original document, pick the Brush Tool, and open the Brush panel (Window > Brush).
Choose the tip you’ve just created, and modify its settings under the Brush Tip Shape
tab as shown below. You can use a different Spacing value if you want the lines to be closer or farther apart from each other.
Create a new layer below each text layer you have, and call the layers Brushes 1, Brushes 2, and so on.
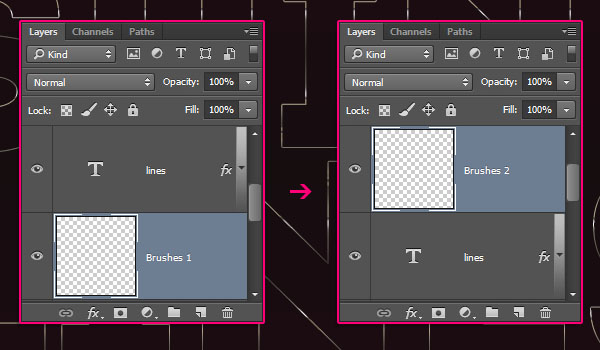
For each text layer, Cmd/Ctrl + click its thumbnail to create a selection, then click its Brushes layer.
With the Brush Tool still active, click once where you want the lines to start.
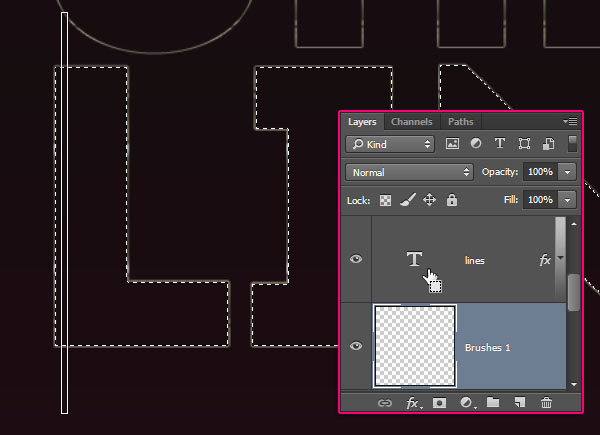
Press and hold the Shift key, then click once again where you want the lines to end, and release all. This will fill the selection with the modified lines brush.

Press Cmd/Ctrl + D to get rid of the selection, and repeat the same steps to fill the rest of the text with lines.

Step 5
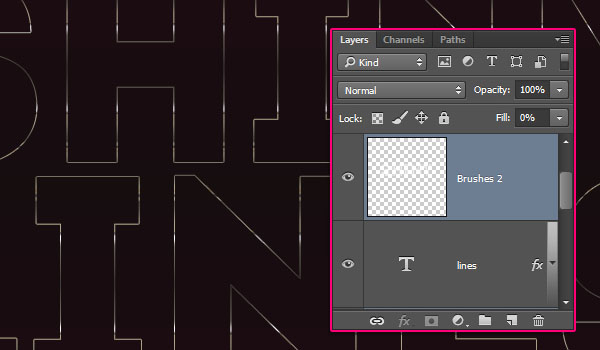
Change all the Brushes layers’ Fill values to 0.
Double click one of the Brushes layers to apply a Gradient Overlay effect using the steel pipe 20 gradient fill.
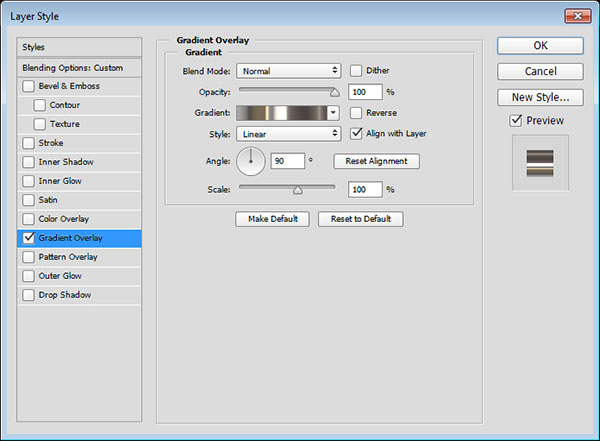
This will style the lines. Copy and Paste the layer style for the rest of the Brushes layers you have.
You can try using different gradient fill combinations as well if you like.
Step 6
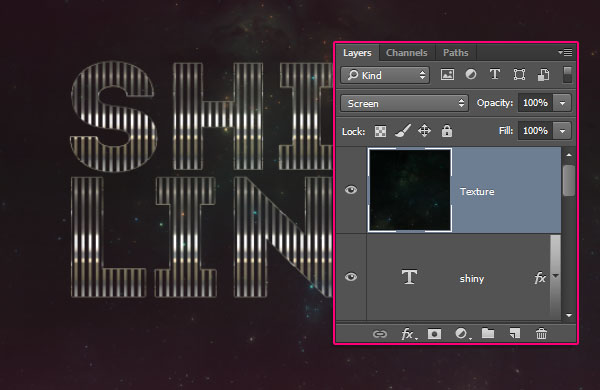
Place the Celestial Background 48 image on top of all layers, change its layers’ Blend Mode to Screen, and resize it as needed.
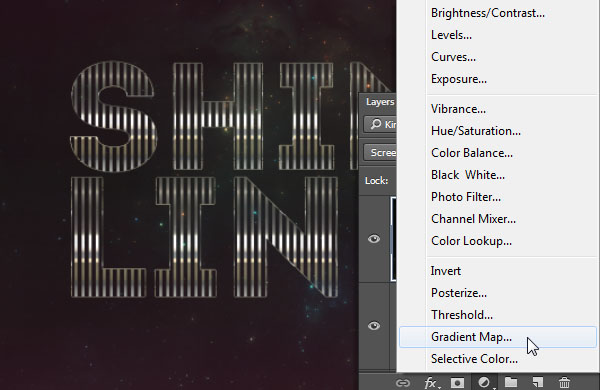
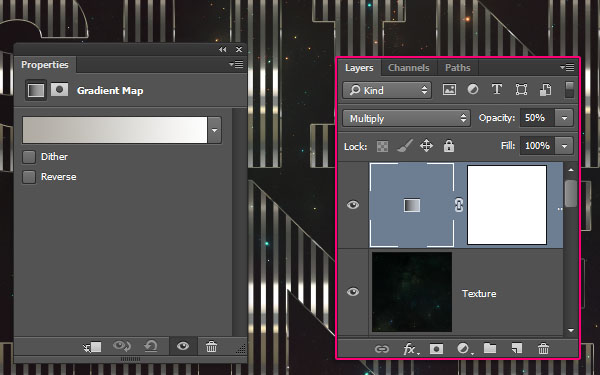
Click the Create new fill or adjustment layer icon and choose Gradient Map.
Create the gradient using the colors #afaba3 to the left and #ffffff to the right. Change the adjustment layer’s Blend Mode to Multiply, and its Opacity to 50%.
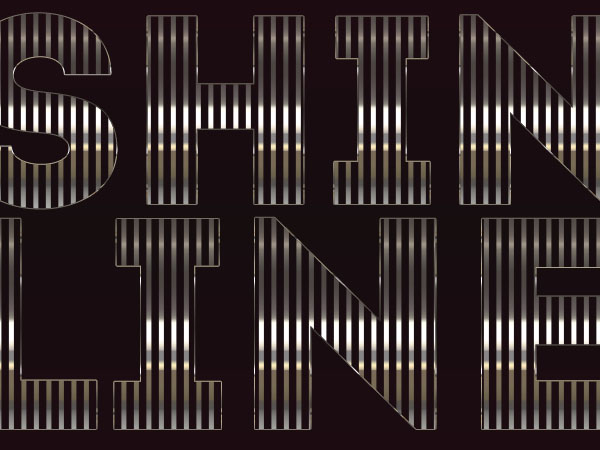
Conclusion
This is the final result. Creating the brush using different settings, as well as using other gradient fills, can help you achieve many variations of this effect.
Hope you enjoyed the tutorial and found it helpful.

