
This technique is written for Photoshop CS6 Public Beta, but can be accomplished in prior versions with a few small work-arounds.
When I first spotted the graphic for ABC's Scandal television series, the mysterious wrinkled and shredded paper intrigued me, but upon closer inspection I also loved the distressed type and singed paper edges. In today's tutorial, we'll use a custom brush as well as a free texture to reproduce the graphic.
Step 1: Create a New Document
Choose File>New. Set the Width to 1000 pixels, the Height to 650 pixels, and the resolution to 72 pixels/inch (use a higher resolution if the image is intended for print). Ensure that the Color Mode is set to RGB and the Bit Depth to 8. Set the Background Contents to White.
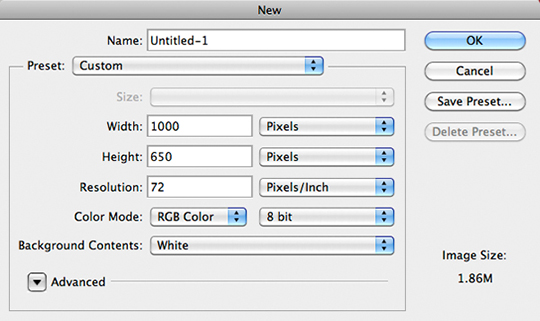
Press OK.
Step 2: Create a Custom Shredded Paper Brush
Now we'll create a brush that we can use to produce the look of shredded paper. Click the Create a new layer icon at the base of the Layers panel. Select the Rectangular Marquee tool. Drag out a vertically oriented rectangle shape that looks like the screengrab below.
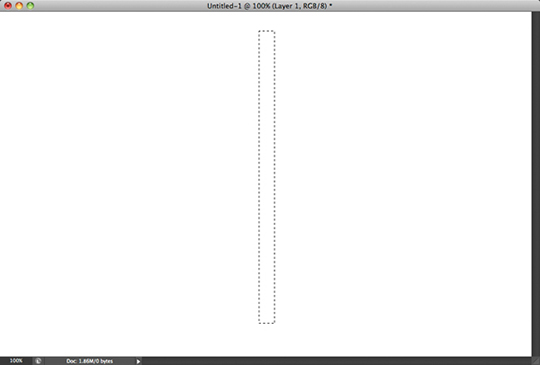
Press "D," then Option-Delete (PC: Alt- Backspace) to fill the selection with black. Choose Edit>Define Brush Preset. Name the brush "Shredded Paper" and click OK. We'll put this custom brush to use in Step 4. Choose Select>Deselect and turn off visibility for the black rectangle layer (Layer 1).
Step 3: Fill the Background
Activate the Background. Press Shift-Delete (PC: Shift-Backspace) to invoke the Fill dialog. Set the Contents menu to 50% Gray and press OK. Double-click the "Background" layer name and click OK in the New Layer dialog to convert the Background to a normal layer. Click the Add a layer style ("fx") icon at the base of the Layers panel and choose Gradient Overlay. Change the settings to match the screengrab below.
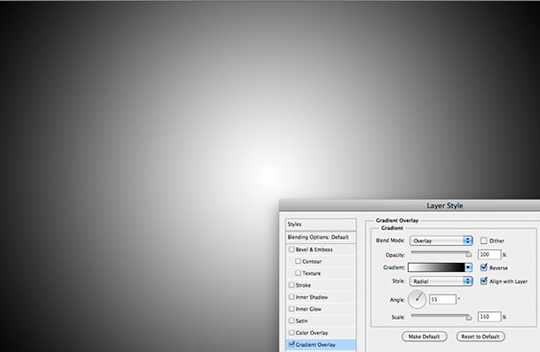
Press OK.
Step 4: Paint in the Shredded Paper
Now we'll import a wrinkled paper texture and put the custom brush to use to create the look of wrinkled, shredded paper. Open an image of wrinkled paper. If you don't have one, visit www.cgtextures.com and click the Paper thumbnail. Click the Plain Paper thumbnail and download the "Paper0029" texture.
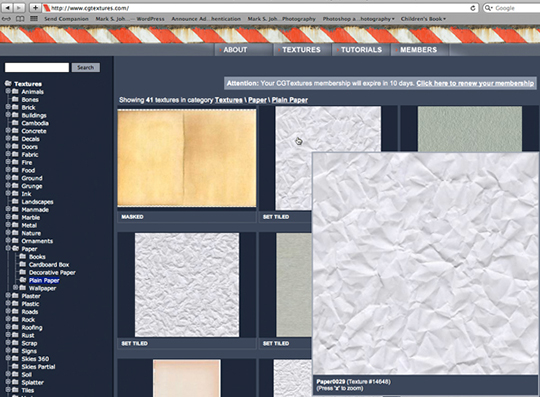
With the wrinkled paper image open, activate the Move tool, hold Shift, and drag the texture into the graphic document. Choose Edit>Transform>Scale. If necessary, press Command-0 (PC: Control-0) in order to see the corner handles. While pressing Shift-Option (PC: Shift-Alt), drag one of the corner handles until the paper is roughly the same size as the document. Press Return (PC: Enter).
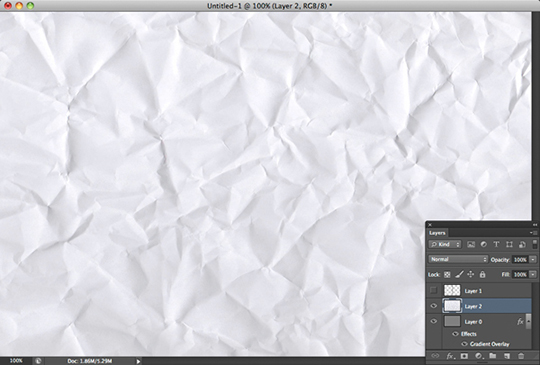
While holding Option (PC: Alt), click the Add layer mask icon at the base of the Layers panel to add a black-filled mask. Activate the Brush tool. Press "D" to set white as the Foreground color. In the Brush panel, activate the "Shredded Paper" custom brush. If we were to paint right now, the brush would produce a long continuous block of paint. This is not what we want so we'll modify several of the brush attributes. In the Brush panel, click on the words "Shape Dynamics." Change the Size Jitter to 40% and the Angle Jitter to 2%.
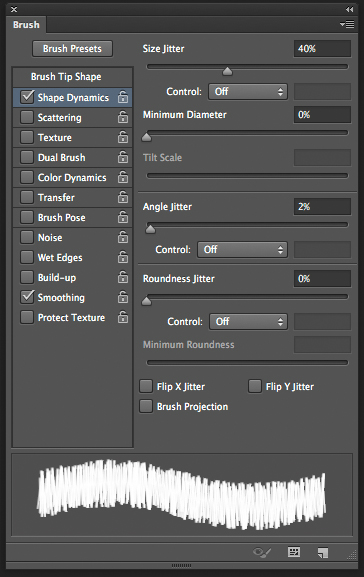
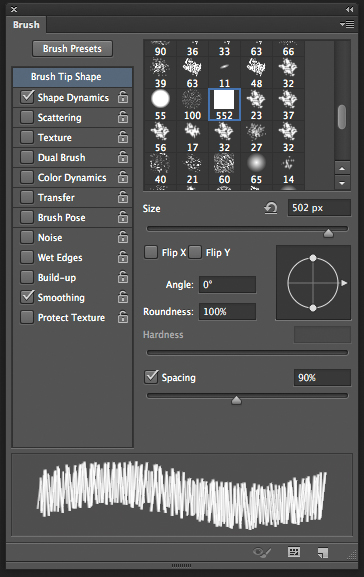
Notice how the stroke preview changes. Now click on the words "Brush Tip Shape" and set the Spacing to 90%.
Paint over the top of the document to produce something similar to this screengrab.
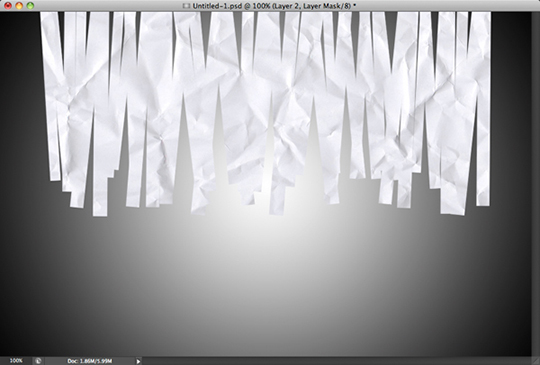
To extend the paper vertically, unlink the mask from the layer thumbnail by clicking the small chain link icon.
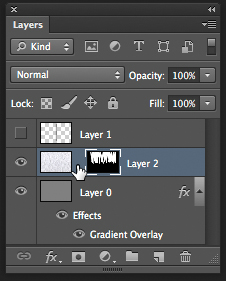
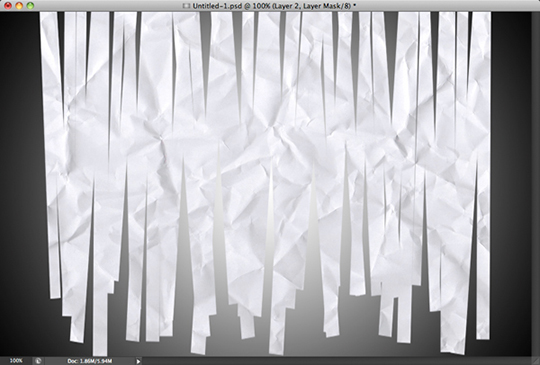
Now choose Edit>Transform>Scale and drag the bottom center handle downward to stretch the paper until it reaches the bottom of the document. Press Return (PC: Enter).
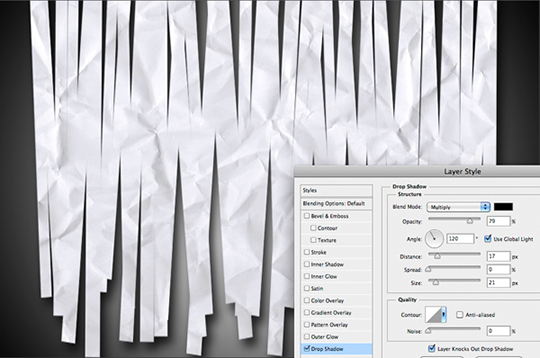
To make the paper appear more three-dimensional, click the Add a layer style icon at the base of the Layers panel and choose Drop Shadow. Go with the settings that you see here.
Press OK. Let's add a subtle, stylistic blur effect. Press Command-J (PC: Control-J) to duplicate the paper layer. Activate the original paper layer (the lower one) and relink the mask by clicking the empty space between the mask and layer thumbnail. Now choose Filter>Blur>Gaussian Blur. Set the Radius to 5 pixels.
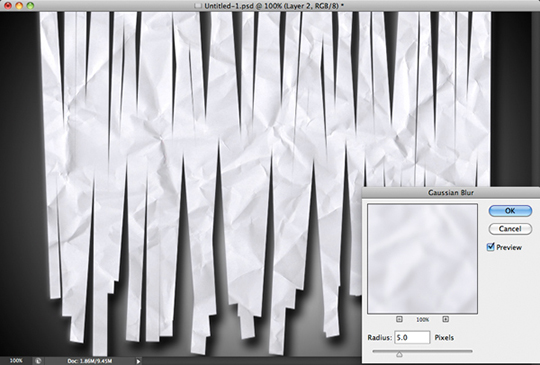
Press OK. Activate the upper paper layer (Layer 2 copy).
Step 5: Add Lorem Ipsum Type to the Paper
Select the Horizontal Type tool and drag out a text box that covers most of the paper.
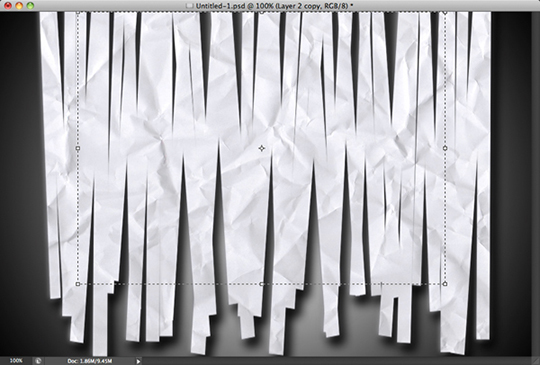
Choose Type>Paste Lorem Ipsum. Click the Commit any current edits (big check) icon in the Options Bar.
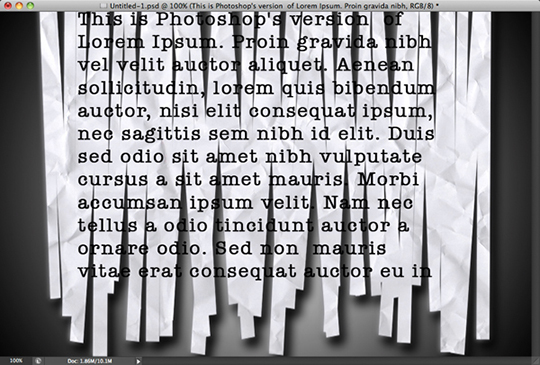
With the type layer and Horizontal Type tool still active, use the Options Bar to change the typeface to something similar to American Typewriter and to size the type until it fits.
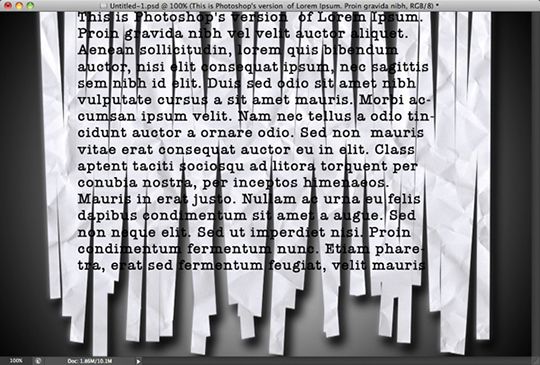
Choose Layer>Create Clipping Mask to clip the type into the shredded paper layer. Choose Layer>Layer Style>Blending Options. Drag the Underlying Layer highlight slider inward to fade the type. Use the Option key (PC: Alt key) to separate the slider and produce a smoother blend.
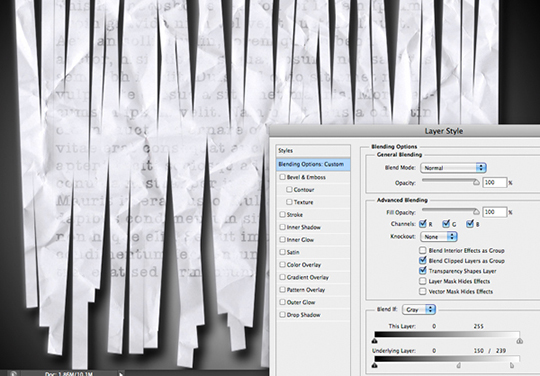
Press OK.
Step 6: Subtly Tint the Paper
Click the Hue/Saturation icon in the Adjustments panel. In the Properties panel, check Colorize. Set the Hue to 63, the Saturation to 5, and the Lightness to +2.
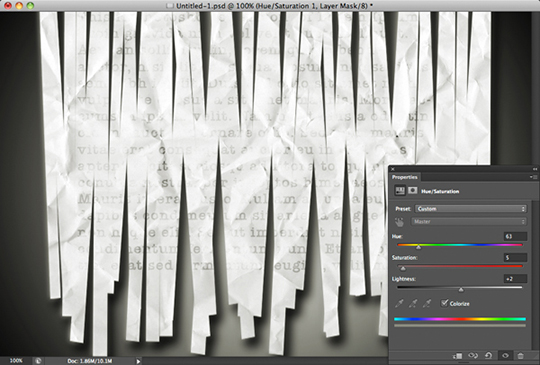
Choose Layer>Create Clipping Mask to clip the colorized layer into the paper.
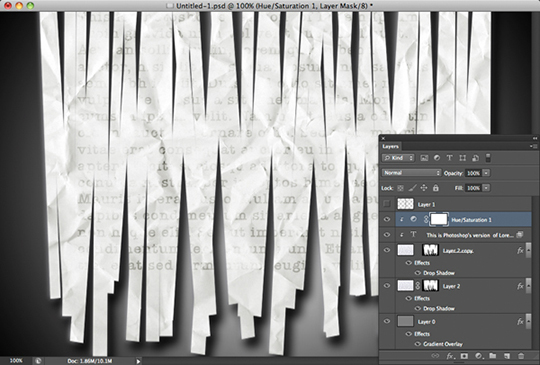
Step 7: Add the Title
Activate the Horizontal Type tool. Click near the lower left corner of the document to avoid re-activating the Lorem Ipsum layer. Using All-Caps, type the word "RUMORS." Click the Commit any current edits icon in the Options Bar. In the Options Bar, change the typeface to Arial Bold. Change the color to a blood red (150, 1, 1). Choose Edit>Transform>Scale to enlarge the type until it looks similar to the screengrab below.
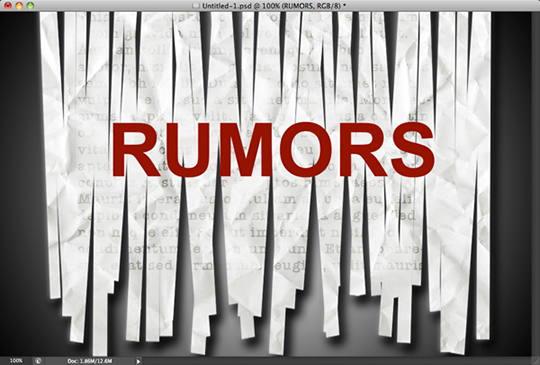
Choose Layer>Create Clipping Mask to clip the title into the shredded paper.
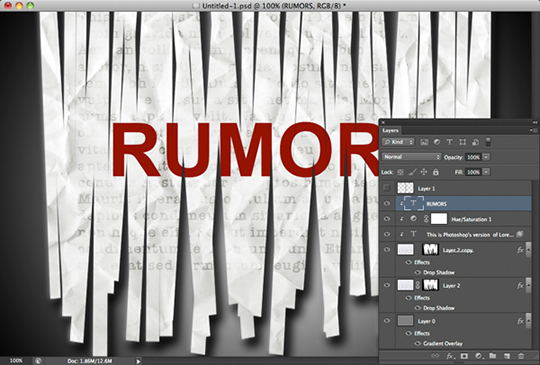
Step 8: Distress the Title
Choose Layer>Layer Style>Blending Options. Drag the Underlying Layer highlight slider inward to fade the type. Use the Option key (PC: Alt key) to create a smoother blend.
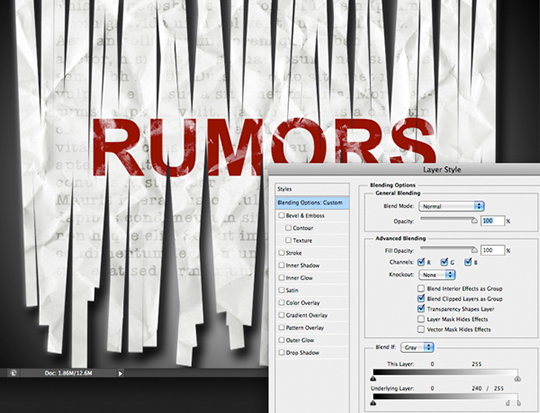
Press OK. To take the distress to the next level, pay a visit to www.obsidiandawn.com and download the free high-res brushes in the "Markings/Blemishes" category called "Distressed Brushes."
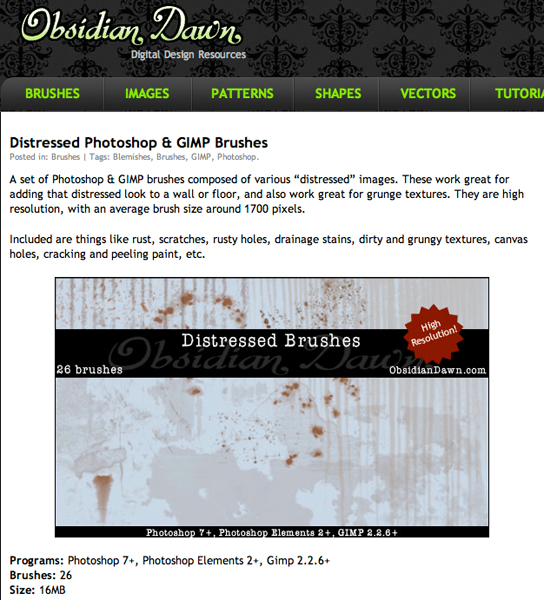
Following download, choose Edit>Presets>Preset Manager. Click the Load button and navigate to the "SS-distressed.abr" brush file. Click Open, then Done. Click the Create a new layer icon at the base of the Layers panel. Set the Foreground color to the same red as the type (150, 1, 1). Choose the Brush tool. In the Brush panel, locate the distressed brushes and paint with small sizes over the edges of the title. To create variation, rotate the brushes as you work.
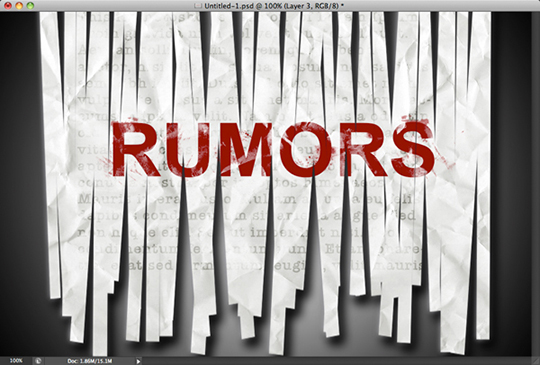
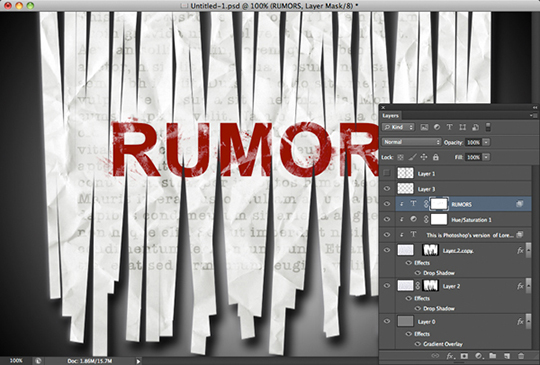
Activate the title layer and add a layer mask. Using the same brushes, paint with black over bits and pieces of the title.
Step 9: Singe the Paper Edges
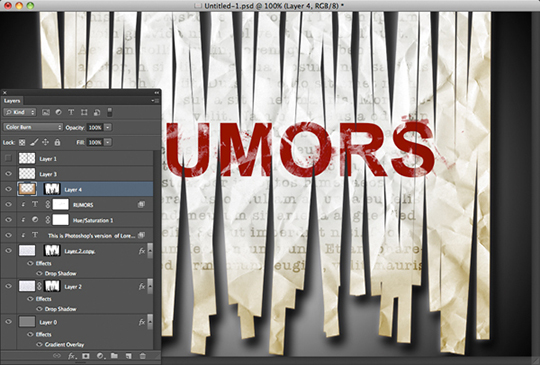
Add a new layer. Option-drag (PC: Alt-drag) the mask from Layer 2 copy (the unblurred wrinkled paper layer) to the new layer. Activate the layer thumbnail. Change the blend mode to Color Burn. Click the Foreground color chip and set the color to 185, 142, 95. Press OK. Using a standard soft-edged brush, paint with a large diameter over the edges of the paper to add a hint of singeing.
Step 10: Add Finishing Touches
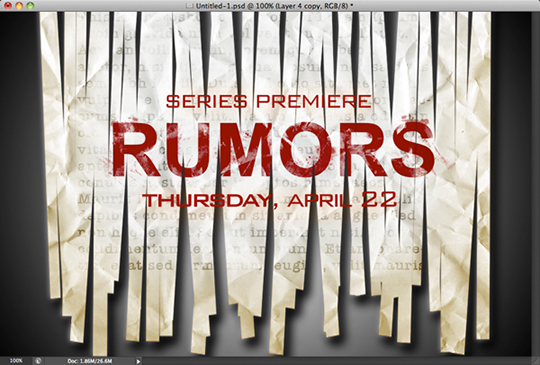
I finished the graphic by adding a couple more lines of type.
Mark S. Johnson Photography
msjphotography.com


Awesome Tut! Thanks a lot! 😀
This is a graphic design site. To follow this instruction you can improve yourself. Thanks.