
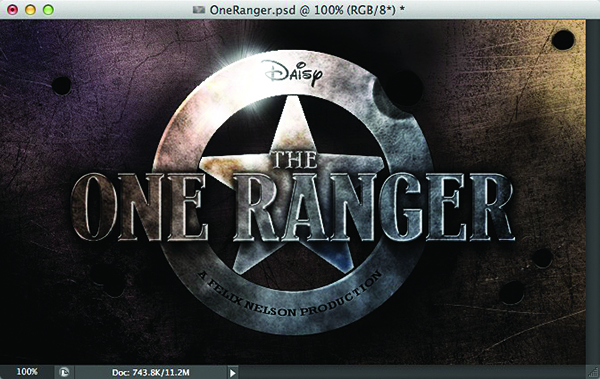
Creating a glossy, metallic effect is quite a bit easier than trying to achieve a worn, dull, pitted one. And the logo for The Lone Ranger movie does a great job of replicating that aged, weathered, metallic look. While most of the effects I re-create rely heavily on layer styles, it's interesting to see how many times I used the Overlay blend mode (in both the layer styles and individual layers) in this tutorial. Go ahead, count 'em. Its a freakin' Overlay overload. Who knew it would work so well?
[KelbyOne members may load the file used in this tutorial by clicking here. All files are for personal use only.]
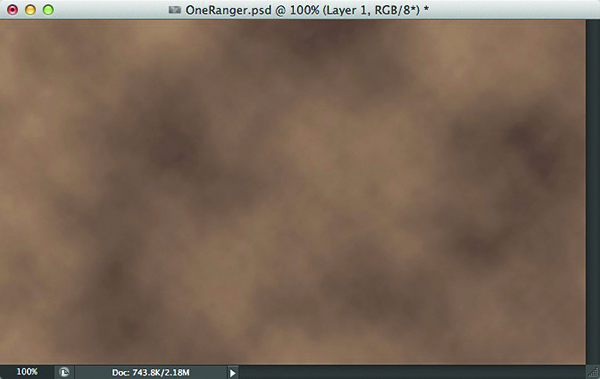
STEP ONE: Open the OneRanger.psd (the background of the download file is slightly different than the one you see here). Create a new layer (Layer 1) by clicking the Create a New Layer icon at the bottom of the Layers panel. Click on the Foreground color swatch at the bottom of the Toolbox, choose a dark-brown color (R:67, G:50, B:45), and click OK. Now, click on the Background color swatch, choose a light-brown color (R:161, G:129, B:105), and click OK. Go to Filter>Render>Clouds.
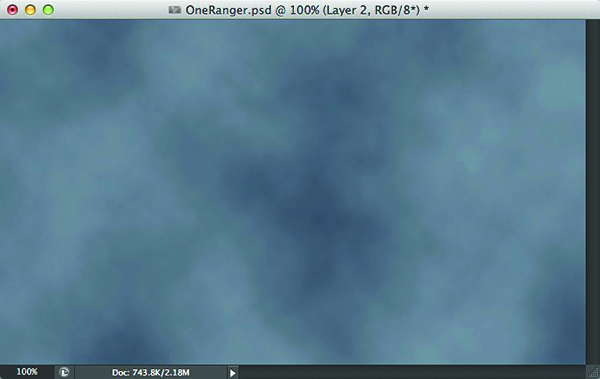
Create another layer (Layer 2), change the Foreground color to blue (R:58, G:71, B:85) and the Background color to a light blue (R:120, G:129, B:144). Press Command-F (PC: Ctrl-F) to apply the Clouds filter again.
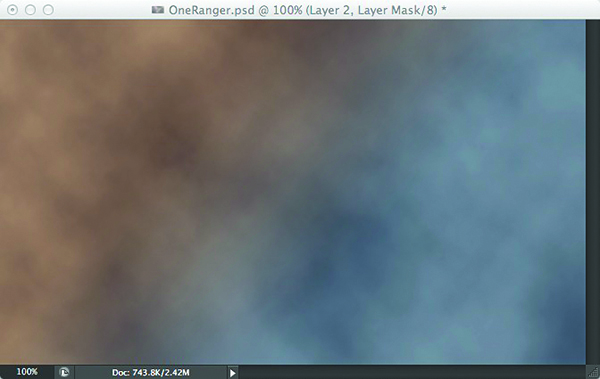
STEP TWO: Click the Add Layer Mask icon (circle in a square) at the bottom of the Layers panel. Press D to set the Foreground and Background colors to white and black, respectively. Choose the Gradient tool (G) from the Toolbox, click the Gradient Editor thumbnail in the Options Bar, select Foreground to Background, and click OK. Now click-and-drag a gradient from the lower right toward the upper left of the document.
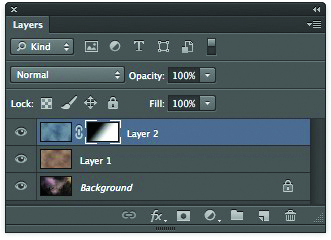
STEP THREE: Press Command-E (PC: Ctrl-E) to Merge Down (combine Layers 1 and 2). Duplicate this layer (Layer 1) by dragging it onto the Create a New Layer icon at the bottom of the Layers panel (Layer 1 copy). Duplicate Layer 1 once again (Layer 1 copy 2). Hide both of the duplicated layers by clicking on the Eye icon to the left of each layer in the Layers panel. Click on Layer 1 to make it the active Layer.
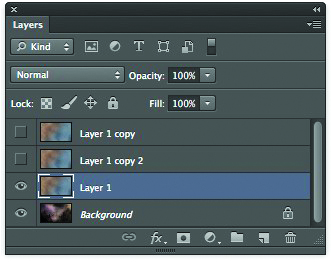
STEP FOUR: Choose the Path Selection tool (A) from the Toolbox, and click on Path 1 in the Paths panel (Window>Paths). Click on the outer ring portion of the path (not the star), and click on the Load Path As a Selection icon (dotted circle) at the bottom of the Paths panel. Now, click on the Add Layer Mask icon in the Layers panel.
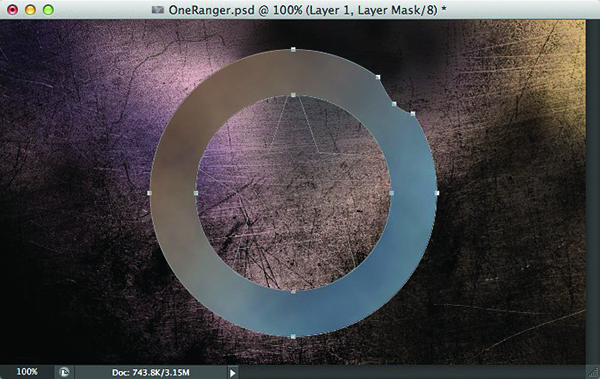
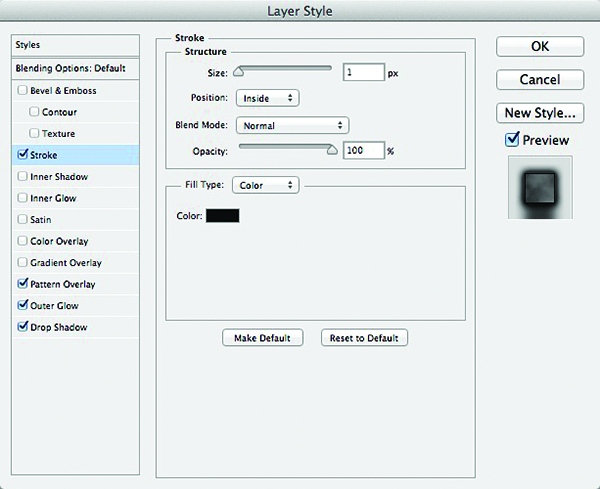
STEP FIVE: Click on the Add a Layer Style icon (Æ’x) at the bottom of the Layers panel and choose Stroke. Choose Inside for Position, and set the Size to 1 px.
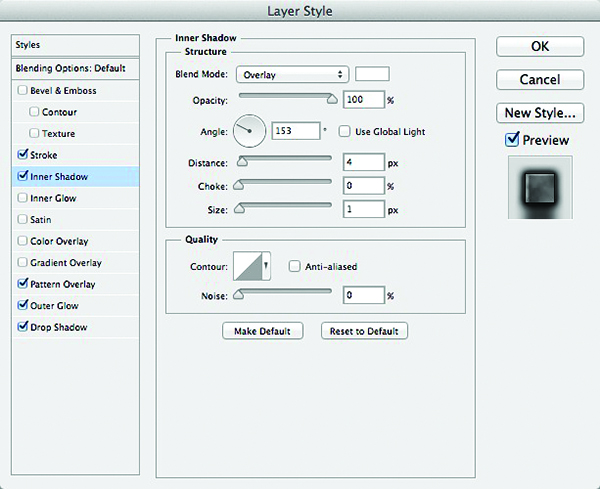
Now, choose Inner Shadow from the Styles list on the left side of the Layer Style dialog. Change the Blend Mode to Overlay, click on the black color swatch, choose white for the color, and click OK. Enter 100% for Opacity, uncheck Use Global Light, enter 153º for Angle, 4 px for Distance, and 1 px for Size.
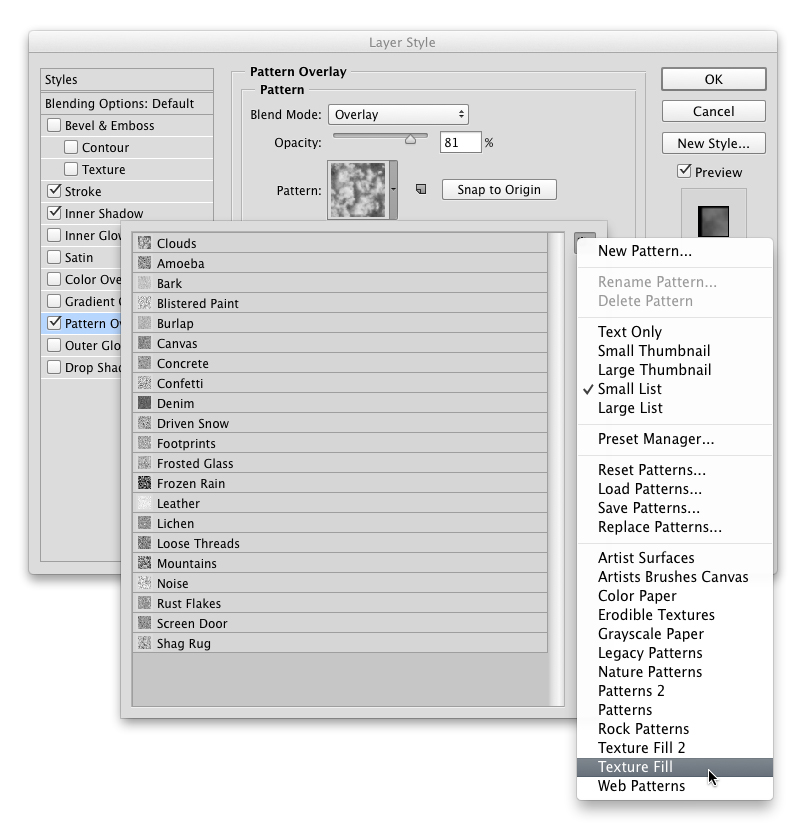
Choose Pattern Overlay from the Styles list. Change the Blend Mode to Overlay, enter 81% for Opacity, and 200% for Scale. Click the down-facing arrow next to the Pattern thumbnail, then click the gear icon at the top right and choose Texture Fill to load the new patterns. Click OK when the warning dialog appears, then choose Clouds as the Pattern. Don't click OK yet.
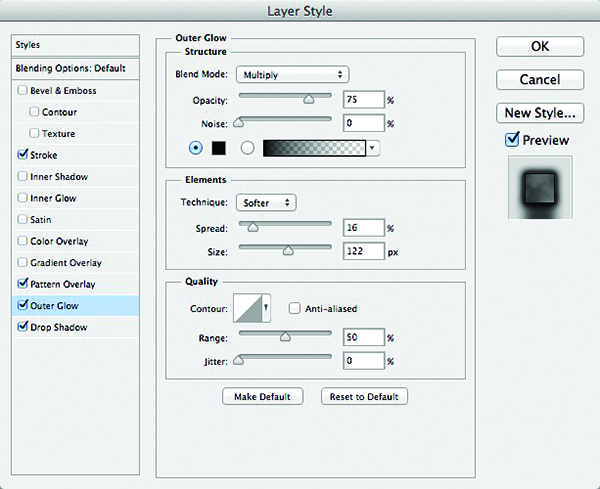
STEP SIX: Choose Outer Glow from the Styles list. Choose Multiply as the Blend Mode, click the yellow color swatch, choose black as the color, and click OK. Enter 16% for Spread, and 122 px for Size.
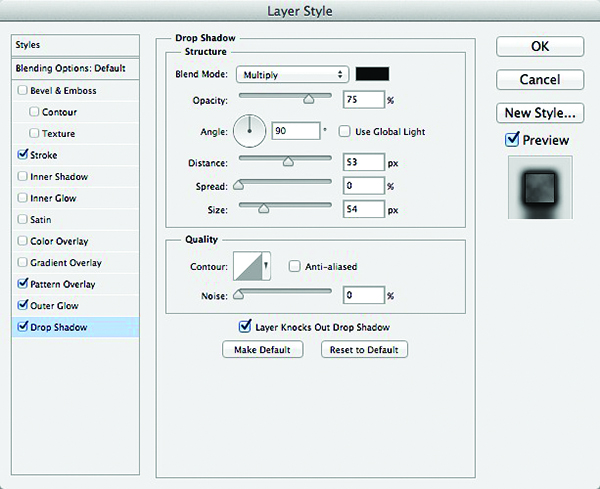
Choose Drop Shadow from the Styles list. Uncheck Use Global Light, enter 90º for Angle, 53 px for Distance, 54 px for Size, and click OK to apply the layer styles.
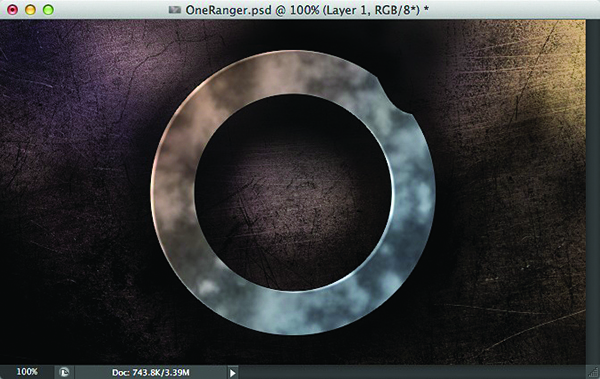
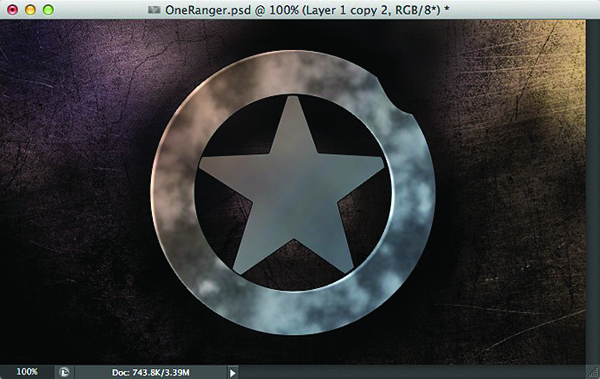
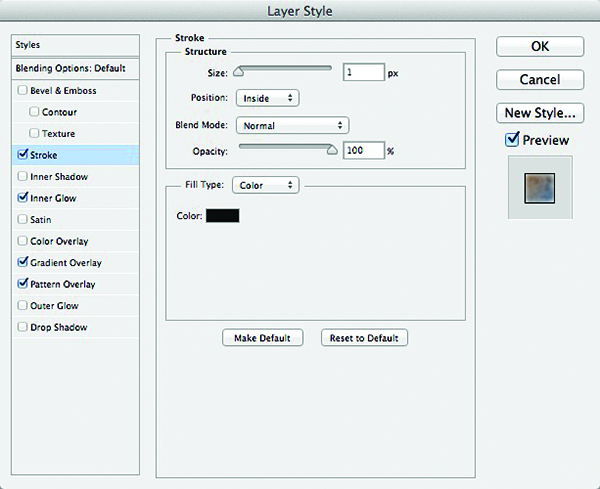
STEP SEVEN: Click the Eye icon next to Layer 1 copy 2 to make it visible, and click on that layer to select it. Click on Path 1 in the Paths panel, select the star portion of the path, and load it as a selection. Click the Add a Layer Mask icon at the bottom of the Layers panel. Now, click the Add a Layer Style icon and choose Stroke. Choose Inside for Position, and set the Size to 1 px. Don't click OK yet.
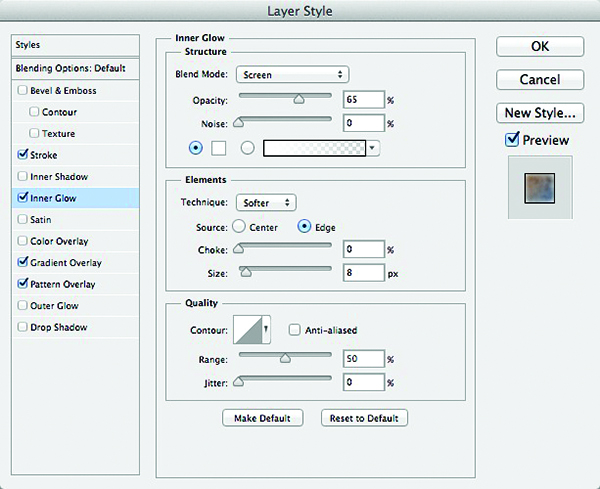
STEP EIGHT: Choose Inner Glow from the Styles list. Enter 65% for Opacity and 8 px for Size. Click on the color swatch, choose white as the color, and click OK.
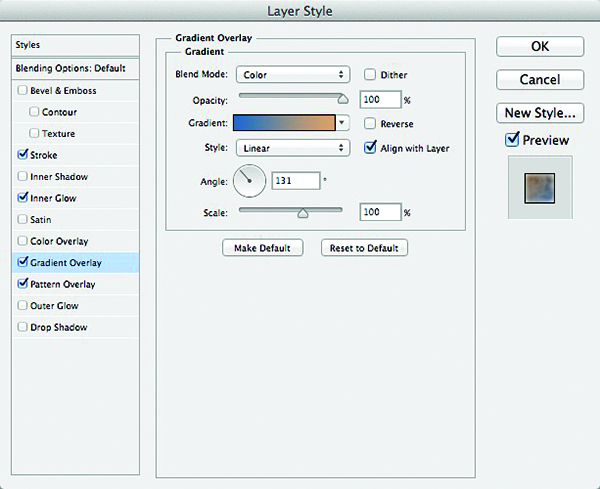
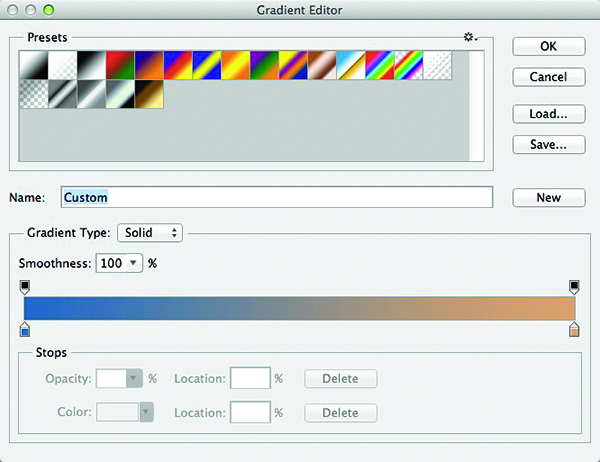
Choose Gradient Overlay from the Styles list. Choose Color for the Blend Mode, set the Angle to 131º, and click on the Gradient thumbnail to open the Gradient Editor. Click on the black color stop on the left side under the Gradient ramp, click the Color swatch, choose blue (R:42, G:106, B:154) in the Color Picker, and click OK. Click on the white color stop on the right side, click the Color swatch, choose a tan color (R:222, G:164, B:117), and click OK. Click OK to close the Gradient Editor.
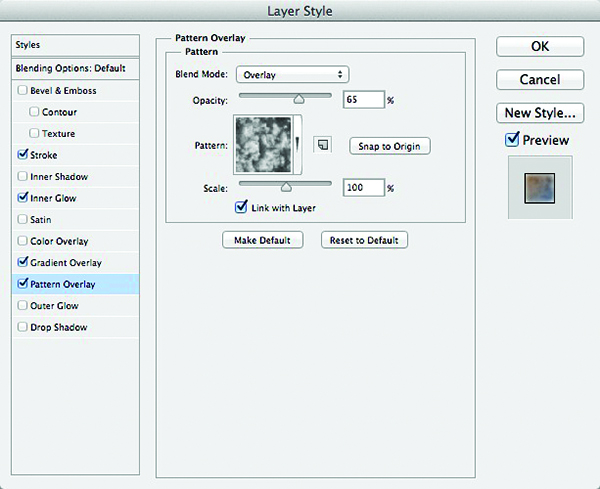
Choose Pattern Overlay from the Styles list. Choose Overlay as the Blend Mode and enter 65% for Opacity. Click on the down-facing arrow next to the Pattern thumbnail, choose Clouds as the Pattern, and click OK.
STEP NINE: Add a new Layer (Layer 2). Change the bend mode to Overlay, and lower the Opacity to 50%. Press D to set the Foreground and Background colors to black and white, respectively. Command-click (PC: Ctrl-click) on the Path 1 thumbnail in the Paths panel to load it as a selection. Go to Filter>Render>Clouds.
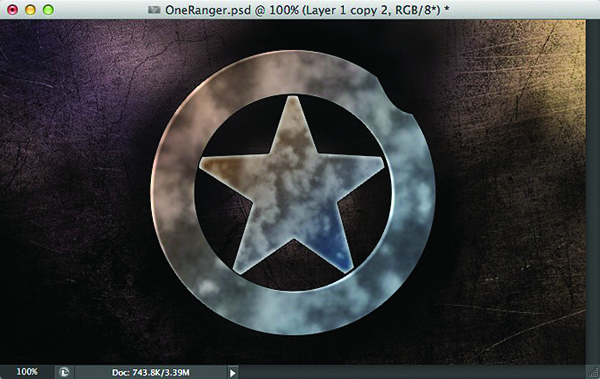
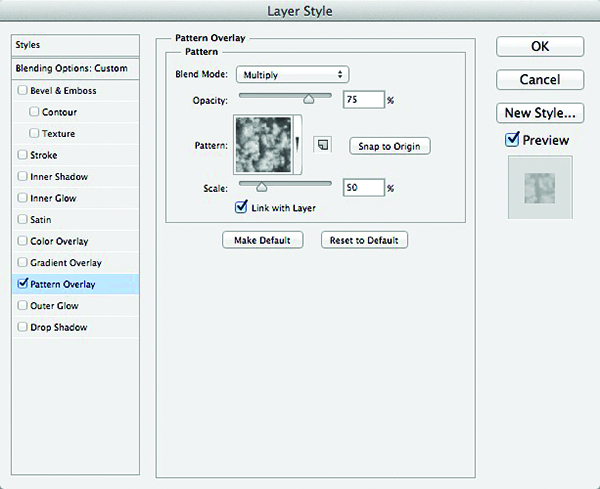
Click the Add a Layer Style icon, and choose Pattern Overlay. Choose Multiply as the Blend Mode, lower the Opacity to 75% and the Scale to 50%, and click OK to apply the style.
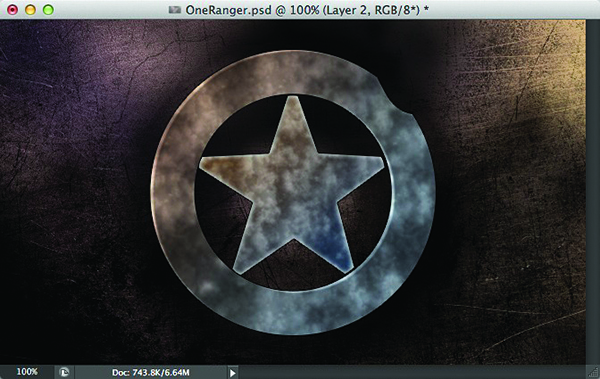
STEP TEN: Add another new layer (Layer 3), and change the blend mode to Overlay. Press X to set the Foreground color to white. Choose the Gradient tool, click the Radial Gradient icon in the Options Bar (the second one from the left), and click-and-drag a gradient from the upper left down past the lower right of the selection (see example).
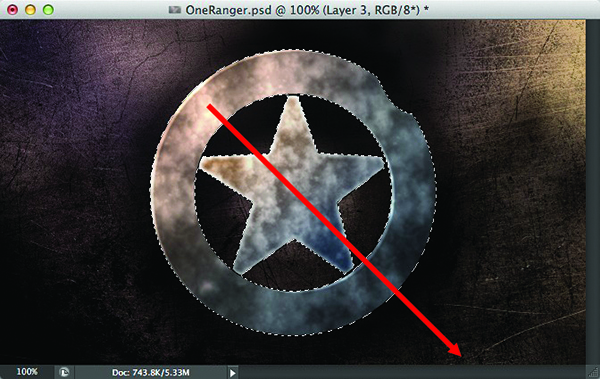
STEP ELEVEN: Add a new layer (Layer 4) and change the blend mode to Overlay. Choose the Brush tool (B) from the Toolbox. Using a large, soft-edged brush set to white, paint in a highlight over the top left of the selection. Press Command-D (PC: Ctrl-D) to deselect. Now, click the square where the Eye icon was next to Layer 1 copy to make it visible, drag it to the top of the layer stack, and make it the active layer. Command-click (PC: Ctrl-click) on the Path 2 thumbnail in the Paths panel to load it as a selection. Click on the Add Layer Mask icon in the Layers panel.
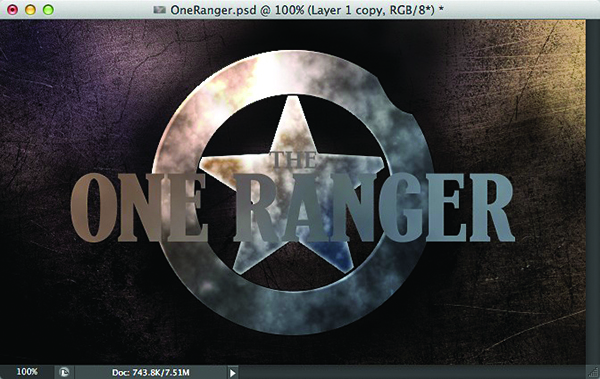
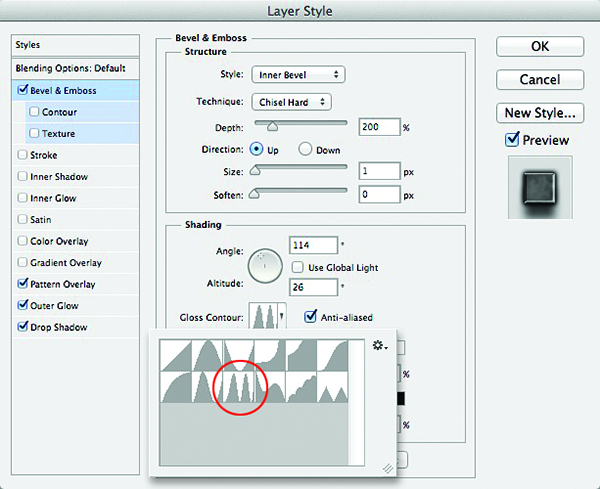
STEP TWELVE: Click on the Add a Layer Style icon and choose Bevel & Emboss. Choose Chisel Hard for Technique, enter 200% for Depth, and 1 px for Size. Uncheck Use Global Light, enter 114º for Angle, and 26º for Altitude. Click on the down-facing arrow next to the Gloss Contour thumbnail and choose Ring - Double. Check the Anti-aliased box.
Choose Pattern Overlay from the Styles list. Choose Overlay as the Blend Mode, enter 80% for Opacity, click the down-facing arrow next to the Pattern thumbnail, and choose Clouds as the Pattern.
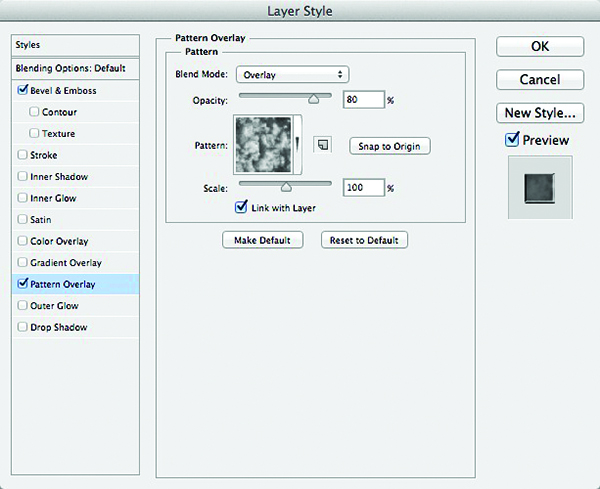
Now, choose Outer Glow from the Styles list. Choose Multiply as the Blend Mode, click on the yellow color swatch, choose black as the color, and click OK. Enter 10% for Spread and 15 px for size.
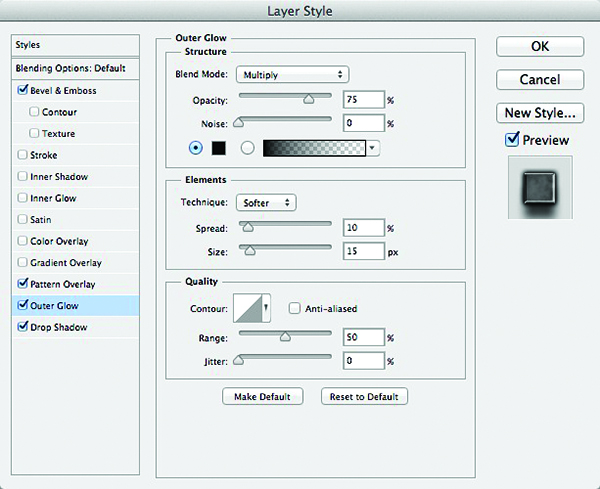
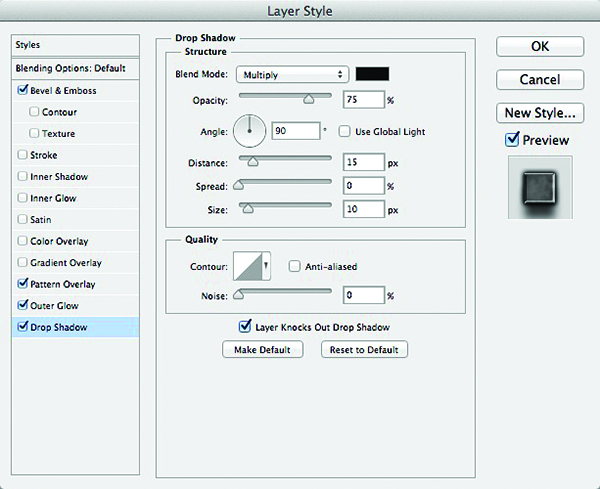
Choose Drop shadow from the Styles list. Uncheck Use Global Light, enter 90º for Angle, 15 px for Distance, 10 px for Size, and click OK.
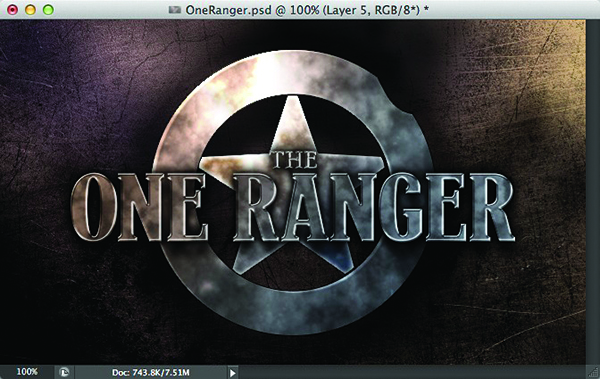
STEP THIRTEEN: Find and open an image of textured metal similar to the one we're using here. With the Move tool (V), drag it into the OneRanger.psd (Layer 5). Press Command-T (PC: Ctrl-T) to enter Free Transform, make it the same size as the working file, and press Enter to commit the transformation. Press Command-Shift-U (PC: Ctrl-Shift-U) to desaturate the image. Now, press Command-L (PC: Ctrl-L) to bring up the Levels dialog. Click on the black Input Levels slider and drag it toward the right to darken the image. Click OK. Change the blend mode to Overlay.
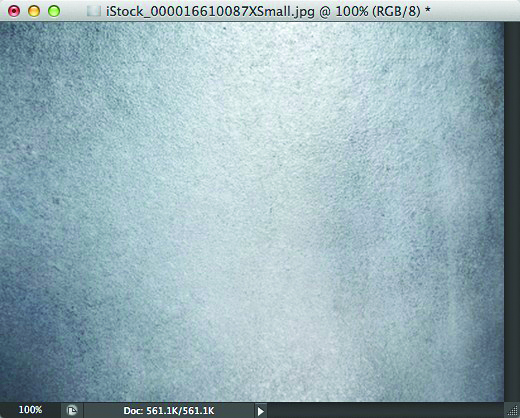
â”CREDIT: iStock, Pomachka, Image #16610087
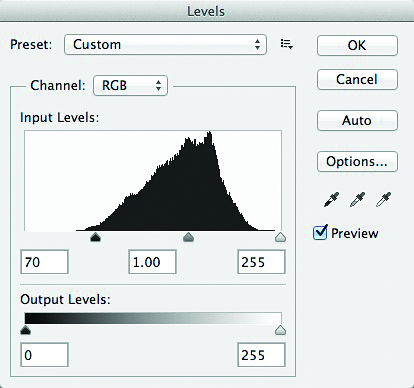
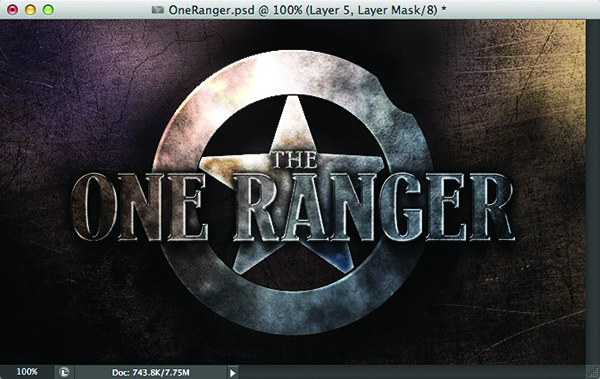
STEP FOURTEEN: Command-Click (PC: Ctrl-click) directly on Layer 1's layer mask thumbnail (the outer ring) to load it as a selection. Now, Shift-Command-click (PC: Shift-Ctrl-click) directly on Layer 1 copy 2's layer mask thumbnail (the star) to add it to the selection. Finally, Shift-Command-click (PC: Shift-Ctrl-click) directly on Layer 1 copy's layer mask thumbnail (the text) to add it to the selection. With Layer 5 as the active layer, click on the Add Layer Mask icon.
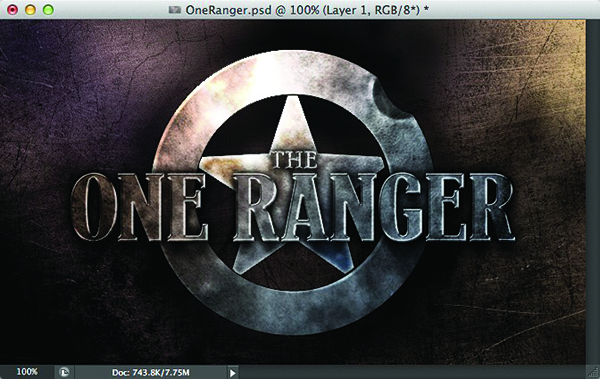
STEP FIFTEEN: Click on Layer 1 to make it the active layer. Choose the Burn tool (nested under the Dodge tool [O]) from the Toolbox. Using a hard-edged brush, darken a circular area on the top-right edge of the outer ring, where there's a slight indentation in the path. Next, choose the Dodge tool and using a small, soft-edged brush, lighten the very edges of the indentation (see example).
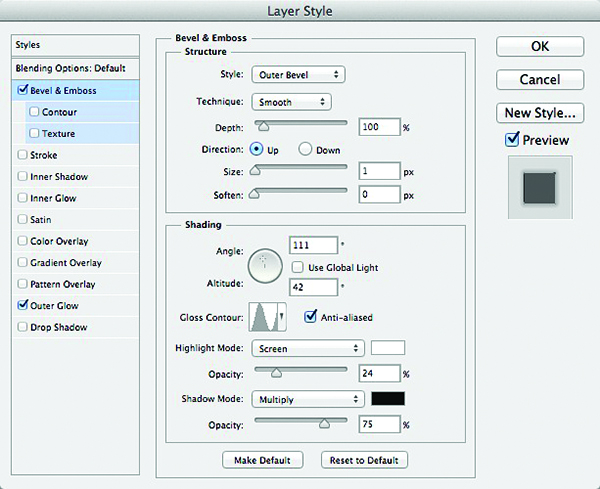
STEP SIXTEEN: Create a new layer (Layer 6) and drag it below Layer 1 in the Layers panel. Press D to set the Foreground color to black. Choose the Brush tool, and with a hard-edged brush, paint in some bullet holes (see examples). Click the Add a Layer Style icon and choose Bevel & Emboss. Choose Outer Bevel for Style, and enter 100% for Depth and 1 px for Size. Uncheck Use Global Light, and enter 111º for Angle and 42º for Altitude. Click on the down-facing arrow next to the Gloss Contour thumbnail, and choose Ring. Check the Anti-aliased box. Enter 24% for the Highlight Mode Opacity.
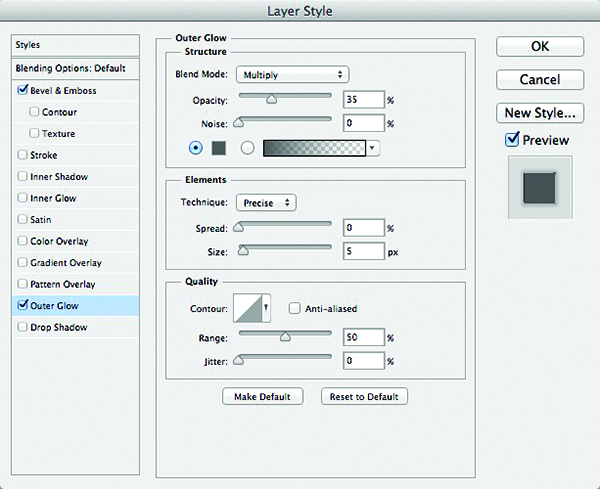
Choose Outer Glow from the Styles list. Choose Multiply for the Blend Mode, and lower the Opacity to 35%. Click on the yellow color swatch, choose a gray color (R:75, G:75, B:75), and click OK. Choose Precise for Technique, enter 5 px for Size, and click OK to apply the layer style. Add some additional text and a lens flare to complete the effect.
This article is courtesy of Photoshop User magazine, the official publication of KelbyOne, which provides quality online education for creative people. For more information, visit KelbyOne.com.

