
Iris Blur is the second of the five blur filters in the Blur Gallery available in Photoshop CC and later, but it was first introduced as one of three filters in Photoshop CS6. It enables you to achieve what the Field Blur does (add depth of field to flat images), but with more control.
This tutorial will show you how to use the Iris Blur filter to achieve an out-of-focus effect, use multiple pins and smart filters, and get a bokeh effect.
Tutorial Assets
1. The road to Heaven by Nina Matthews Photography
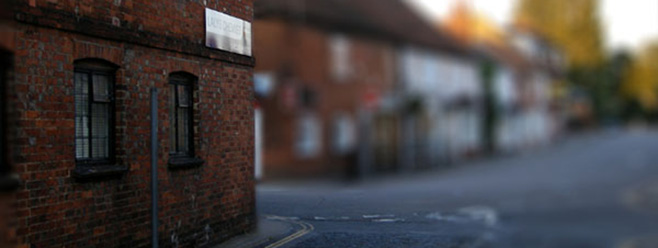
2. Farnham Street by Steve Parker
3. Light me up by Valerie Everett
Working with Pins and Modifying the Blur and Transition Areas
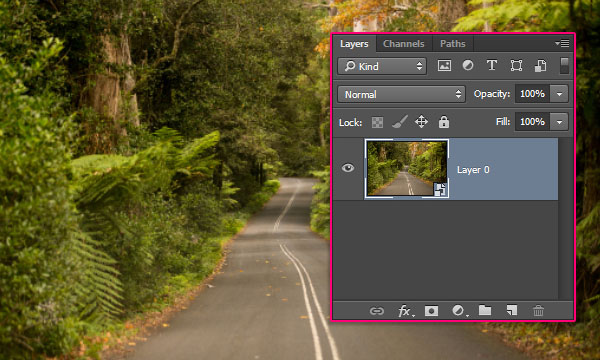
STEP ONE: Open The road to Heaven image, Right-click the Background layer, and choose Convert to Smart Object. Alternatively, you can select that layer and go to Filter>Convert for Smart Filters. This is an optional step, but smart objects are great when using filters, as they make the applied filters editable at any time, as well as create smart filter masks that can help with modifying and cleaning up the final results.
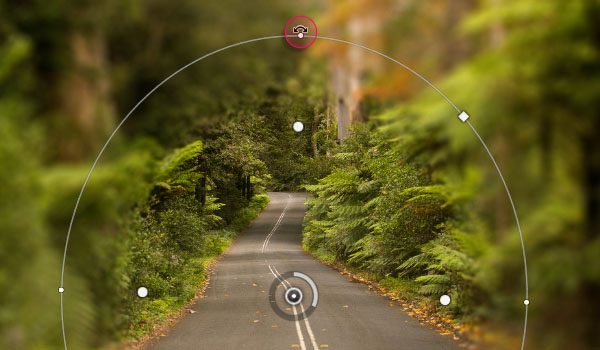
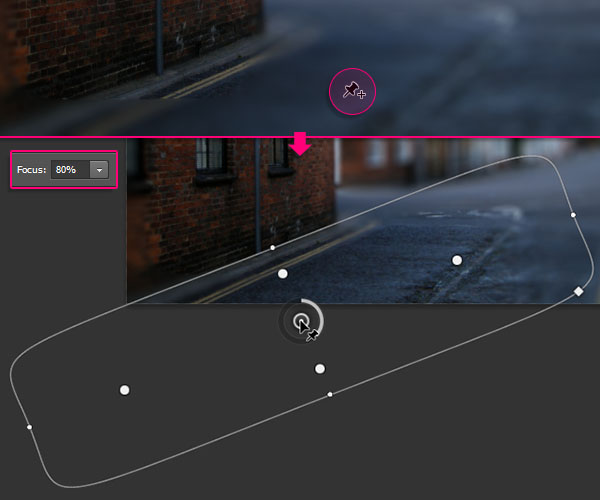
STEP TWO: Go to Filter>Blur Gallery>Iris Blur. This will open the Blur Gallery. A pin is added to the center of the image with an ellipse surrounding it controlling the blur effect over the image (hover your cursor inside the ellipse to see the pin).
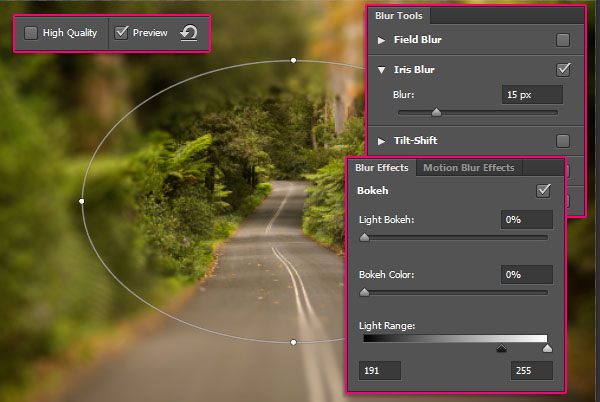
STEP THREE: At the right of the screen, there are two panels: The main Blur Tools panel at the top with the Iris Blur control, and the Blur Effects panel at the bottom with some extra options and settings for the bokeh effect.
STEP FOUR: There are a couple more controls in the Options Bar that might come in handy, as well. High Quality controls the rendering quality of the preview. If this box is checked, the preview might be rendered a bit slower, depending on your device. When checked, Preview shows the result of any changes in the blur filter's settings. When unchecked, you can view the original image without any blur. Tip: You can press the P key to turn the Preview on and off. Click the Remove All Pins icon (curved arrow) in the Options Bar to remove all the blur pins on the image.
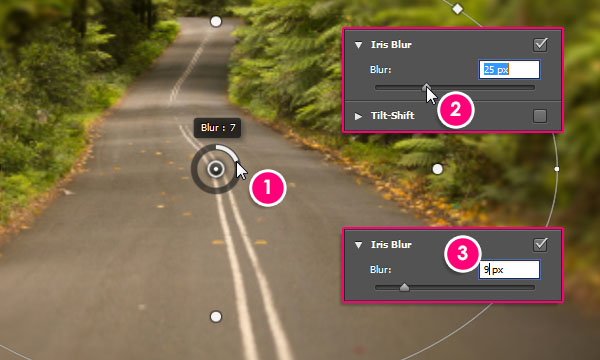
STEP FIVE: To move the pin around, simply click on its center and drag it to a new position, then release the mouse button. To change the blur amount of a pin, select that pin by clicking its center, then you can either:
• Move the mouse over the outer ring, then click-and-drag clockwise to increase the blur amount and counterclockwise to decrease it.
• Drag the Blur slider in the Blur Tools panel to the right to increase the blur amount and to the left to decrease it.
• Click inside the Blur field under the Blur Tools panel and enter an integer value between 0 and 500 px.
STEP SIX: The dots surrounding the center pin help control how the blur effect is applied to the image, giving the Iris Blur more adjustment power than the Field Blur. The four smaller dots joined by the elliptical line control the 100% point for the blur effect, meaning that everything outside that line gets 100% of the Blur amount assigned.
You can change the shape of the ellipse by hovering the cursor over any of the four outer dots, and when the cursor's shape changes into a rotate icon (bent double arrow), click the dot and drag it to reshape and rotate the ellipse.
STEP SEVEN: You can also click-and-drag the line itself to make the ellipse bigger or smaller. This will constrain its shape and rotation angle.
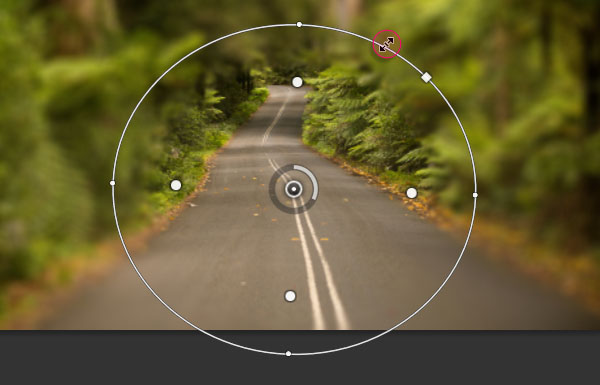
The four larger dots between the center pin and the outer 100% blur line control the transition area for the blur effect. No blur effect is applied to the area between the center pin and the four inner dots at all, but the blur effect grows gradually starting from the inner dots toward the outer ones. These transition points can be clicked-and-dragged closer to or further from the center pin. By default, clicking-and-dragging any of the points moves all of them together.
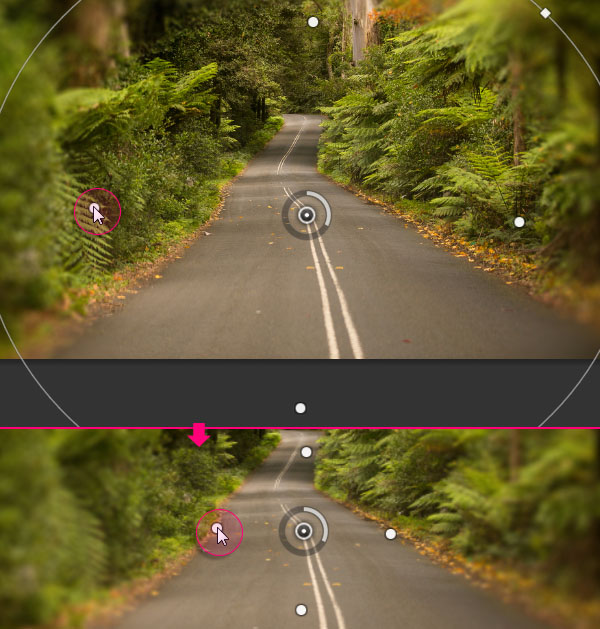
To move an individual inner point, press-and-hold the Option (PC: Alt) key then click-and-drag that point.
If you move a transition point on top of the center pin, the blur effect will start gradually from the center, so that point's area will have no 100% focus. If you move a transition point on top of an outer dot, then there will be no transition in the gradient for that area, so the image will be sharp all the way between the center pin and that point. The same applies if all transition points were moved together, as well. Tip: Press-and-hold the H key to hide the pins.
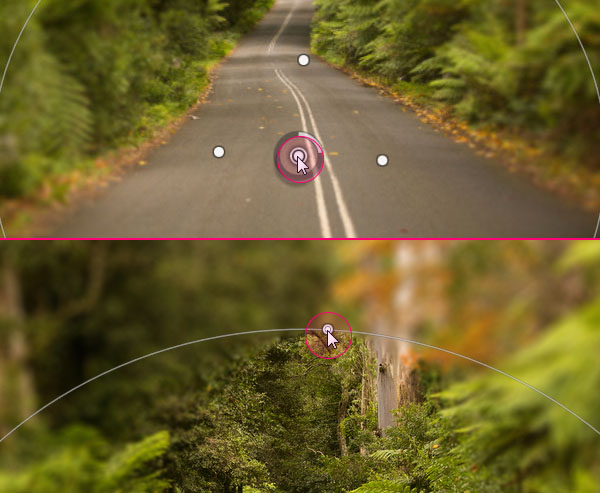
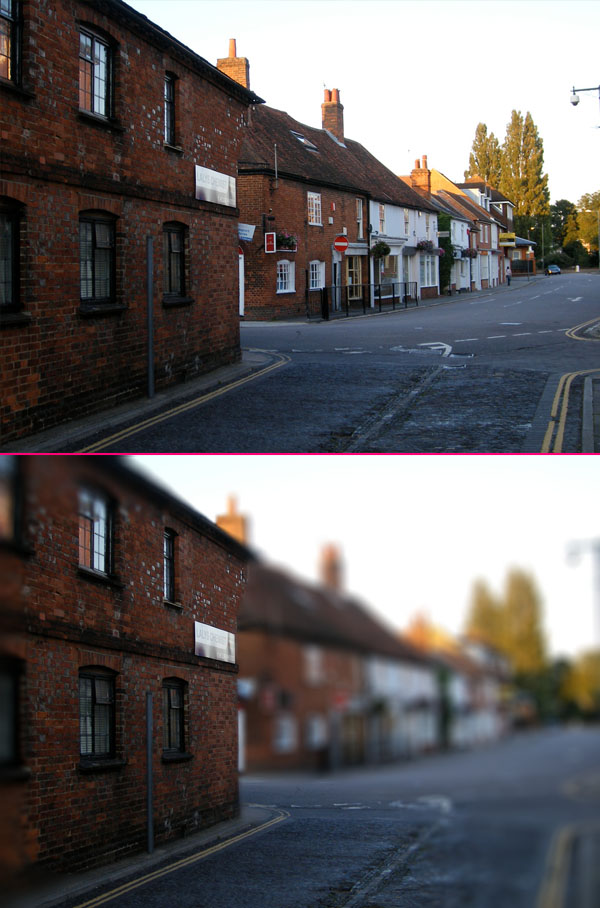
STEP EIGHT: Iris Blur is a great way to create a blurred vignette effect. You can enlarge the ellipse until it extends beyond the edges of the image, then adjust it to blur the corners. When you're satisfied with how the filter looks, click OK in the Options Bar or press Enter to apply the filter.

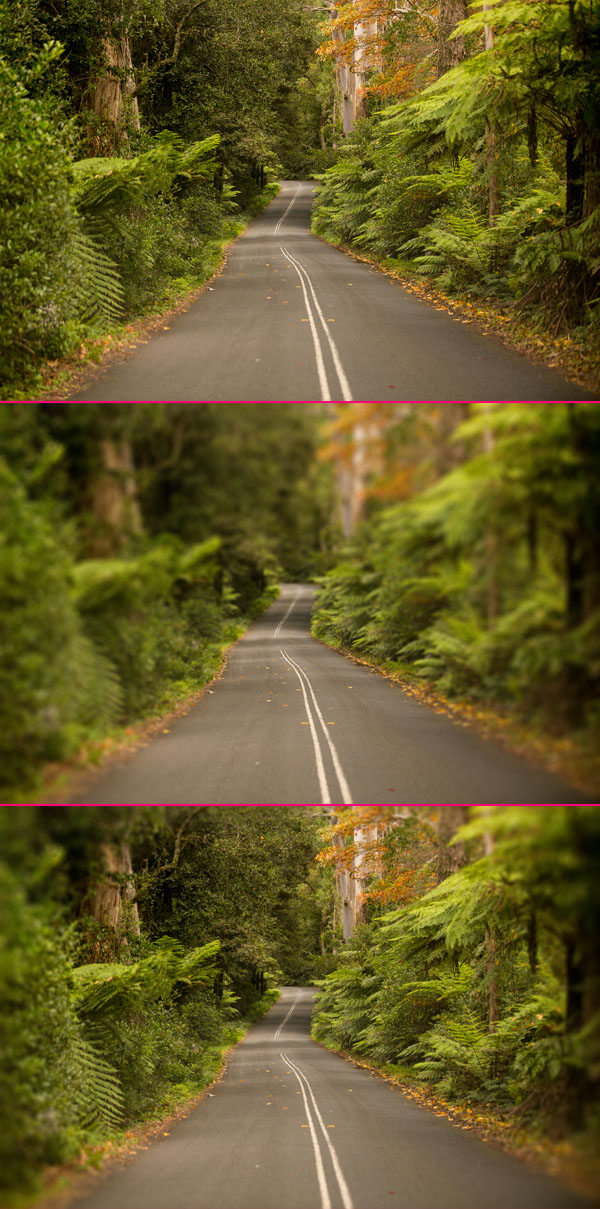
Here are the before and after images. The filter helped us create an out-of-focus effect, as well as a blurred vignette effect pretty easily and quickly.
Working with Square Areas and Smart Filters
STEP ONE: Open the Farnham Street image, convert it to a smart object, and go to Filter>Blur Gallery>Iris Blur. Notice the white square icon at the ellipse's line between the outer dots. This square is used to control the curve of the line. If you click-and-drag it outward, you'll get a rectangle with rounded corners. The square can be dragged inward to get the ellipse line back again.
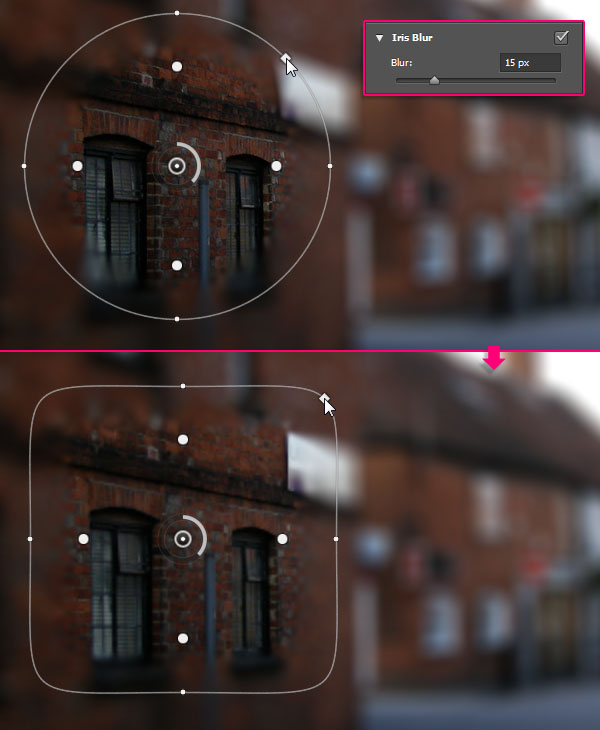
STEP TWO: You can work with the rounded rectangle just like you did with the ellipse before. Don't worry about blurring an area that you want to remain sharp; we'll fix that next using the smart filter's mask.
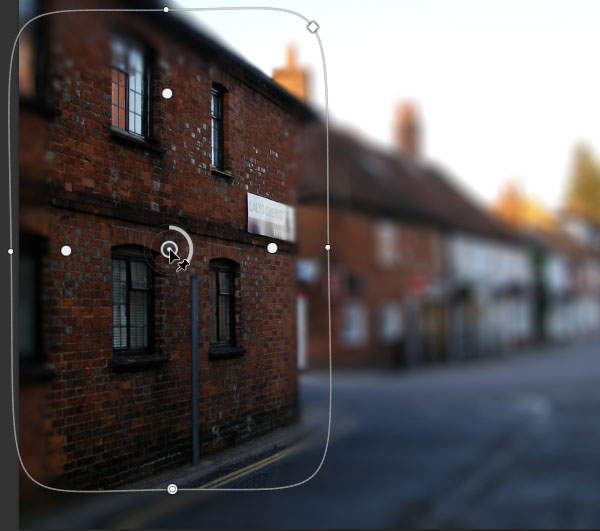
You can click anywhere to add more pins, if needed, and reshape them separately, or click a pin then press the Delete (PC: Backspace) key to remove it.
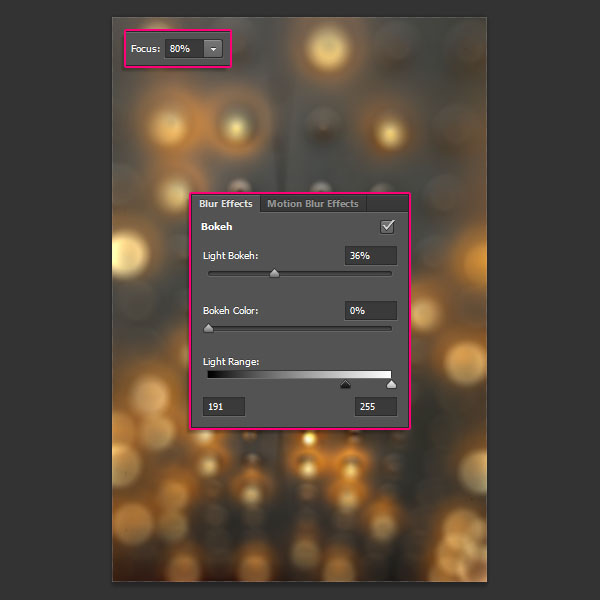
Keep in mind that the Blur amount value is global, so it's applied to all the pins you add to the image. In other words, unlike the Field Blur, you can't assign a different Blur value to each pin. You can, however, change the Focus value in the Options Bar at the top. This blurs the default 100% sharp area between the center pin and the inner dots. If you want the focus to be a 100% for only one pin, then you can reduce the Focus value for the rest of the pins as needed.
STEP THREE: When you're done, press Enter to apply the filter. Now you can further control the blur using the smart filter's mask. To do so, click the Smart Filters thumbnail, choose the Brush tool (B), press D then X to set the Foreground color to black, then paint over the areas where you want to remove the blur. If you make a mistake, press X to set the Foreground color to white, paint any areas that you want to blur again, then press X to set the Foreground back to black and continue.
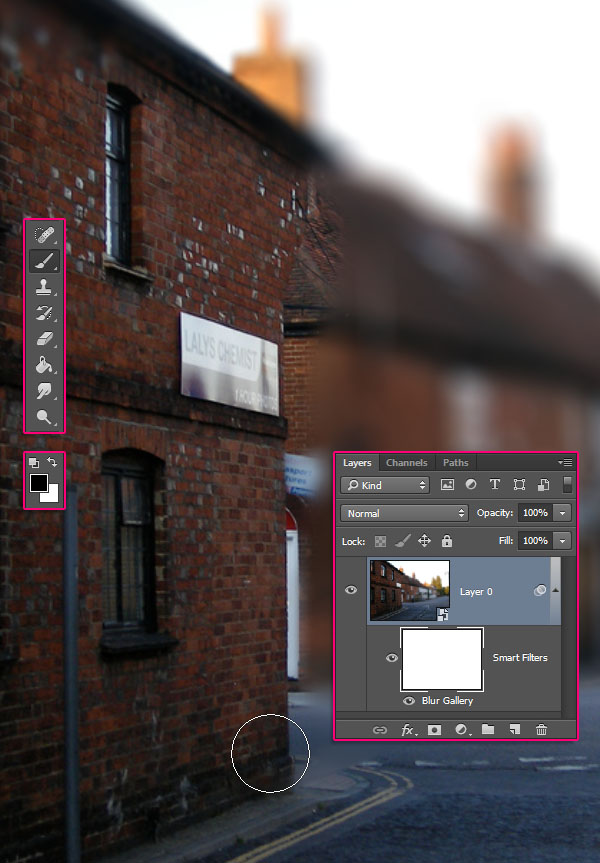
This gives you more control over the edges and corners that you can't precisely get by modifying the ellipse or rounded rectangle's shape.
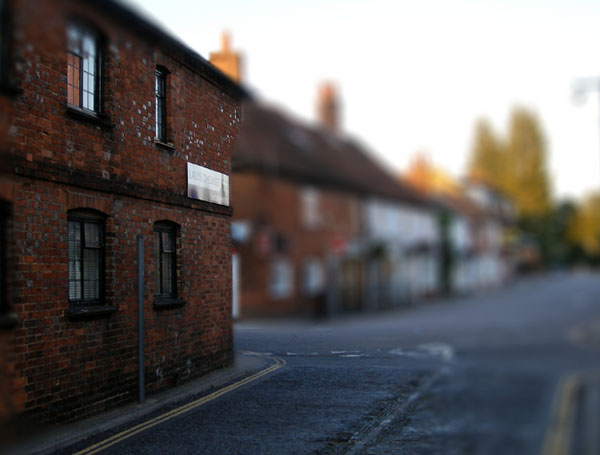
Here's the before and after. You can see how changing the blur line's shape helps with applying it to different shapes and areas.
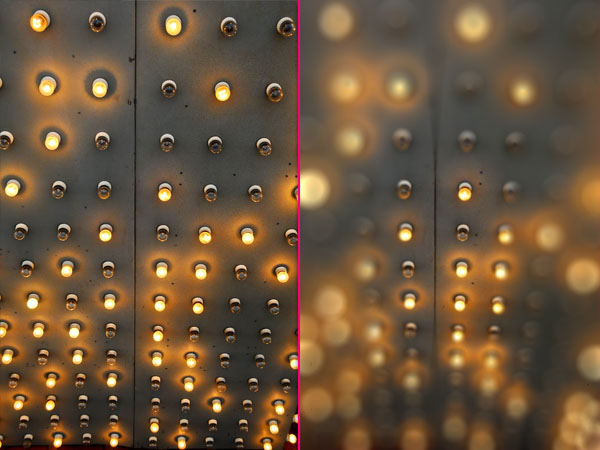
Creating a Bokeh Effect
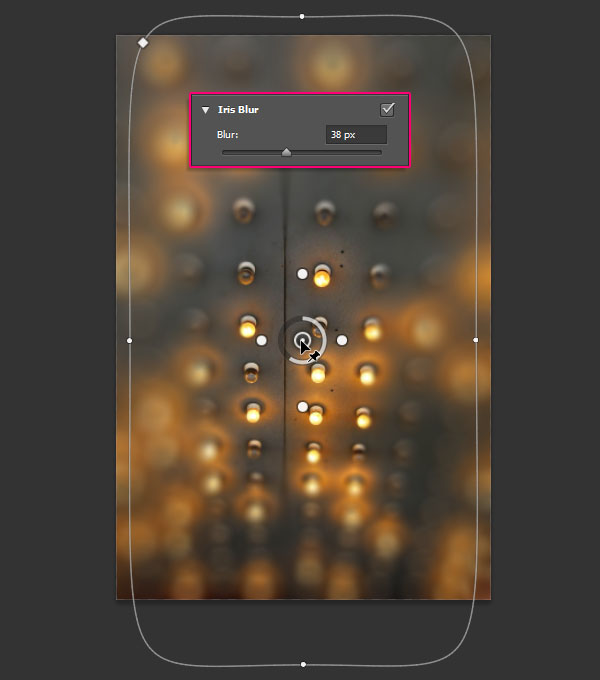
STEP ONE: Another cool effect you can achieve with the Iris Blur is a bokeh effect. Bokeh is the effect created when the camera lens renders out-of-focus points of light. If you have any image with a couple of lights, preferably against a dark background, or an image with some contrast going on between its elements, you can achieve that effect using the Iris Blur filter. Open the Light me up image, and go to Filter>Blur Gallery>Iris Blur. Adjust the line and transition area to suit the image, then increase the Blur value to 38 px.
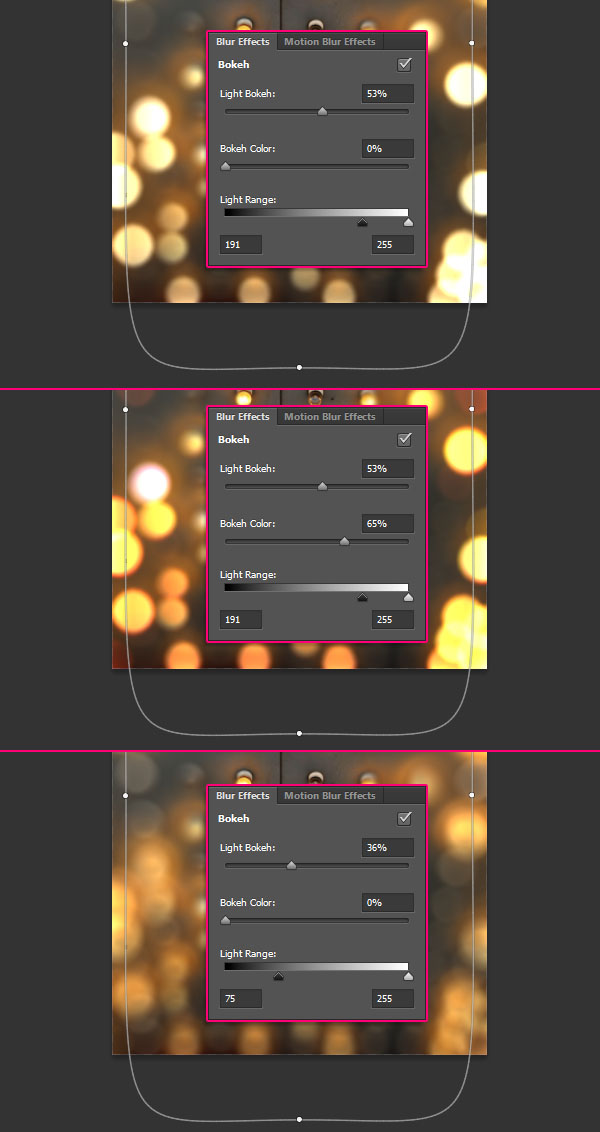
STEP TWO: Check the Bokeh box in the Blur Effects panel, and start changing the Light Bokeh value to create the bokeh effect.

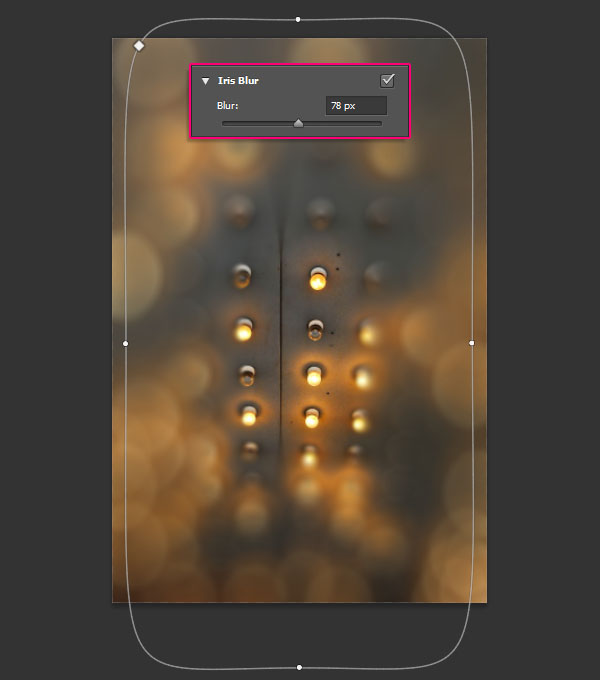
STEP THREE: You can go back to the Blur value and decrease it or increase it to get smaller or larger bokeh renders, respectively.
STEP FOUR: Now you can fine-tune the bokeh effect. The Light Bokeh value controls the bokeh effect's overall intensity. Bokeh Color controls how colorful the bokeh is, kind of similar to the Saturation in the Hue/Saturation dialog. The Light Range controls the range of light where the bokeh appears. If you drag the black slider to the left, you're excluding the darker areas. If you drag the white slider to the left, you're excluding the lighter areas of the image.
Just play around with the different values until you get a result you like.
The Iris Blur's bokeh effect can be applied to a certain area of an image without the need to create any selections.
This tutorial covered the basics of the Iris Blur filter, and explained a couple of different ways of using it for various images. I hope you enjoyed the tips and tricks and found the tutorial helpful.

Can you invert the effect so that the blur is in the inside with the outside without effect?