Quick Frame Effects
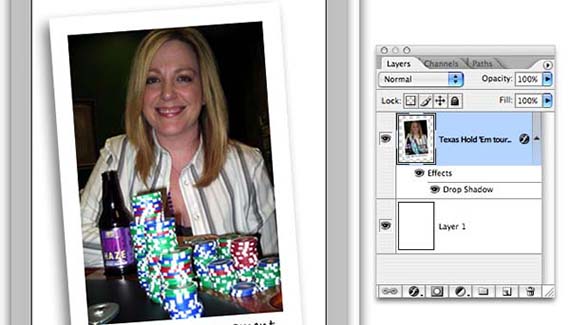
Here’s a couple of super quick frame effects to add a little burst of creativity to otherwise mundane photos.
Fast Frame #1
Step 1: Pop open a photo in Photoshop and double-click the background layer to make it editable.
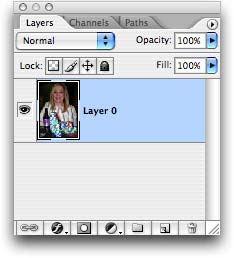
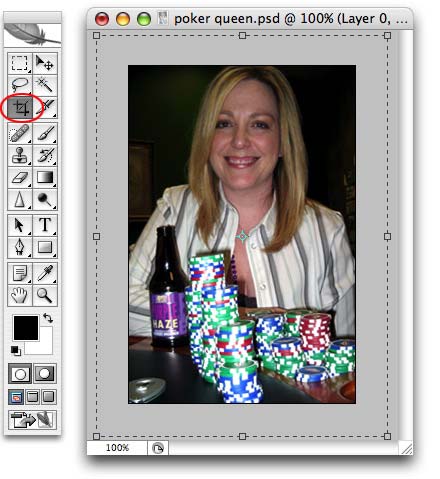
Step 2: Press C to select the Crop tool. We’re going to give ourselves a little wiggle room by drawing a crop box around the image, then pulling out the handles on all four sides to increase Canvas size. Press Return to accept the crop and enjoy your newfound space
Step 3: Click the tiny cursive “f” at the bottom of the Layers Palette and choose Stroke..
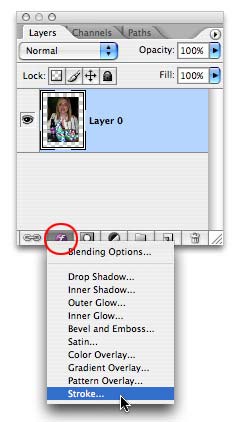
For the resolution of this particular photo, a stroke size of 13 pixels worked out well. For sharp corners, choose Inside from the Position pop-up menu (for round corners choose Outside). Pick a color from the color well (circled in red below).
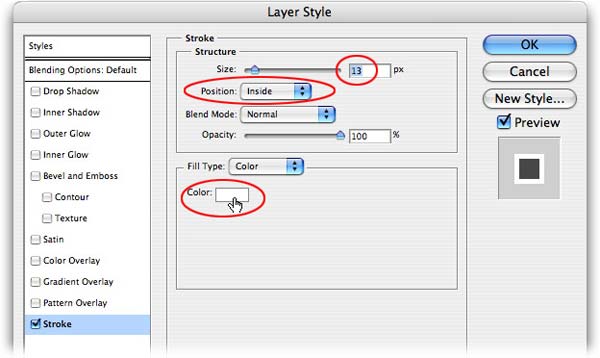
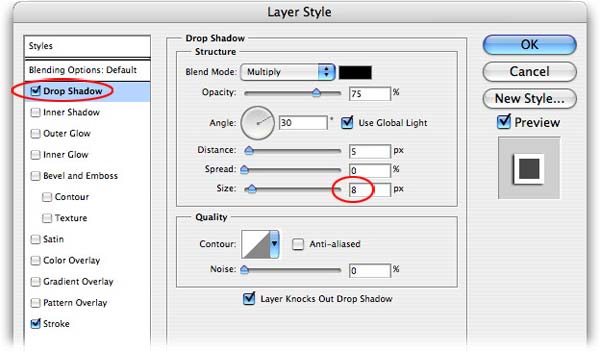
Step 5: Before closing the Layer Style dialog box, select Drop Shadow from the left-hand menu. Mouse over to the photo and move the drop shadow around, then use the Size slider to soften it a bit. Click OK when finished.
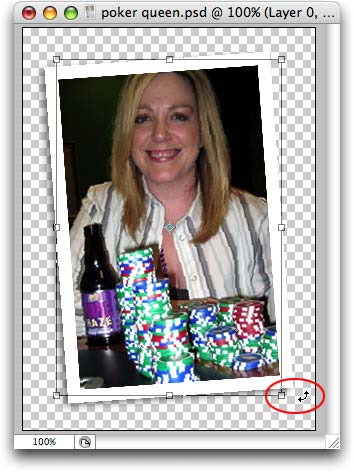
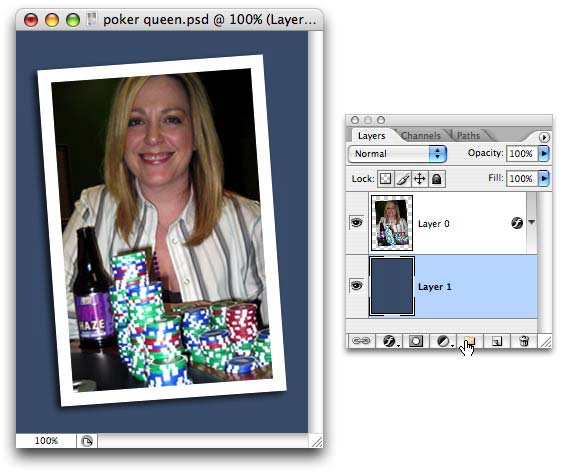
Step 6: Summon Free Transform by pressing Command + T (PC: Ctrl +T). Rotate your creation counter-clockwise by positioning the cursor just below the bottom right-hand handle, then dragging upward slightly. Press return to accept the rotation.
Step 7: Command click (PC: Right click) the new layer icon at the bottom of the Layers Palette to add a layer beneath the one you’re working on.
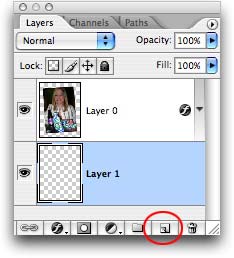
Step 8: Click the foreground color chip in the main Toolbox and pick a color. With the new layer selected, press Option + Delete (PC: Alt + Delete) to fill the new layer with color.
Tada! Here’s the finished product:
Fast Frame #2
A variation on the first frame, we’ll start with giving ourselves more canvas space.
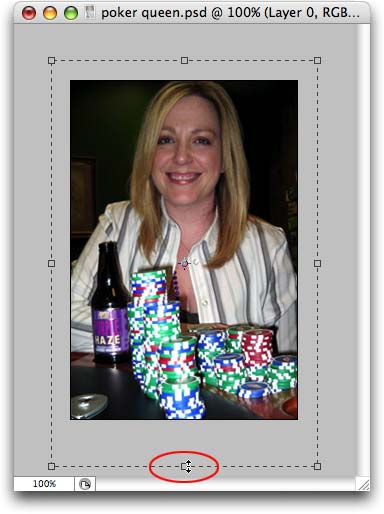
Step 1: Press C to select the Crop tool, and draw a crop box around the image. Pull the handles as shown below: about 1/4 inch on the left, top, and right, then about 1/2 inch on the bottom. Press Return to take receipt of your new space.
Step 2: Command click (PC: Right click) the new layer icon at the bottom of the Layers Palette to add a new layer beneath the one you’re on, like we did above in Step 7.
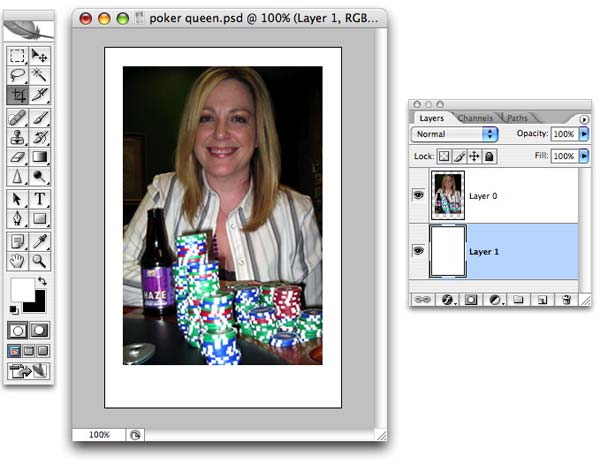
Step 3: Press D to set your color chips to the default of black and white, and press X until white is on top. Press Option + Delete (PC: Alt + Delete) to fill the new layer with white. Here’s where we are so far:
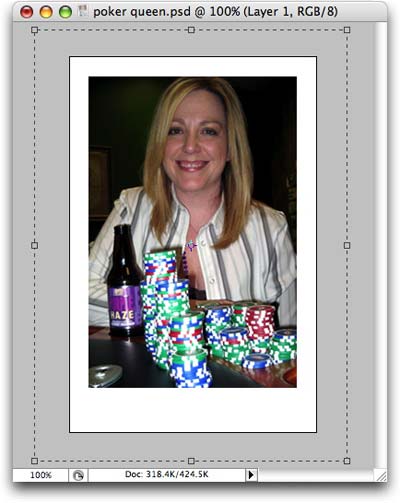
Step 4: Press C to select the Crop tool again, and draw a box around the image. This time add space on all four sizes equally. Press Return to accept the crop.
Step 5: Press T to select the Type tool and add a caption at the bottom of the polaroid-ish border.
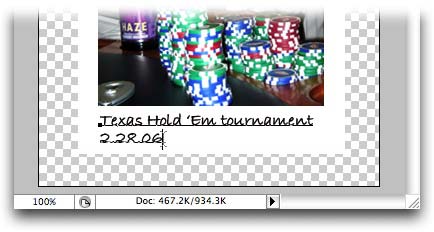
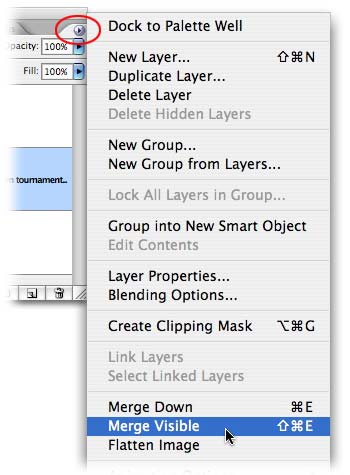
Step 6: When you have everything *just* right, choose Merge Visible from the Layers Palette pop-up menu.
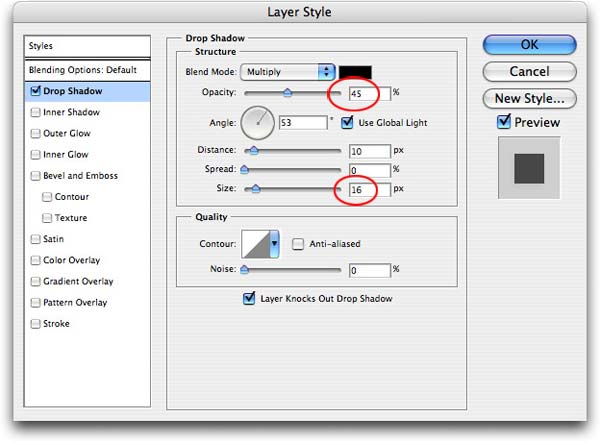
Step 7: Now you’re free to rotate and add a drop shadow like we did above in Fast Frame #1. This time, I increased the size of the drop shadow quite a bit so it would show up on the right side of the photo to define the edge. I also lowered the opacity of the shadow just a bit.
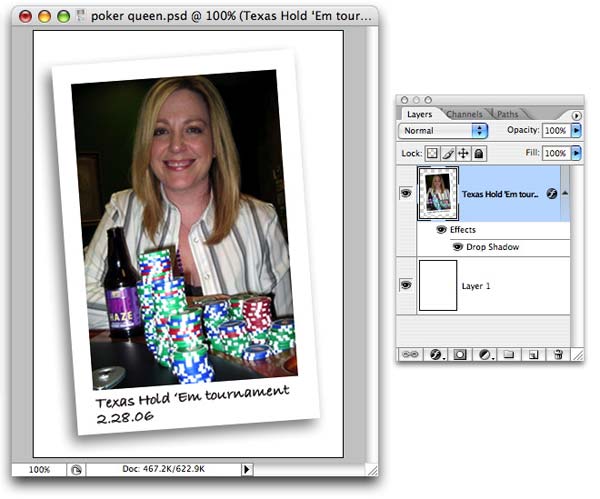
Here’s what we end up with:
That’s all for this week! Until next week, happy fast framing 😉
by Lesa Snider
The Graphic Reporter
http://www.graphicreporter.com
Chief Evangelist, iStockphoto.com


very nice… a whole new idea learned…
I used this idea for my Digital Photography Homework….
Thankz;)
Thanks!,
nice tutorial! thanks!
thanks i learn it..