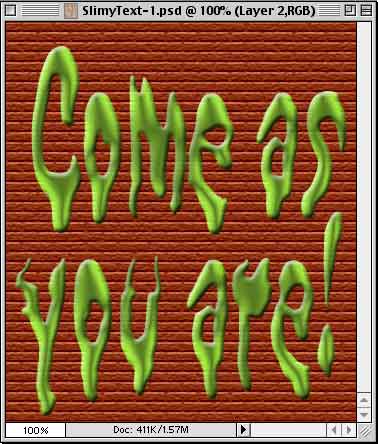
With Halloween right around the corner, it’s time to start dressing things up. And nothing quite says “Happy Halloween” like some slimy letters sliding down the wall. In this installment, we’ll create the slimy text and next time we’ll make it drip down a wall in an animated GIF.
We can use just about any typeface for this. Serif fonts, such as Times, have lots of neat places for slime to drip. However, such fonts as Sand have a more hand-drawn look to them. The font should be reasonably substantial. In Photoshop 6, you can adjust the height and width of the font in the Character palette, and you can use Faux Bold from that palette’s menu to beef things up. The color of the text at this point is insignificant. We’re using it as a template for a selection.
Click the New layer button at the bottom of the Layers palette. That adds a blank layer directly above your type layer. Now, with the blank layer still active, Command-click on the thumbnail of the type layer (the “T”). This loads the transparency mask from the type layer as a selection. Even when you don’t create a layer mask, every layer that has any transparency has a built-in mask. Command-clicking the layer (it doesn’t have to be active) makes a selection that includes all non-transparent pixels. Reduced opacity and feathering are preserved in the selection. Delete the Type layer.
Since we had the new layer active when we made the selection, we’re all set now to fill with color. Make your foreground color a nasty green, such as RGB 120/200/65. Then hold down the Option key (Alt on Windows) and press Delete (Backspace). This fills the selection with the foreground color. Apply these layer effects:
Inner Bevel: Smooth/100%/Up/5/0.
Satin: Multiply/Black/50%/Angle 19°/11/14/Contour: Invert.
Color Overlay: Screen/RGB 132-235-0/Opacity 70%.
Deselect the letter shapes by using the keyboard shortcut Command-D/Control-D.

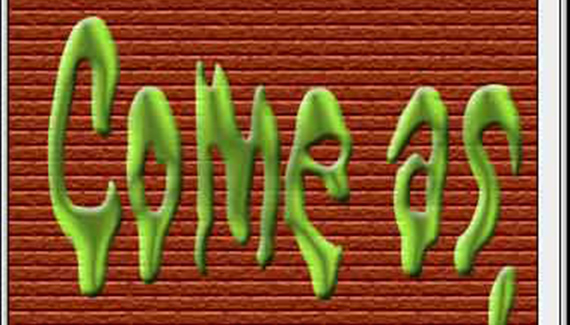
Now let’s add a background behind the letters, a wall down which the slime can drip. Add a new layer and move it behind your slime. We’ll create a brick wall. To start, select your foreground color. Bricks come in lots of colors, so you’ve got some flexibility here. I’ll use RGB 138/46/14 to create red bricks. Make sure that the empty layer is active and again use Option/Alt Delete/Backspace to fill the layer with the foreground color.
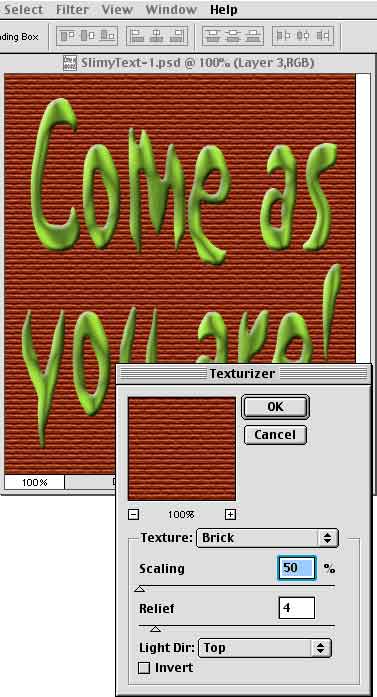
We’ll create bricks from this smooth, solid color fill using the filter Texture> Texturizer.
The settings you choose will depend on the size and resolution of the image and, as always, your personal vision. For this 350 x 400 pixel image, settings of 100% and Relief:4 produce a good look. (The Texturizer filter doesn’t show you the effect of the settings in the document window, just in the little preview window. We’ve applied the filter in the background so that you can see how it would look.)

Different settings can change the look and feel of the filter.

At the bottom of the History palette, click on the left-most button. That creates a new document from the current history state. Save this file to use with the animation exercise in the second installment of this series. Use the name
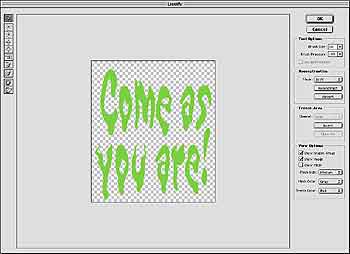
Make the letter layer active again by clicking once on it in the Layers palette. Use the menu command Image> Liquify to open the dialog box. Select a hard-edged brush that’s a little wider than the strokes of the text. Set the pressure to 100%. Drag downward from the bottoms of all of the letters. Carefully select other areas where gravity could have an effect on slime running down walls.
To finish the look, Command-click the type layer’s thumbnail to re-select the slime. Then use the menu command Select> Border. Make it about 5 pixels. You can reapply Filter> Texture> Texturizer, using the same settings as you used as your background. (The shortcut is Command-F/Control-F.) The edges of the slime will then appear to conform to the wall.