

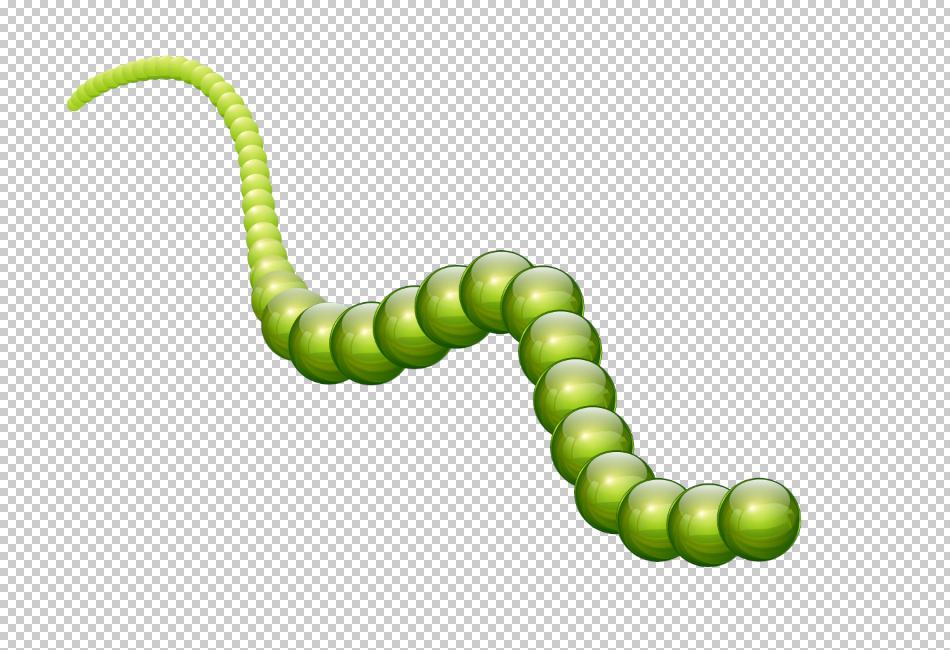
One of the secret powers of the Mixer Brush is that it can sample multiple colors or even pixels to use for its stroke. This is great for creating color-rich strokes to simulate painting with a real brush, but for this project we're going to use an image as the paint source to create repeating segments that can be used for anything from robot arms to your very own superworm.
Step One: Start with an image of a sphere. (You'll probably want to try a lot of different types of images after this, but let's start simple.) If you're using a stock image, use the Elliptical marquee tool (nested under the Rectangular Marquee tool [M] in the Toolbox) to make a selection around the sphere. (Tip: As you're drawing the selection, you can press-and-hold the Spacebar to reposition the selection.) Press Command-J (PC: Ctrl-J) to create a copy of the sphere on its own layer. [KelbyOne members may download the file used in this tutorial at http://kelbyone.com/magazine/issue/january-2015. All files are for personal use only.]

©Cobalt/Fotolia
Step Two: Create a new 12×8″ document (File>New) at 300 ppi, set the Background Contents drop-down menu to Transparent, and click OK. Using the Move tool (V), click-and-drag the copied sphere into this new document. You can use a Color Overlay layer style or a Hue/Saturation adjustment layer to re-color your sphere if you need to. You'll probably need to use Free Transform (Command-T [PC: Ctrl-T]) to size the sphere so that it's slightly larger than the widest part of the worm that you want to create to give yourself a little wiggle room.

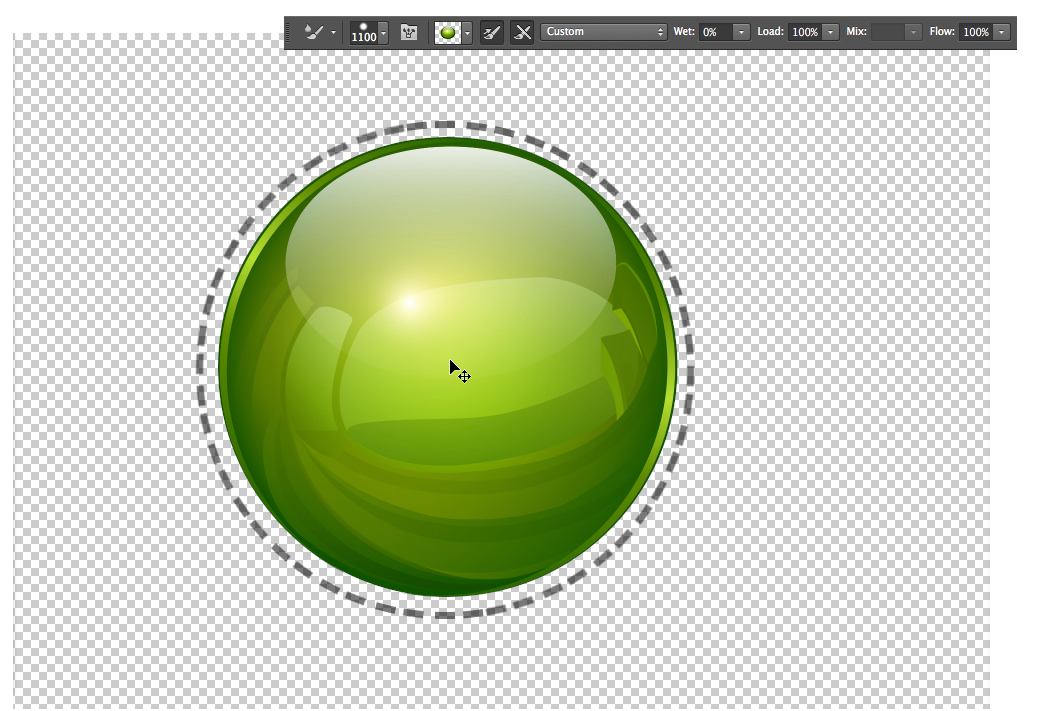
Step Three: Make sure that you have the Mixer Brush tool selected. If not, click-and-hold on the Brush tool (B) in the Toolbox, and choose the Mixer Brush from the flyout menu (or toggle through the Brush tools by pressing Shift-B). You'll notice that the Options Bar for the Mixer Brush has a few more items than the regular Brush tool. There are several important options that have to be set correctly for this to work. The fifth icon from the left is the toggle for Load the Brush after Each Stroke, and it needs to be clicked on in order to load up the sphere colors. The Wet setting needs to be at 0%, the Load and Flow at 100%, and Sample All Layers needs to be turned off.
![]()
Step Four: This process is a lot like sampling something for the Clone Stamp tool; the only difference is that the Mixer Brush only clones what's inside the diameter of the brush, so you'll need to choose a hard-edged round brush that's slightly larger than the sphere (we used a dotted line here so you can better see the circumference of the brush in our example). For a hard-edged brush, click on the brush preview thumbnail in the Options Bar to open the Brush Preset Picker, and set the Hardness to 100%. Use your Bracket Keys on your keyboard to quickly change the size of the brush.
Now place your Mixer Brush cursor in the center of the sphere and hold down Option (PC: Alt) and click to sample. You should see the sphere appear in the small preview thumbnail in the Options Bar next to the Load the Brush icon. If you accidentally left Sample All Layers turned on and, say, you're working on a white background, your sample will probably have a white border around the sphere that you might not notice until later, which can cause problems.
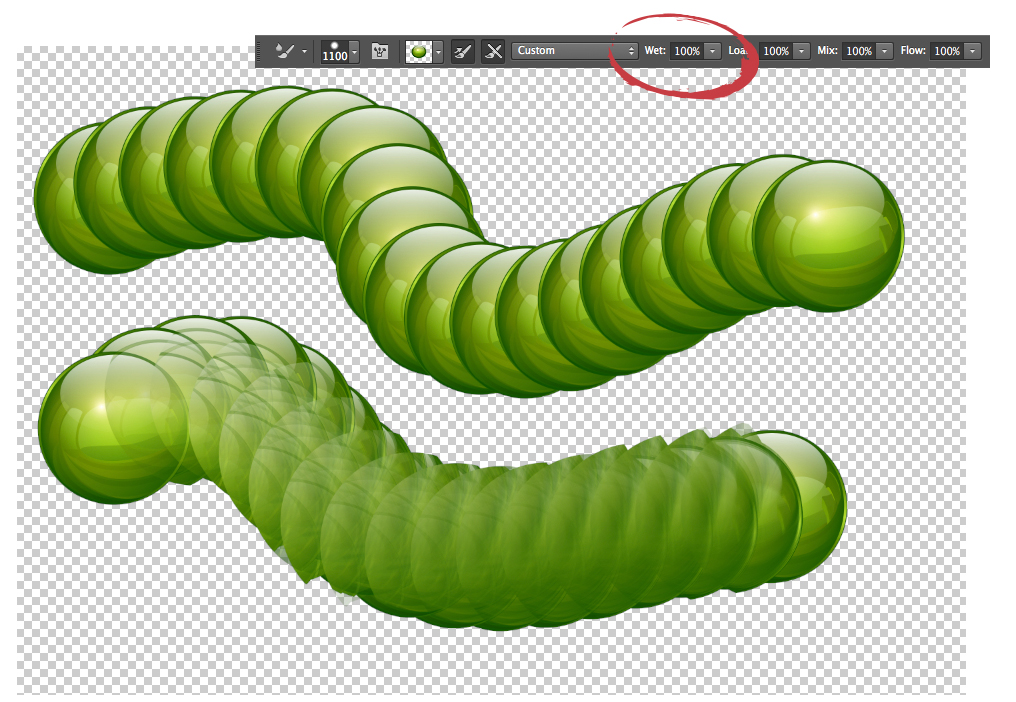
Step Five: Now that you have your brush loaded and ready to go, click on the Create a New Layer icon at the bottom of the Layers panel, and give it a whirl. Depending on what brush you've chosen and its settings, you can either have a really cool-looking Doc Octopus arm-like stroke or a big blob. The first things to check if things don't look right are the Load and Flow settings. If they're not at full strength, it can result in some transparency, and if you have the Wet option turned on, it can cause the stroke to smear together. The top example here is correct, but the bottom example has Wet set to 100%.
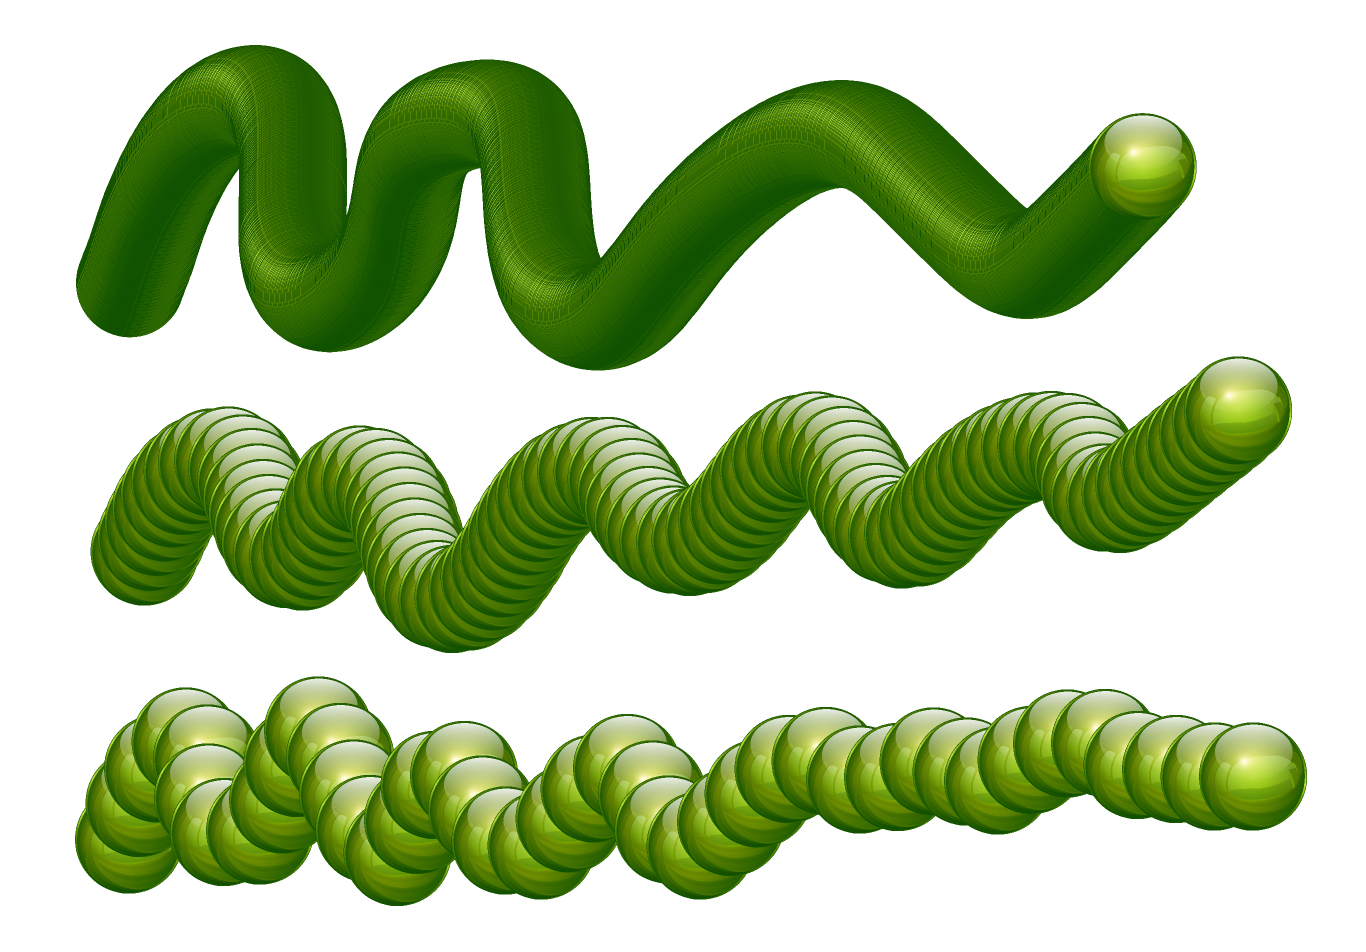
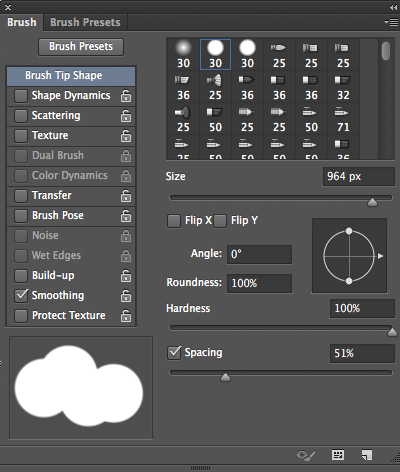
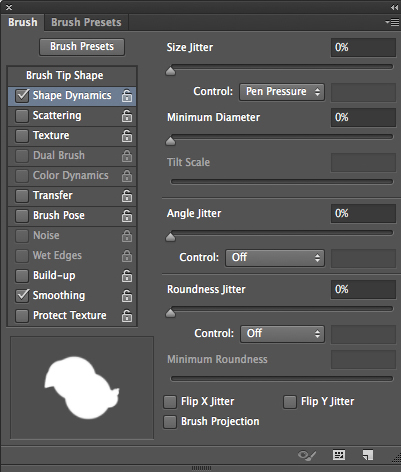
Step Six: One of the most powerful features in Photoshop is the Brush engine, and we're going to open it to tweak the look of the stroke. The good news is that we're only adjusting a couple of settings. Click on the third icon from the left in the Options Bar and the Brush panel pops open. Make sure Brush Tip Shape is selected at the top of the list on the left side of the panel. You only have to adjust one slider here, Spacing. Moving it to the left paints the spheres closer together; moving it to the right paints the spheres further apart. With the panel open, you can make practice strokes in your document and see the results. Tweak until you're happy.
Step Seven: If you have a pressure-sensitive input device such as a Wacom Intuos tablet, then you can go to the Shape Dynamics section in the Brush panel and choose Pen Pressure from the Control drop-down menu under Size Jitter. Also, make sure that Pen Pressure is turned off in the Transfer section, as you don't want the pen pressure affecting the transparency. This will allow you to make parts of your worm smaller or larger by simply applying more pressure. An even faster way is to simply toggle on the last icon in the Mixer Brush Options Bar to get the same result.
Step Eight: If you don't have a pressure-sensitive device, you can still get the look you want by combining a couple of techniques. Draw out a straight worm that's as fat as the fattest part on a new layer. Use Edit>Puppet Warp to reshape the worm, trying your best to keep it as smooth and natural as possible. Simply click in several places along the length of the worm to add pins and then drag individual pins to see how it affects the shape. If you mess up on a section, you can always click on that pin, delete it, and start again.
Once you get it pretty close, press Enter to commit the Puppet Warp, and then use Filter>Liquify to help smooth it out and taper it a bit. Remember, use the Forward Warp tool (W) in Liquify to make small adjustments and just bump the edges over and over until you get the shape you wantâ”baby steps.

Step Nine: Double-check that Sample All Layers is turned offâ”this will get you almost every time as seen in the top example here. Also pay attention to the direction of the light on the spheres: it will look a lot different when you paint in different directions. If you're creating multiple tentacles, create each one on its own layer to make adjustments and masking easier.
If you can use a pressure-sensitive tablet, envision drawing in three dimensions and it will help you regulate the pressure better. In other words, if you think about one end of the worm being smaller because it's farther back in the image and the other end being bigger because it's getting closer as it moves across the page, it will help influence your hand. Weird, but it works.


Step Ten: That's all there is to it. Because this technique is so easy and cool, once you get the hang of it, the hardest part will be to come up with new ways to use tentacles in your imagery. Perhaps you could specialize in robotics rendering or ductwork diagraming, or maybe you will land a gig luring folks to try out fishing. But that's just a drop in the ocean. Don't stop at just making tentacles; see what other images you can sample to come up with your own superfunky Mixer Brush strokes.

Hook: ©koya979/Fotolia; Plant ©angorius/Fotolia
Understanding how a tool works empowers the craftsman to create more things faster and better. Creating something fun like superworms is a great way to better understand the Mixer Brush and opens the door to creating "reel" pretty pictures.
This article is courtesy of Photoshop User magazine, the official publication of KelbyOne, which provides quality online education for creative people. For more information, visit KelbyOne.com.
