
There are so many things that can be done in the Photoshop CS6 3D environment. With all the 3D tools and settings, you can create many amazing 3D effects easily and quickly. This tutorial will show you how to create a simple and fun layered text effect using the 3D capabilities, and will show you some cool tips and tricks that can be used whenever working in the 3D environment in general as well.
Tutorial Assets
1- PoetsenOne font.
2- Tiles Texture – 2.
Step 1
Create a new 1150 x 825 px document, and create the text in Black using the font PoetsenOne, and the font Size 200 pt.
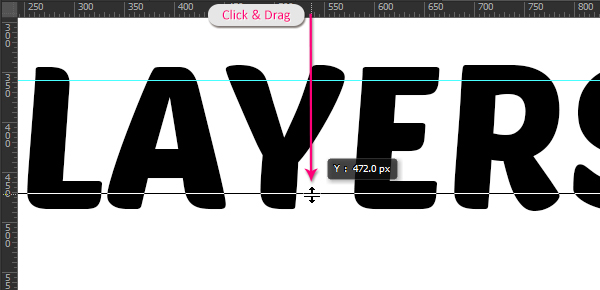
Next, we are going to create some guides near the top and the bottom of the text. To do so, show the Rulers (View -> Rulers), then click and drag the ruler at the top to create each guide and place it where you want it to be on the text.
The holes we are going to create inside the text will be added along those guides.
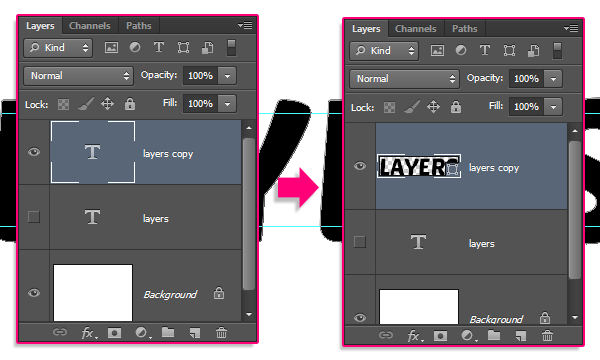
Duplicate the text layer, and make it invisible by clicking the eye icon next to it. Then right click the copy layer and choose Convert to Shape.
Step 2
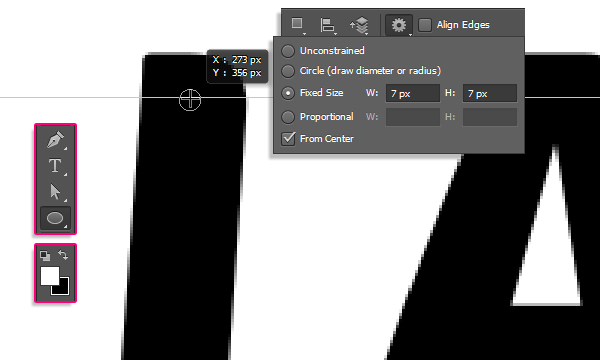
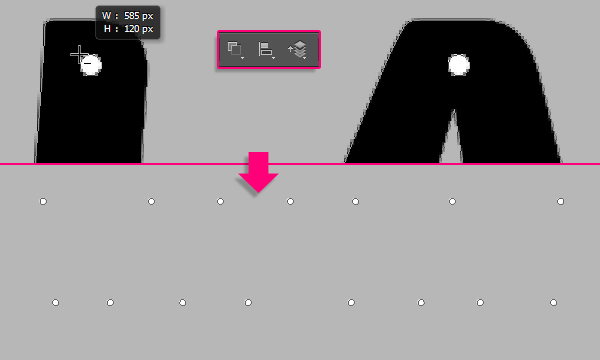
Set the Foreground color to White, pick the Ellipse Tool, click the Geometry Settings icon in the Options bar, then set the Fixed Size dimensions to 7, and check the From Center box.
Then, click and drag slightly along the upper guide you created, to place a circle in the center of the first letter’s edges surrounding the guide.
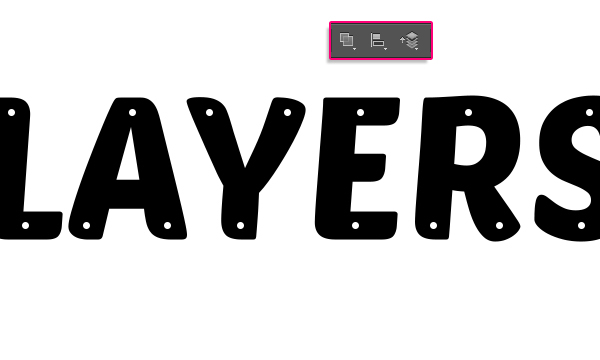
Click the Combine Shapes icon in the Options bar, then continue adding the circles along both guides for the all letters/letters’ tips.
When you’re done, you can get rid of the guides if you like by going to View -> Clear Guides.
Step 3
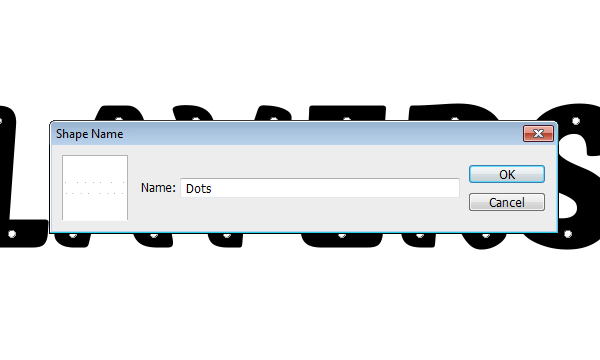
Go to Edit -> Define Custom Shape, and type in a name for the new shape (e.g. Dots).
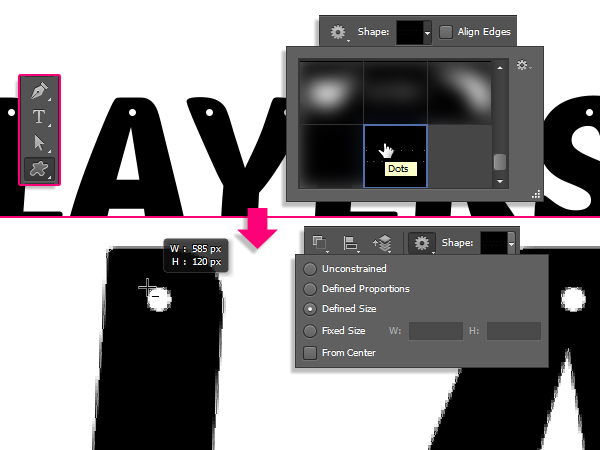
Pick the Custom Shape Tool, then scroll down the Custom Shape picker to click the “Dots” shape you’ve just defined.
After that, click the Subtract Front Shape icon in the Options bar, click the Geometry Settings icon, and choose the Defined Size option and un-check the From Center box. This will create the dots in the exact same original size.
Select the text shape layer, then click and drag the dots shape so that the first dot of the shape is placed exactly over the first dot shape you already have. The dots will snap when they are exactly on top of each other.
Once you release the mouse button, the dots will be subtracted from the text shape.
Set the Foreground color to #b7b7b7, pick the Rectangle Tool, then click and drag to create a rectangle that extends a tiny bit outside the document, and place that rectangle right below the text shape layer.
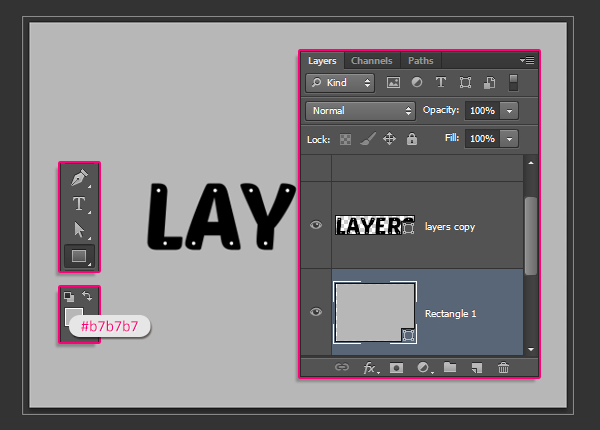
Subtract the Dots shape from the rectangle just like you did previously.
In the image below, the other layers are made invisible so that you can see the result.
Step 4
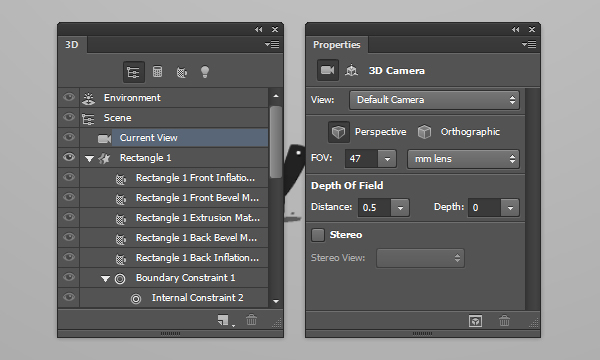
Select each of the shape layers that you have, then go to 3D -> New 3D Extrusion from Selected Path.
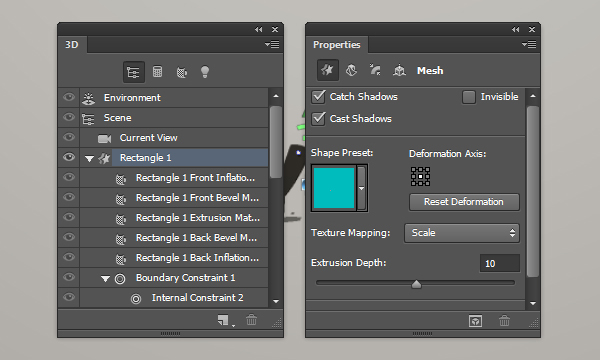
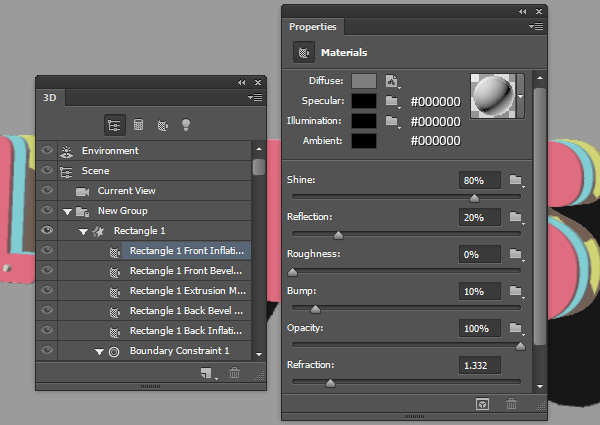
To access the 3D mesh settings and properties, you'll need to open two panels: The 3D panel, and the Properties panel (both found under the Window menu).
The 3D panel has all the components of the 3D scene, and when you click the name of any of those, you'll be able to access its settings in the Properties panel. So make sure to always select the name of the element you want to modify in the 3D panel before you change its settings in the Properties panel.
Select the Rectangle layer in the Layers panel, then its mesh name in the 3D panel, and change the Extrusion Depth to 10 in the Properties panel.
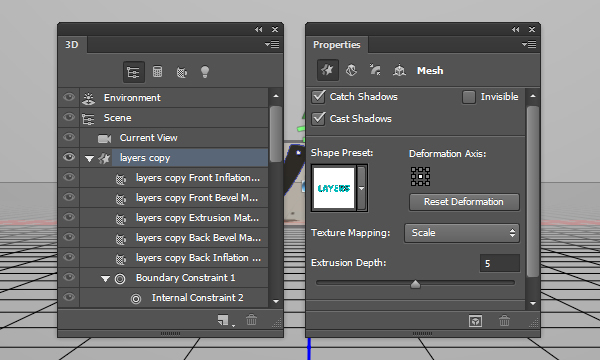
Select the text shape layer, then its mesh name in the 3D panel, and change the Extrusion Depth to 5.
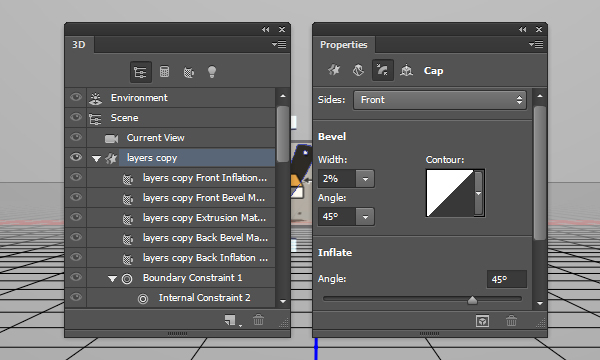
Click the Cap icon at the top of the Properties panel, and change the Bevel Width to 2.
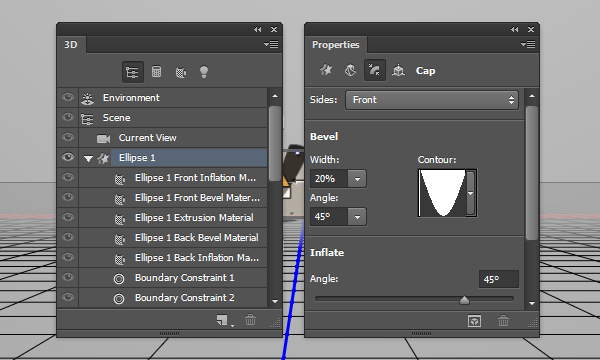
Select the dots shape layer, its mesh name in the 3D panel, click the Cap icon, then change the Bevel Width to 20, and change the Contour to Cone – Inverted.
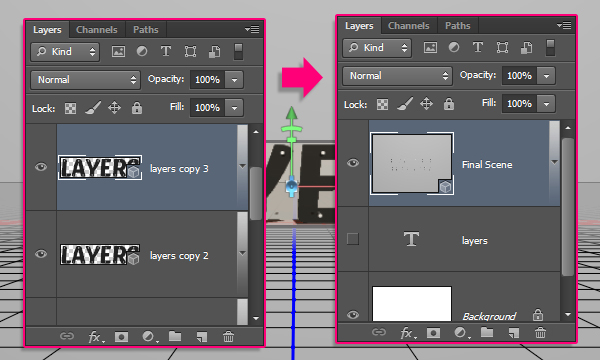
Duplicate the text shape layer twice so that you have 3 text shape layers. Then select all the 3D layers you have, and go to 3D -> Merge 3D Layers. This will place all the 3D meshes in one scene. You can rename the merged 3D layer to anything you like (e.g. Final Scene).
Step 5
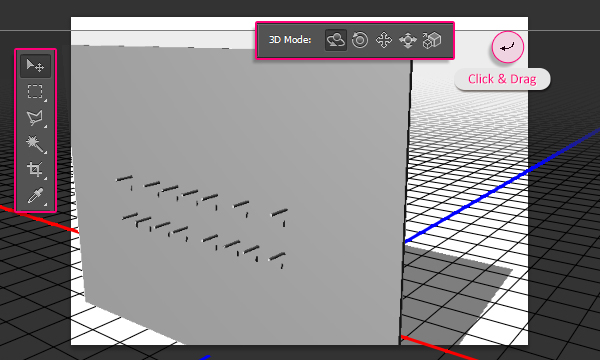
Select the Move Tool. You'll find a set of 3D Modes for the tool to the right of the Options bar. When you choose one of those, you can then click and drag to perform any changes (on the selected element in the 3D panel).
So click the Current View tab in the 3D panel, then click and drag in any empty area of the 3D scene to change the Camera View, but don't move any of the meshes yet.
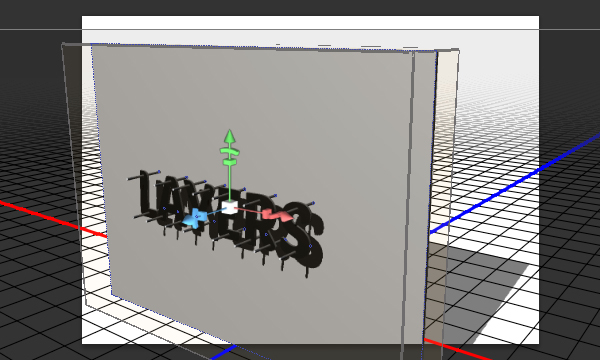
Next, select each 3D mesh name in the 3D panel, and move it to place the elements in the 3D scene.
Step 6
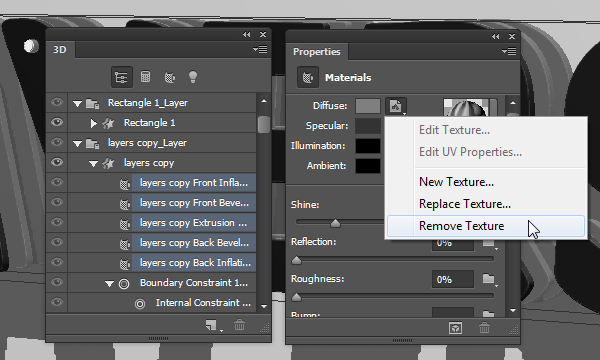
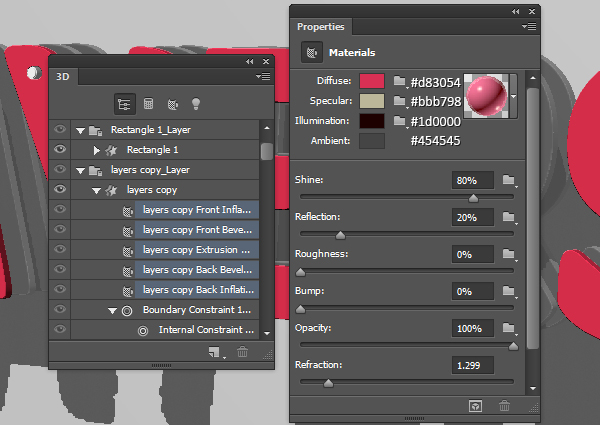
Click all the material tabs of the first text shape mesh in the 3D panel, then, in the Properties panel, click the Diffuse texture icon, and choose Remove Texture.
Change the rest of the settings as shown below. The Diffuse color is #d83054, the Specular is #bbb798, the Illumination is #1d0000, and the Ambient is #454545. But you can absolutely choose any other colors you like for the Diffuse.
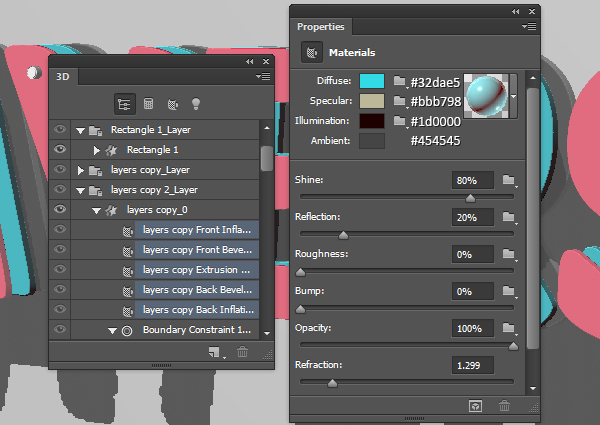
Follow the same steps to change the material settings for the other text shape meshes you have. The only value you need to change is the Diffuse one if you want to use different colors for each layer of text. The color used for the second layer here is #32dae5.
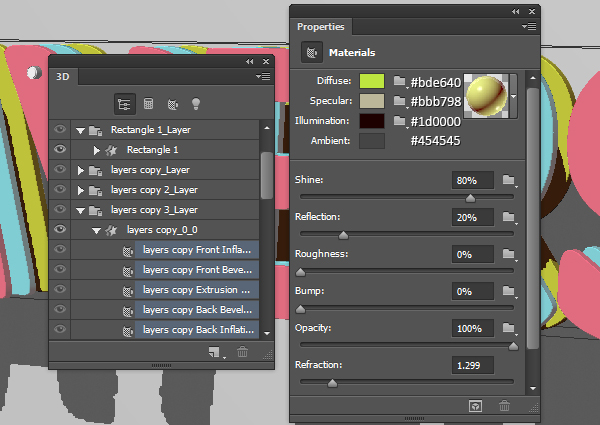
The color used for the third layer is #bde640.
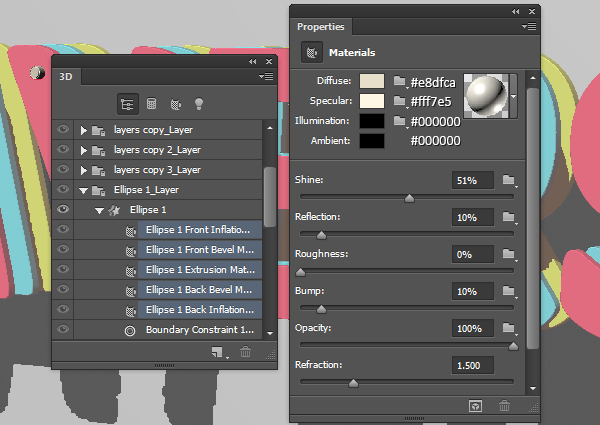
As for the dots mesh, after you remove the Diffuse texture, change the settings as shown below. The Diffuse color is #e8dfca, the Specular is #fff7e5, and the Illumination and Ambient colors are set to #000000.
Step 7
Select the Rectangle’s Front Inflation Material tab in the 3D panel, and change the Specular, Illumination and Ambient colors to #000000. Then change the rest of the values as shown below.
Click the Diffuse texture icon and choose Edit Texture.
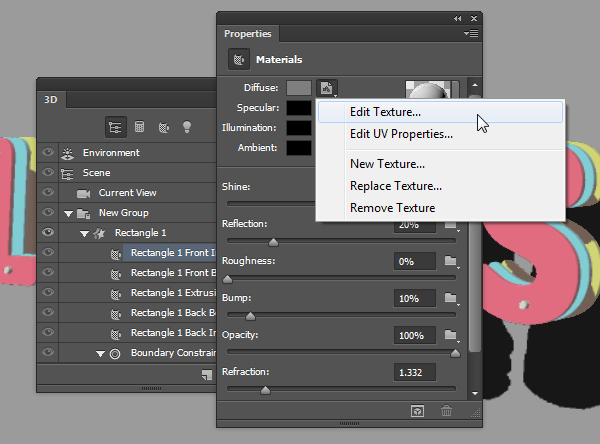
This will open the texture’s file so that you can modify it.
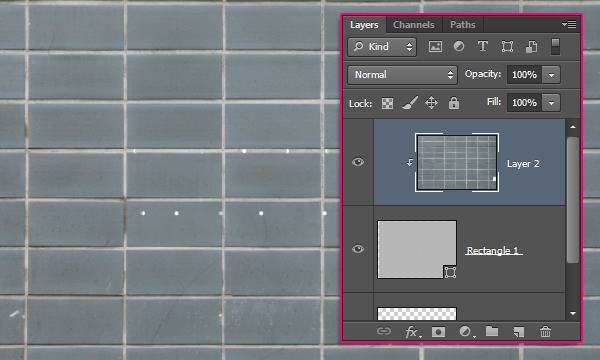
Place the “Tiles Texture – 2” image on top of the rectangle shape layer, resize it as needed, then right click its layer and choose “Create Clipping Mask” so that the holes of the shape appear through the texture.
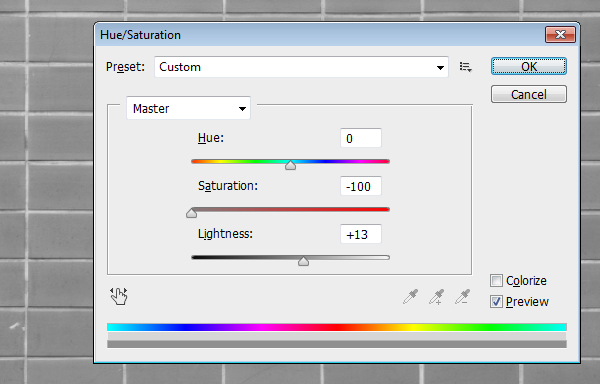
Go to Image -> Adjustments -> Hue/Saturation, change the Saturation value to -100, and the Lightness to 13.
Save the file (File -> Save), then go to Save As to save the file in the folder of the original file you’re working on using the name “Bump”. Then close it (File -> Close) to go back to the original document.
Step 8
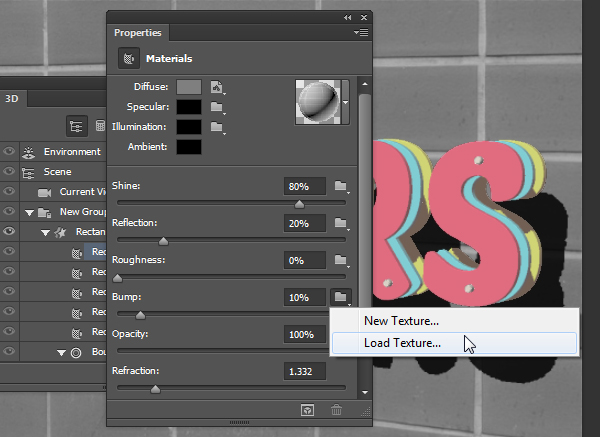
Click the Bump folder icon and choose Load Texture, and load the “Bump” file you saved in the previous step.
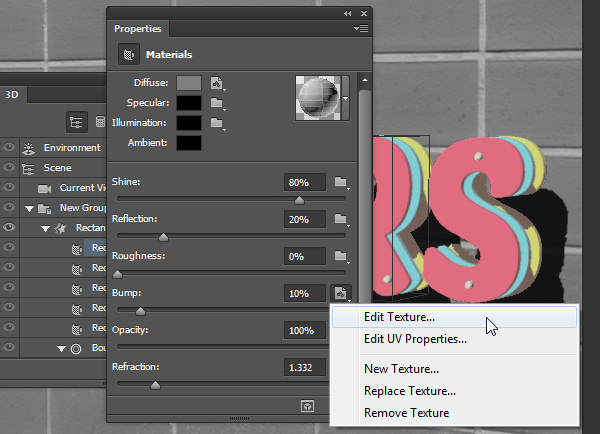
Click the Bump texture icon and choose Edit Texture.
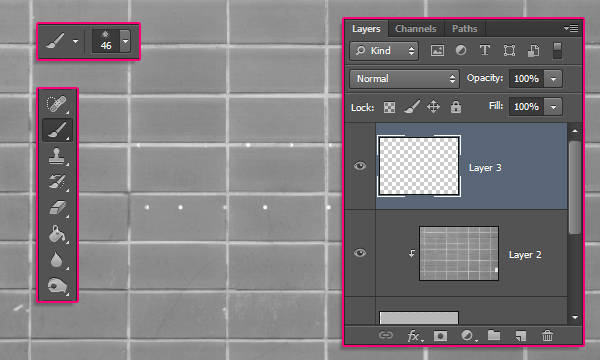
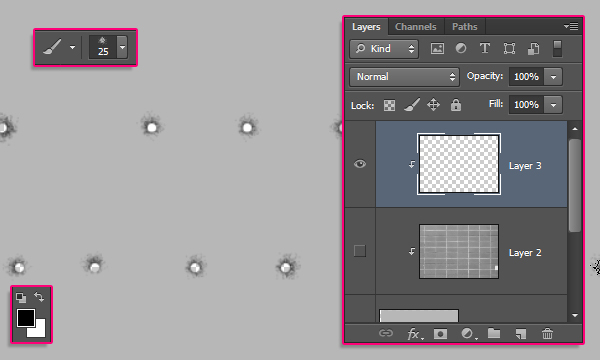
Create a new layer on top of all layers, pick the Brush Tool, and choose the “Spatter 46 pixels” brush tip.
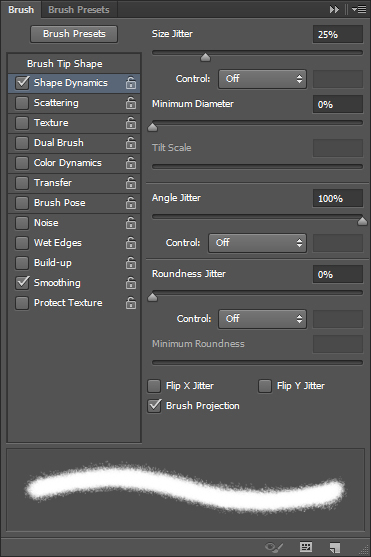
Open the Brush panel (Window -> Brush), and under Shape Dynamics, change the Size Jitter to 25% and the Angle Jitter to 100%.
Right click the new layer you created and choose Create Clipping Mask, then make the texture layer invisible by clicking the eye icon next to it. Set the Foreground color to Black, set the brush tip size to 25 px, then click once in the middle of each dot. The Shape Dynamics settings will help create results of slightly different sizes and angles.
The dark color of the brush in the Bump texture will create an illusion of flatter surface areas, that seem to be deeper-looking parts compared to the original surface.
Save the file and close it to go back to the original document.
Step 9
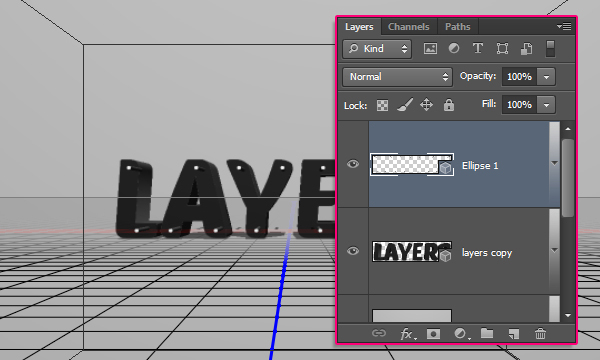
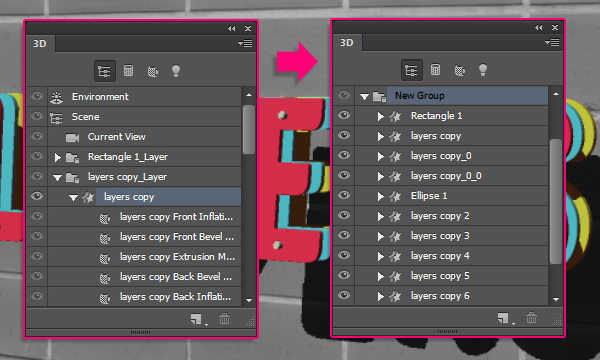
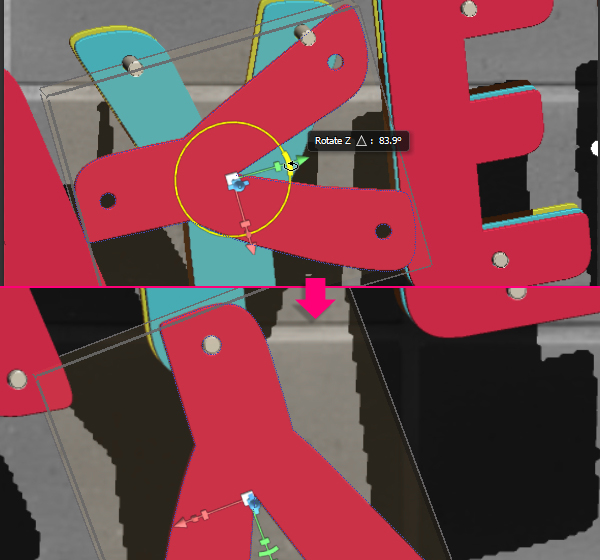
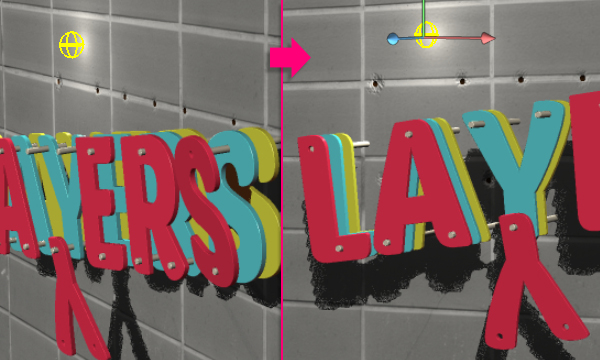
Select the text mesh name of the very front text layer, then go to 3D -> Split Extrusion. This will make each letter a separate mesh, so that you can move it on its own.
Adjust the camera view so that the text fits within the document in an angle you like.
Select all the mesh groups in the 3D panel except for the Rectangle group, then pick the Move Tool, and rotate the text slightly so that it looks like its falling off of the wall.
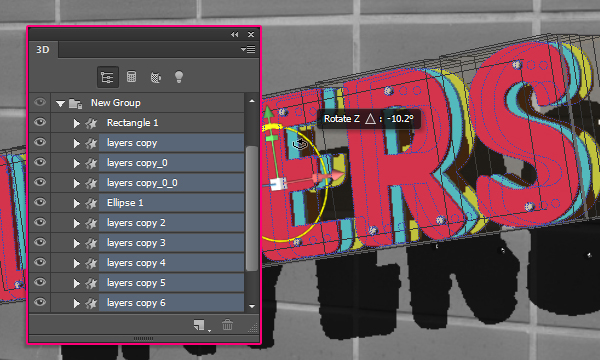
You can change the camera view to see how the text looks, and make sure that the higher side is attached to its holes in the wall.
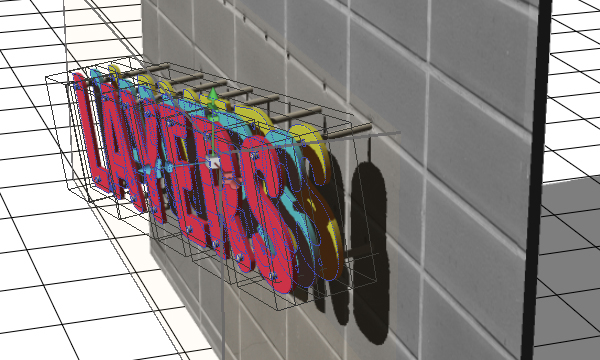
If needed, you can change the Ellipse mesh Extrusion Depth from the Properties panel.

Step 10
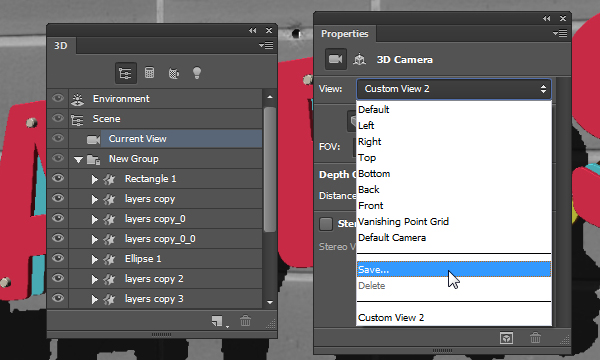
Once you’re done, change the camera view to the final angle that you want to use for rendering later on. Then, from the View drop down menu, choose Save to save that camera view.
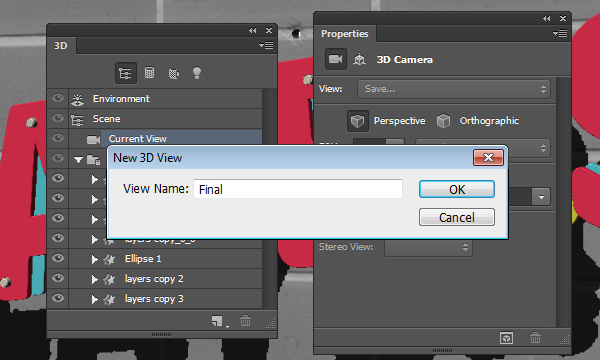
Enter a name for the view and click OK.
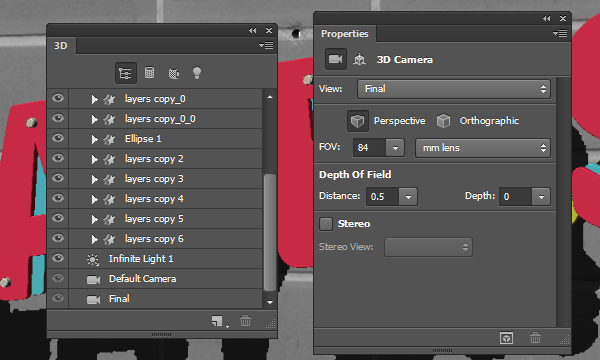
Now whenever you change the camera view then want to go back to the final one, you can click the saved view tab at the bottom of the 3D panel, or choose it from the View drop down menu in the Properties panel.
Step 11
Choose the Front view from the View drop down menu.
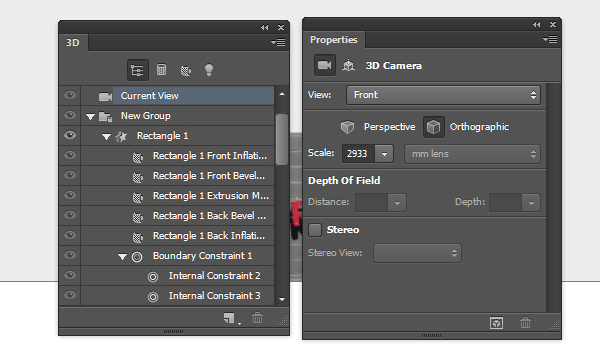
Zoom in the camera view until you can see the letters clearly. Start selecting some letters from the front layer of text, then rotate, move, and place them out of their original places. The Front view will make getting the letters in place much easier.
A slight change can be enough for some letters. Not every letter needs to be totally out of its original place. But it’s up to you to decide how to move the letters around depending on the final result you’re looking for.
When you’re done, get back to your final (saved) view.
Step 12
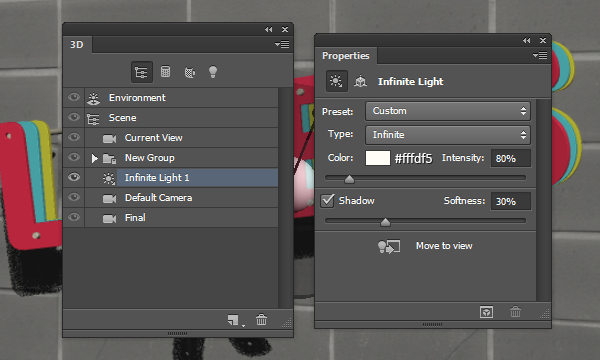
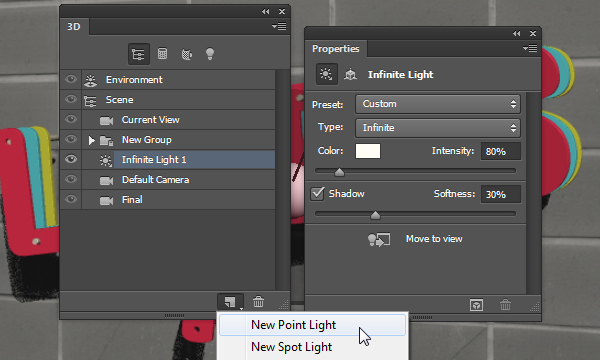
Time to work on the lighting. Start by clicking the Infinite Light 1 tab in the 3D panel, then, in the Properties panel, change the color to #fffdf5, the Intensity to 80%, and the Shadow Softness to 30%.
Click the Coordinates icon at the top of the Properties panel, and use the values shown below.
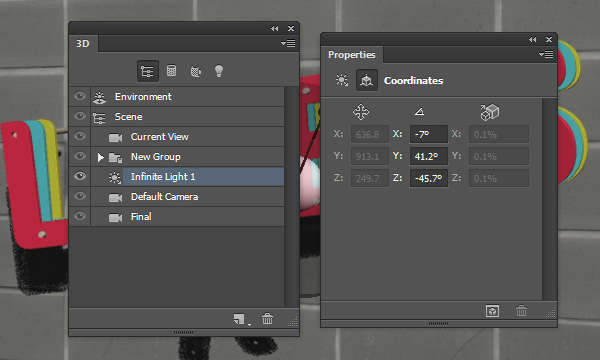
You can also use the Move Tool to move the light around in the Scene.
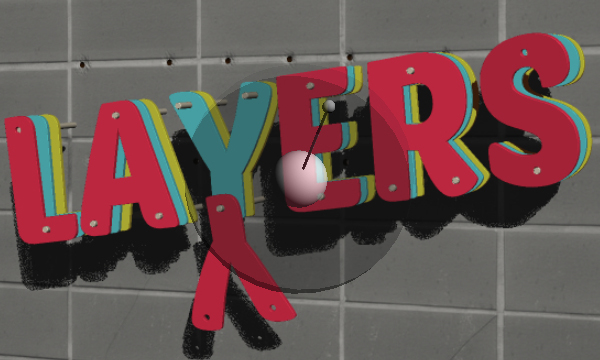
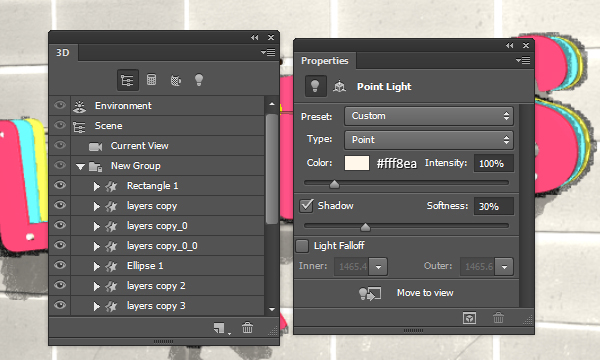
Click the Add new Light to Scene icon down the 3D panel, and choose Point Light.
In the Properties panel, change the color to #fff8ea, the Intensity to 100%, and the Shadow Softness to 30%.
The light might seem so bright, but you’ll need to move it so that it touches the wall. Place it on top of the part you like of the text.
Step 13
Select the Rectangle Extrusion Material, remove its Diffuse texture, and change its settings as below. The Diffuse color is #676767, the Specular is #333333, and the Illumination and Ambient colors are #000000. This will darken up the holes material.

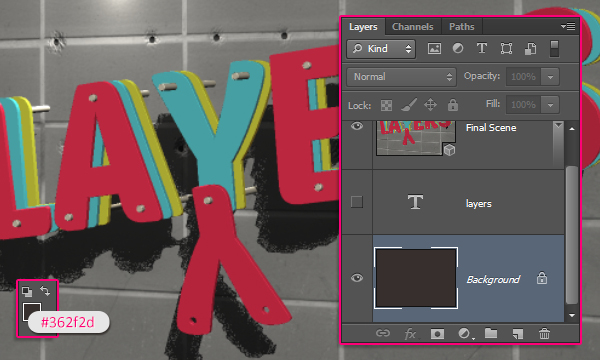
Select the Background layer, and fill it with the color #362f2d.
If there’s nothing else you want to change, select the 3D “Final Scene” layer again, then go ahead and render the scene (3D -> Render). The rendering might take some time, but you can stop it by clicking anywhere inside the scene, or pressing the Esc key.
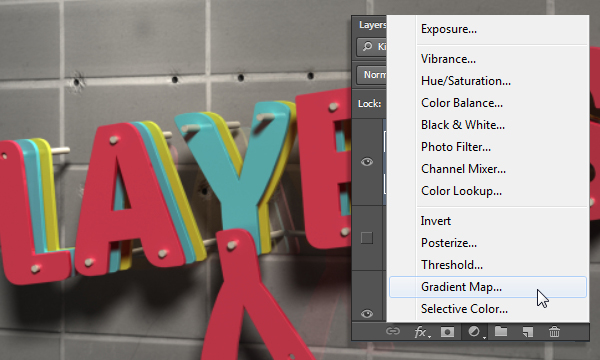
When the rendering is finished, click the ‘Create new fill or adjustments layer’ icon down the Layers panel, and choose Gradient Map.
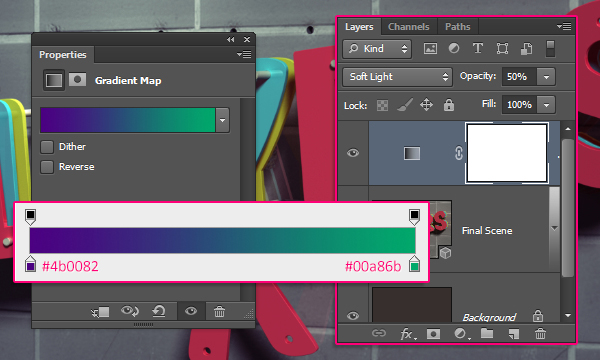
Create the Gradient using the colors #4b0082 to the left and #00a86b to the right. Then change the adjustment layer’s Blend Mode to Soft Light and its Opacity to 50%. This will enhance the coloring and contrast of the final result.
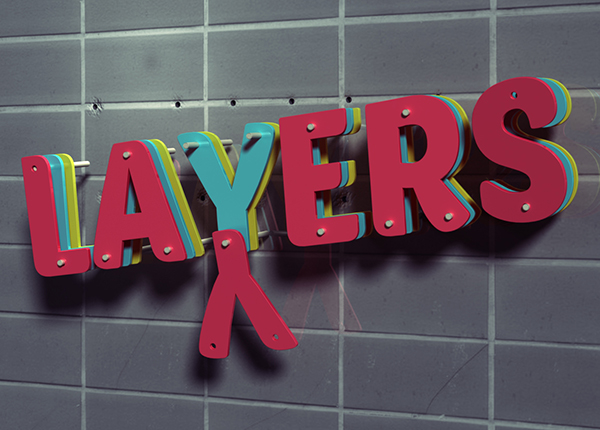
Conclusion
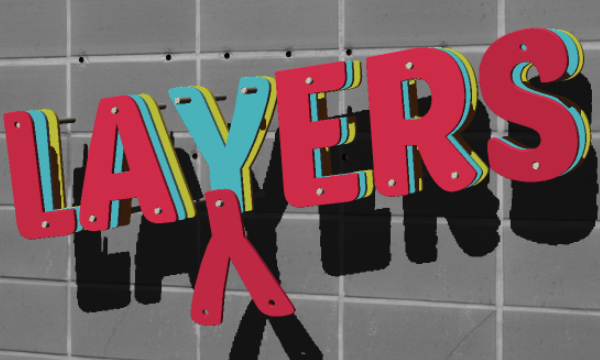
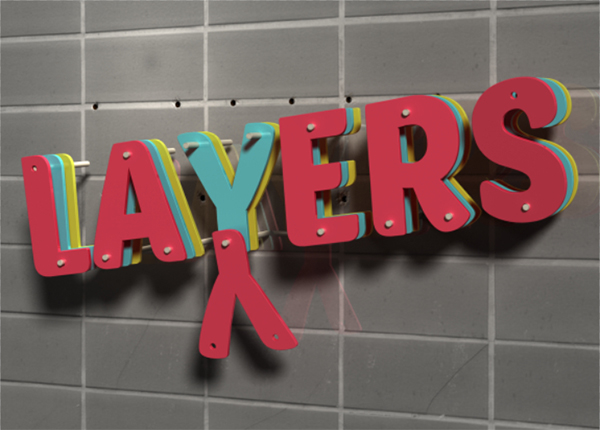
This is the final result. Photoshop CS6’s 3D Tools and environment are a great way to achieve some amazing 3D effects. You can as well play around with the colors and moving the letters to get different versions of the effect.
Hope you enjoyed the tutorial and found it helpful.

Thanks alot for this great tutorial
do you know what its means
“Pick the Custom Shape Tool, then scroll down the Custom Shape picker to click the “Dots†shape you’ve just defined.
After that, click the Subtract Front Shape icon in the Options bar, click the Geometry Settings icon, and choose the Defined Size option and un-check the From Center box. This will create the dots in the exact same original size.
Select the text shape layer, then click and drag the dots shape so that the first dot of the shape is placed exactly over the first dot shape you already have. The dots will snap when they are exactly on top of each other.”
Once you release the mouse button, the dots will be subtracted from the text shape.
At step two, when I try to use the ellipse tool I get an error msg saying the layer has to be rasterized.
I Know this is an old tutorial. But I still figured I say Hi, and thank you for the great instruction. I am just trying to learn the 3D part of Photoshop,and navigating through your tutorial taught me a lot of new stuff that I can apply to my other works. So Thank you again! Cheers! – E
Thank you! This is actually a great tutorial. Again Thanks?