
Photoshop’s blend modes can be applied in surprising ways to create painterly light, ethereal ambiance, and beautiful luminous accents. In today’s tutorial, we’ll employ a combination of blend mode, filter, and layer style techniques to produce a photo composite that closely resembles a beautiful classical painting.
Images courtesy of Shutterstock (Girl: Copyright SvetlanaFedoseyeva, Background: Copyright Tappasan Phurisamrit)
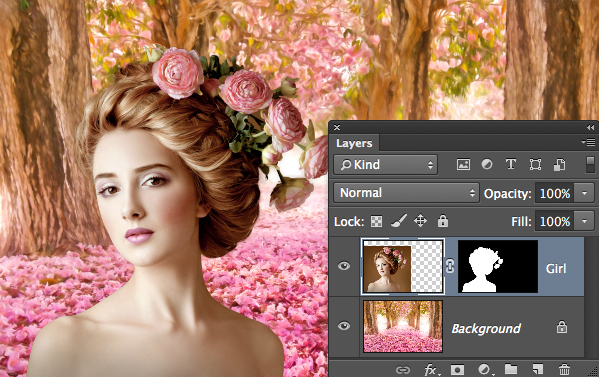
Step 1: Open a Basic Photo Composite
Open a file with a background layer and a masked subject layer.
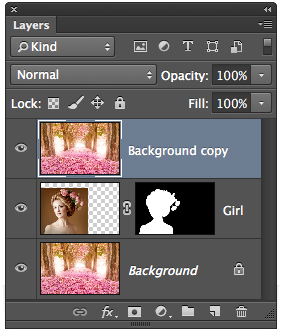
Step 2: Create a Unifying Painterly Light Layer
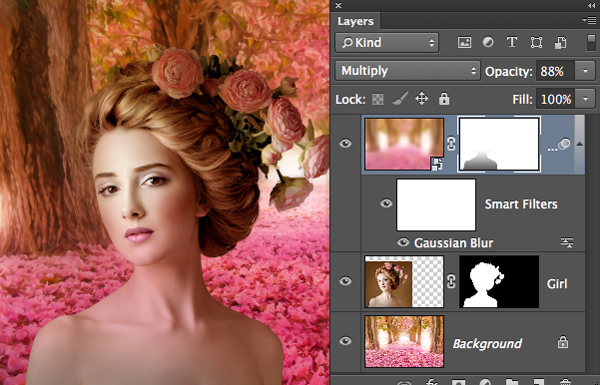
Activate the Background layer and press Command-J (PC: Control-J). Drag the layer to the top of the Layers panel.
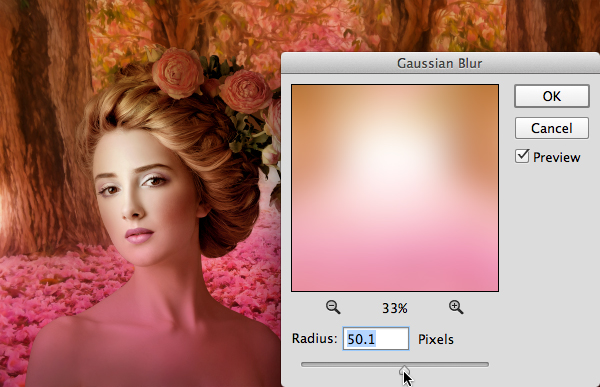
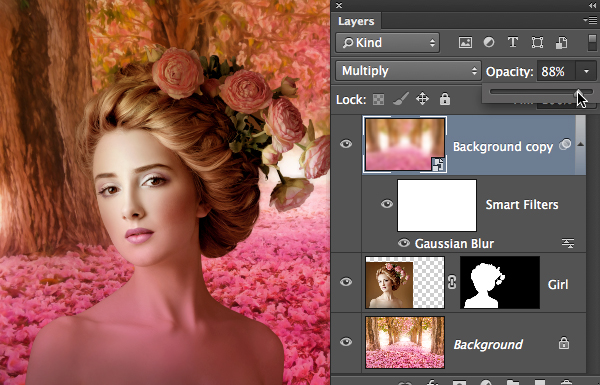
Choose Filter>Convert for Smart Filters. Change the blend mode to Multiply. Choose Filter>Blur>Gaussian Blur and adjust the Radius until very little detail remains.
Press OK. Adjust the layer's opacity until the scene has a unified, more painterly appearance.
In this example, the pink color on the model's upper torso is too intense, so we'll mask it with a gradient. Click the Add layer mask icon at the base of the Layers panel. To confine the gradient to the model, Command-click (PC: Control-click) the mask for the "Girl" layer. This loads a selection. Activate the Gradient tool. Press D then X to set black as the Foreground color. From the Gradient picker in the Options Bar, choose the Foreground to Transparent gradient. Click the Linear Gradient icon and set the Opacity to 70%. Starting at the bottom of the model, drag a gradient up to her lips and let go. Choose Select>Deselect.
Step 3: Create an Ethereal Light Layer
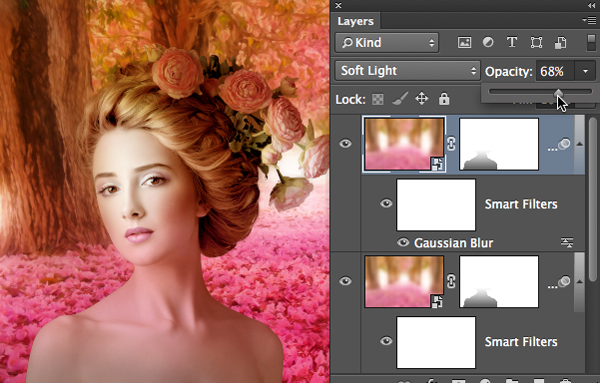
With the unifying layer active, press Command-J (PC: Control-J) to duplicate it. Change the blend mode to Soft Light. Adjust the opacity until this layer exhibits beautiful ethereal light.
Step 4: Create a Rim Light Layer
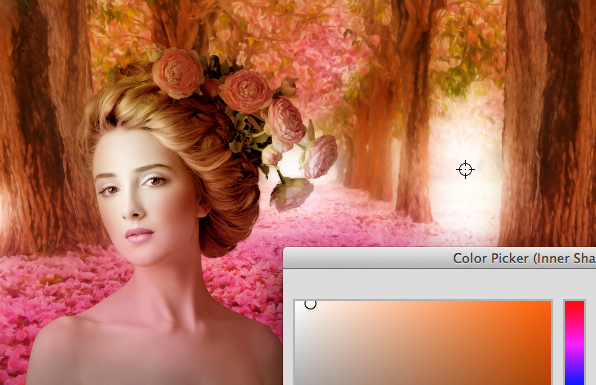
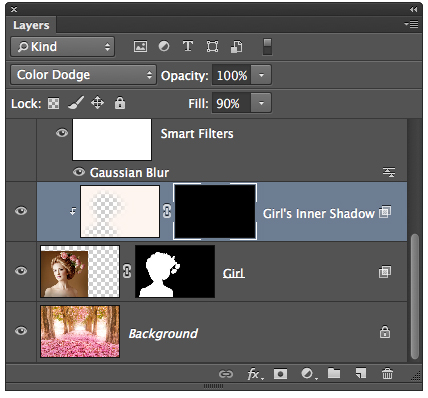
Since light in this scene is coming from the right side, let's use a fun layer style trick to add rim light to the flower side of the model. Activate the subject layer (Girl). Choose Layer>Layer Style>Inner Shadow. Click the color chip and sample the bright sidelight color from the scene.
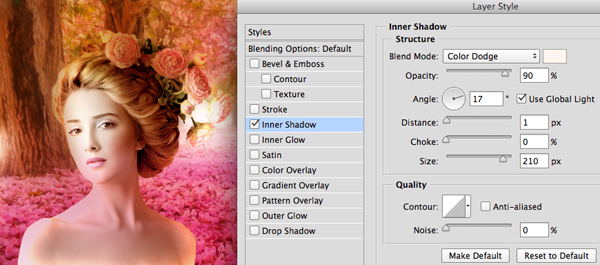
Press OK. Set the blend mode to Color Dodge. Adjust the Opacity, Angle, and Size to produce pleasing rim light.
Press OK. To isolate the rim light to selected regions, choose Layer>Layer Style>Create Layer. Activate the "Girl's Inner Shadow" layer and Option-click (PC: Alt-click) the Add layer mask icon to add a black-filled mask.
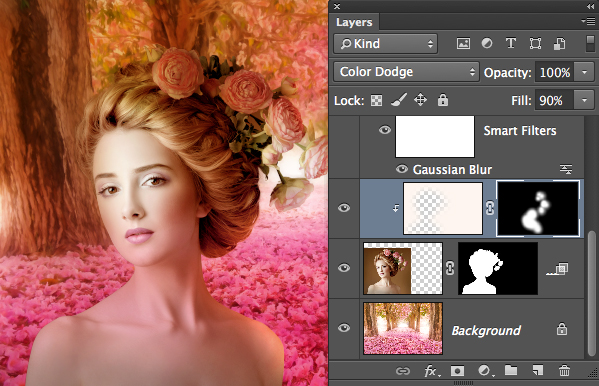
Activate the Brush tool. Press D to set the Foreground Color to white. Using a soft-edged brush at 100% opacity and flow, paint the rim light into areas exposed to the sidelight.
Step 5: Create a Glowing Backlight Layer
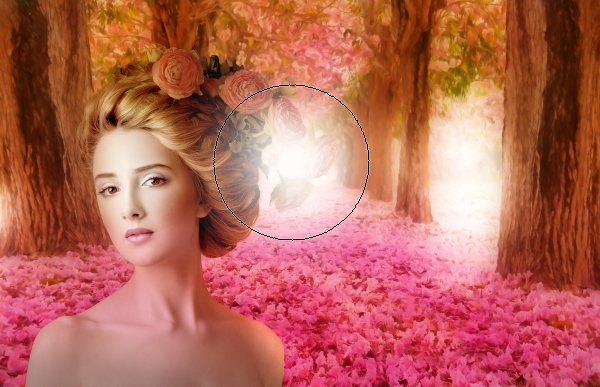
Since light is also coming from behind the model, let's accentuate it and wrap a little light around the model. Activate the topmost layer. Click the Create a new layer icon at the base of the Layers panel. Activate the Brush tool. Hold Option (PC: Alt) and click to sample the bright sidelight color from the scene. Using a big, soft brush, dab once with white over the backlit area.
To better control the effect, Option-drag (PC: Alt-drag) the mask from the subject layer (Girl) to the top layer. Press Command-I (PC: Control-I) to invert the mask. This permits light around the model's edges to shine. Now let's allow some of the light to wrap around her. Double-click the Layer mask thumbnail to open the Properties panel. Adjust the Density slider to wrap the light around the model's hair and flowers.
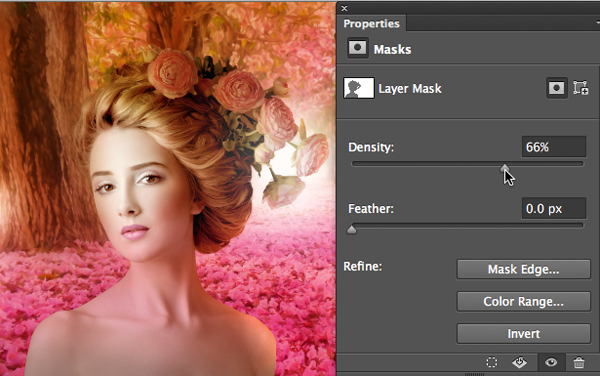
To refine the overall backlit effect, adjust the layer's opacity.
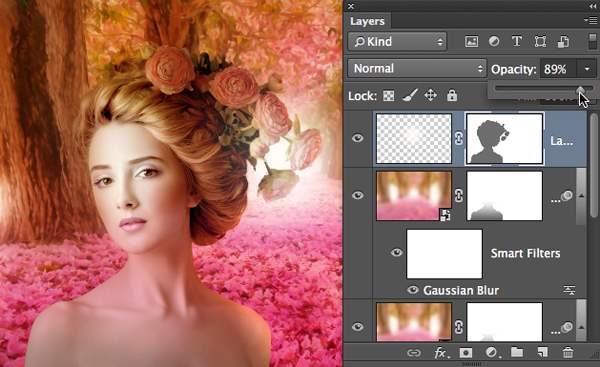
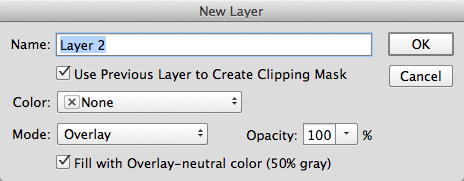
Step 6: Create a Dodge and Burn Layer
Now let's add accent light to the existing highlights on the model to complete the painterly look. Activate the "Girl's Inner Shadow" layer. While pressing Option (PC: Alt), click the Create a new layer icon. In the New Layer dialog, check the Use Previous Layer to Create Clipping Mask box, change the Mode to Overlay, and check the Fill with Overlay-neutral color (50% gray) box.
Press OK. This adds a clipped dodge and burn layer. Using a soft-edged white brush set to 20% opacity, build light into areas that already contain light to accentuate them.

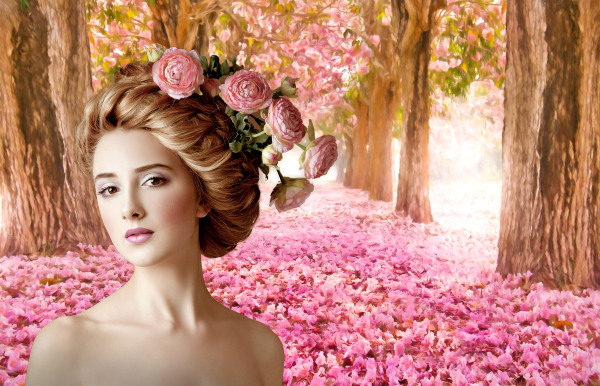
Here's a look at the "Before" imageâ¦
â¦and here's the "After."
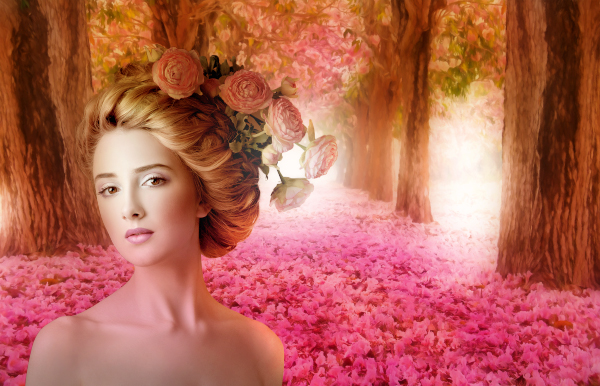
What a difference a few blend modes and layer styles can make!
Mark S. Johnson Photography
msjphotography.com
