
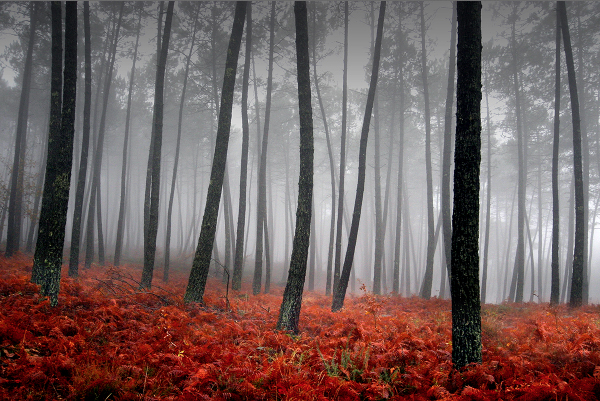
If the idea of playing Mother Nature excites you, you'll love this simple technique for transforming an overcast day into a beautiful snow scene with powder-covered vegetation and falling flakes.
Image courtesy of Shutterstock (Image ID: 8436919 / Copyright: Jorge Casais)
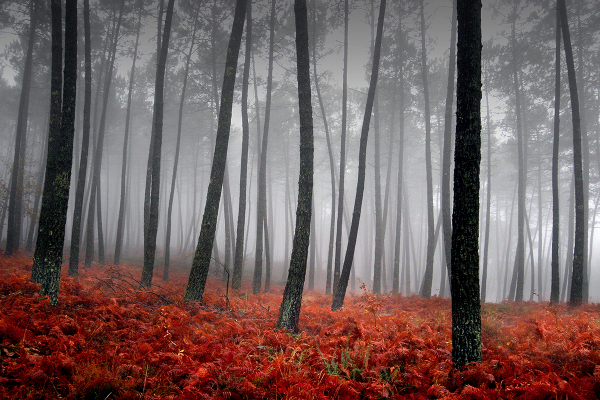
Step 1: Open an Overcast Photo
Open an overcast photo with little or no detail in the sky.
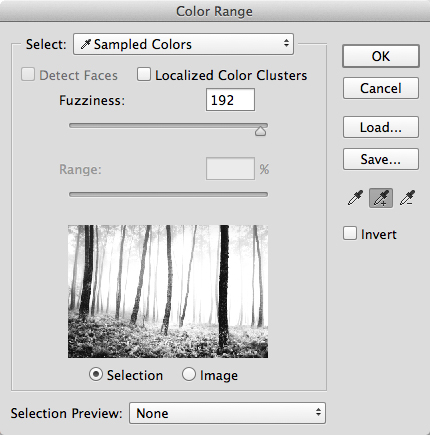
Step 2: Add Ground Snow
Choose Select>Color Range. With the Select pull-down set to Sampled Colors and the Selection Preview pull-down set to None, hover over the photo and click on a bright spot in the sky. Notice the grayscale preview box near the base of the Color Range dialog. White areas represent where snow will exist and black areas represent an absence of snow. Move the Fuzziness slider to achieve a desirable quantity of snow. If cranking the slider to the maximum setting does not yield enough snow, activate the Add to Sample (+) eyedropper and click on a bright spot in the vegetation. After clicking, refine the Fuzziness amount.
Press OK. Click the Create a new layer icon at the base of the Layers panel to make a new layer. Choose Edit>Fill. Set the Contents pull-down to White and press OK. Choose Select>Deselect to eliminate the marching ants. To give the snow a less crisp appearance, choose Filter>Blur>Gaussian Blur. On a high-res file, set the Radius value around 2 pixels and press OK.
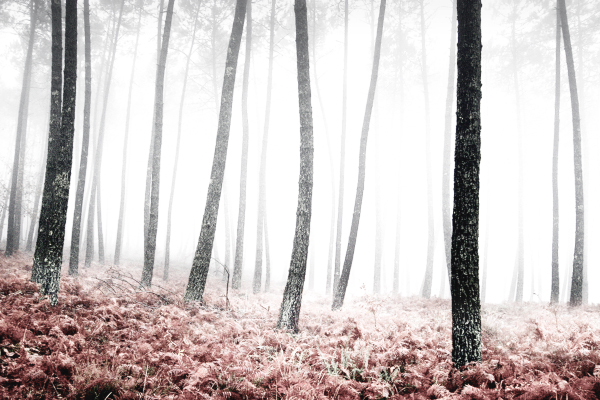
Note: If the snow is not intense enough, press Command-J (PC: Control-J) to duplicate the snow layer.
Step 3: Add Falling Snow
The scene is already looking quite good, but we can improve it by adding falling snow. To accomplish this, we'll use a set of free snow brushes from the good folks at Obsidian Dawn. Open a web browser and navigate to http://www.obsidiandawn.com/snow-snowflakes-photoshop-gimp-brushes. Be sure to read the Terms of Use, then download the Snow & Snowflakes Brushes. Place the SS-snow file (.abr) into a meaningful location on your hard drive and return to Photoshop. Activate the Brush tool and press D, then X to set the Foreground color to white. In the Options Bar, open the Brush Preset picker, slide over to its flyout menu and choose Load Brushes.
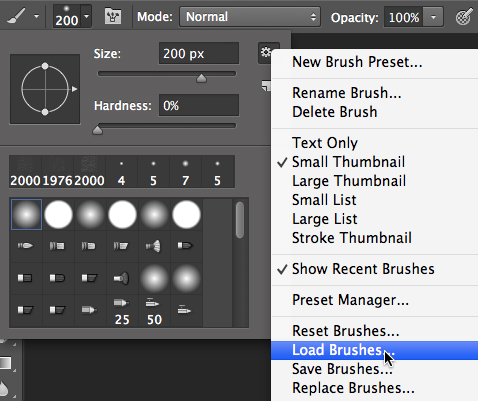
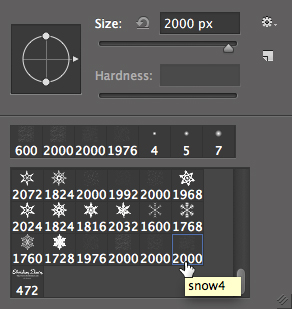
Navigate to the SS-snow brushes you recently downloaded and press Open to load these brushes at the end of the brush list. Re-open the Brush Preset picker and scroll to the bottom of the list. Click on the 2000 pixel snow2 brush.
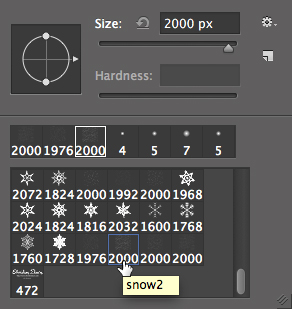
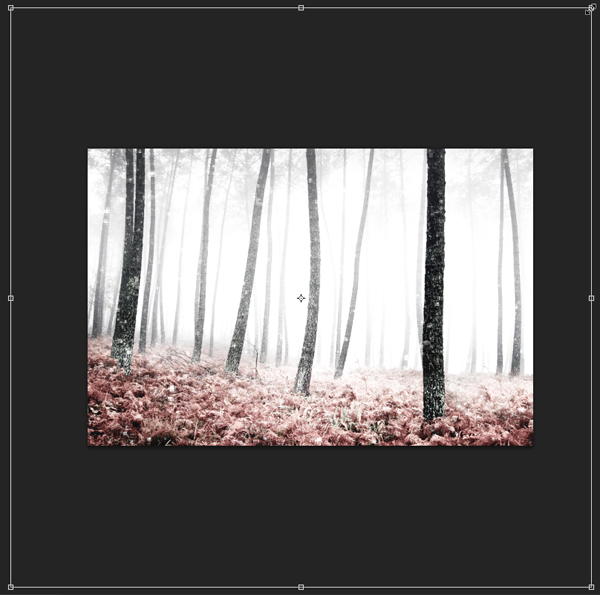
Click the Create a new layer icon at the base of the Layers panel. Click once in the middle of the photo to create a square filled with snowflakes. To simulate that these flakes are close to the lens, we'll make them big and blurry. Press Command-T (Control-T) to activate Free Transform. While pressing Shift-Option (PC: Shift-Alt), grab a corner handle and scale the flakes up to a large, close-to-the-lens size.
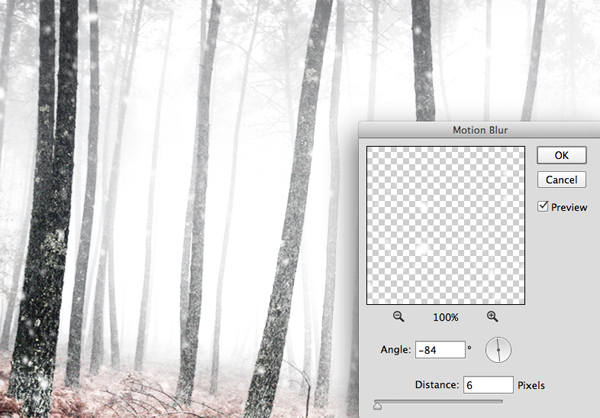
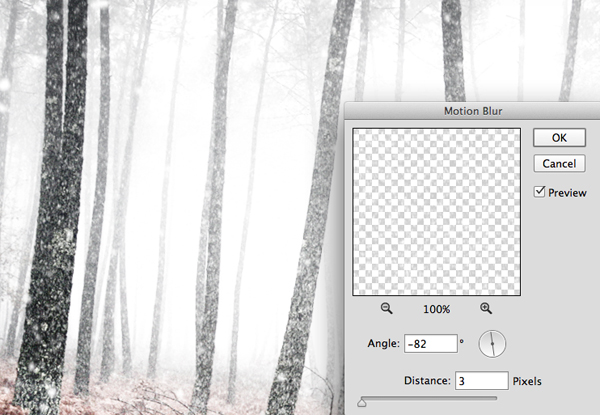
Press Return (PC: Enter). Now let's add a little motion to the flakes. Choose Filter>Convert for Smart Filters, then Filter>Blur>Motion Blur. Adjust the Angle and Distance settings until the foreground snow looks realistic.
Press OK. Now let's add one more layer of snow to represent the flakes falling farther from the lens. While pressing Command (PC: Control), click the Create a new layer icon. This makes a new layer below the current one. Return to the Brush Preset picker and choose the 2000 pixel snow4 brush.
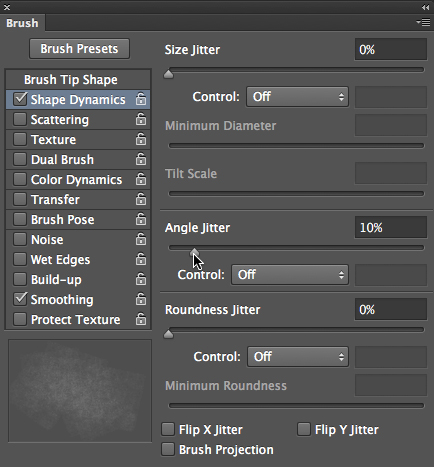
Open the Brush panel and click on the words Shape Dynamics. Set the Angle Jitter to 10% so the flakes will all look slightly different.
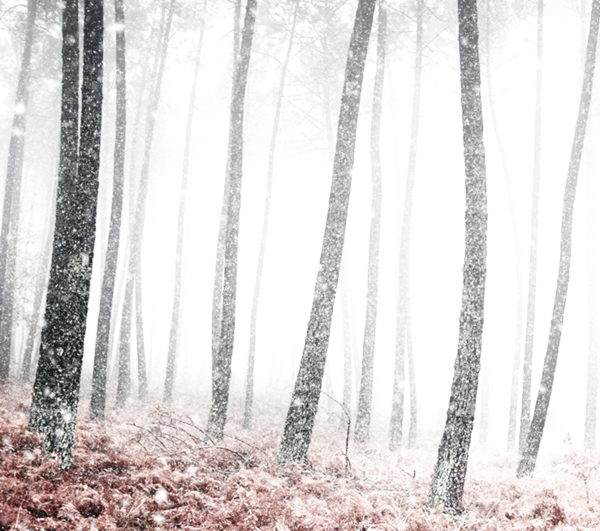
Hover over the photo and click (don't drag) in various spots to create a tapestry of snowflakes covering the scene.
As before, choose Filter>Convert for Smart Filters, then Filter>Blur>Motion Blur. Adjust the Angle and Distance settings until the flakes look believable.
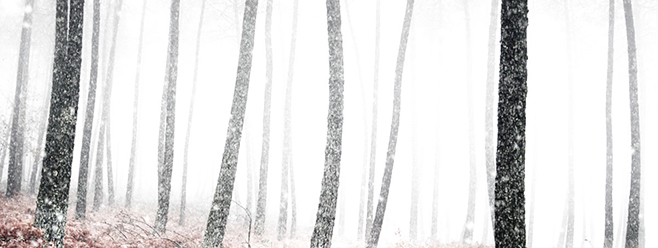
Press OK. Here's the original sceneâ¦
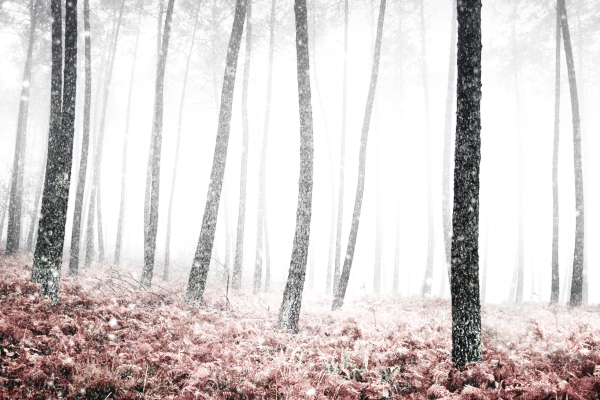
â¦and here's the snow scene. Wow!
If you'd like to learn how to create your very own snowflakes brushes from scratch, take a look at this video tutorial on my website. (The tutorial is a 4-minute preview for non-members and free to all MSJPhotography members.)
Mark S. Johnson Photography
msjphotography.com
