
Does the thought of isolating (also referred to as “knocking out”) a person in a photo with big hair fill you with dread? Never fear for the Extract filter is here!
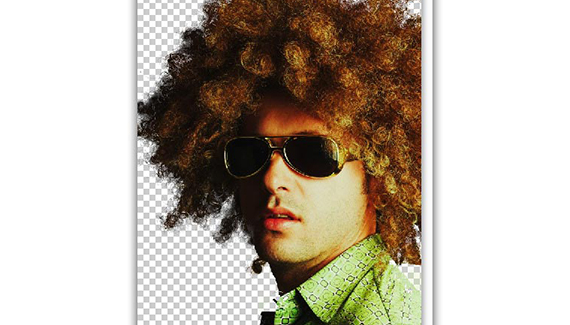
Let’s take this image of a frizzy-haired hippy I snatched from iStockphoto.com. To change the background, it would mean creating a selection around the hippy dude and his frighteningly frizzy hair. Yes, there are third-party plug-ins who’d make haste of this task for a price, but what if I don’t want to spend the extra money? I can turn to the Extract filter for help instead.
Highlight the edges
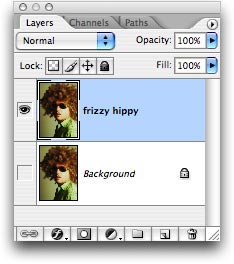
Because the Extract filter is “destructive” (it deletes pixels), we’ll start off by immediately duplicating the background layer. We’ll use this layer copy later on to create a non-destructive layer mask, so that we’re *hiding* pixels rather than deleting them. This will build in flexibility for editing the selection. Read on.
Step 1: Open the photo and immediately press Command + J (PC: Ctrl + J) to duplicate the background layer. Turn the visibility off on the original layer for now, as we’ll be working only with the copy. I named the new layer “frizzy hippy” as shown below:
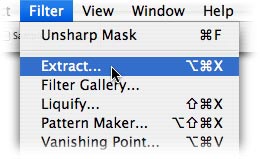
Step 2: Choose Filter > Extract.
Step 3: In the resulting dialog box, select the Highlight tool and draw a selection around the hippy dude. TIP: If you mess up, just select the Eraser tool in the Extract filter’s toolbar, fix the mistake, and switch back to the Highlight tool to continue outlining the area to be knocked out.
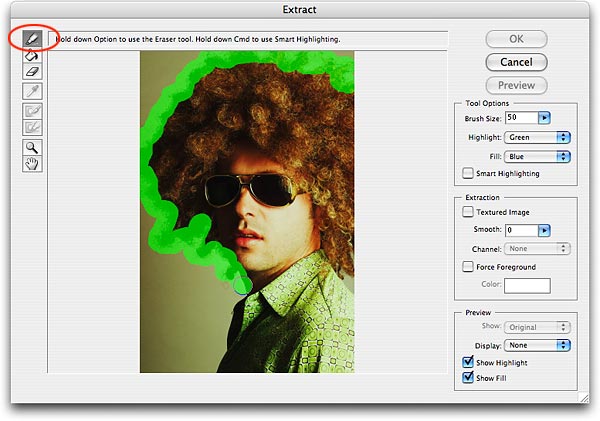
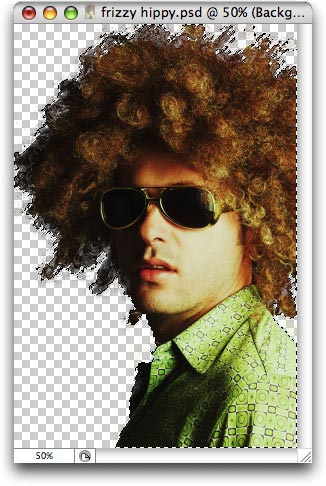
Step 4: Select the Paint Bucket tool and click inside the area you want to keep, and press OK. The Extract filter will dutifully delete the background and create a new layer containing only the hippy dude.
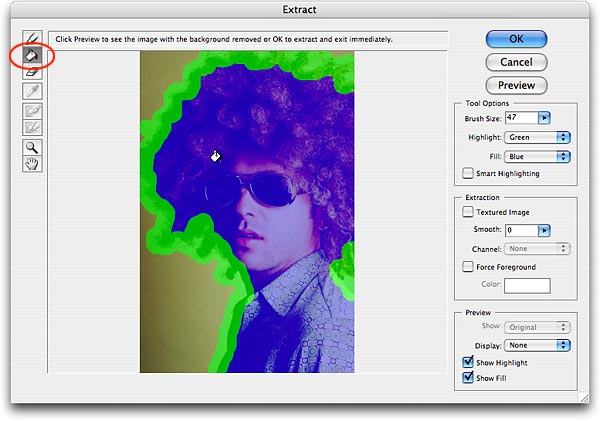
NOTE: In the screen shot above, notice how I did not highlight all the way around the photo. Because certain areas bleed off the page, they do not need selecting.
Here’s what we have now:

TIP: If you’re not satisfied with the results of the Extract, just press Command + Z (PC: Ctrl + Z) to undo it and try again. Experiment with different brush sizes to get a better selection. There are also several options living inside the Extract filter dialog box, though for this example I didn’t use them. To see what they do, use your mouse to hover over any of the text labels and a brief explanation will appear at the top of the dialog box.
Create a layer mask
To clean up the selection, you could select the History Brush and paint back in areas that the Extract filter erroneously zapped. Though, a better option is to create a layer mask on the original background layer instead.
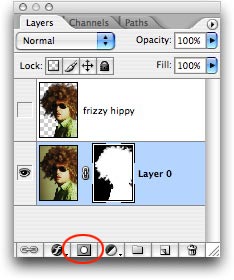
Step 5: Command click (PC: Ctrl click) the newly knocked out layer (the one created by the Extract filter). You should now see marching ants around the frizzy hippy dude.
Step 6: In the layers palette, turn off the visibility of the newly knocked-out layer created by the Extract filter, and turn on the visibility of the original Background layer. Double-click the Background layer to make it editable.
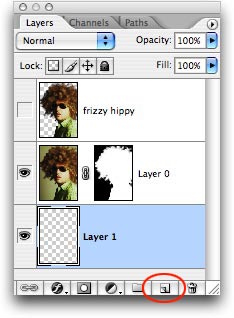
Step 7: Create a layer mask by pressing the circle within a square button at the bottom of the layers palette (circled below in red). This is what my layers palette looks like now:
Edit the mask
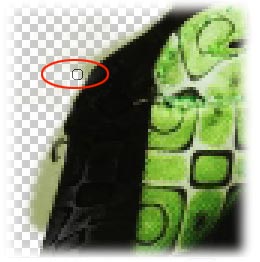
Step 8: Select the Brush tool by pressing B, and paint with white those areas the Extract filter should not have zapped. This will allow them to become visible again. When dealing with layer masks, painting with black hides and white reveals. In the screen shot below, I’m painting with white to reveal bits of Hippy Dude’s shirt the Extract filter discarded.
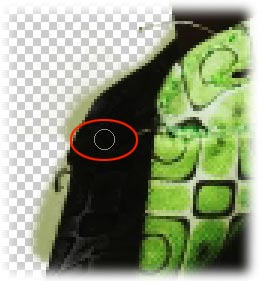
Step 9: As you can see, a little of the background around the shirt collar has come back to haunt me. To fix it, press X to swap color chips so that black is on top (because black hides) and paint the background back out. Keep painting with either white (to reveal) or black (to hide) until you’re satisfied with the mask.
TIP: Press the left bracket, [, to cycle down in brush size and press the right bracket, ], to cycle up.
Create a funky background
Step 10: Create a new layer by pressing Command + Shift + N (PC: Ctrl + Shift + N) and drag it to the bottom of your layers stack. You can also create a new layer by pressing the New Layer icon at the bottom of the layers palette (circled below in red).
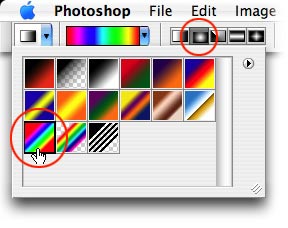
Step 11: Select the Gradient tool by pressing G. Up in the options toolbar, pick a nice rainbow gradient and choose Radial (both options circled in red below).
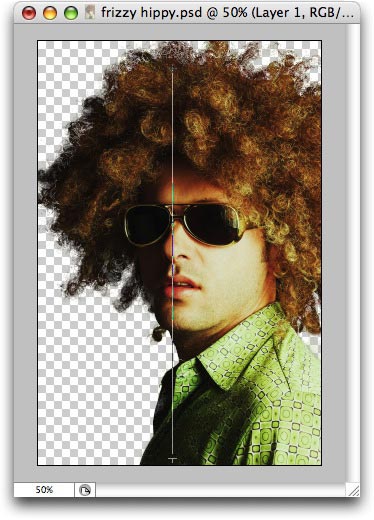
Step 12: Back in the document, drag upwards from the bottom center of the image to the top. This creates a nice psychedelic rainbow background for our hippy.
Here’s the finished photo:
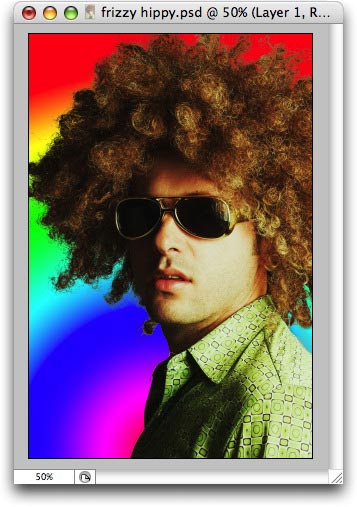
Feel like your back in the 60s yet?!
As you can see, the Extract filter did an amazingly respectable job of selecting the frizzy hair. And by creating a copy of the original Background layer at the very beginning, we were able to use the selection we obtained from the Extract filter to create a non-destructive layer mask. This way we achieved maximum flexibility and were able to fine tune the mask as we wish.
Until next week, happy extracting!
The Graphic Reporter
http://www.graphicreporter.com

I like how you called the guy a hippie, then referred to it as though hippies were commonplace in the 80s
I think you’re thinking the 1960s buddy
Lmao.
Hey,
Thanks for the excellent tutorial… This is one of the easiest and precise tutorial I have ever come across.
Thanks Again
Amos
Thanks for this tutorial it will be very useful but my other extracting problem is – what do you do when the backbrround is far more complicated, say extracting a person from a street-scene?
Great tutorial! Very helpfull
there is a better way to do it, by using channel mask in photoshop, here the video
http://denmuel.blogspot.com/2009/01/how-to-selecting-hair-in-photoshop.html
hanks for the excellent tutorial… Very helpfull
this is nice tutorials