Safe Healing and Cloning in Photoshop CC

The Clone Stamp tool, on the other hand, copies one area of an image to another. Today, you'll learn to use those tools safely to clean up a portrait.
STEP ONE: The Spot Healing Brush tool (J) is great for repairing small- to medium-sized areas with surrounding pixels; those that Photoshop automatically picks. Open an image, create a new layer by pressing Shift-Command-N (PC: Shift-Ctrl-N), name it "spot healing brush," and click OK. Position this layer above the layer you're fixing.
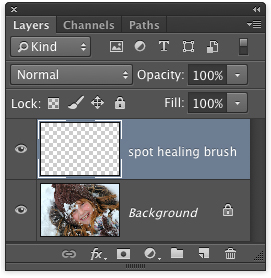
CREDIT: ISTOCK, LINDAYOLANDA, IMAGE #3496810
STEP TWO: Grab the Spot Healing Brush from the Toolbox. (Tip: Pressing Shift-J repeatedly cycles through all tools in that toolset.) In the Options Bar, set the Type to Proximity Match (uses pixels immediately outside the brush cursor) or Content-Aware (analyzes a larger area of nearby pixels); you'll get slightly different results with each Type. Turn on the Sample All Layers checkbox to make Photoshop look through the active empty layer to pixels on layers below.
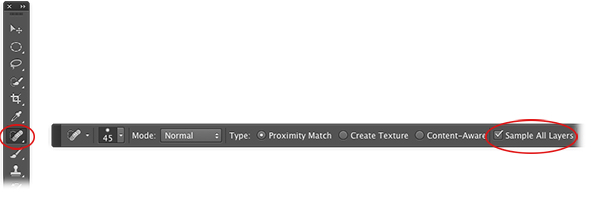
Step Two
STEP THREE: Mouse over to the image and make your brush cursor slightly bigger than the area you're fixing. Click or click-and-drag to remove those areas (a few snow and water droplets from the girl's face in this example). If you don't like the results, press Command-Z (PC: Ctrl-Z) to undo and either change brush size or switch modes (from Proximity Match to Content-Aware, or vice versa) and try again. Tip: Press the Left Bracket key ([) to decrease brush size and the Right Bracket key (]) to increase it. Zoom in and out of your image by pressing Command-+ or Command-- (PC: Ctrl-+ or Ctrl--), respectively.
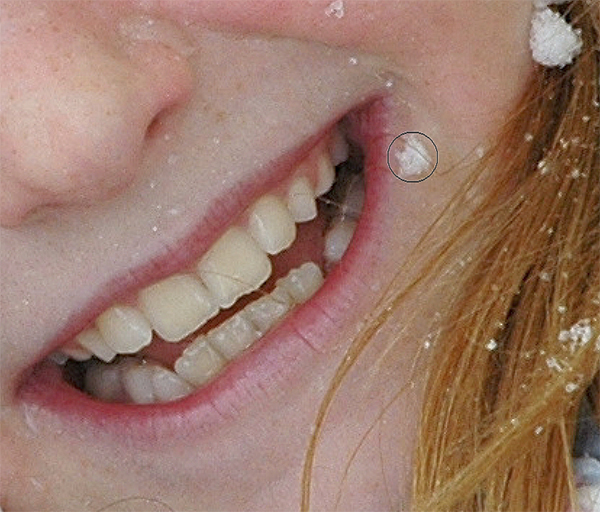
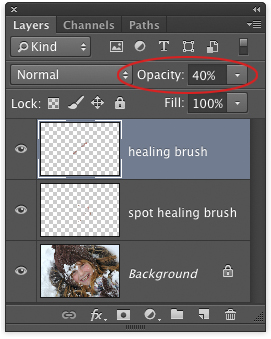
STEP FOUR: The Healing Brush tool is great for fixing small- to medium-sized areas with pixels from another area in your image that you pick by setting a sample point. Create a new layer as described in Step One, name it "healing brush," and position it at the top of your layer stack.
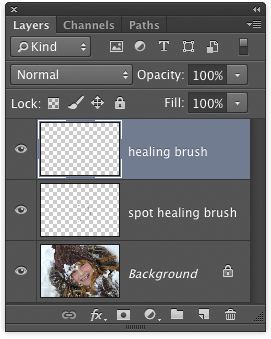
STEP FIVE: Activate the Healing Brush tool (nested below the Spot Healing Brush tool), and in the Options Bar, set the Sample menu to Current & Below.

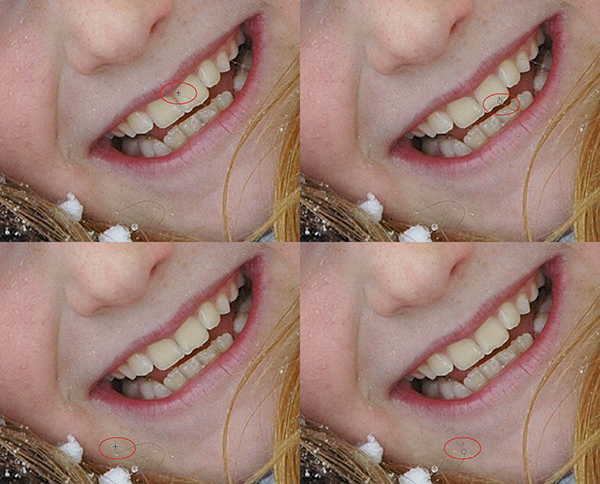
STEP SIX: To reduce the dark area beneath eyes, set a sample point by Option-clicking (PC: Alt-clicking) the spot you want Photoshop to use for the fix, such as the cheek area shown here. Try to use a nearby or adjacent area to match tone and texture.
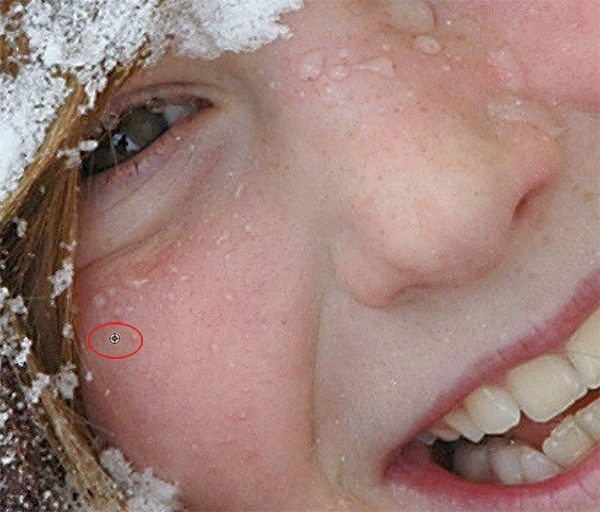
STEP SEVEN: Mouse over to the problem area and adjust the brush size to be a little bigger than what you're fixing. Next, click or, in this case, click-and-drag across the area. Tiny crosshairs mark the sample point as you drag, and a preview of the sampled area appears inside your cursor. Repeat this process on the other eye. If you're fixing a small area, you're probably okay with setting one sample point; for larger areas, you may need to set a new sample point every few brushstrokes. Tip: If you accidentally introduce a repeating pattern, either set another sample point and paint the error away, or switch to the Spot Healing Brush tool to fix it.

STEP EIGHT: Reduce the Opacity of the "healing brush" layer so your changes look realistic (40% was used here).
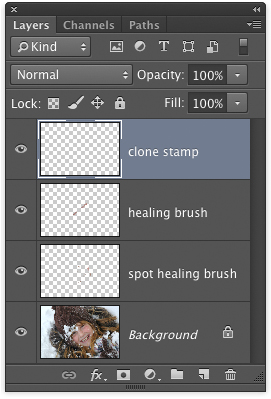
STEP NINE: The Clone Stamp tool (S) copies one area of your image to another, making it great for duplicating objects or removing stray hairs. Create a new layer as described in Step One, name it "clone stamp," and position it at the top of your layer stack.
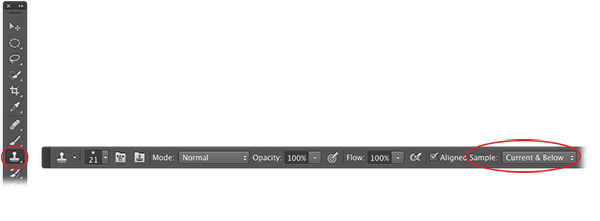
STEP TEN: Activate the Clone Stamp tool and, in the Options Bar, set the Sample menu to Current & Below.
STEP ELEVEN: Repeat Steps Six and Seven to remove strands of hair, such as on her teeth and chin in our example. (Tip: Use a small brush to remove or duplicate small items and a larger brush for bigger stuff.)
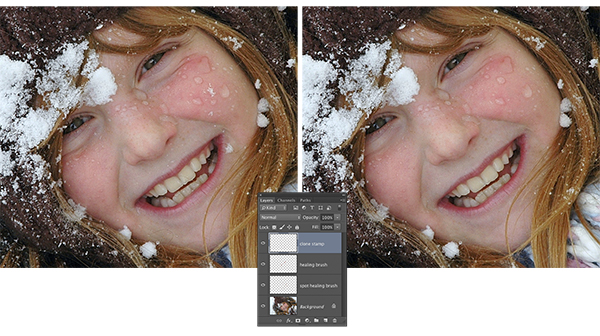
STEP TWELVE: Here's the before and after version of the image, along with the final Layers panel.
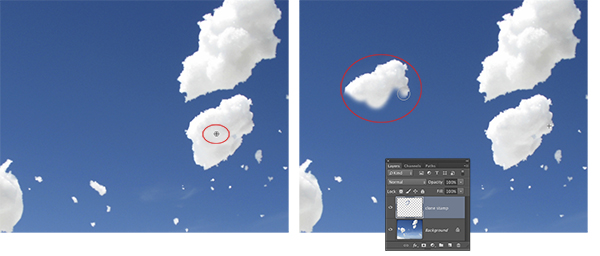
STEP THIRTEEN: As mentioned earlier, you can use the Clone Stamp tool to duplicate items. In this image, we're going to duplicate a snowball. Create a new layer, name it "clone stamp," and set a sample point atop an existing area that you want to duplicate. Mouse over to another area of the image then click-and-drag to duplicate the object. If you introduce any repeating elements, set another sample point and click to fix it, or switch to the Spot Healing Brush or Healing Brush tools to fix it.
CREDIT: ISTOCK, ZENAPHOTO, IMAGE #6594728
STEP FOURTEEN: Be sure to choose File>Save As and pick Photoshop as the Format so you can edit each layer later. You can undo edits by activating that layer and using the Eraser tool (E) or by using a layer mask.
This article is courtesy of Photoshop User magazine, the official publication of KelbyOne, which provides quality online education for creative people. For more information, visit KelbyOne.com

