
Painterly Texture Collage

This technique is written for Photoshop CS6, but can easily be accomplished in prior versions.
For years, I've been blending textures with photographs using blend modes. In most instances, I drain the color from the texture leaving behind only the tactile look of the texture. Lately, thanks to a discovery of the French Kiss Collections website, I've been approaching the capture and blend process a bit differently.
Since French Kiss textures are created from actual natural media paintings that are breathtaking as stand-alone images, I now find myself looking for a texture that will harmonize with the subject's color. In other words, my goal is to make the texture and its color as important to the overall composite as the photo itself. To move the process along quickly, I capture the subject in front of a white backdrop. This allows me to completely replace the white background with a texture using nothing more than a blend mode--no selection making required.
The flower portrait that we'll create today uses a texture and a vintage French script overlay from the French Kiss l’Artiste Collection as well as a texture from the Craquelure Collection.
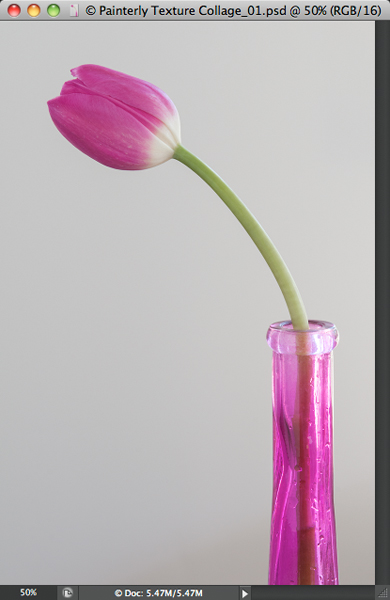
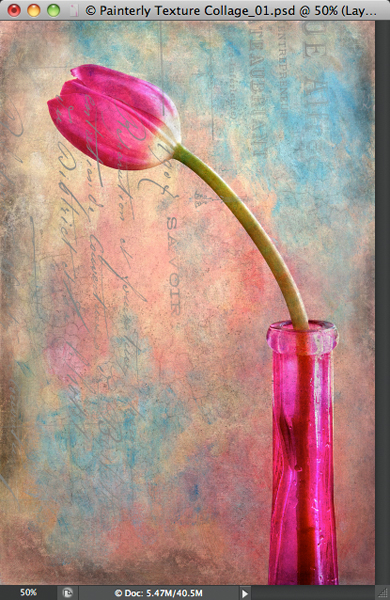
Step 1: Open a Subject Photo
Open an image of a subject captured in front of a white background. Graphic, more literal subjects, such as still lifes, work well for this technique.
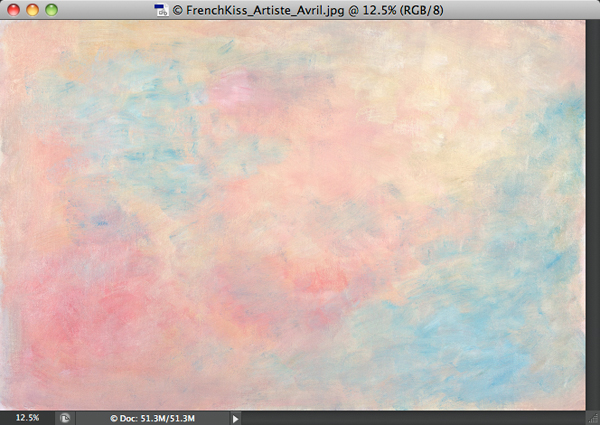
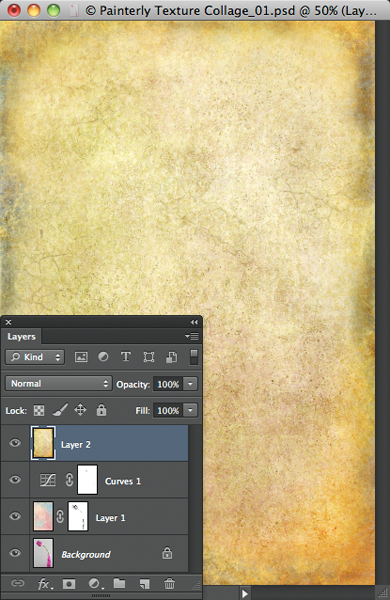
Step 2: Import a Complementary Texture
Open a texture with complementary colors. As I mentioned, I'm working with a texture from one of the French Kiss Collections, but any texture with painterly qualities will do.
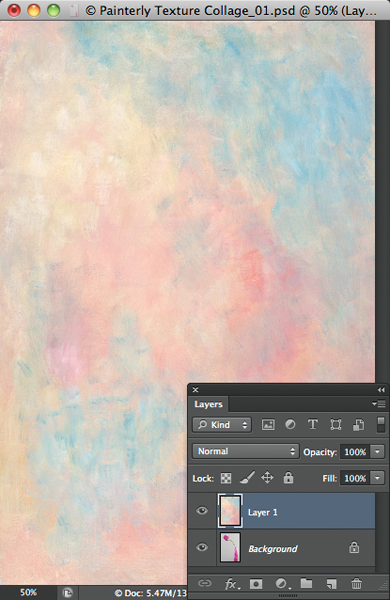
Activate the Move tool. While pressing Shift, drag the texture into the subject photo. In this instance, the texture is significantly larger than the subject photo and needs to be rotated. To scale and rotate the texture, press Command-T (PC: Control-T). If you don't see the Transform bounding box handles, press Command-0 (PC: Control-0) to reveal them. To scale the texture, press Shift-Option (PC: Shift-Alt) and drag one of the corner handles inward. To rotate, hover outside one of the corner handles. When the cursor changes, drag to rotate the texture. Press Return (PC: Enter) to commit the transformation.
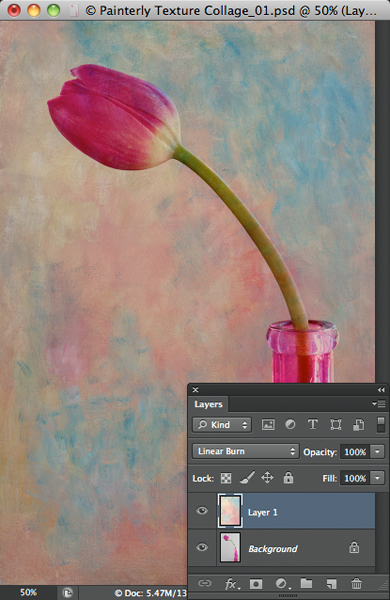
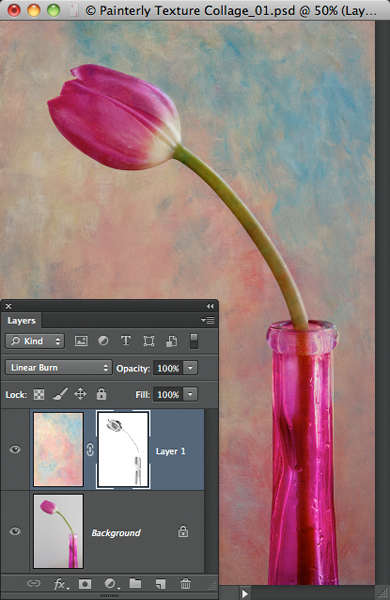
Since the subject was captured in front of a white backdrop, Multiply or Linear Burn blend mode will do the best job of replacing the white background with the texture. Try them both to determine which you prefer. In this example, I chose Linear Burn. Notice how nicely the white background is replaced, yet how the texture also interacts with the subject. Don't worry if the texture interacts too much or if the overall scene appears a little dark.
In this example, I'd like to remove some of the texture from the flower and vase. To accomplish this, click the Add layer mask icon at the base of the Layers panel. Activate the Brush tool and press "D," then "X" to set the Foreground color to black. Tap "3" to set the brush's opacity to 30%. Using a soft-edged brush, paint over existing highlights with detail to open them up. Feel free to paint more than once over areas that benefit from additional brightening.
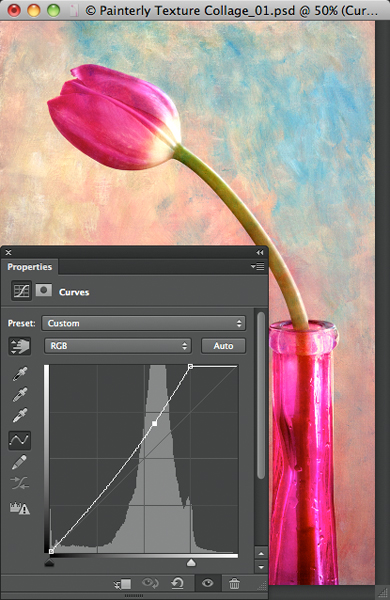
The overall scene is still a bit dingy; so let's add a Curves adjustment layer to make it sparkle. Open the Adjustments panel and click on the Curves icon. In the Properties panel, drag the Highlights slider inward to brighten the highlight values. If specular or near-specular highlights blow out, don't worry. We'll restore them soon. Click on the hand icon to activate the on-image controls. Hover over a darker part of the texture and drag down to heighten the contrast.
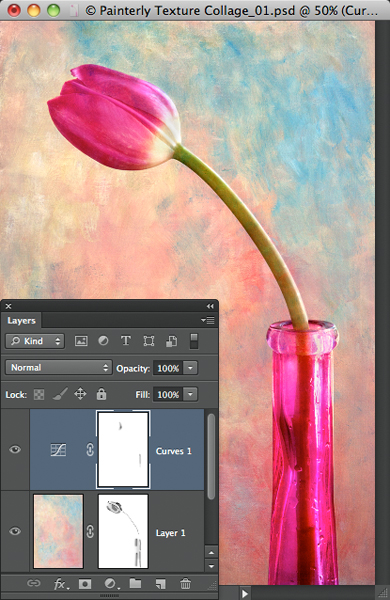
Since the white part at the base of the flower and the specular highlights in the vase are now too bright, grab the Brush tool and paint with 30% black over the endangered areas to restore detail. In some regions, multiple brush strokes may be necessary.
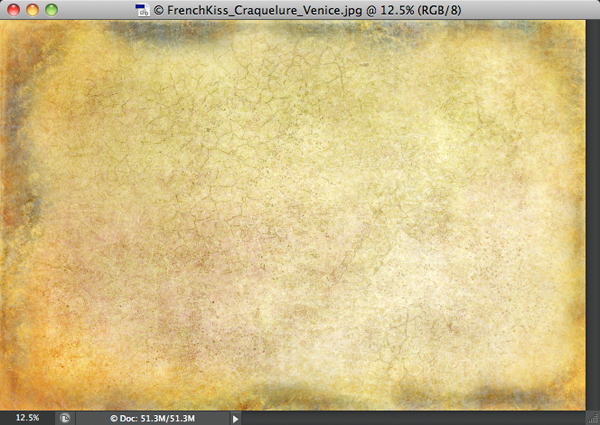
Step 3: Import a Second "Vignette" Texture
Now let's add a second texture to create a unique vignette around the edges and a few random cracks in the middle. Open a texture that contains burned edges and cracks.
Using the same techniques as earlier, import, scale, and rotate the texture until it fits nicely.
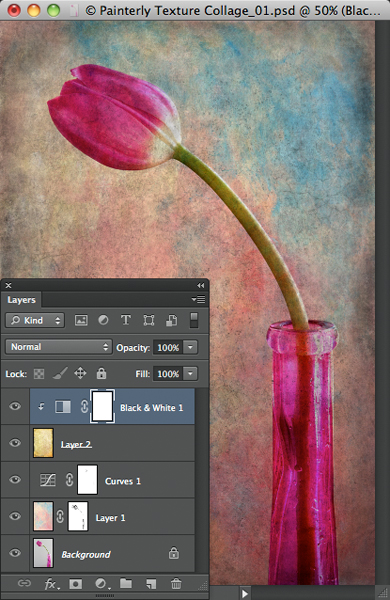
Let's cycle through the blend modes to determine which creates the most pleasing blend. To do so, activate the Move tool, then press Shift and tap the "+" key. Multiply blend mode does a marvelous job of blending the texture with the subject, but it also imparts an undesirable color cast.

To eliminate the color cast, head over to the Adjustments panel and click the Black & White adjustment layer icon. At first, the Black & White adjustment layer drains color from the entire scene. To clip the adjustment layer into only the underlying texture layer, choose Layer>Create Clipping Mask.
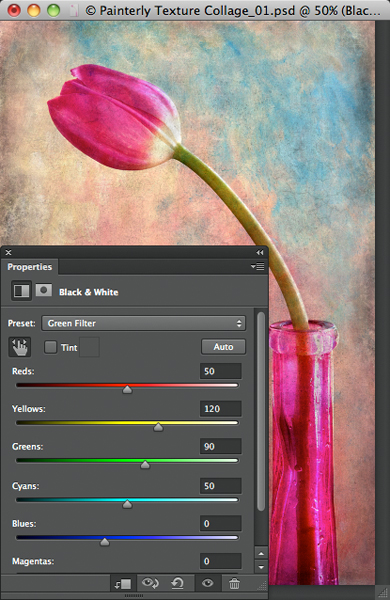
Since the scene is once again too dark, cycle through the Preset menu in the Properties panel until you discover an appropriate black and white filter preset. In this example, I like the way the Green Filter affects the texture and the overall blend, but I'd like a bit more light on and around the flower and vase.
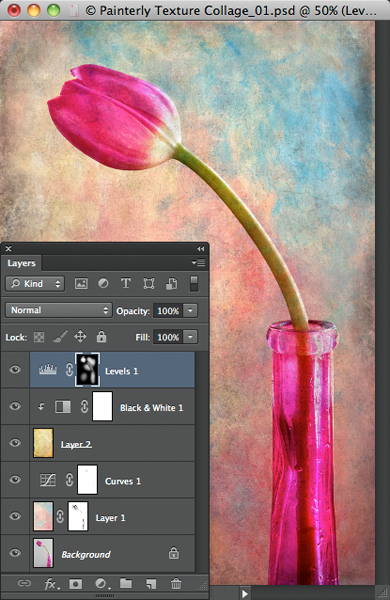
To add light, return to the Adjustments panel and add a Levels adjustment layer. Drag the Highlights slider inward to open up the scene.

To isolate the brightening effect to parts of the flower and vase and to a few adjacent areas, press Command-I (PC: Control-I) to invert the mask to black. Now paint with a soft-edged 50% white brush to selectively add light in and around the flower and vase.
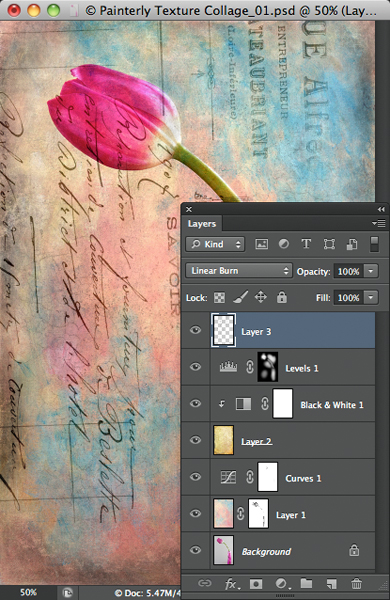
Step 4: Add a Vintage French Script Overlay
To finish this montage, let's add a few random bits of vintage French script. Open a script overlay file. In this instance, the script is already isolated from the background. Using the same strategies as before, import, size, and rotate the script until it fits into the composite scene.
Since the script is a medium gray, let's explore the blend modes until it blends well. Activate the Move tool, then press Shift and tap the "+" key to cycle through the modes. Linear Burn creates the perfect blend.
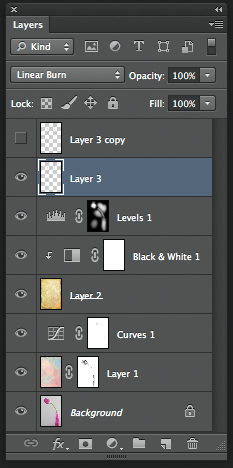
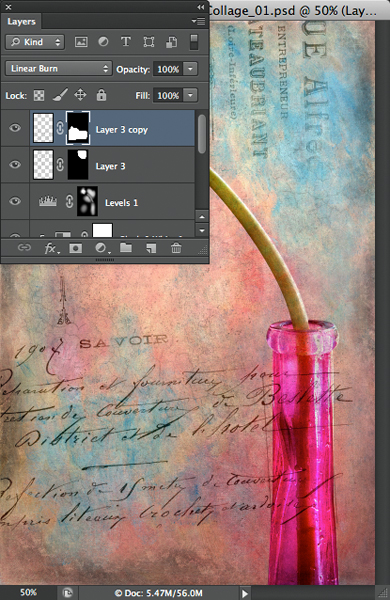
Our goal is to use two separate bits of script. First, we'll work with the script that is currently in the upper right corner and then we'll move on to another bit. To prepare for the process, press Command-J (PC: Control-J) to duplicate the current layer. Turn off visibility for the duplicate layer and activate the original script layer below.
Choose the Lasso tool and draw a selection around the script in the upper right corner.
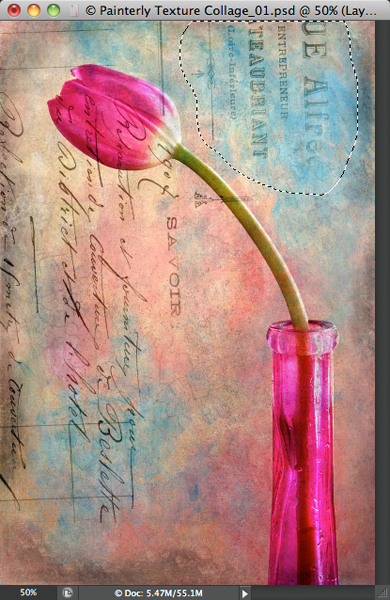
Click the Add layer mask icon at the base of the Layers panel to add a mask that hides all script outside of the selection.

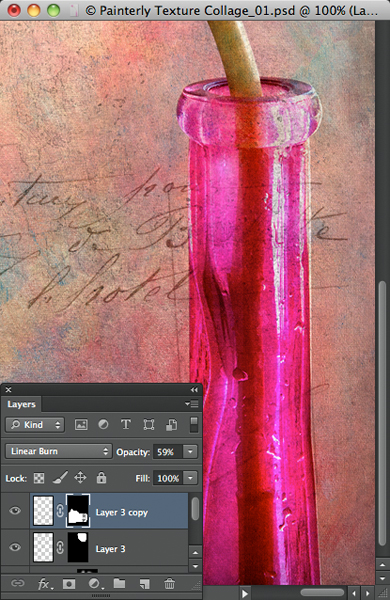
Activate the top layer and restore visibility. Press Command-T (PC: Control-T) and rotate and size the next bit of script. As before, use the Lasso tool to select the desirable region, then click the Add layer mask icon. Here, the script is too opaque and I'm not fond of the way it overlaps the vase.
Drag the Opacity slider in the Layers panel to reduce the script's prominence. Now paint over the vase with a soft-edged black brush set to 75% opacity to make the script nearly, but not entirely, invisible.
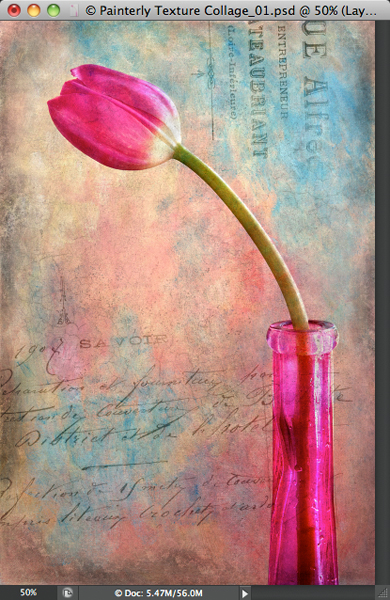
Here's a look at the completed composite. Hope you had as much fun as I did!
Mark S. Johnson Photography
msjphotography.com
