

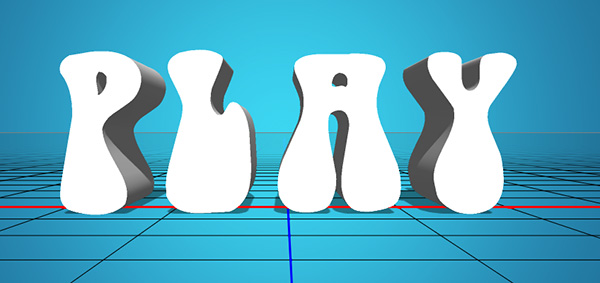
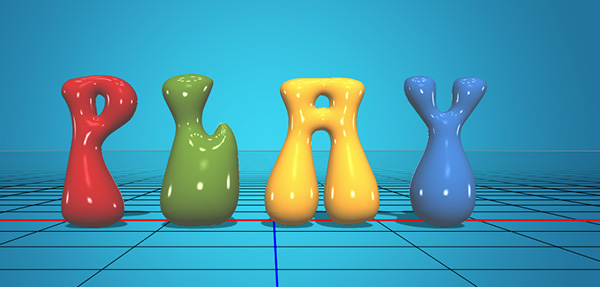
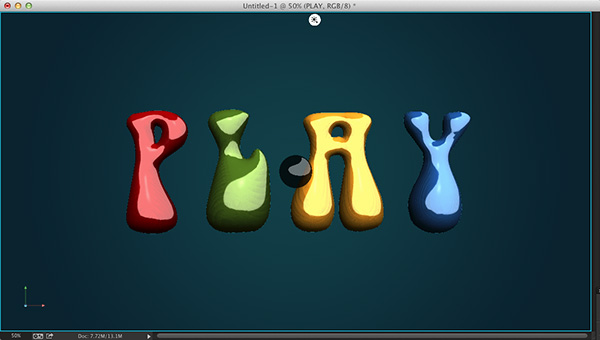
Let's have a little fun with 3D. C'mon, just try it! In this exercise, we'll create some inflated text using the 3D features in Photoshop. With the enhanced surface properties, you can create a reflective metallic look in a matter of minutes. (Note: For this technique, you'll need either Photoshop CS6 Extended or CC.)
STEP ONE: KelbyOne members can start by opening the download file used in this tutorial at http://kelbyone.com/magazine/issue/october-2013/. [All download files are for personal use only. To learn more about KelbyOne, visit http://kelbyone.com.] If you're not a KelbyOne member, you can simply create a new document and follow along with your own text. Either way, you need to use a font that has rounded edges and corners. This will help add to the rounded shapes of the finished 3D text. We used a font called Bell Bottom and typed the word "PLAY." Since this is a specialized font, it's not likely that many of you have it, so the download file contains the text as a shape layer.

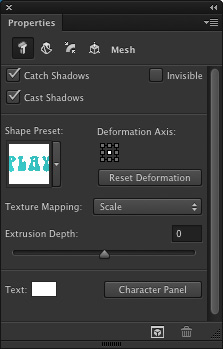
STEP TWO: Let's convert the text into a 3D object. With the text layer or the shape layer active in the Layers panel, go to 3D>New 3D Extrusion from Selected Layer. This will immediately extrude the text and make the wire mesh ground plane visible. (If you don't see the ground plane, switch to the Move tool [V], then choose View>Show>3D Ground Plane.)
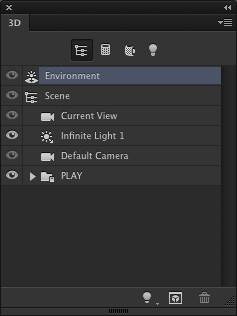
STEP THREE: In the 3D panel (Window>3D), locate the 3D text item in the list and click on it (PLAY in this example). Then, open the Properties panel (Window>Properties) and adjust the Extrusion Depth to 0. We don't need the sides, just the front and back face.

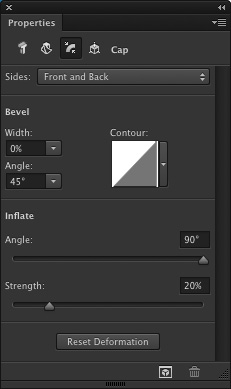
STEP FOUR: At the top of the Properties panel, click on the Cap icon, which is the third icon from the left. This is where you can modify the bevel and inflation settings. First, click on the drop-down menu at the top and set the Sides to Front and Back. Then, go down to the Inflate section and set the Angle to 90° and increase the Strength to about 20%. This will give that inflated look we're after.
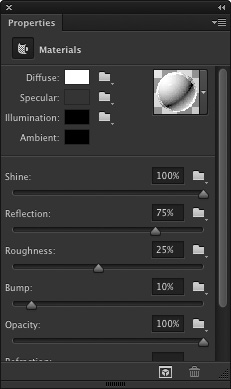
STEP FIVE: Before we split up the letters, let's set up the surface properties for the text elements. In the 3D panel, highlight the Front Inflation Material for the text. In the Properties panel, you'll see the various surface features. Click on the ball icon near the top right to open the Material Picker, and select the No Texture material. Click on the color swatch next to Diffuse, select white in the Color Picker, and click OK. Set the Shine to 100%, the Reflection to 75%, and the Roughness to around 25%. Apply these same settings to the Back Inflation Material, as well.
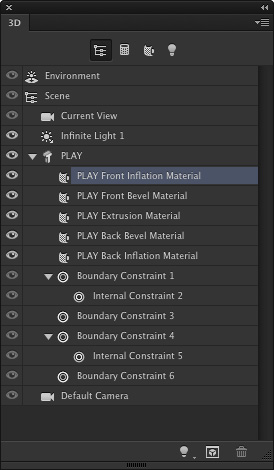
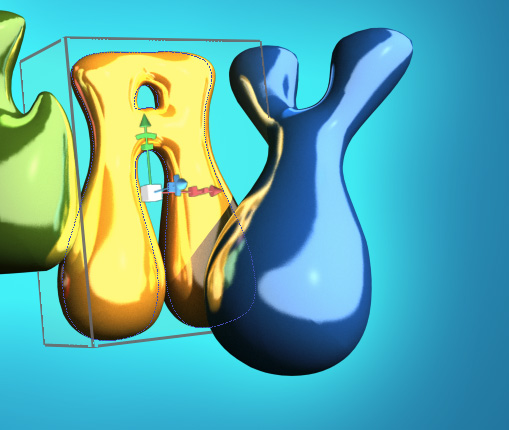
STEP SIX: Go to 3D>Split Extrusion. This will allow you to manipulate each letter individually while keeping all the letters in the same 3D layer. Switch to the Move tool (V), and click on the first letter to put a 3D box around just that letter. You can now use the 3D tools and widgets to change the position and scale this letter in relation to the other letters.

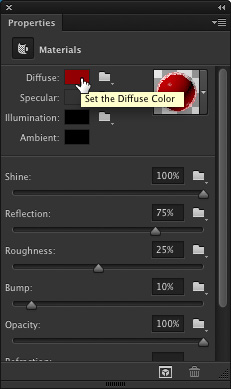
STEP SEVEN: Let's give each letter a different color. Starting with that first selected letter, click on its Front Inflation Material in the 3D panel. At the top of the Properties panel, click on the color swatch next to Diffuse and choose a red color in the Color Picker. Click OK when done. Do the same thing for each of the remaining letters, giving each one a different color. You'll notice that the reflection properties all stay the same even when the color changes.
STEP EIGHT: If you're using Photoshop CC, you'll see some specular dots on the text. These are being created by the default Image Based Light that has been applied to the text (the IBL is solid black in Photoshop CS6). It simulates reflecting the environment the 3D object is sitting in. In this case, it looks like ceiling lights reflected on the surface, but I want to use something different.
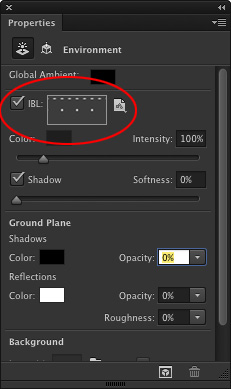
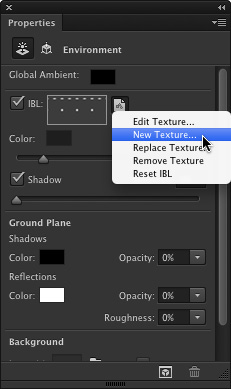
STEP NINE: In the 3D panel, click on Environment at the very top of the list. At the top of the Properties panel, just under Global Ambient, you'll see the IBL (Image Based Light). Click on the icon to the right of the preview thumbnail and choose New Texture. In the New dialog, look for the name of your 3D file in the Preset drop-down menu to use the same dimensions as the main file for this new file, make sure Background Contents is set to White, and click OK.
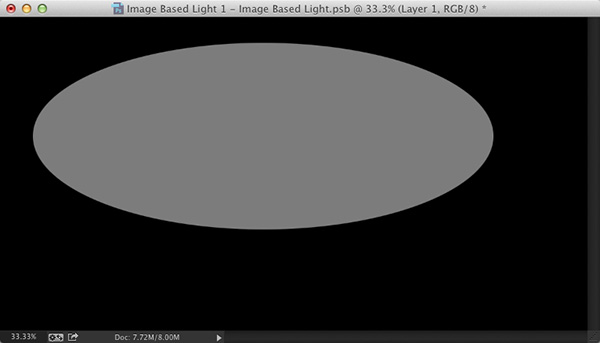
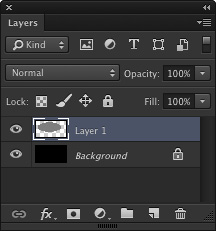
STEP TEN: Once the new file is created, go back to the IBL menu and choose Edit Texture. Once the file opens, press Command-I (PC: Ctrl-I) to invert the white background to black. Then, click the Create a New Layer icon at the bottom of the Layers panel, and use the Elliptical Marquee tool (nested under the Rectangular Marquee tool [M] in the Toolbox) to create a large oval selection inside the canvas. Press Shift-Delete (PC: Shift-Backspace), choose 50% gray from the Use drop-down menu in the Fill dialog, and click OK. Close and save the Image Based Light file.
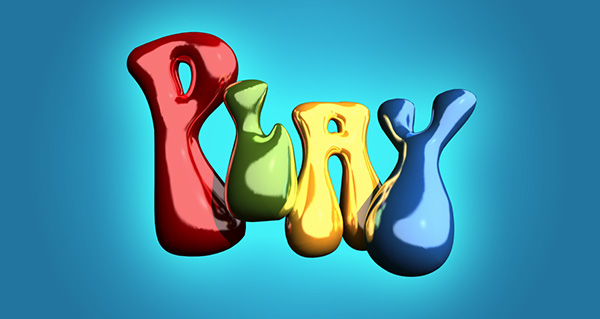
STEP ELEVEN: This will change the appearance of the light and reflected elements on the text. With the Environment property still selected in the 3D panel, you can use the 3D tools to move and rotate the IBL to change the way it appears on the text. You're essentially moving the reflection around the surface of the object. To access the 3D tools, activate the Move tool, and you'll see all the 3D tools at the end of the settings in the Options Bar.
STEP TWELVE: Once that's done, you can reposition and scale each letter using the 3D tools or widgets. The letters will interact with each other by reflecting not just the Image Based Light but also each other once the 3D object is rendered (3D>Render). Remember, even though you can manipulate each letter individually, they all still remain on a single 3D layer.
This article is courtesy of Photoshop User magazine, the official publication of KelbyOne, which provides quality online education for creative people. For more information, visit KelbyOne.com.
