
This technique is written for Photoshop CS6, but can easily be accomplished in prior versions.
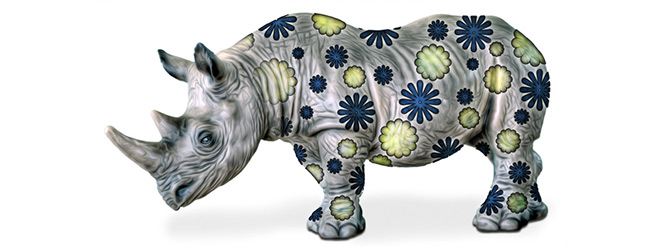
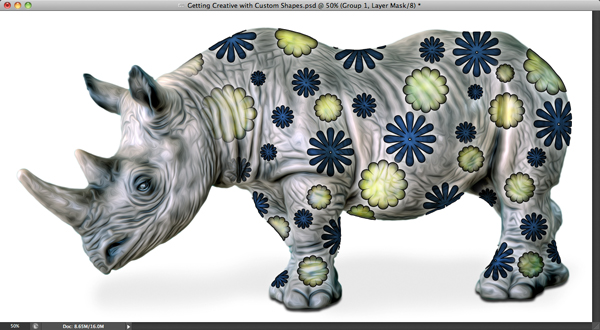
Working on a children’s book has given me the opportunity to deeply engage my imagination. Specifically, I’ve been “dressing up” animals with patterns. Doing so has allowed me to play around with custom shapes, layer styles, and blend modes. The process is incredibly fun! Today, I’d like to share some of the remarkable things I’ve learned using a toy rhinoceros as the subject.
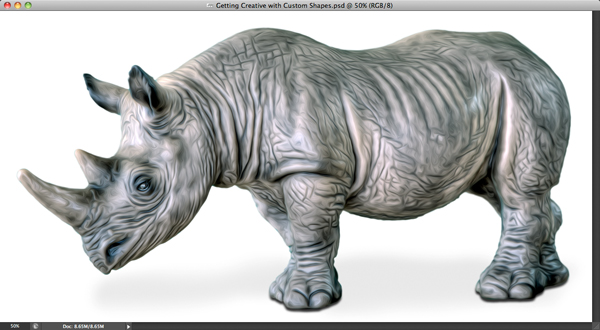
Step 1: Open a Subject that You'd Like to "Dress Up"
Open a photo of a subject that could use a little sprucing up.
Step 2: Add Playful Custom Shapes
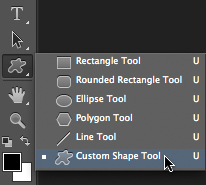
Let’s add some custom shapes to the rhino. In the Tools panel, click-and-hold on the Rectangle tool and then slide down to activate the Custom Shape tool.
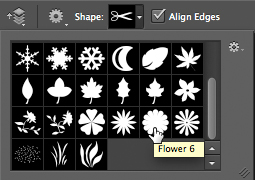
Press "D" to set black as the Foreground color. In the Options Bar, ensure that the tool mode is set to Shape. Click on the inverted triangle to open the Custom Shape picker and then slide out to the associated menu and choose "Nature."
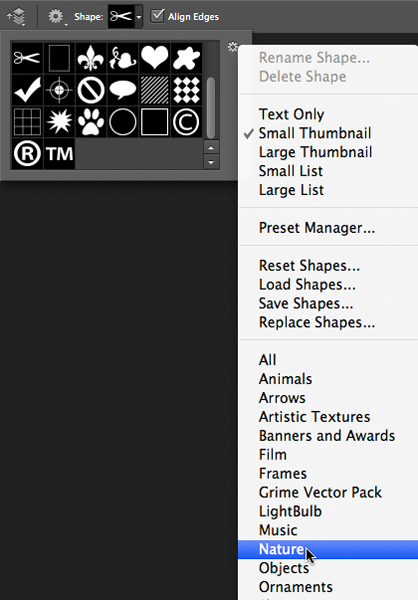
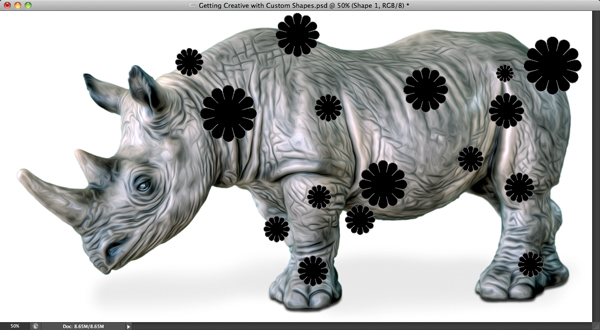
In the alert dialog, click OK to replace the current shapes with the Nature shapes. The “Flower 6” custom shape has a playful feeling that children will like, so scroll down and click on its icon.
While pressing Shift, hover over the rhino and click-and-drag out a variety of differently sized shapes. Don't be afraid to draw outside the bounds of the rhino.
Step 3: Spruce Up the Shapes
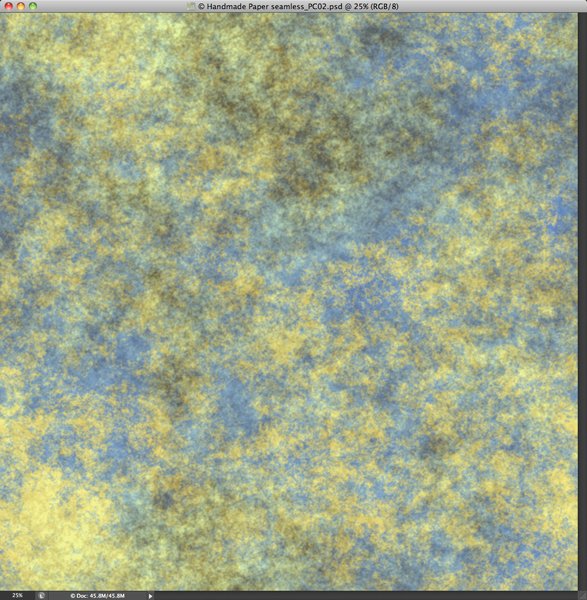
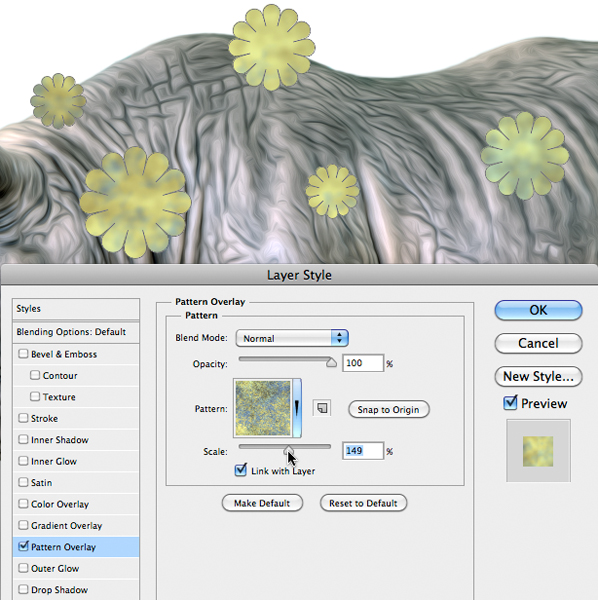
To spruce up the bland shapes, we’ll use layer styles. Since one of the layer styles will be a pattern overlay, we first need to define the pattern we want. In this example, we'll use a seamless texture from my Texture Labs Photographers’ Collection Two. Because the texture is seamless, it will cover a subject of any size. To define the texture as a pattern, start by opening it.
Special Note: NAPP members are entitled to a 15% discount on all Texture Labs Collections and Bundles. Simply enter the code "NAPPLAB15" when checking out.
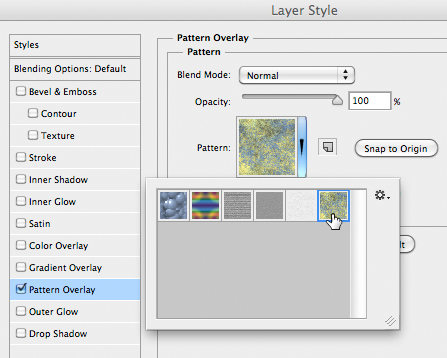
Now choose Edit>Define Pattern. Leave the default name and press OK. Close the texture. Click the "fx" icon at the base of the Layers panel and choose Pattern Overlay. Click the inverted triangle to open the Pattern picker and choose the pattern that we just defined.
Use the Scale slider to increase the size of the pattern until it looks the way you desire.
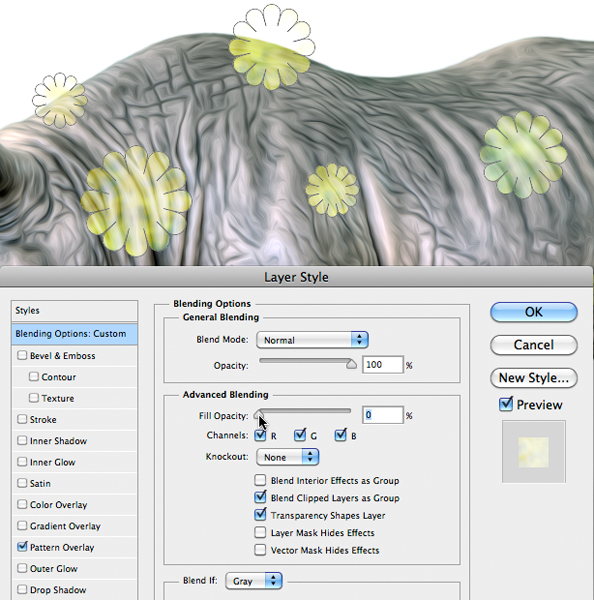
To blend the shapes into the texture of the rhino's hide, change the Blend Mode to Hard Light. At the moment, Hard Light mode is interacting with the underlying black color and not the hide. To accomplish the desired blend, click on the words "Blending Options: Default" in the upper left corner of the panel. Set the Fill Opacity slider to 0%.
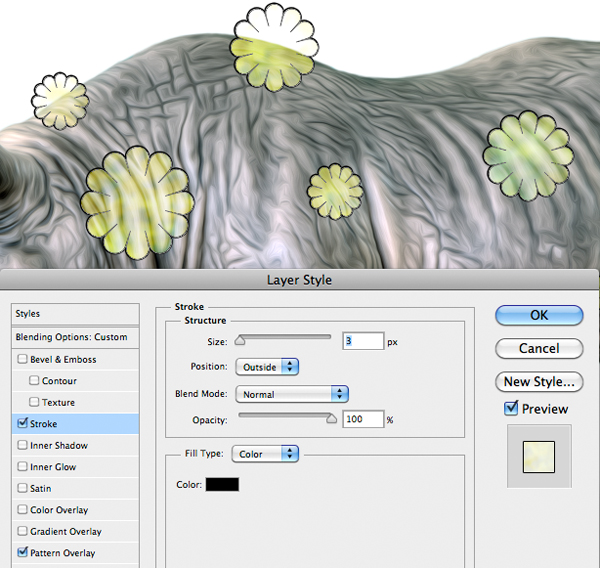
Now, let’s dress the pattern up by adding some more layer styles. In the left panel, click on the word "Stroke." Leave the settings at their defaults.
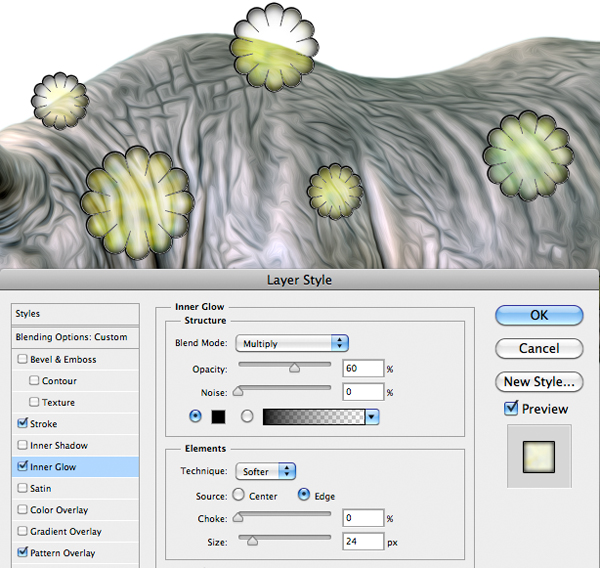
Now click on the words "Inner Glow." Change the Blend Mode to Multiply and set the color to black. Go with an Opacity of 60% and a Size of 24 px.
Finally, click the words "Outer Glow." Ensure that the Blend Mode is set to Screen. Change the color to white. Enter an Opacity of 65% and a Size of 46 px.
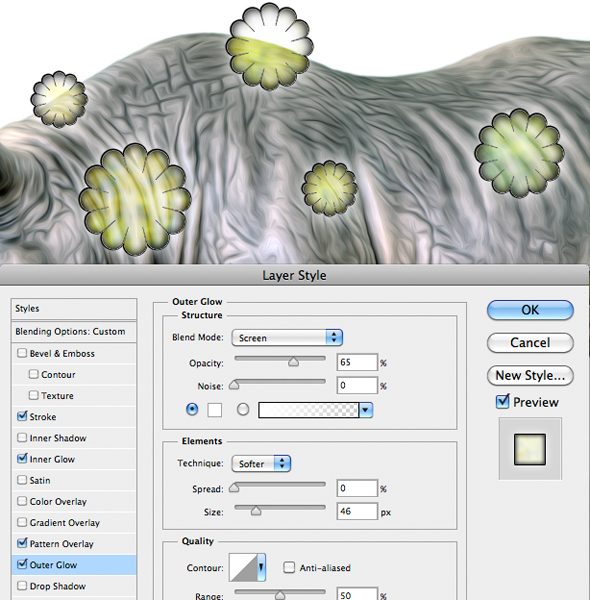
Press OK. To view the layer without the custom shape paths visible, click on the Background layer.
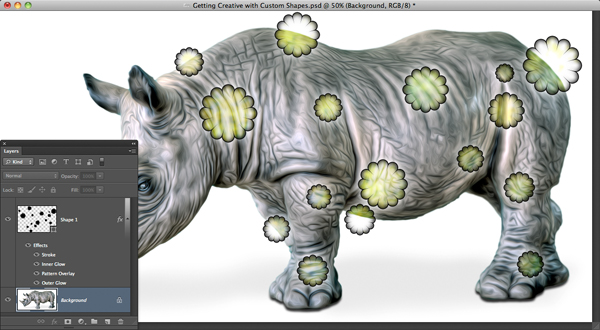
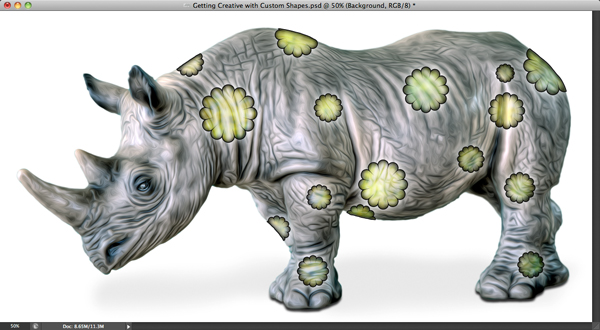
Step 4: Mask the Shapes
To confine the shapes to just the rhino, activate the Magic Wand and click on the white area outside the rhino. Choose Select>Inverse. Reactivate the custom shape layer ("Shape 1") and click the Add layer mask icon at the base of the Layers panel. Once again, click the Background layer.
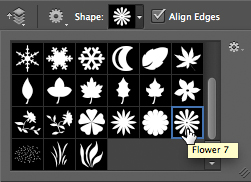
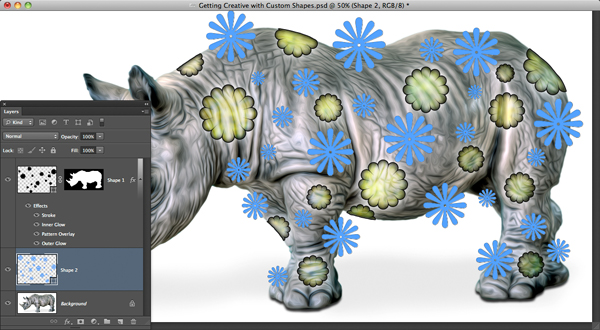
Step 5: Repeat Steps 2 - 4 Using a Different Custom Shape
Now we'll mix another custom shape in among the original flower shapes. Activate the Custom Shape tool. Open the Custom Shape picker in the Options Bar and choose “Flower 7.”
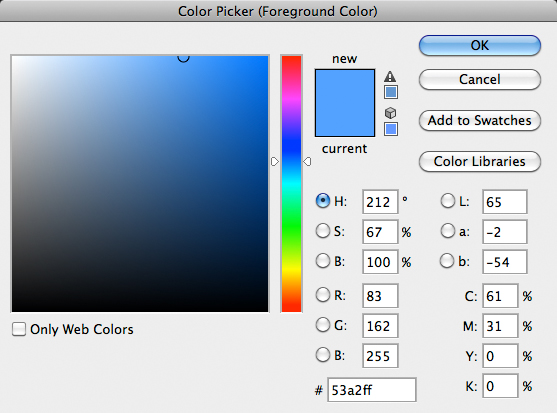
Click on the Foreground color chip at the base of the Tools panel. Set the "R" value to 83, the "G" value to 162, and the "B" value to 255.
Press OK. While holding Shift, drag out a series of shapes on the rhino.
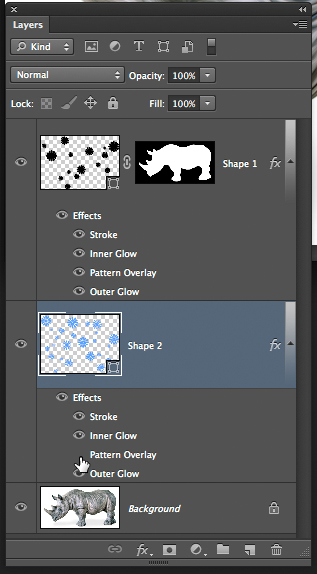
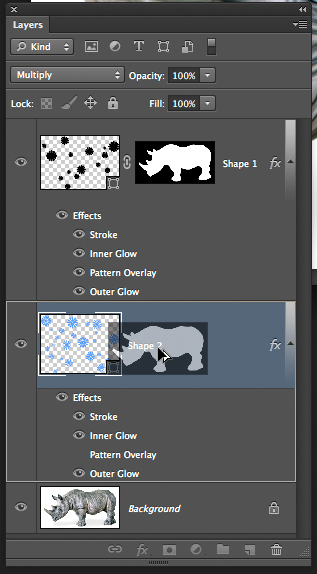
To simplify the process of adding layer styles, let's borrow the styles from the "Shape 1" layer. While holding Option (PC: Alt), click-and-drag the "Effects" from the "Shape 1" layer to the "Shape 2" layer.
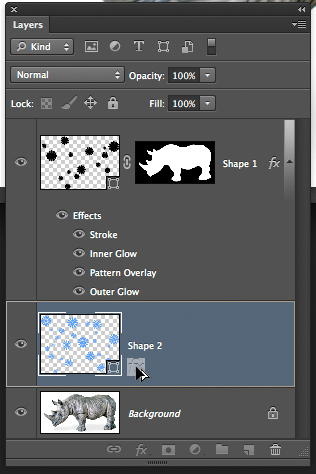
When you let go, the styles copy to the destination layer.

On this layer, let's use the existing blue color rather than adding a pattern overlay. To eliminate it, simply toggle off the visibility (eye) icon next to the words "Pattern Overlay."
To blend the blue shapes with the rhino's hide, change the layer's blend mode to Multiply.
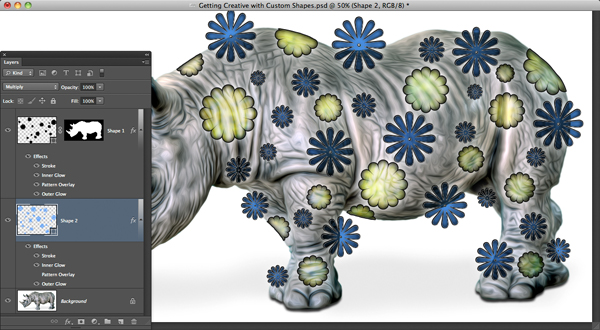
Since the shapes extend beyond the edges of the rhino, hide them by holding Option (PC: Alt) and dragging the mask from the "Shape 1" layer to the "Shape 2" layer.
Click on the Background layer to view the result.
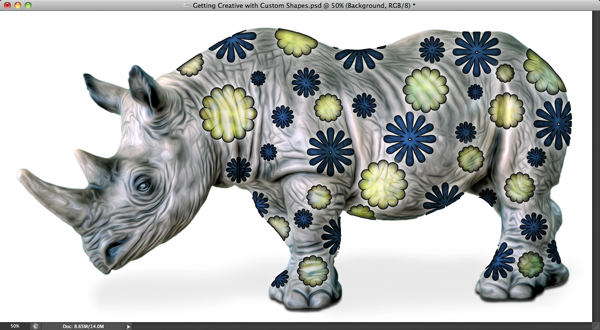
Step 6: Fade Shapes Around the Neck
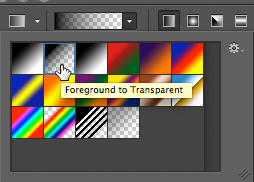
To finish the effect, let's fade the shapes around the rhino's neck. In the Layers panel, click on the "Shape 2" layer. While holding Shift, click on the "Shape 1" layer to select it as well. Choose Layer>New>Group from Layers. Leave the default name and press OK. Click the Add layer mask icon at the base of the Layers panel. Activate the Gradient tool. Press "D," then "X" to set black as the Foreground color. In the Options Bar, open the Gradient picker and choose the Foreground to Transparent option.
Click the Radial Gradient icon. Now click-and-drag from the left to right edge of each of the shapes bordering the rhino's neck.
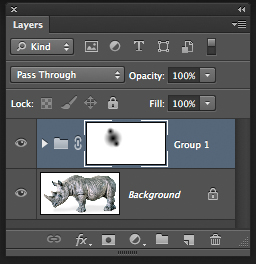
This creates a lovely faded effect where the shapes approach the rhino's head.
Mark S. Johnson Photography
msjphotography.com
