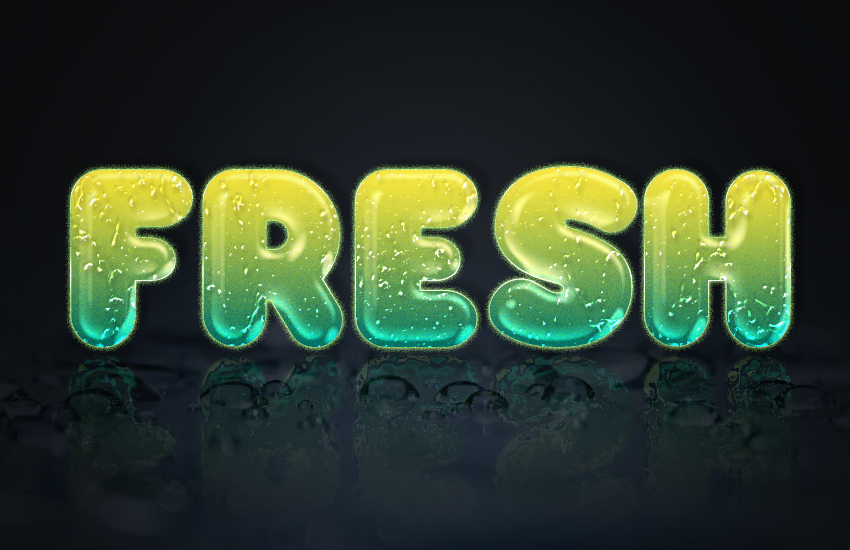
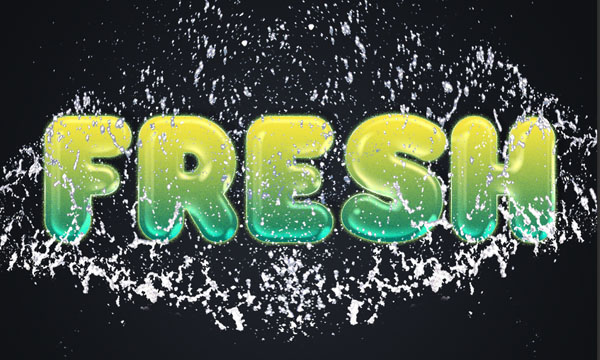
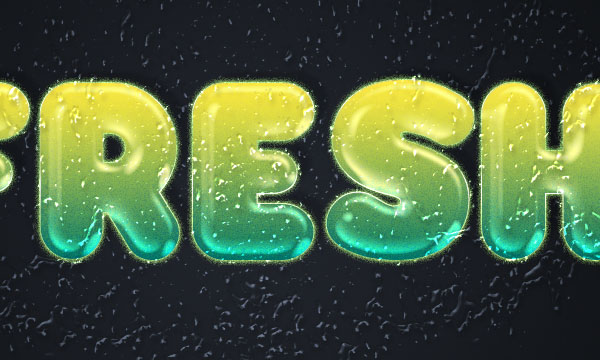
This tutorial will show you a simple way to create a cool, fresh, glossy text effect using layer styles and a couple of images.
Tutorial Assets
1. Franks Font
2. Water Splash 3 by Moonglowlilly
3. Water Drops by Gex78
4. Gradient-Shapes for Photoshop by ilnanny (Load the CHROMES.grd file)
STEP ONE: Create a new 850×550 px document at 72 ppi. Click the Foreground color swatch and set the Foreground color to #22272d, then set the Background color to #101115. Choose the Gradient tool (G), click the gradient thumbnail in the Options Bar to open the Gradient Editor, click the Foreground to Background gradient, and click OK. Now click the Radial Gradient icon in the Options Bar. Click-and-drag from the center of the document to one of the corners to create the background gradient.
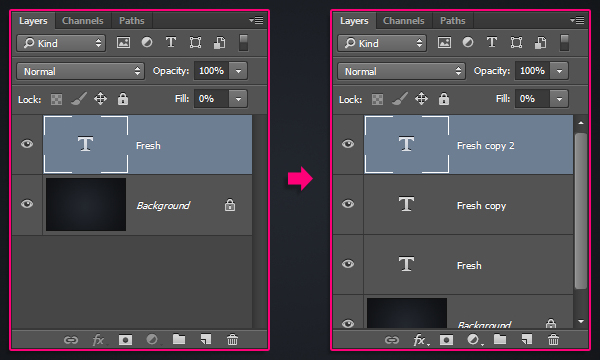
Select the Type tool (T) and, using the Franks font at 230 pt, type the word "FRESH" in white in the center of the document. Change the text layer's Fill value to 0%, then press Command-J (PC: Ctrl-J) twice to make two copies.

STEP TWO: Double-click to the right of the original text layer's name to bring up the Layer Style dialog. Click Bevel & Emboss in the Styles list on the left. Set the Size to 27 px, uncheck Use Global Light, set the Angle to 149° and Altitude to 58°. Click the down-facing arrow next to the Gloss Contour thumbnail and choose Cone - Inverted. Check the Anti-aliased box, change the Highlight Mode to Overlay, make the Highlight Mode Opacity 100%, and change the Shadow Mode Opacity to 0%.
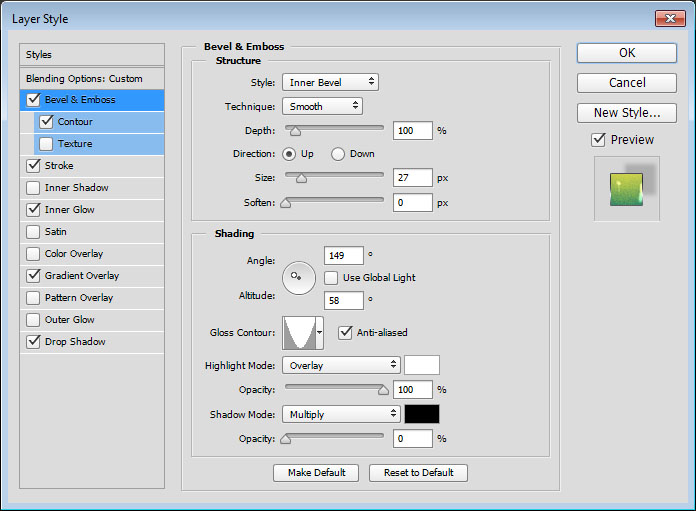
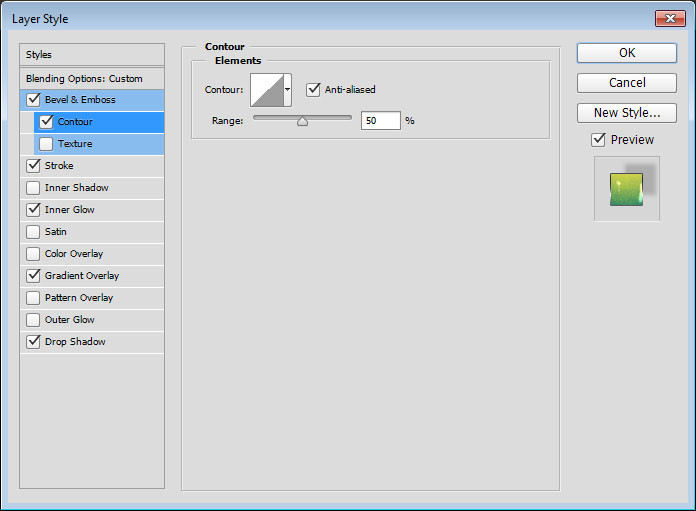
Now click Contour in the Styles list and check the Anti-aliased box.
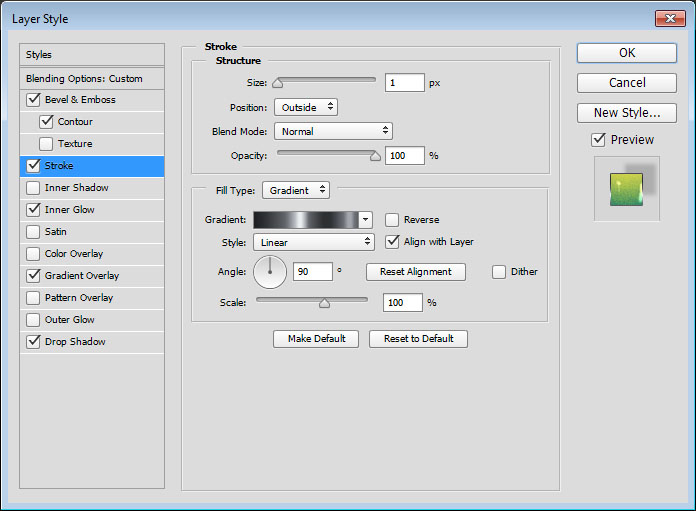
Click Stroke in the Styles list. Set the Size to 1 px. Change the Fill Type to Gradient and set the Angle to 90°. Now click the Gradient thumbnail to open the Gradient Editor. Click the Load button on the right, navigate to the gradient-shapes for Photoshop download, locate the CHROMES.grd file, and click Open. The gradients will be added to the bottom of the list. Select the stainless steel 10x gradient and click OK to close the Gradient Editor.
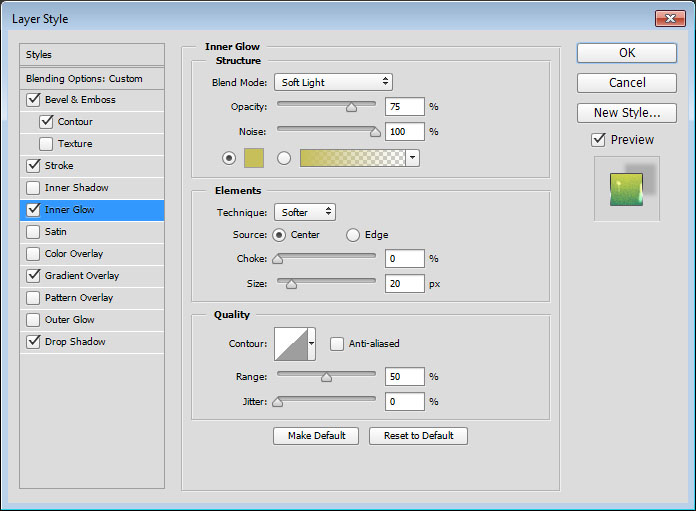
Choose Inner Glow on the left. Change the Blend Mode to Soft Light and set Noise to 100%. Now click the yellow color swatch, use #c7bf5a as the color, and click OK to close the Color Picker. Set Source to Center and change the Size to 20 px.
Choose Gradient Overlay from the Styles list, then click the Gradient thumbnail to open the Gradient Editor. Click the black color stop at the bottom left of the gradient ramp, then click the Color swatch, set the color to #016f6e, and click OK to close the Color Picker. Now click the color stop at the bottom right, change the color to #fee847, click OK to close the Color Picker, and click OK again to close the Gradient Editor.
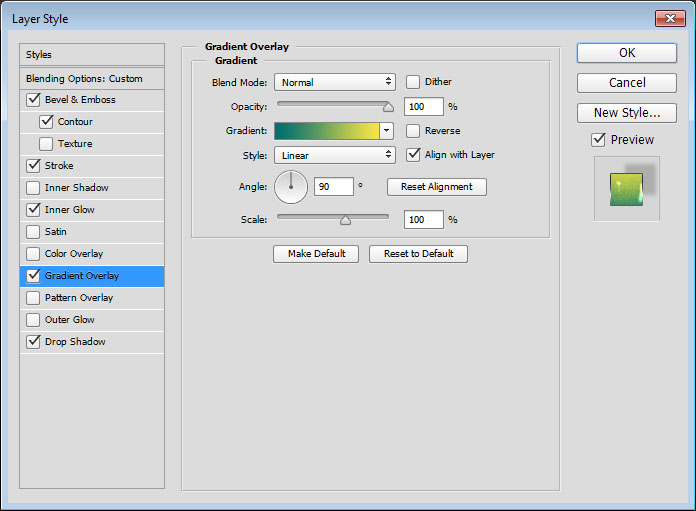
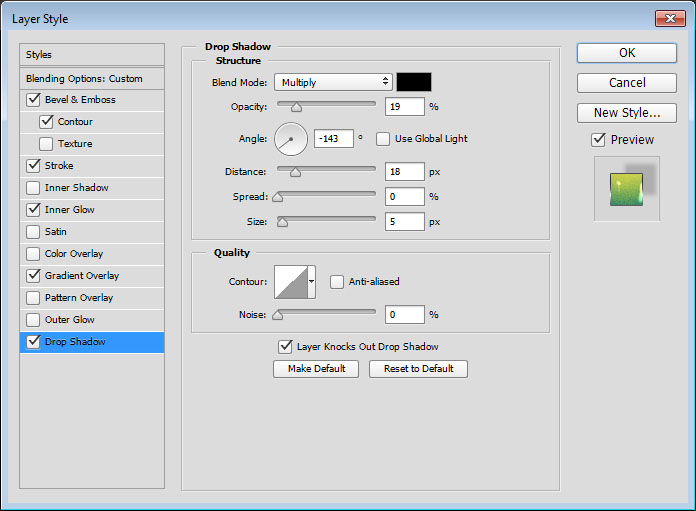
Now click Drop Shadow. Set the Opacity to 19%, uncheck Use Global Light, change the Angle to -143°, and make the Distance 18 px. Click OK to close the Layer Style dialog. This will style the main text layer. You can try different gradient fills if you like.

STEP THREE: Double-click to the right of the first copy text layer's name to open the Layer Style dialog. Choose Bevel & Emboss on the left, change the Size to 10 px, uncheck Use Global Light, and make the Angle 63° and Altitude 69°. Check the Anti-aliased box, change the Highlight Mode to Overlay, Highlight Mode Opacity to 100%, and Shadow Mode Opacity to 0%. Click OK to apply the layer style. This will add another glossy layer to the text.


STEP FOUR: Double-click the second copy text layer to bring up the Layer Style dialog. Click Bevel & Emboss, set Size to 21 px, uncheck Use Global Light, and change Angle to -121° and Altitude to 58°. Now check the Anti-aliased box, change the Highlight Mode to Overlay, set the Highlight Mode Opacity to 100%, and change the Shadow Mode Opacity to 0%.

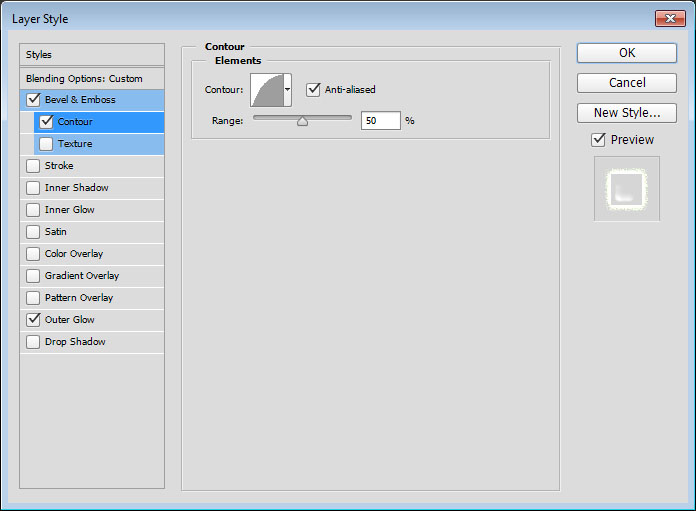
Click Contour in the Styles list. Click the down-facing arrow next to the Contour thumbnail, choose Half Round, and check the Anti-aliased box.
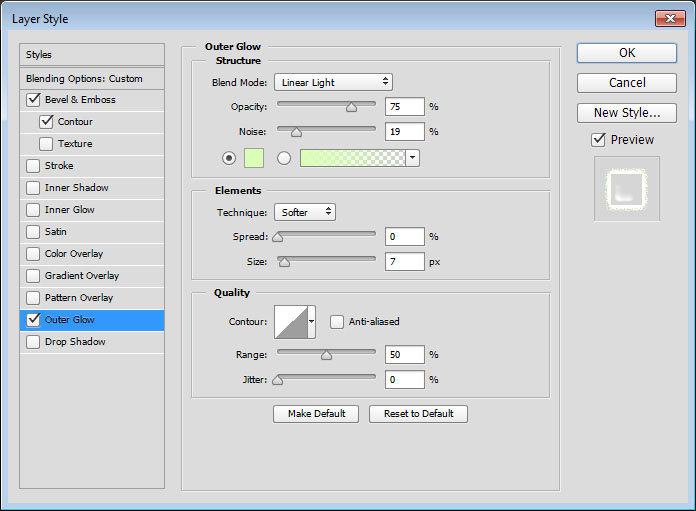
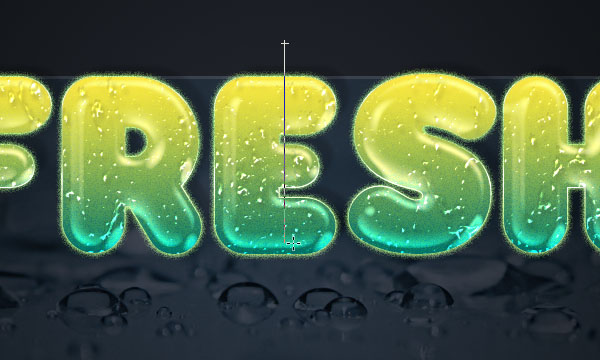
Choose Outer Glow from the Styles list. Change the Blend Mode to Linear Light and set Noise to 19%. Click the yellow color swatch, choose #dbffb7 for the color, click OK to close the Color Picker, and change Size to 7 px. Click OK to apply the layer style. This adds the last glossy layer, as well as an outer glow to make the effect look more interesting.

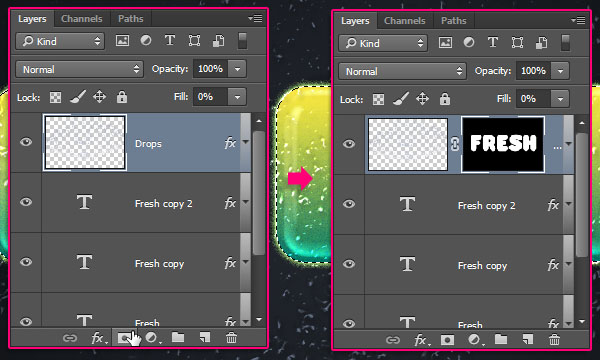
STEP FIVE: Open the Water Splash 3 image, choose the Move tool (V), and click-and-drag the image onto the working document at the top of the layer stack. Then go to Edit>Free Transform to resize it and move it around as needed so it covers the text you have. Press Enter to commit the transformation.
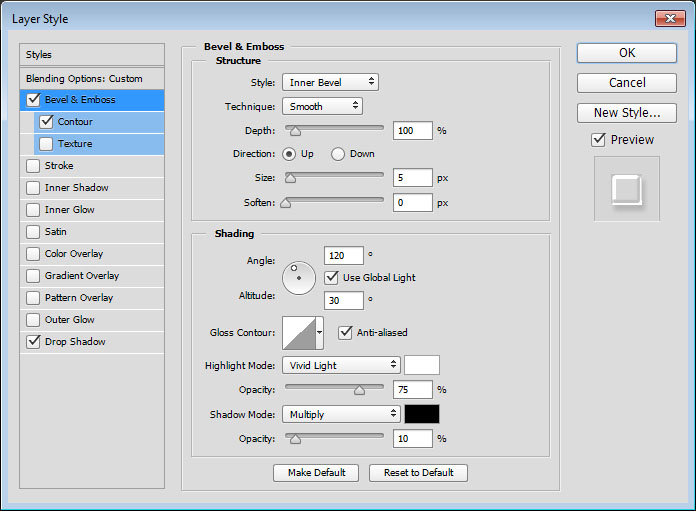
Double-click the water splash layer name, rename it "Drops," then change its Fill value to 0%. Now double-click to the right of the layer name to bring up the Layer Style dialog. Choose Bevel & Emboss from the Styles list, check the Anti-aliased box, change the Highlight Mode to Vivid Light, and reduce the Shadow Mode Opacity to 10%.
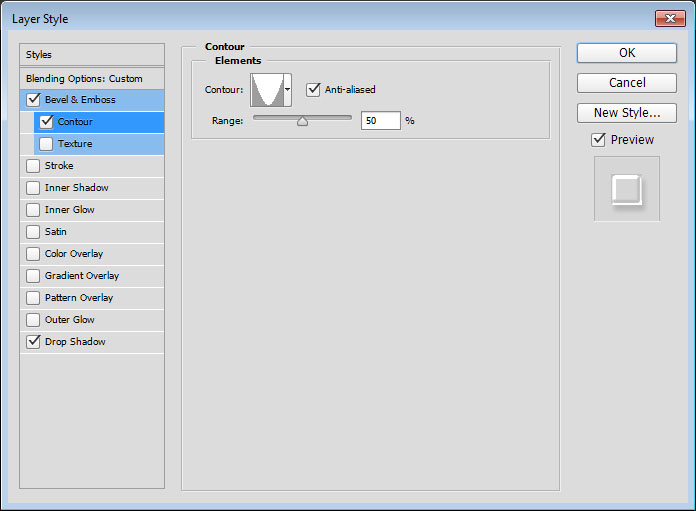
Now choose Contour, change the Contour to Cone - Inverted, and check the Anti-aliased box.
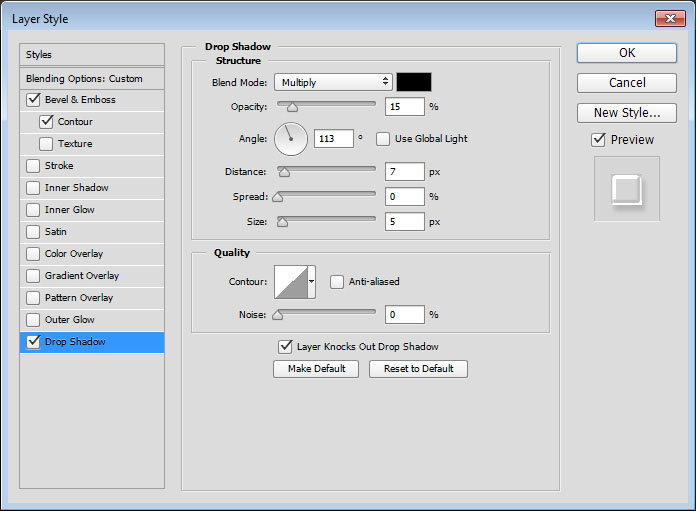
Click Drop Shadow, reduce Opacity to 15%, uncheck Use Global Light, change the Angle to 113°, and set the Distance to 7 px. Click OK to apply the layer style. This styles the drops and blends them nicely with the text.
Command-click (PC: Ctrl-click) a text layer's thumbnail to load it as a selection, then click the Add Layer Mask icon (circle in a square) at the bottom of the Layers panel. This will get rid of all the extra drops outside the text, but you'll still be able to delete the mask and reapply it to any other text you create.


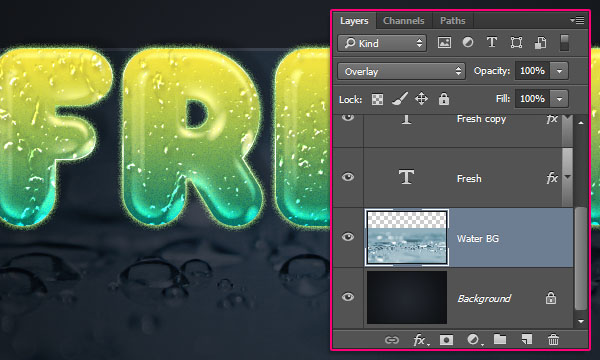
STEP SIX: Open one of the water drops images in the Gex78 folder (any image will work). With the Move tool, drag-and-drop the image into the working file, then drag it below the original text layer. Double-click the layer's name and rename it Water BG. At the top of the Layers panel, change the blend mode to Overlay. Choose Edit>Free Transform and resize the image so it extends a bit behind the text.
Click the Add Layer Mask icon at the bottom of the Layers panel, and press D then X set the Foreground and Background colors to black and white, respectively. Pick the Gradient tool, click the gradient thumbnail in the Options Bar, choose the Foreground to Background gradient, click OK to close the Gradient Editor, then click the Linear Gradient icon in the Options Bar.
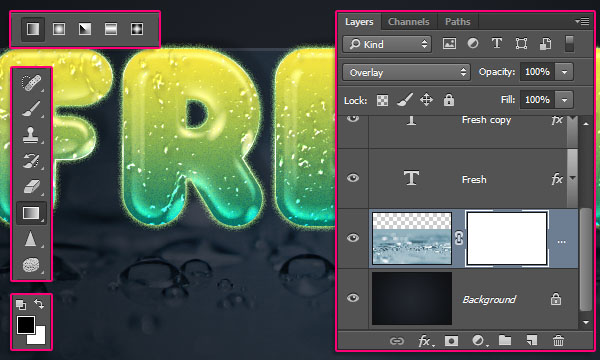
Next, place the cursor a bit above the water drops image's top edge, then click-and-drag to the bottom of the text. This will erase the upper part of the image and make it fade into the original background. You can undo and redo the step until you get a result that you think looks good.

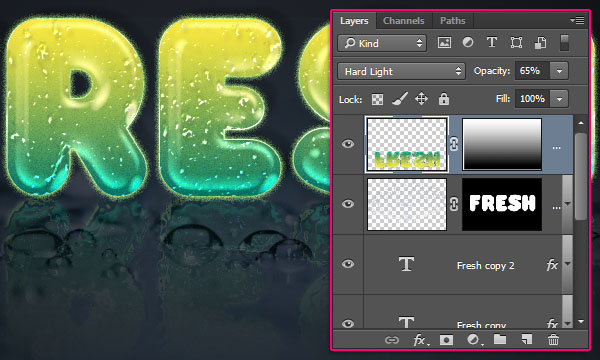
STEP SEVEN: Select the top layer, then Shift-click to select all the layers except the Background and Water BG layers. Choose Layer>Duplicate Layers, click OK in the dialog that appears, then choose Layer>Merge Layers. Double-click the duplicated layer's name and rename it Reflection.
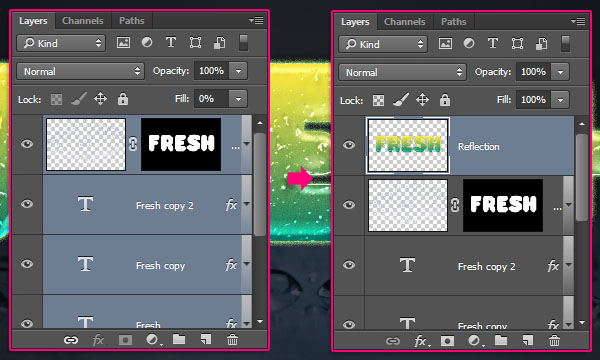
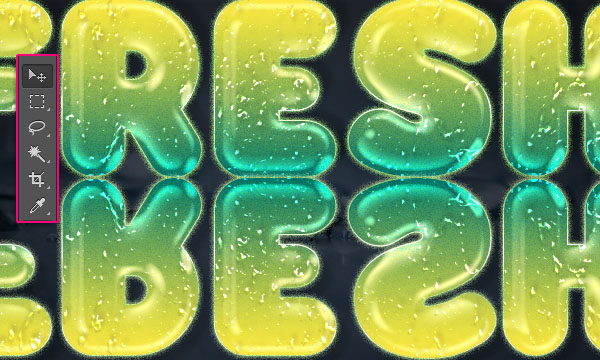
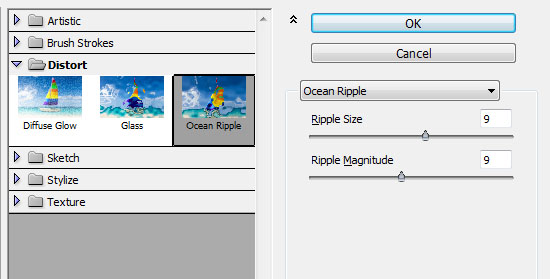
Go to Edit>Transform>Flip Vertical to flip the merged layer upside down. Using the Move tool, press-and-hold the Shift key and click-and-drag the reflection downward until it touches the text's bottom edge. Choose Filter>Filter Gallery>Distort>Ocean Ripple, and change both values to 9. This makes the reflection look more realistic. (Note: If the Filter Gallery is grayed out, choose Image>Mode>8 Bits/Channel and try again.)
Change the Reflection layer's blend mode to Hard Light, and lower the Opacity to 65%. Then, follow the same directions in paragraphs two and three of Step Six to erase the lower part of the reflection and make it fade out using a layer mask and a gradient. Make sure you drag the gradient from the bottom to well above the nonreflected letters to get the right fade.
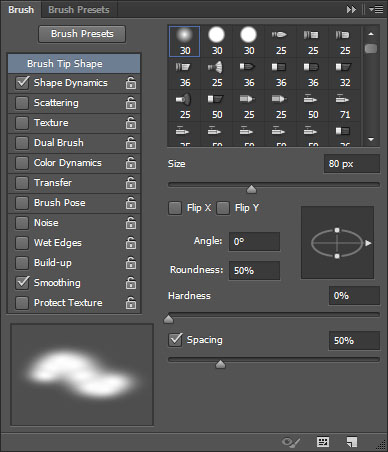
STEP EIGHT: Click the Create a New Layer icon at the bottom of the Layers panel to add a layer above the reflection layer. Rename the layer Shadow, click the Foreground color swatch, choose #464646 for the color, and click OK to close the Color Picker. Choose the Brush tool (B) and open the Brush panel (Window>Brush). With Brush Tip Shape selected on the left, set the Size to 80 px, Roundness to 50%, and Spacing to 50%. Now click Shape Dynamics, change Size Jitter to 30%, and make sure Control is set to Off for all instances.
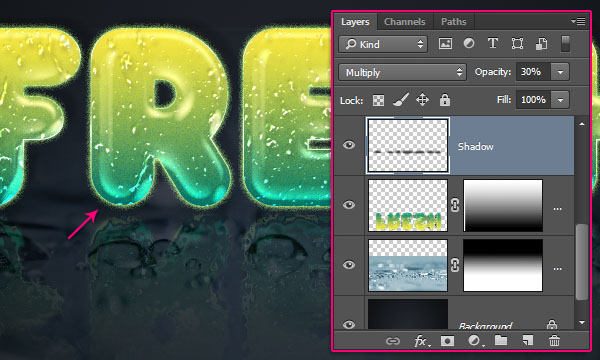
Change the Shadow layer's blend mode to Multiply and lower the Opacity to 30%. Now paint some shadows below the text. You can change the Opacity value if you need to after adding the shadow.
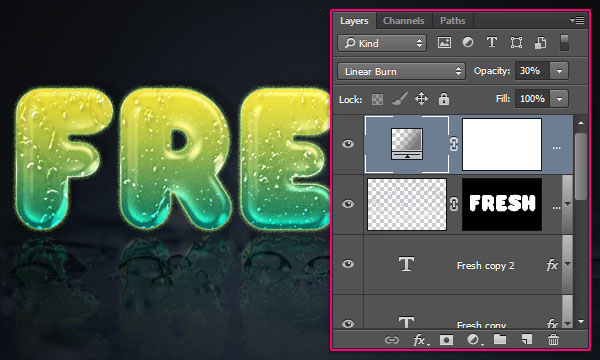
Click the Create New Adjustment Layer icon (half-black, half-white circle) at the bottom of the Layers panel and choose Gradient. In the Gradient Fill dialog, click the Gradient thumbnail, double-click the color stop at the bottom left, enter #7c7c7c, and click OK to close the Color Picker. Now double-click the bottom-right stop, use the same color, and click OK twice. Back in the Gradient Fill dialog, change Style to Radial, Scale to 500%, check Reverse, and click OK.
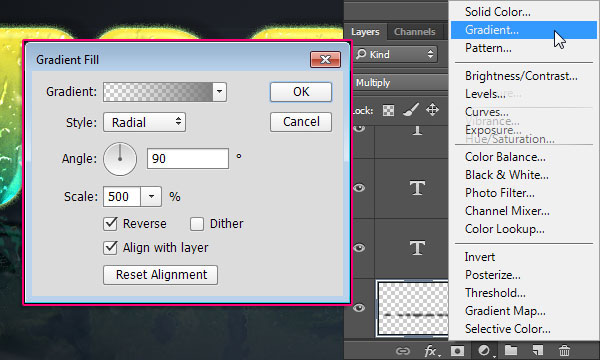
Finally, change the adjustment layer's blend mode to Linear Burn and lower the Opacity to 30%. This will complete the text effect by slightly adjusting the color.
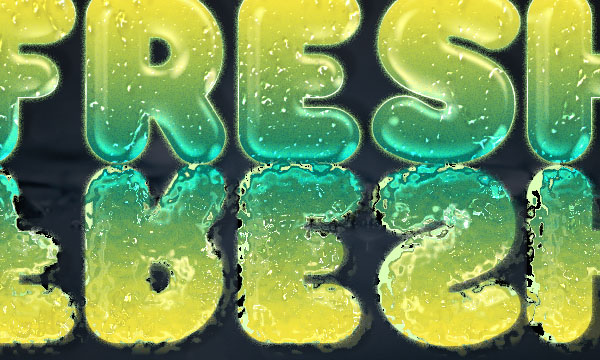
Here's the final result. The main effect is created using layer styles, but the images added the fresh, interesting drops and background. I hope you enjoyed the tutorial and found it helpful.