

This tutorial will show you how to use a couple of Photoshop’s Layer Styles, and a simple sparkles brush to create a shiny, posh crystal text effect.
Tutorial Assets
1) Easy Street EPS Bold font.
2) Stars and Flares Brush Set by MysticEmma.
3) gradient-shapes for Photoshop ilnanny (Load the CHROMES.grd file).
Loading the Contours and the Gradients
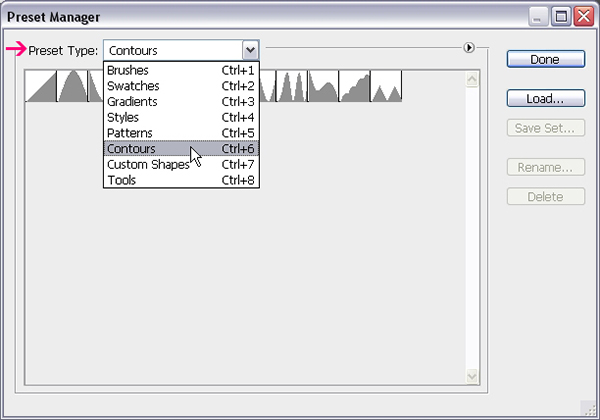
You might need to load the Contours used in some of the Layer Styles below. To do so, go to Edit > Preset Manager, and choose Contours from the Preset Type drop down menu.
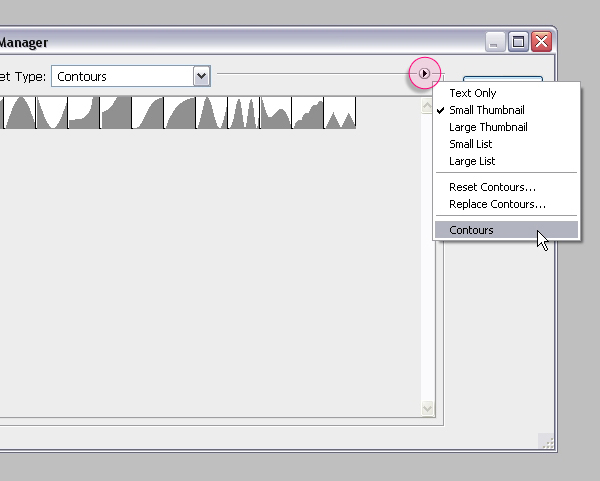
Click the small arrow in the top right corner, and choose Contours.
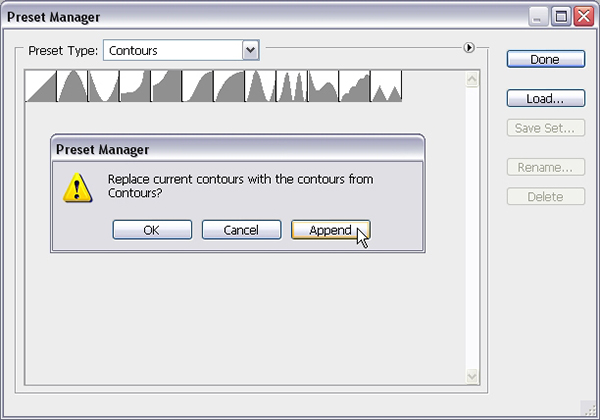
Click Append to add the new contours to the existing ones.
You’ll also need to load a Photoshop Gradient set. So go to Edit > Preset Manager, and choose Gradients from the Preset Type drop down menu.
Then, click the little arrow to the right of the Preset Type drop down menu, and choose the Spectrums set at the bottom of the pop-up menu. When the dialog box appears after that, just click Append.
Step 1
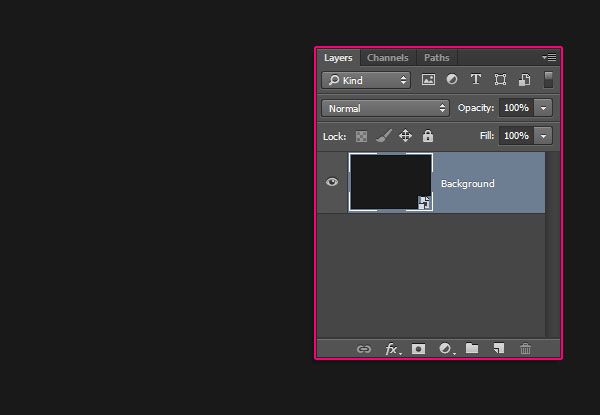
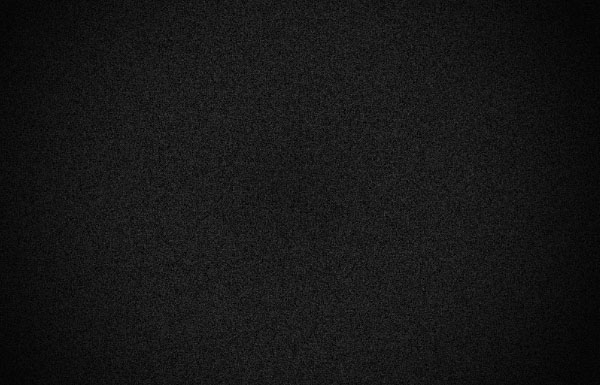
Create a new 900 x 600 px document. Fill the Background with the color #191919, then go to Filter > Convert for Smart Filters.
Set the Foreground and Background colors back to Black and White.
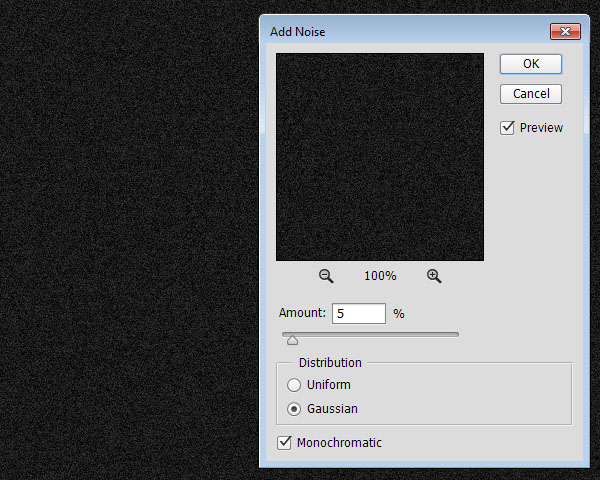
Go to Filter > Noise > Add Noise. Set the Amount to 5, the Distribution to Gaussian, and check the Monochromatic box.
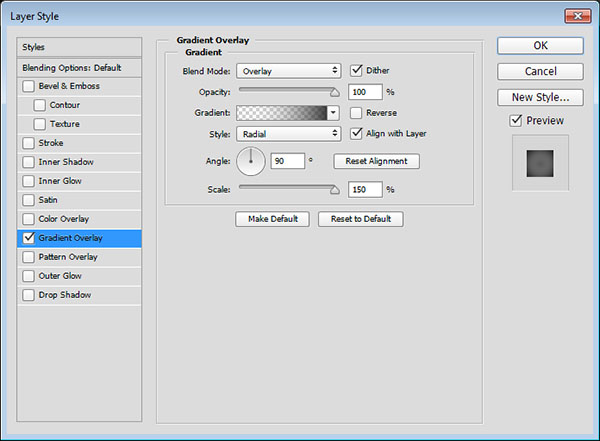
Double click the Background layer to apply a Gradient Overlay effect.
Blend Mode: Overlay
Check the Dither box
Style: Radial
Scale: 150%
Click the Gradient box to create a transparent to fill color gradient using the colors #fefefe to the left and #252525 to the right.
This will create the Background.
Step 2
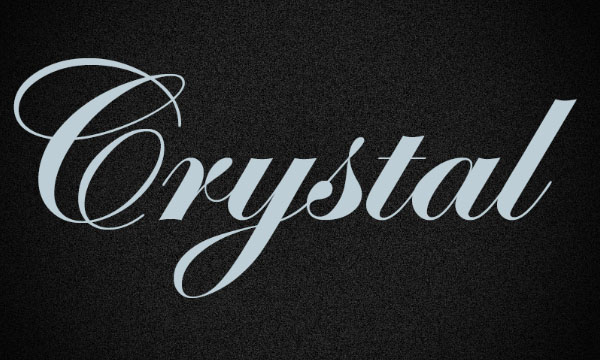
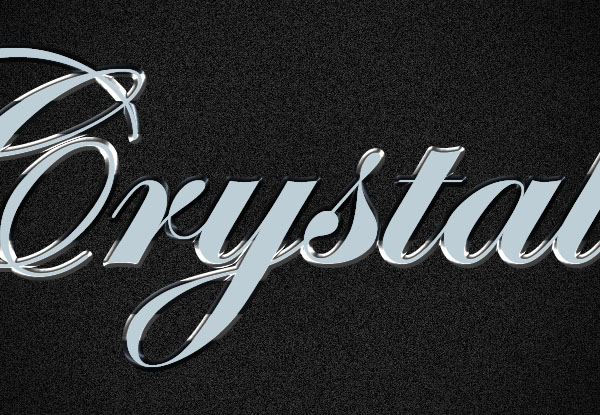
Create the text using the font Easy Street EPS Bold, the color #bdced6, and the font Size 300 pt.
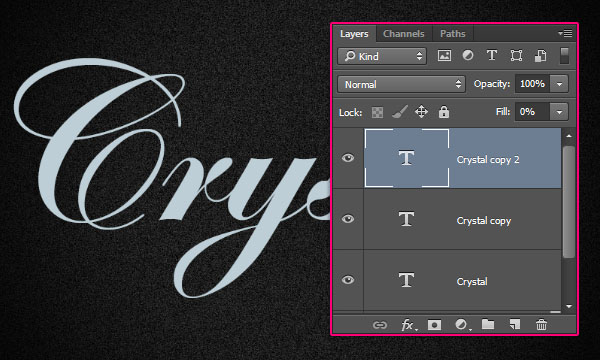
Duplicate the text layer twice, and change the second copy’s Fill value to 0.
Step 3
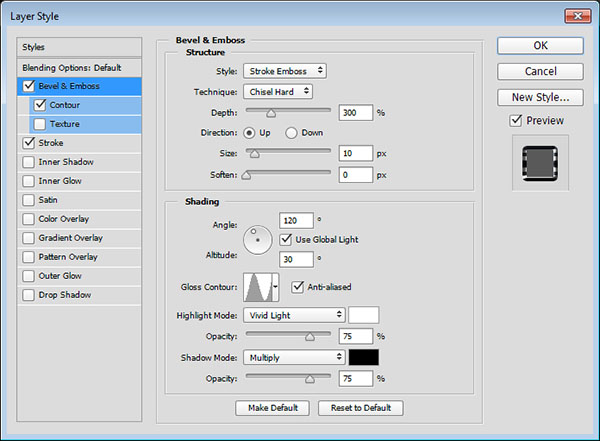
Double click the original text layer to apply the following layer style:
– Bevel and Emboss
Style: Stroke Emboss
Technique: Chisel Hard
Depth: 300
Size: 10
Gloss Contour: Ring
Check the Anti-aliased box
Highlight Mode: Vivid Light
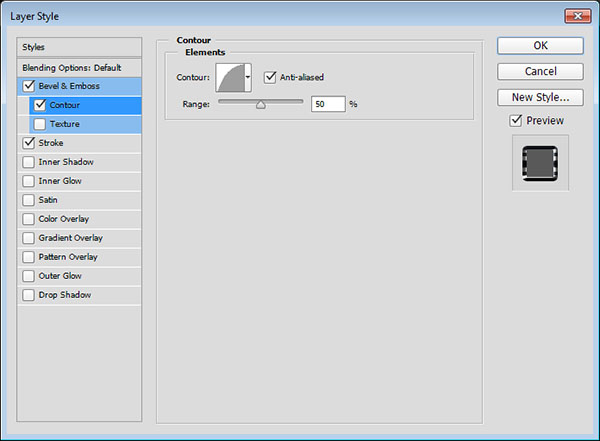
– Contour
Contour: Half Round
Check the Anti-aliased box.
– Stroke
Size: 5
Fill Type: Gradient
Style: Reflected
Angle: 90
Use the stainless steel xx gradient fill
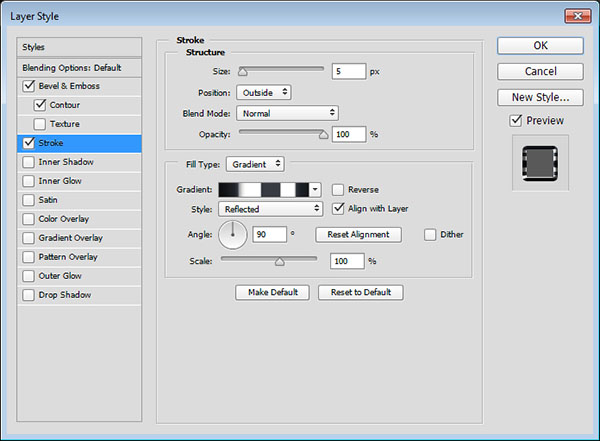
This will style the shiny outer stroke.
Step 4
Double click the first copy text layer to apply the following layer style:
– Bevel and Emboss
Size: 18
Check the Anti-aliased box
Highlight Mode: Vivid Light
Shadow Mode: Color Burn
Color: #2d3838

– Contour
Contour: Half Round
Check the Anti-aliased box.

– Stroke
Size: 1
Fill Type: Gradient
Angle: 90
Use the faucet 120 gradient fill

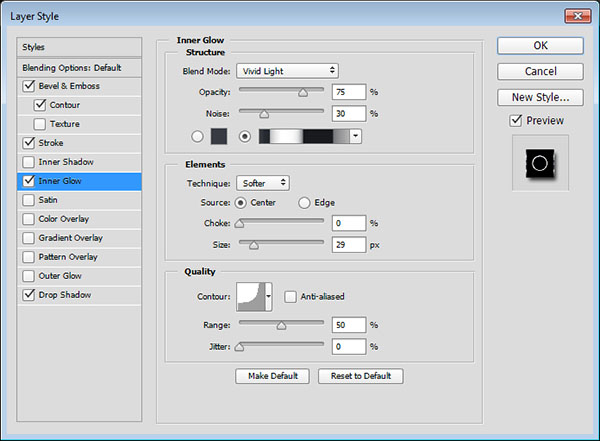
– Inner Glow
Blend Mode: Vivid Light
Noise: 30
Color: Use the stainless steel x101 gradient fill
Source: Center
Size: 29
Contour: Cove – Deep
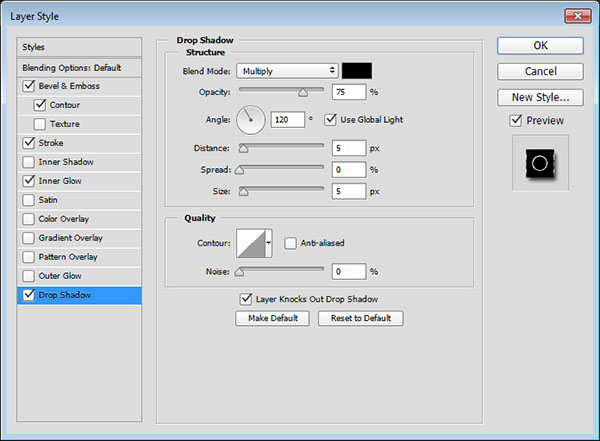
– Drop Shadow
Use the Default values
This will style the first layer of text.
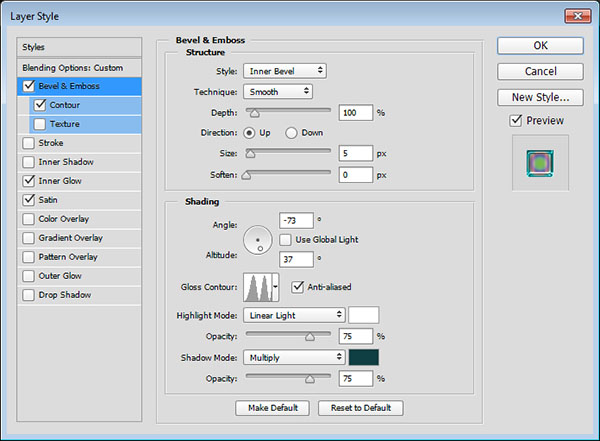
Step 5
Double click the second copy text layer to apply the following Layer Style:
– Bevel and Emboss
Uncheck the Use Global Light box
Angle: -73
Altitude: 37
Gloss Contour: Ring – Double
Check the Anti-aliased box
Highlight Mode: Linear Light
Shadow Mode – Color: #0e3f43
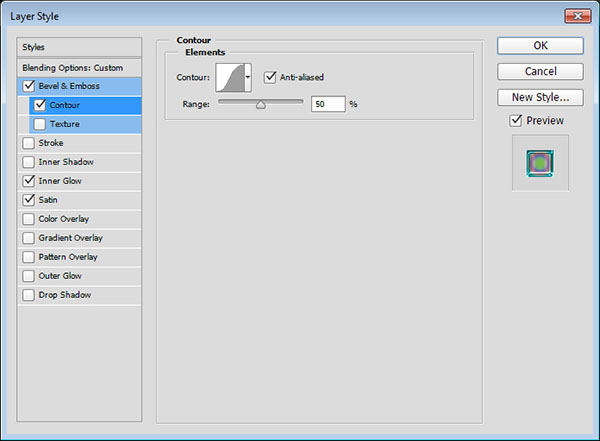
– Contour
Contour: Gaussian
Check the Anti-aliased box.
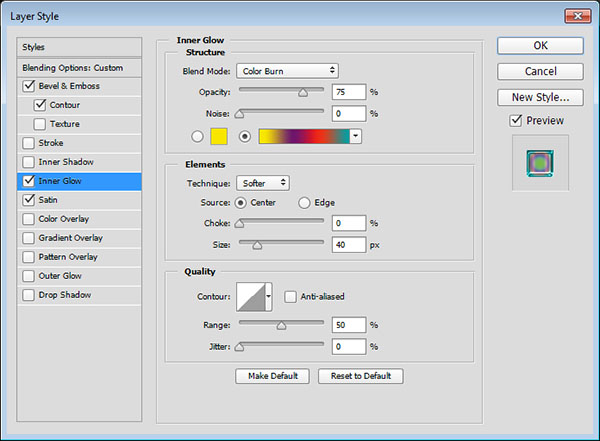
– Inner Glow
Blend Mode: Color Burn
Color: Use the Yellow, Violet, Red, Teal gradient fill
Source: Center
Size: 40
– Satin
Blend Mode: Linear Burn
Color: #58dde1
Distance: 27
Size: 16
Contour: Cone

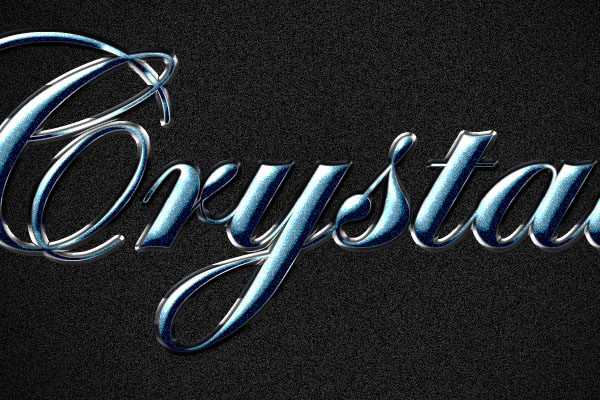
This will style the second layer of text.
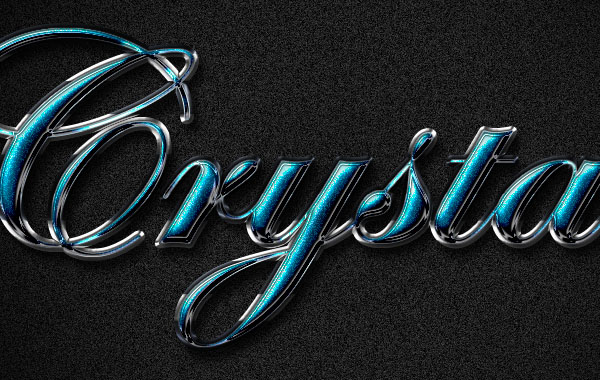
Step 6
Duplicate the original text layer, place the copy below the original, rename it to Shadow, right click it and choose Rasterize Layer Style, then change its Fill value to 0.
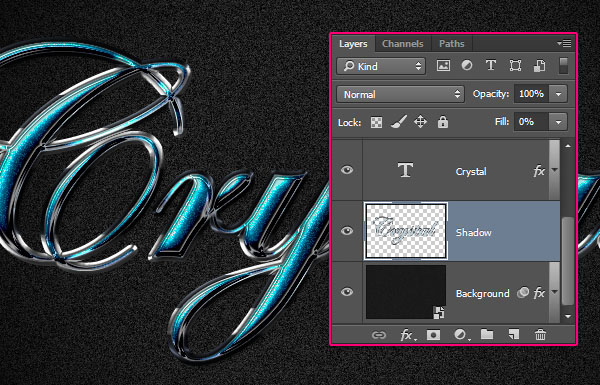
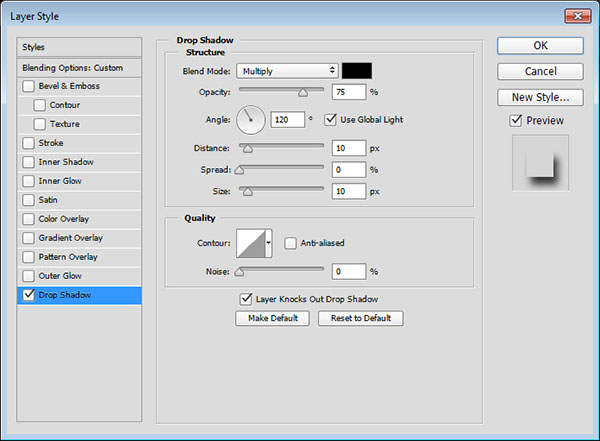
Double click the Shadow layer to apply a Drop Shadow effect by changing the Distance and Size values to 10.
This will add some shadow to intensify the effect a little bit.
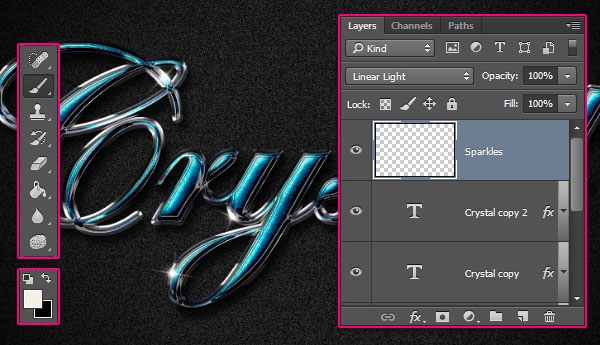
Step 7
Set the Foreground color to #f4f1e2, create a new layer on top of all layers, name it Sparkles, and change its Blend Mode to Linear Light.
Then, pick the Brush Tool, and choose any of the tips from the Stars and Flares Brush Set.
You can adjust some of the brush tip’s settings under the Shape Dynamics tab in the Brush panel (like the Size Jitter and Angle Jitter), then start adding a couple of sparkles all around the text edges.
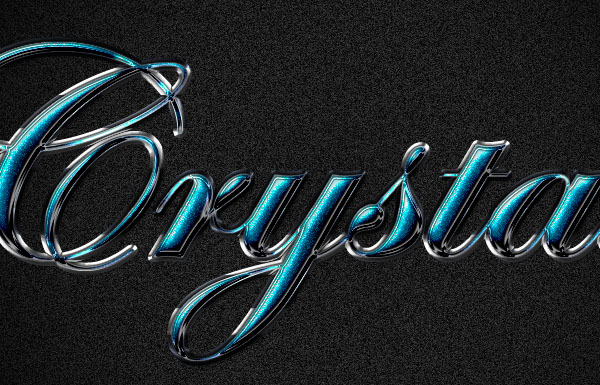
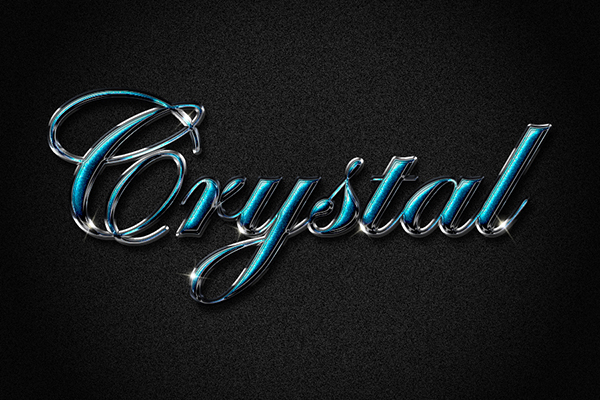
Conclusion
This is the final result. The cool trick was to use gradient fills instead of solid colors for the Inner Glow effects. It just incorporates more colors in the effect and makes it pop a bit more.
Hope you enjoyed the tutorial and found it helpful.

Awesome tutorial