Boosting Specific Colors
CREDIT: MATT KLOSKOWSKI
Often, you'll have a photo where one of the colors just doesn't stand out like it did when you took the photo. One of the benefits of a Hue/Saturation adjustment layer is that you can target specific colors with it, and not the whole photo. Plus, the ability to hide the changes with the layer mask on the adjustment layer can really help create some strong images.
STEP 1:
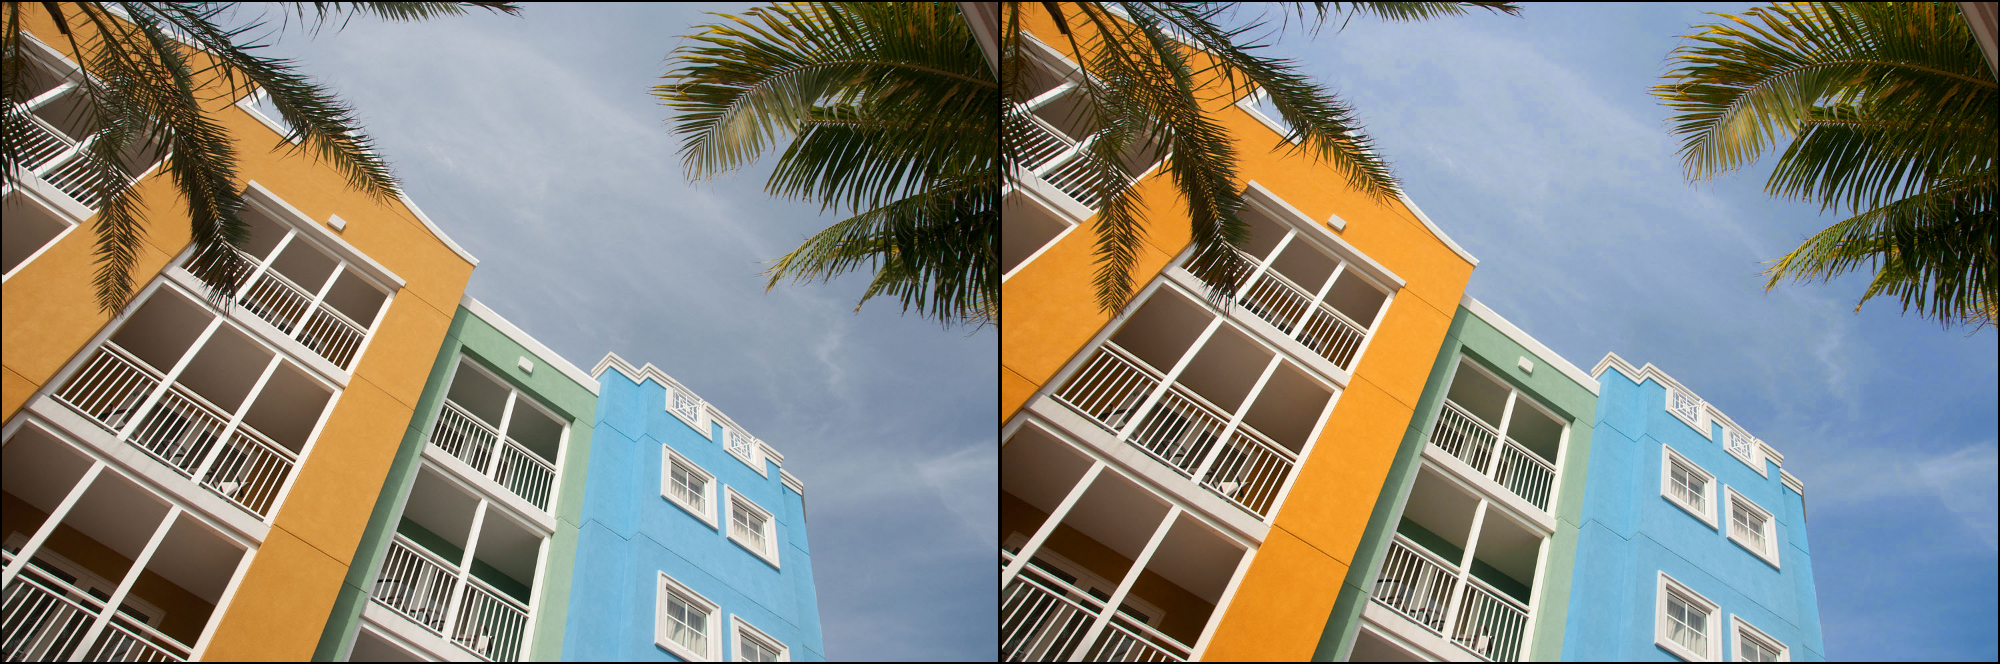
Open a photo where some of the colors just don't have the same punch that the others do. In this example, the yellows and blues look like they could use a little more of a color boost. Go to the Adjustments panel (Window>Adjustments) and click on the Hue/Saturation icon. From the pop-up menu above the Hue slider, choose the color that you want to boost. First, we'll enhance the yellows, so I'm choosing Yellows here.


STEP 2:
Drag the Saturation slider to the right to around +40, and you'll see the yellows become more saturated. This works the same for other colors, too. For example, the sky could use more blue, so choose Blues from the pop-up menu. Now, increase the Saturation setting and you'll see just the blues start to become more vivid.


STEP 3:
The problem is that anything else that was blue in the photo also became more intense. In this case, the blue building on the right became more saturated, as well, but I kinda liked its less vivid color from before. Since the Hue/Saturation adjustment layer has a mask on it, though, just select the Brush tool (B), choose a soft-edged brush from the Brush Picker, then press X to swap your Foreground and Background colors, making your Foreground color black. Paint with black on the layer mask to hide the effects from the other areas. So now the color boost from the adjustment layer only affects the sky and yellow areas and nothing else.


By Matt Kloskowski
Excerpt from Layers: The Complete Guide to Photoshop's Most Powerful Feature
Learn how to do more from Layers: The Complete Guide to Photoshop's Most Powerful Feature here: http://kel.by/Layers2E