Using Photoshop CS6 to create selective softening effects using the new on-screen Blur Filters. Mix and match among the three filters for a variety of depth-of-field and tilt-shift effects.
Step One: Open Choice Image
Open choice image from the File > Open menu command. Note the Blur Filter effects do not operate as Smart Filters so to ensure the integrity of the original image Layer use precaution and apply the filters on a file copy or duplicate the target image layer.

Step Two: Select Choice of Blur Filter
With your image Layer active, go to the Filter > Blur menu command and choose any one of the three available options: Field, Iris, Tilt-Shift.
Since all three appear in the same User Interface (UI) Panel, it doesn't matter which one you select if you intend to experiment. You will have the option to toggle or mix between the three once at the Blur UI.
I opted for the Tilt-Shift Blur filter as captured below.
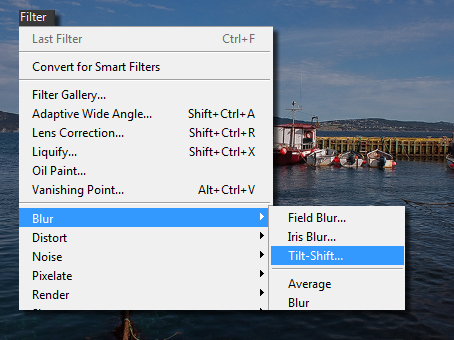
Tilt-Shift
On-screen Controls and Property/Effects Panels
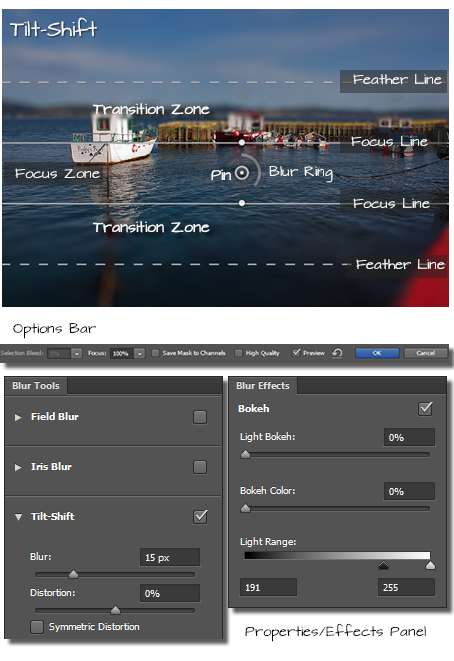
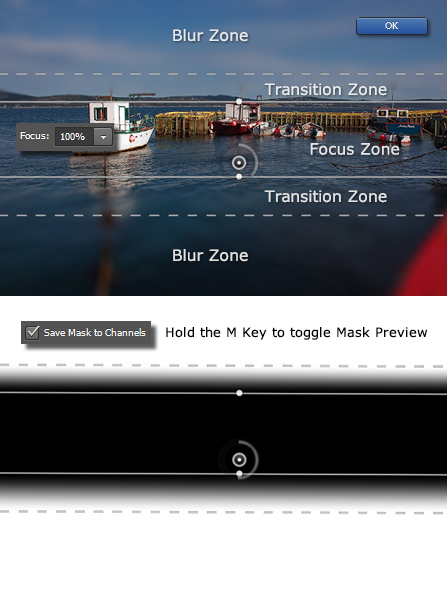
This will take you immediately to the Blur Gallery UI with the chosen filter (in my case Tilt-shift) active. As captured below you have a number of on-screen controls, Options Bar features and Property/Effects Panels items to choose from.
Simple Process:
- simply drag the initial Pin into your preferred location within the image preview;
- adjust (drag up or down) the Focus (Solid) Lines to â˜square-off' the focus zone. This will be the zone of unchanged focus unless the Options Bar Focus value is decreased from its initial value of 100%;
- adjust (drag up or down) the Feather (Dotted) Lines to determine the amount of feather or transition from the Focus Zone; this space between the focus and feathered lines represent the transition zone.
- then adjust the Blur Ring slider or the Blur property panel control slider to determine the amount of blur you want;
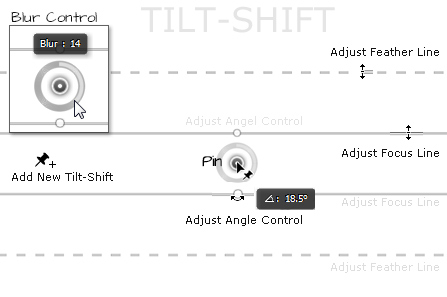
Some other on-screen controls to be aware are depicted in the following graphic.
- A single blur filter is defined by a â˜pin'; click and drag the pin to adjust its position.
- Adjust the Feather/Focus Lines (drag up or down) will be dictated by a double-headed arrow cursor when you mouse-over them;
- Mouse-over any area away from the other on-screen controls you get a â˜thumbtack' or â˜Add Pin' cursor. Click once at its current position and a new blur filter will be applied.
- Blur is controlled by an on-screen â˜Blur Ring' slider: drag left or right to increment or decrement the value.
- Both Focus Lines have an Angle control; when clicked a double-headed curved arrow will appear as well as a tooltip depicting the angle value applied.
- To remove/delete a Pin: select it then hit the Delete key on your keyboard.
Toggle the H key to hide the on-screen blur controls.
Additionally configure the Options Bar â˜Focus' value from the default of 100% to a lower value and enable the Save Mask to Channels option to preserve the â˜focus' selection as an alpha channel. Also when working with the Blur Filters toggle the M key for a Mask Preview as captured below, bottom.
Field Blur
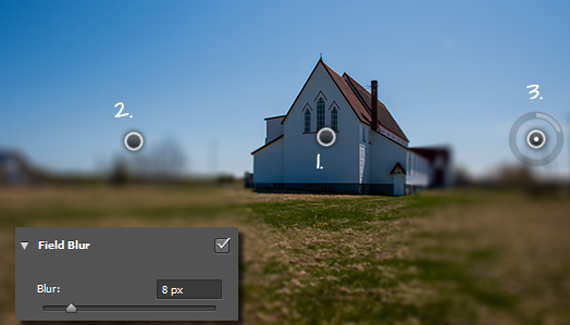
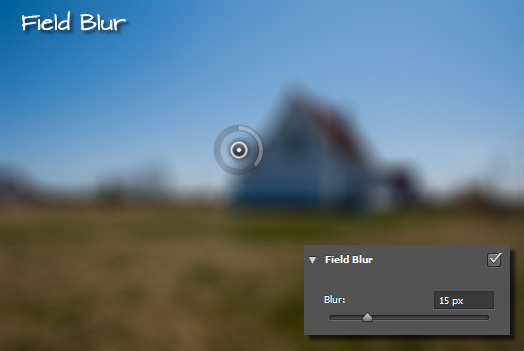
The Field Blur option only has a single property control: Blur and when set will influence the entire image bounds, as captured below.
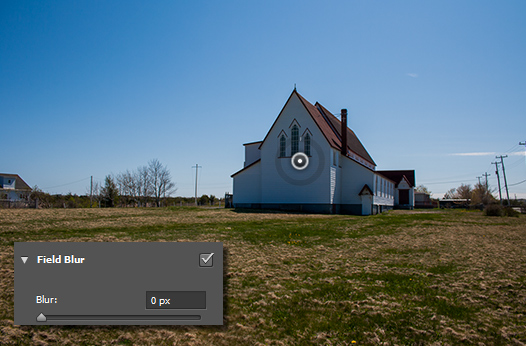
To isolate a focus area to simulate a gradient or transition using this filter alone, set the initial Pin Blur value to 0 px.
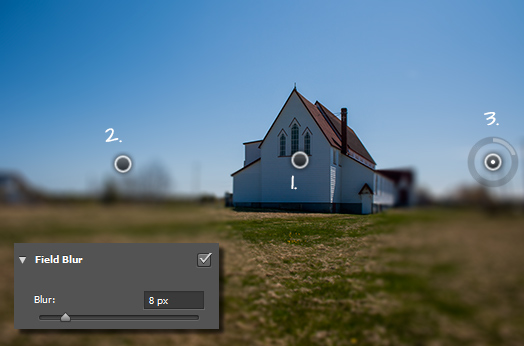
Then add additional Pins anywhere else with a value greater than 0 px. As captured below I used a Blur value of 8 px on pins #2 and #3. These create transition zones toward the focus zone (the pin that has a blur value of 0).
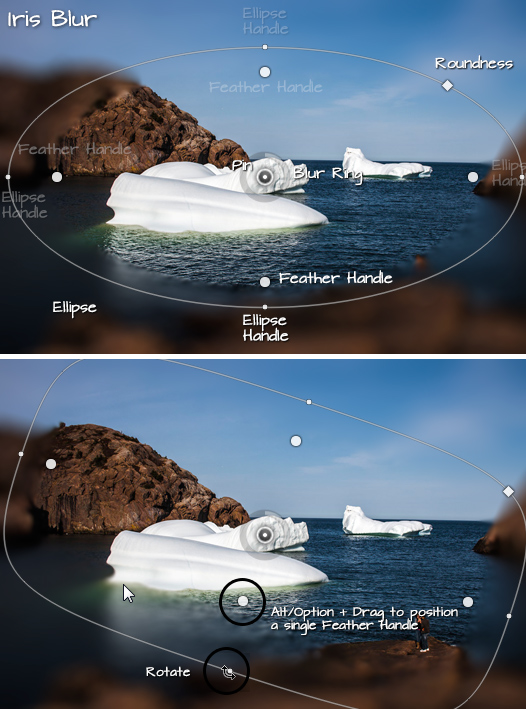
Iris Blur
This filter option simulates a camera lens blur, with on-screen shape and size controls.
As captured below:
- adjust the Ellipse Handle(s) to control the size (drag up or down) and rotation (drag left or right) of the focus.
- click and drag a Feather Handle to increase or reduce the feather transition. Click and drag one also moves the other three. To adjust anyone of them independent of the other, press Alt/Option + Click + Drag.
- Click and drag the Roundness Handler to control the corner radius of the ellipse shape.
As a final note the Blur Filters will not work with Smart Objects, Video Layers, Adjustment Layers, Layer Masks, Multi-Channel Mode nor Single-Channel Images. So as noted from the start of this walk-through be sure to work on a copy of the image file or a duplicate of the image layer.
Until next week
Happy trails
http://www.heathrowe.com


Thank you for the explanation. It was terrible trying to guess how to use the new blur features, but this article cleared it up for me.
Same here!
Your welcome, Ken.
Darrell
Thank you very much, Darrell.