
Before starting the tutorial, please download this free Rain Water Drops image by clicking here.
Notice that almost any similar image will work, but to follow this tutorial exactly as showed you will need the mentioned resource. If you use a different image, just be sure to adjust the settings showed here according to your own needs.
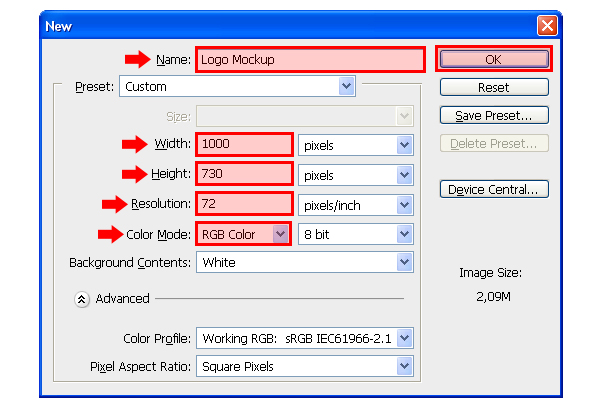
1) Open Photoshop and go to File > New. In the new window, set the name to "Logo Mockup", the Width to 1000px, the Height to 730px, the resolution to 72 pixels/inch and be sure to have the color mode set to RGB. Click OK.
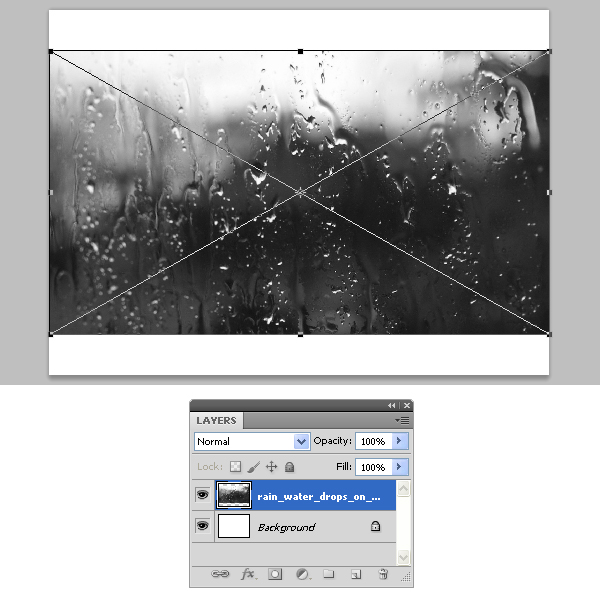
2) Go to File > Place. Locate the recently downloaded Rain Water Drops image and click Place.
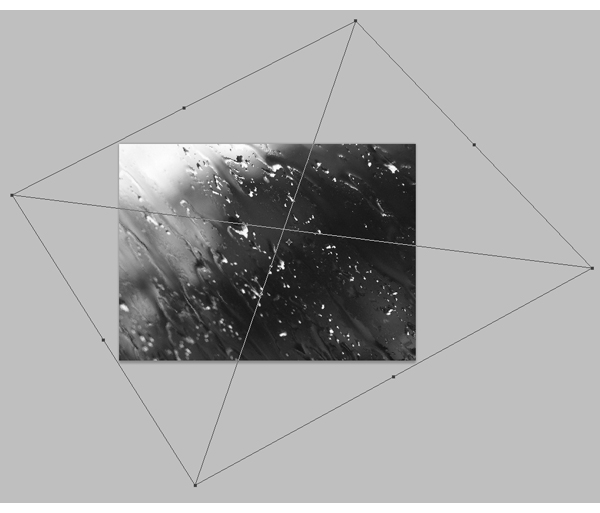
3) With the image layer still active, go to Edit > Transform > Distort. Click and Drag the four corners of the image until you get a distortion similar to the one showed.
When you finish with the distortion, click the Commit Distortion button in the toolbar to apply the changes.
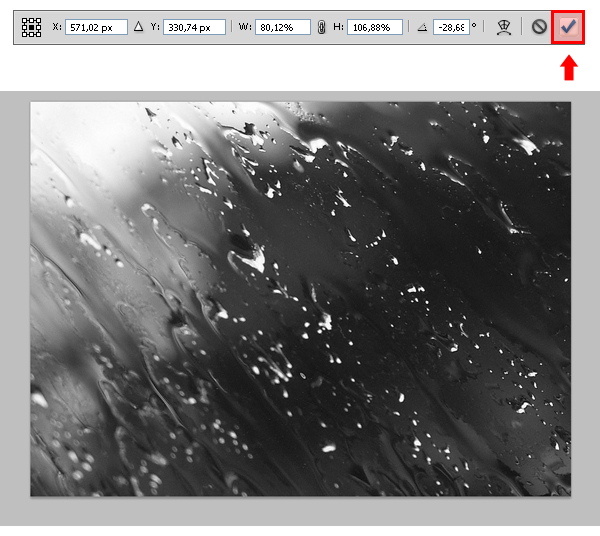
As you can see, Photoshop will make a Smart Object of your placed image.
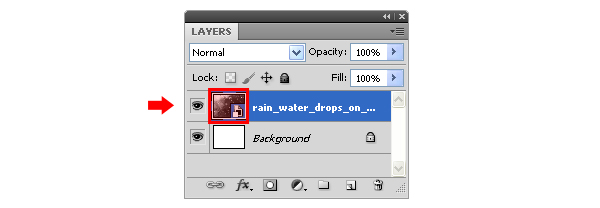
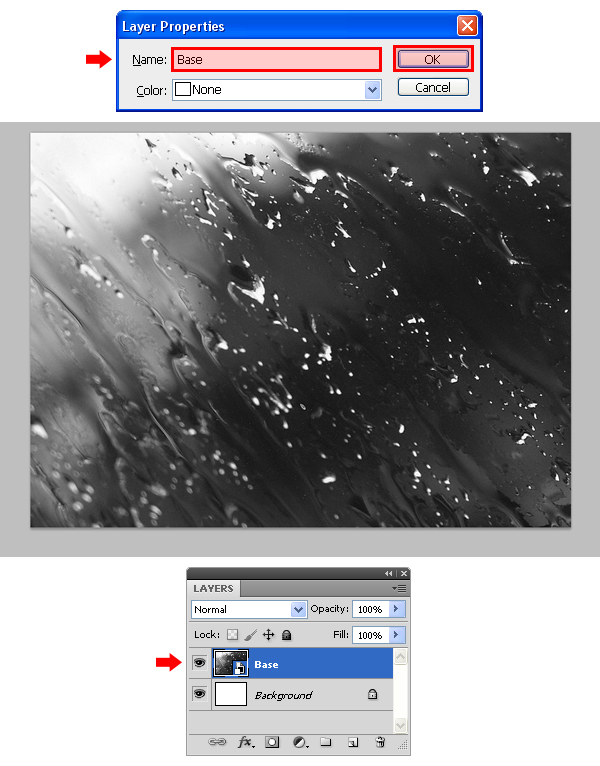
4) To work more comfortable, we will rename this layer to "Base", to do so, go to Layer > Layer Properties and in the dialog window set the name to "Base" and click OK.
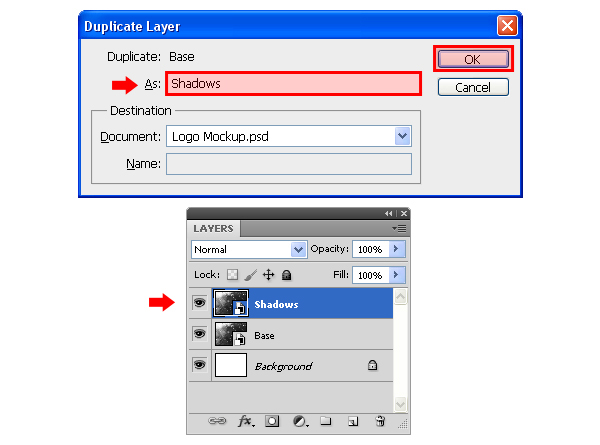
5) Go to Layer > Duplicate Layer. Set the name to "Shadows" and click OK.
6) Again, go to Layer > Duplicate Layer. Set the name to "Lights" and click OK.

7) Click over the layer Base in the Layer´s panel. Go to Layer > New Fill Layer > Solid Color. In the "New Layer" window click OK. In the color selection window, set the color to #FFFFFF and click OK.
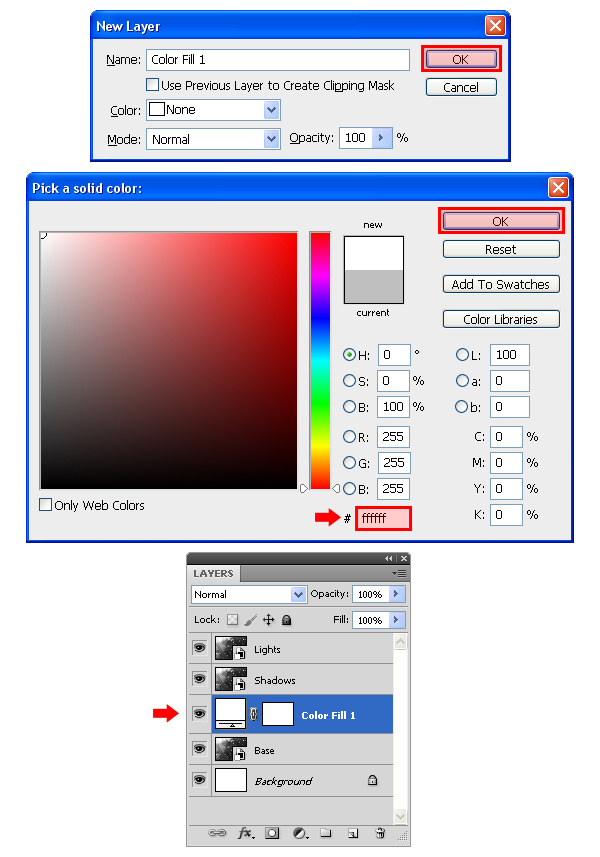
8) Hide the "Lights" layer by clicking on the eye icon next to the layer´s thumbnail.

Click over the layer "Shadows" in the Layer´s panel in order to select it, and set the opacity down to 22%.
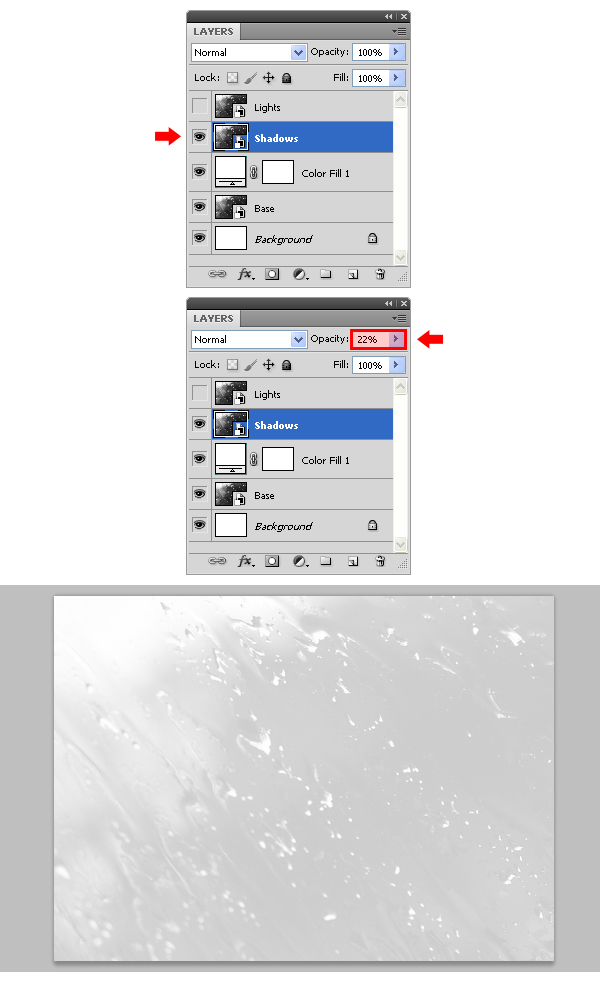
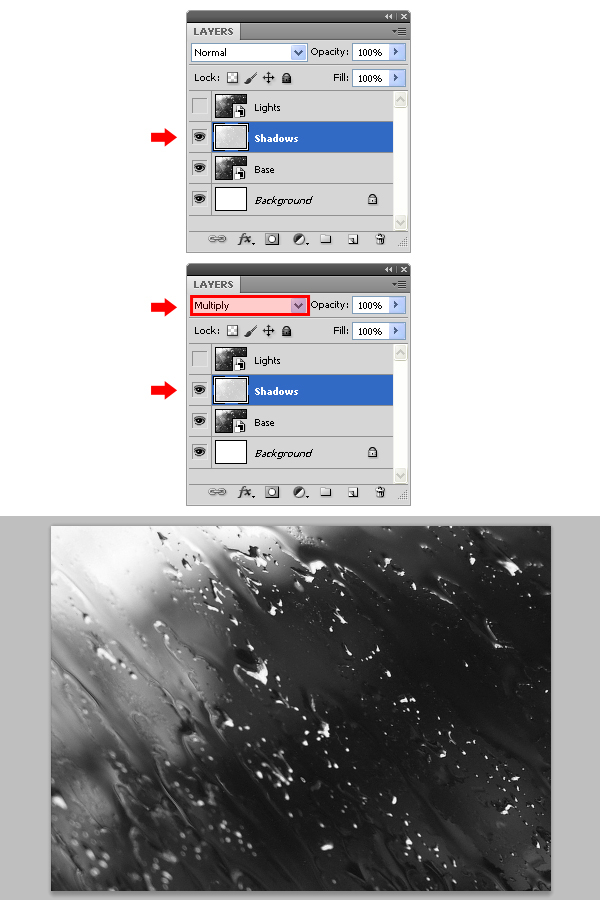
9) Hold the Control (Command) key, and click over the "Color Fill 1" layer (this will select both layers). Go to Layer > Merge Layers.

10) With the Shadows layer still selected, set the mode to Multiply.
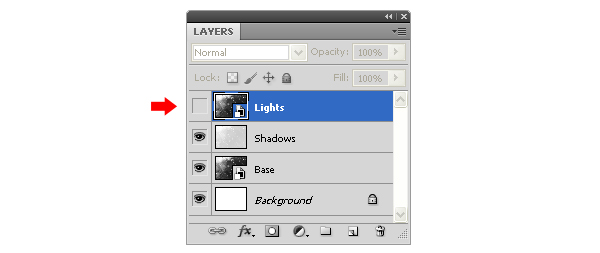
11) Click over the Lights layer to select it.
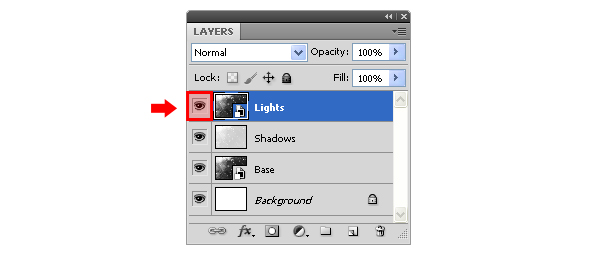
Make it visible by clicking on the eye icon next to the layer´s thumbnail.
Now, set the layer mode to Screen and bring down the opacity to 35%.

12) Now, select the layer Base again by clicking over the layer´s name.
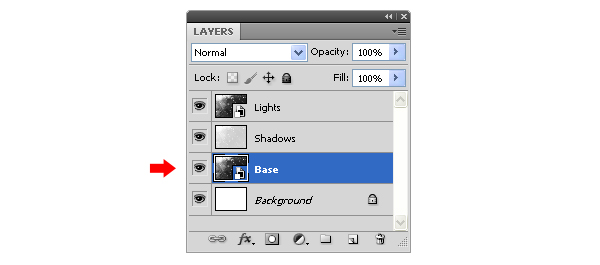
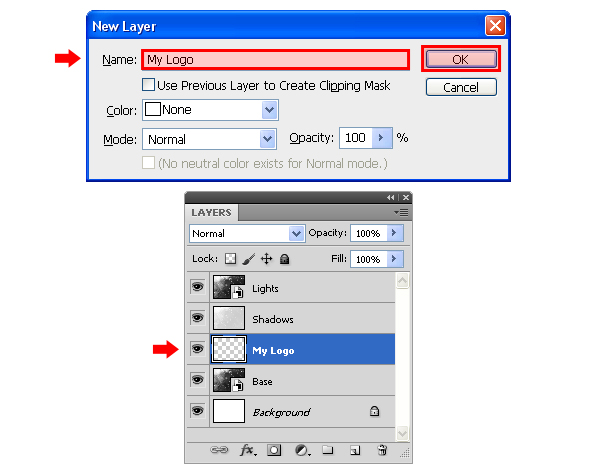
Go to Layer > New > Layer, set the name in the dialog box to "My Logo" and click OK.
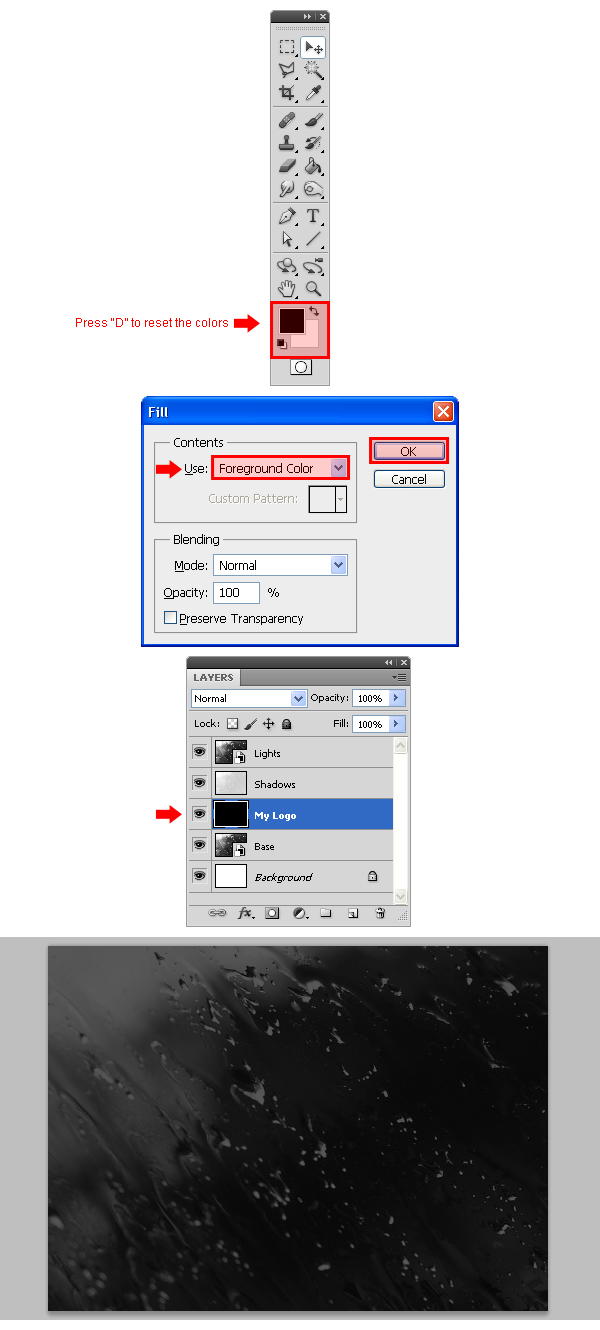
13) Press "D" on your keyboard to reset the Foreground and Background colors and go to Edit > Fill. In the dialog window select Foreground color from the dropdown menu and click OK.
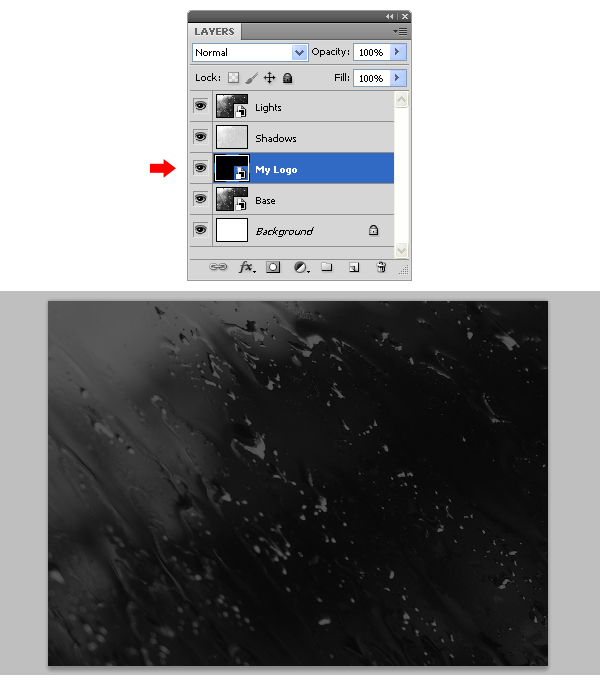
14) Go to Layer > Smart Object > Convert to Smart Object.
15) Go to Edit > Transform > Distort. Click and Drag the four corners of the Smart Object "My Logo" until you get a distortion similar to the one showed.
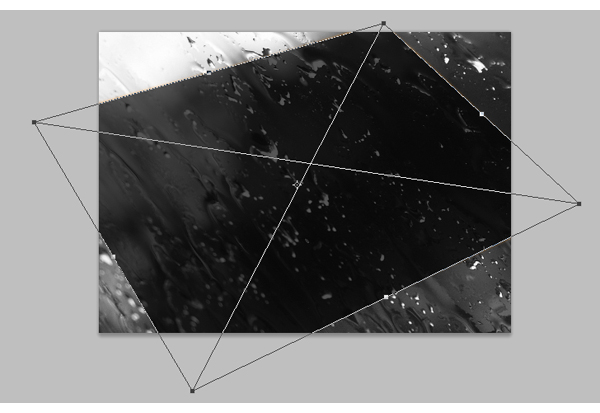
When you finish with the distortion, click the Commit Distortion button in the toolbar to apply the changes.
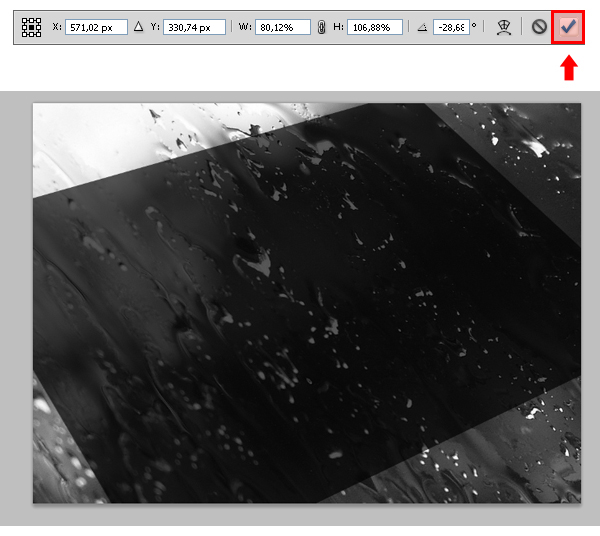
16) Select the Lights layer by clicking over the layer´s name in the layers panel. Go to Layer > New > Layer and set the name to "Gradient". Click OK.

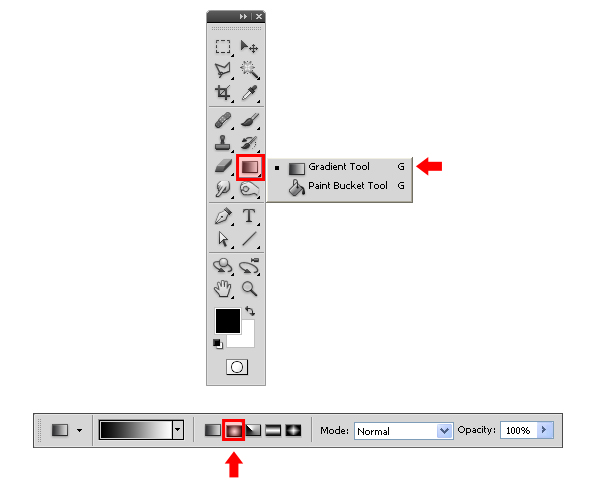
17) Select the Gradient Tool from the Tools palette; and from the toolbar, select the Radial Gradient.
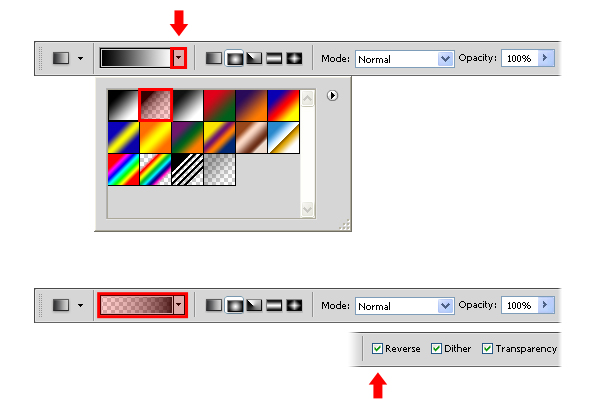
Click over the arrow next to the gradient thumbnail in the toolbar, and from the gradient thumbnails select the Foreground to Transparent gradient. Check the Reverse option in the gradient tool palette (we are doing this to make our gradient from Transparent to Foreground)
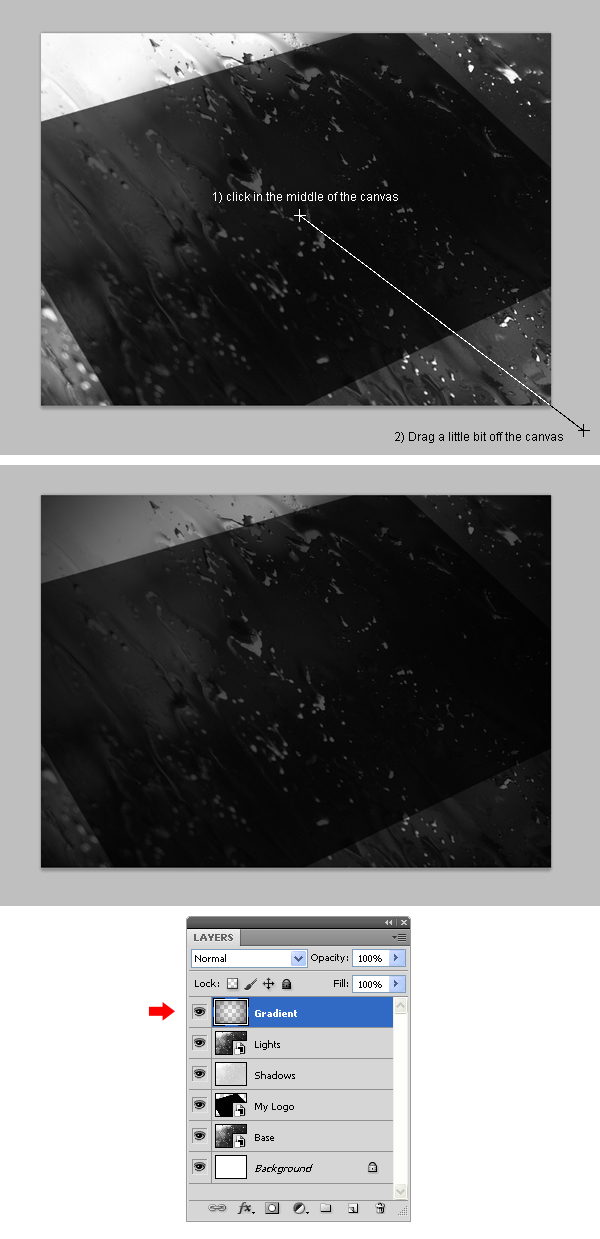
18) Click in the middle of the canvas and drag until you have passed the canvas size as shown, then release the mouse button.
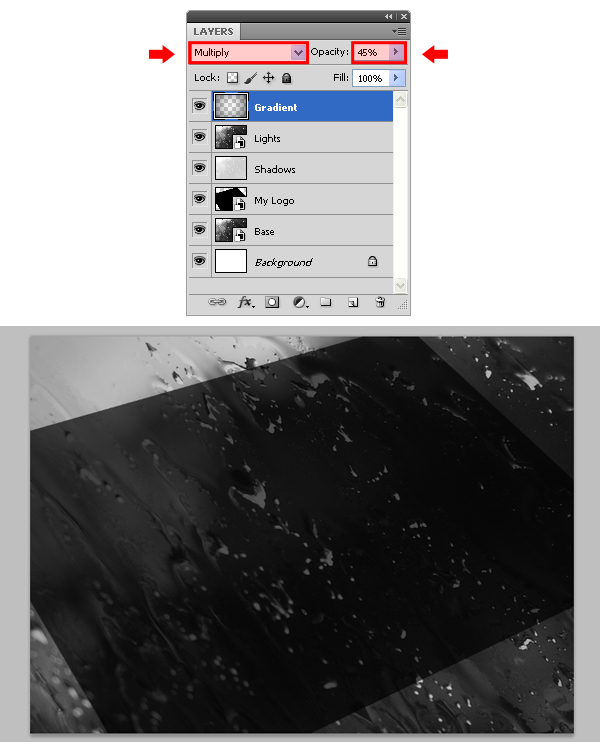
19) Set the layer mode to Multiply, and bring down the opacity to 45%.
20) Click over the Base layer to select it and go to Filter > Blur > Gaussian Blur. Set the radius to 3 pixels and click OK.
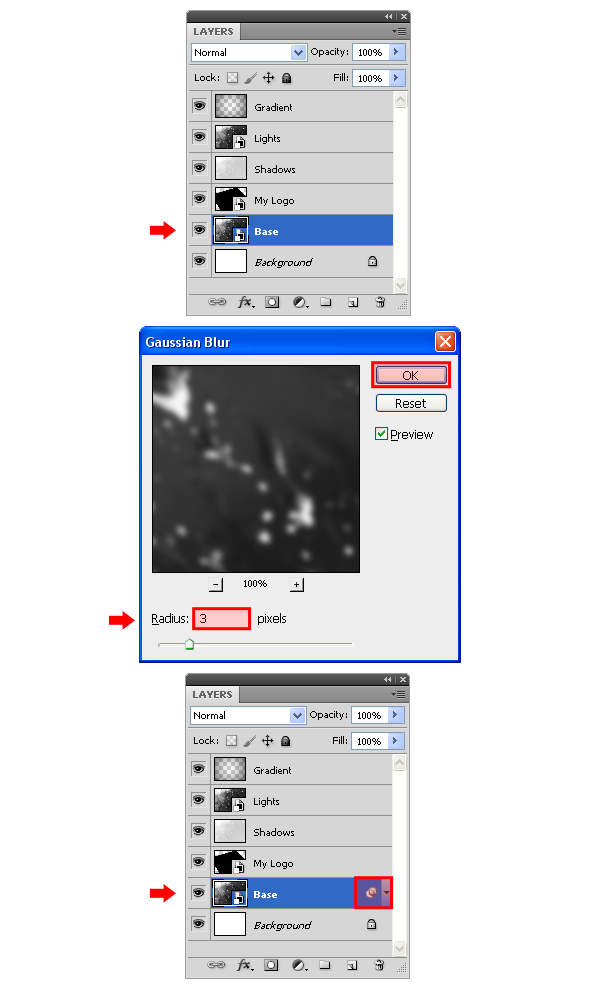
As you can see, a new icon appears at the right of the layer´s name; this icon represent a Smart Filter in a layer with a Smart Object.
21) Hide the "Gradient", "Lights", "Shadows" and "My Logo" layers by clicking on the eye icon next to each layer thumbnail (we will do this so you can have a better look on what we will do next).
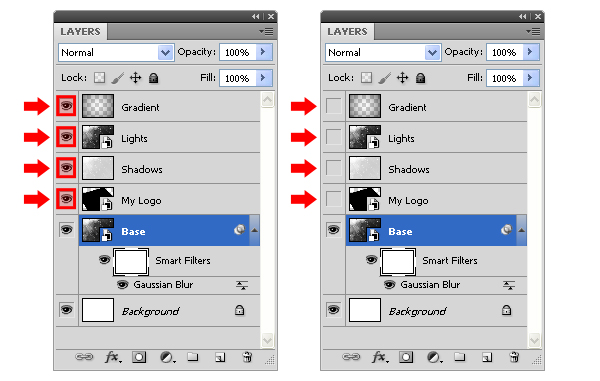
Click over the arrow next to the Smart Filter icon, this will show additional options for this filter.
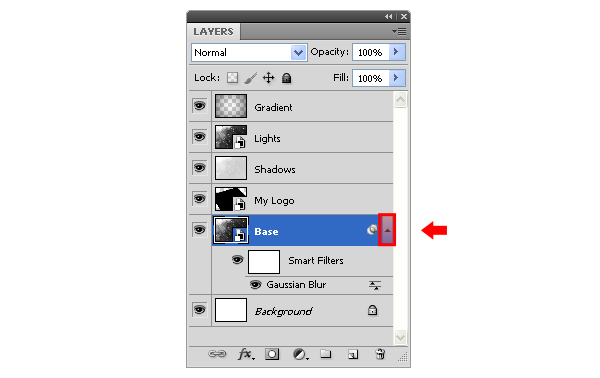
Click over the white thumbnail of the Smart Filter and select the Gradient Tool from the Tools Palette.
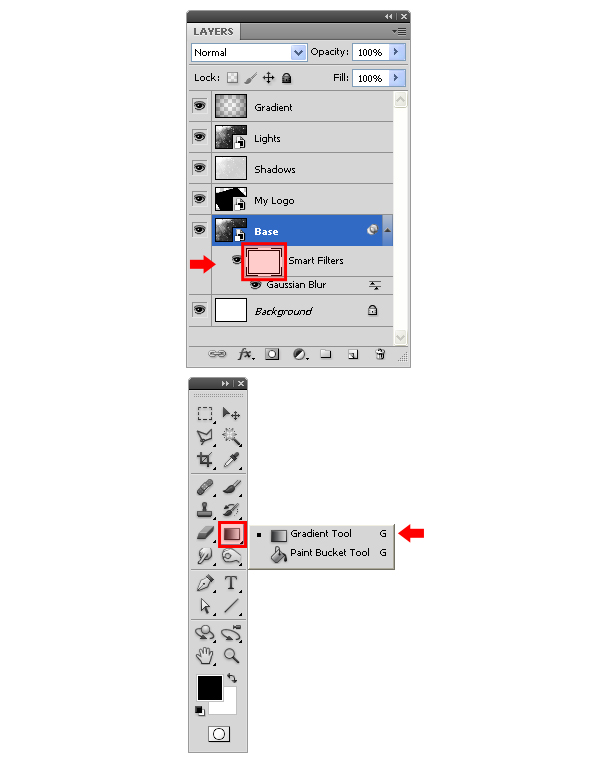
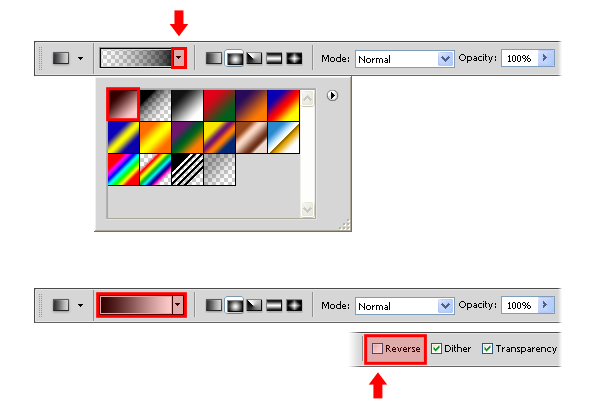
Click over the arrow next to the gradient thumbnail in the toolbar, and from the gradient thumbnails select the Foreground to Background gradient. Uncheck the Reverse option in the gradient tool palette (we are doing this due we already have reversed the gradient in the step 17)
22) Click in the middle of the canvas and drag until you have reached the canvas bottom right border as shown, then release the mouse button.
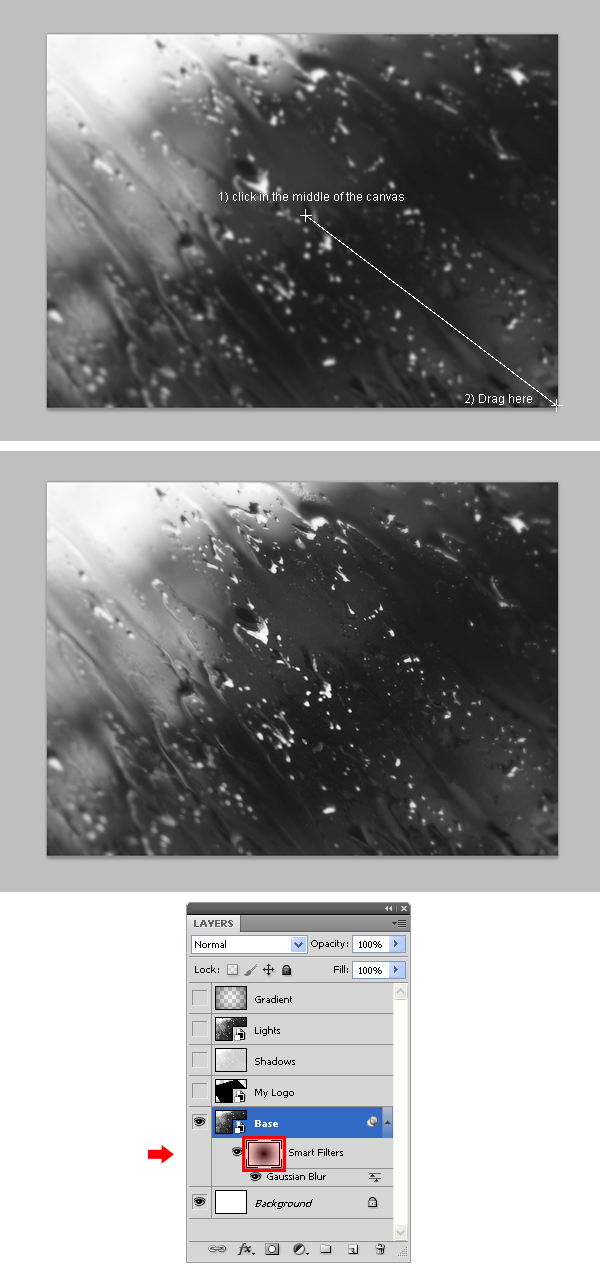
As you can see, we have created a mask for the Gaussian Blur effect.
23) Now, we will apply the same effect to "My Logo" layer; but instead doing all the last steps again, we will make it quicker. Go to Layer > Duplicate Layer and set the name as "Base 2", click OK.

Click over the Smart Filter icon and drag it (a bigger icon will appear) to the "My Logo" layer, then release the mouse button. As you can see, the icon of the "Base 2" layer has gone, and it is now in the "My Logo" layer; this indicates that the Smart Filter is now applied to this layer.

24) Hit the delete key in your keyboard to delete the "Base 2" layer, and click over the empty square next to the "Gradient", "Lights", "Shadows" and "My Logo" layers to make them visible.
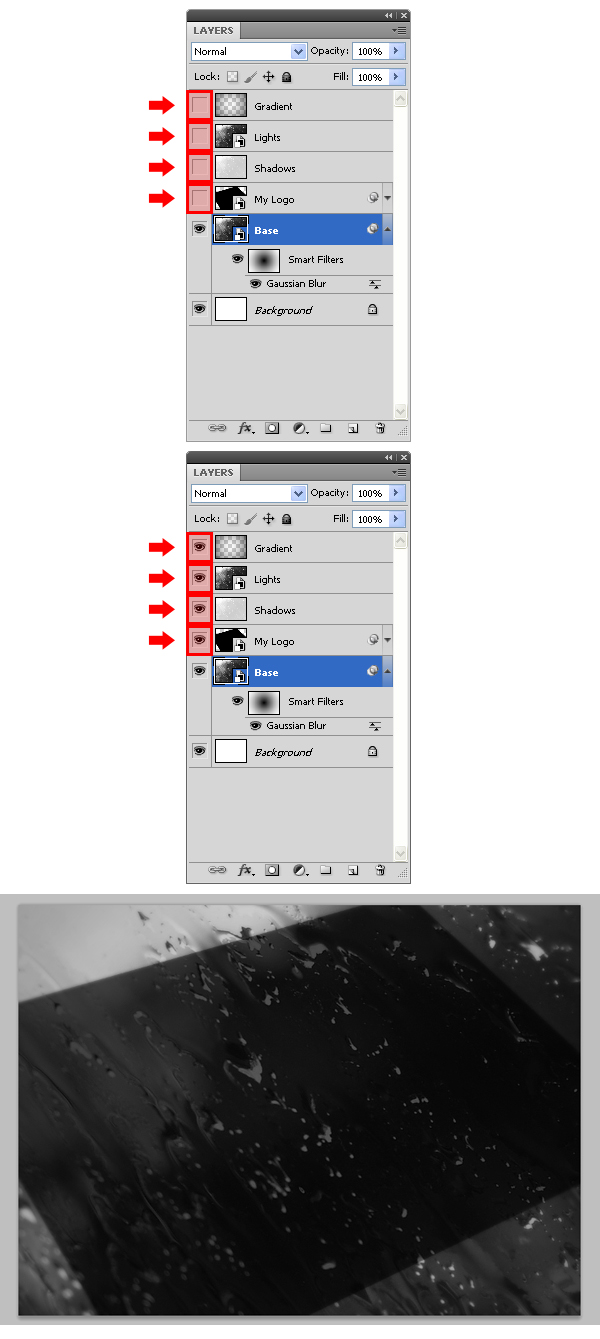
25) Click over the "My Logo" layer to make it active.

We are now ready to place our logo. Go to Layer > Smart Objects > Edit Contents. A new canvas will be opened with our Smart Object ready to be edited.
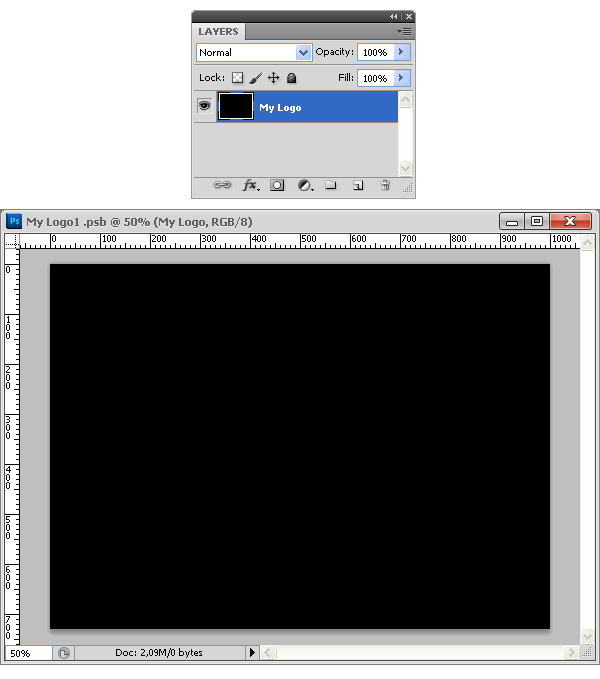
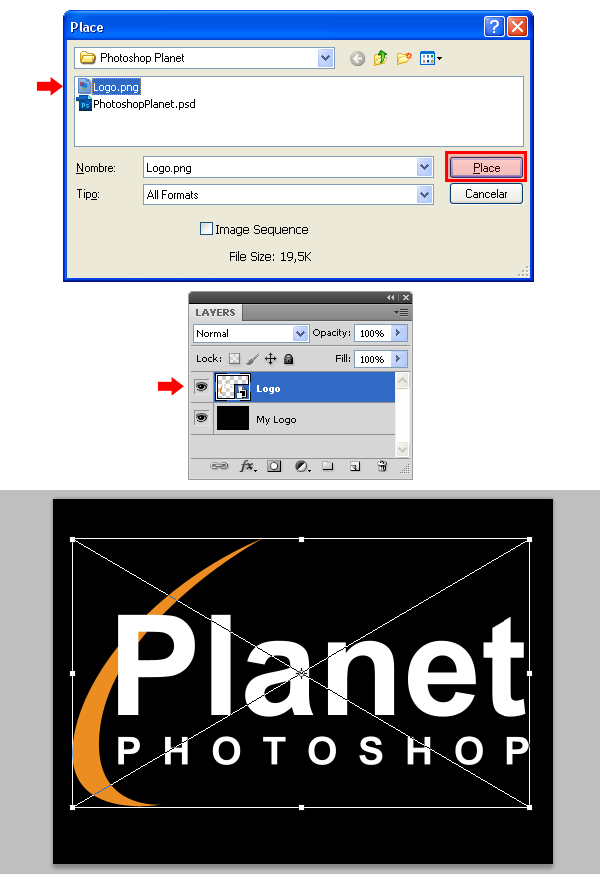
26) In the new canvas, go to File > Place. Locate your logo and click the Place button (you will get a better result if your logo has a transparent background). If needed, adjust the logo size and hit the "Enter" key.
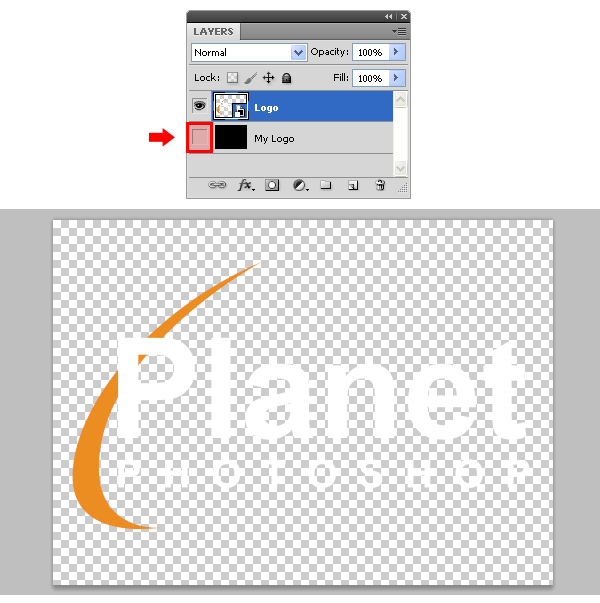
27) Click over the eye icon next to the "My Logo" layer´s thumbnail to hide it.
28) Now, go to File > Save. Finally, switch to your "Logo Mockup" document, and you will see the logo applied with all the effects we have made. Finally, go to File > Save in order to save the "Logo Mockup" document and use it as many time as you need.
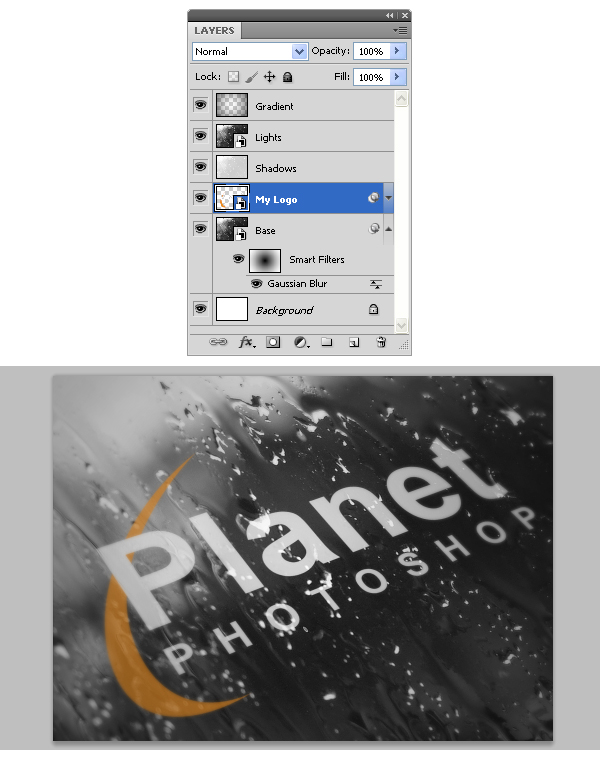
The next time you need to place a logo, you just need to open the "Logo Mockup" document, edit the Smart Object "My Logo" and save both documents.


I don’t know or understand what I did, but this is the result of me doing this tutorial. The water drops are my car windshield and the logo , I made on the fly. http://rsmithdigital.com/images/Logo_Mockup.jpg
Thanks Diego!