

This technique is written for Photoshop CS6, but can be accomplished in prior versions.
Compositing with photos is one of my all-time favorite endeavors. I relish the opportunity to exercise my creative muscles while crafting a scene with cinematic qualities that might not be possible to create with only a camera. In today’s lesson, we’ll examine one of the techniques that is most essential to making a composite believableâ¦wrapping light around the subject. I’ll show you the original way of doing this as well as a new way that I stumbled upon quite by accident.
(Note: Both photos used in this tutorial are courtesy of Shutterstock.)
Step 1: Select the Subject, Add a Mask, Refine the Mask, and Import into the Background
Since this lesson is not about making and refining selections, I’ve already selected and imported the subject into the background. At this point, however, the subject is not interacting with the background light.
Note: To learn more about making tricky selections and refining edges, check out my Dramatic Portrait Compositing video tutorial series.

Step 2: Wrap Light the Old-Fashioned Way
Before I show you the light-wrapping technique that I stumbled upon by accident, let's take a look at another great method that often works, but not as well in this example. Activate the subject layer and choose Layer>Layer Style>Inner Glow. Ensure that the blend mode is set to Screen and click the glow color box.
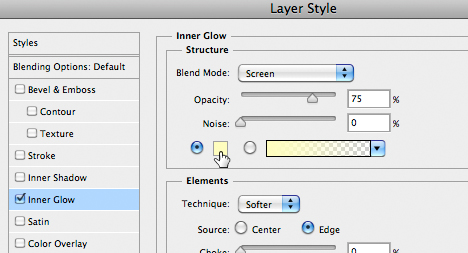
Hover over an area of prevailing light in the photo and click once to sample.
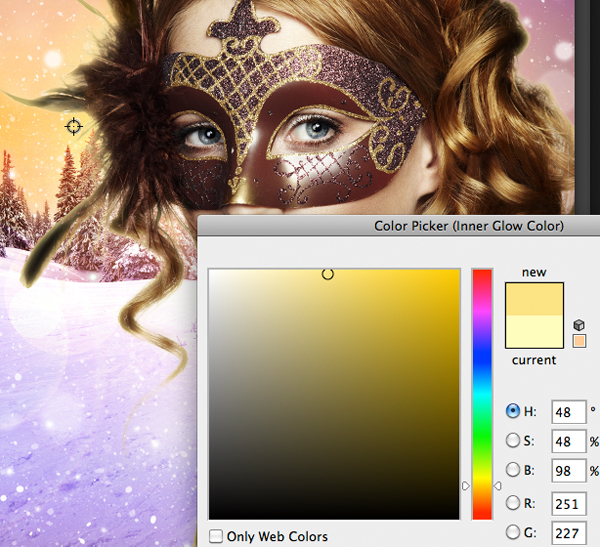
This samples the light color and wraps it around the subject's edges. In this example, the light is both warm and cool (rather than just warm), and that is why this particular technique falls short. Click OK. For the sake of education, let's move forward as if this technique is working. Adjust the Size slider and the Opacity slider until the light wraps nicely.

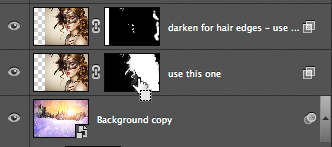
Press OK. Notice how the wrapping light looks realistic in some areas, such as the hair on the right of the model's face and her shoulder, but unrealistic on the top of her head and the hair on the left of her face. To overcome this issue, choose Layer>Layer Style>Create Layer. This turns the Inner Glow layer style into an actual pixel-bearing layer. Activate the Inner Glow layer and choose Layer>Layer Mask>Reveal All. Grab a soft-edged black brush at 100% opacity and flow and paint over areas where the light should not wrap.
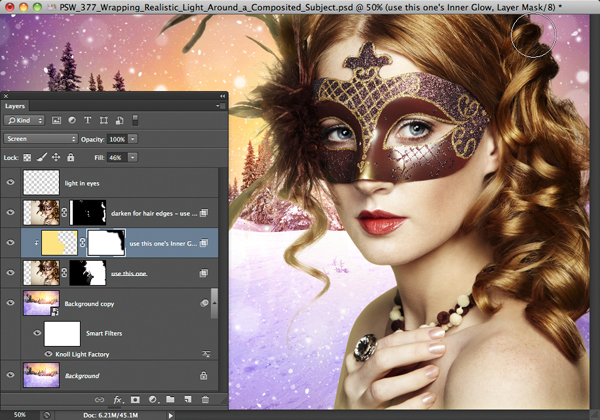
Since we're about to explore an even better method for this type of scene, grab the Inner Glow layer and drag it to the trash icon at the base of the Layers panel.
Step 3: Wrap Light the Cool New Way
Awhile ago, I learned a sweet little color balancing trick from Matt Kloskowski's compositing book that involved duplicating the background layer, moving it above the subject layer, clipping it, and using Filter>Blur>Average to blur away detail. Then, to balance the color of the subject with the color of the background, change the blend mode to Color and reduce the layer's opacity. I was applying this color balancing technique when it struck me that I could use a similar technique to wrap very realistic light around a subject. Here's how. Activate the Background and press Command-J (PC: Control-J) to duplicate it. Drag the duplicate layer to the top of the layer stack. Choose Filter>Convert for Smart Filters. Choose Filter>Blur>Gaussian Blur and drag the Radius slider to eliminate all detail.
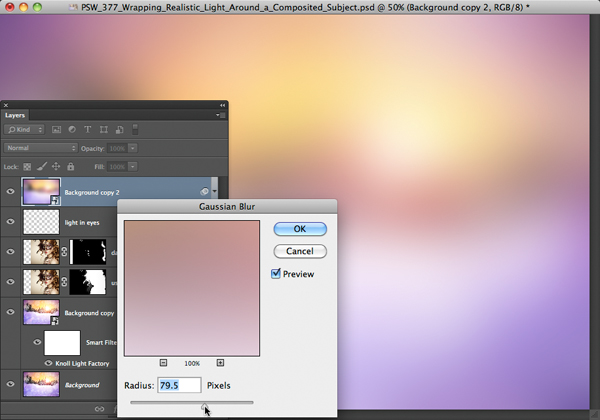
Press OK. Activate the Move tool. While holding Shift, tap the + key to cycle through the blend modes. Look for a mode that covers the subject with a veil of light that is consistent with the background light. Usually, Multiply, Soft Light, or Hard Light mode will do the trick. In this example, Hard Light mode is ideal.
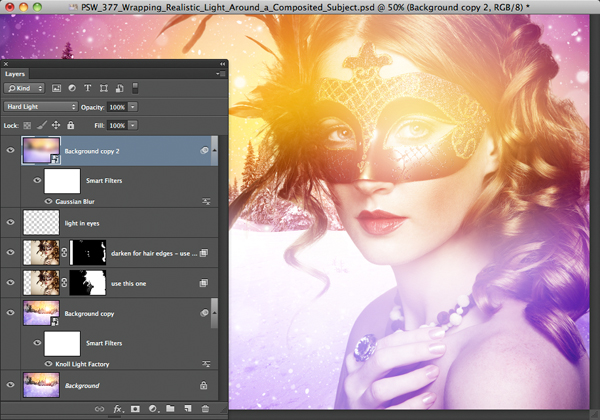
Choose Layer>Layer Mask>Hide All to add a black-filled mask. Command-click (PC: Control-click) on the layer mask thumbnail associated with the subject layer to load the mask as a selection.
Hide the selection by pressing Command-H (PC: Control-H). Grab a soft-edge white brush at 30% opacity and begin painting natural light around the edges of the subject. Paint over especially bright areas more than once to build up the light.

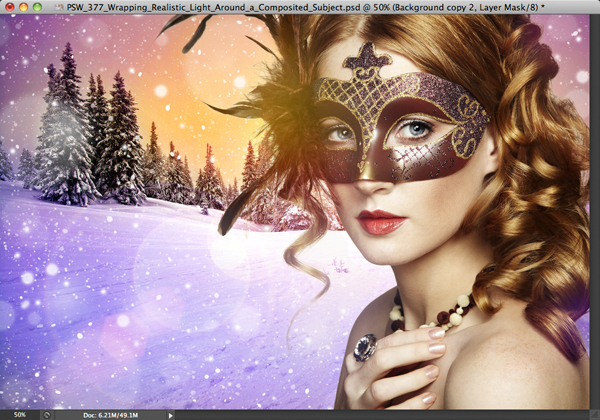
Wow! Here's the completed result with realistic wrapping light!
Mark S. Johnson Photography
msjphotography.com
