
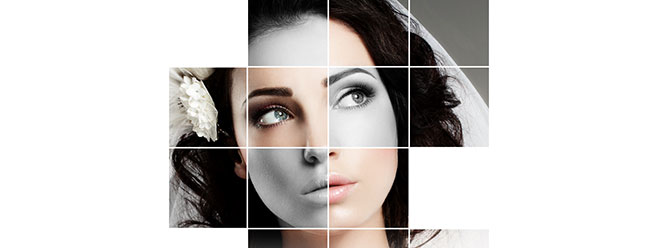
This is a cool grid effect I did back in my first book, Photoshop Down & Dirty Tricks for Designers, and I thought it lent itself nicely to a wedding-themed design. With a few updated tricks for this technique, you can definitely have some fun with your wedding images.
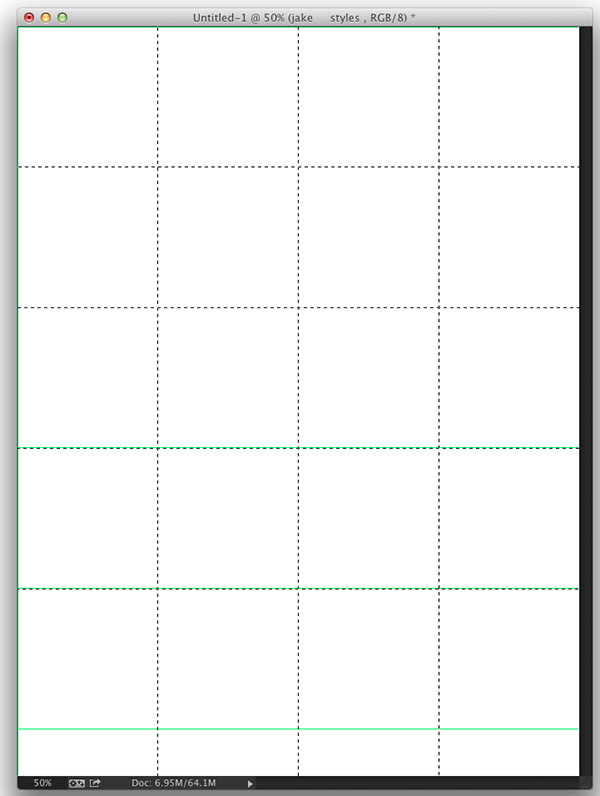
STEP ONE: Create a new document (File>New) that's 9×12″ at 100 ppi. Make sure the Background Contents drop-down menu in the New dialog is set to White.
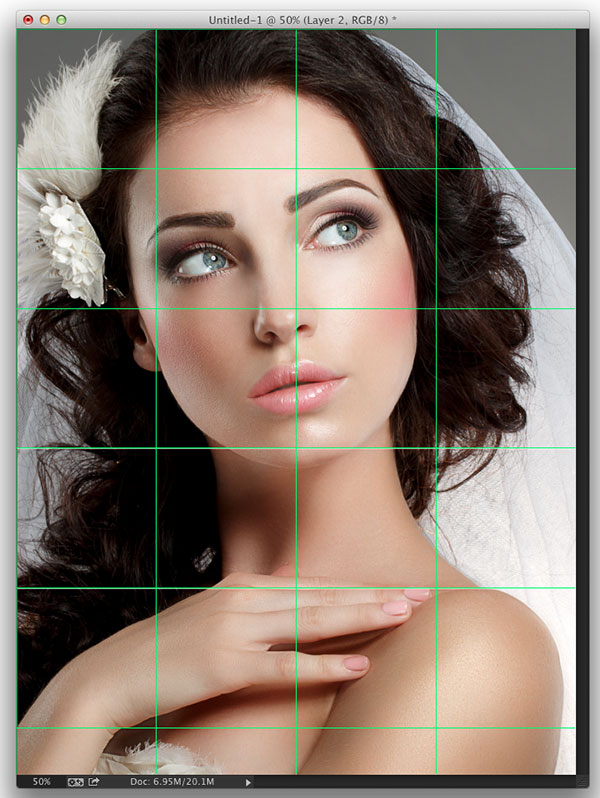
STEP TWO: Go to Photoshop (PC: Edit)>Preferences>Guides, Grid & Slices. We want to create four squares across our document, so enter 2.25 Inches where it says Gridline Every. Then, set the Subdivisions to 1. The default color will work fine but we would prefer something more visible. Click on the color swatch and choose a different color. We chose a light green. Click OK when done. You won't see the grid in your document just yet.

STEP THREE: Go to View>Show>Grid. You should now see a grid with several rows going across the image, each with four equal squares. â¨
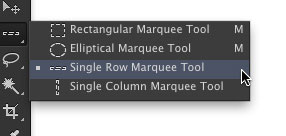
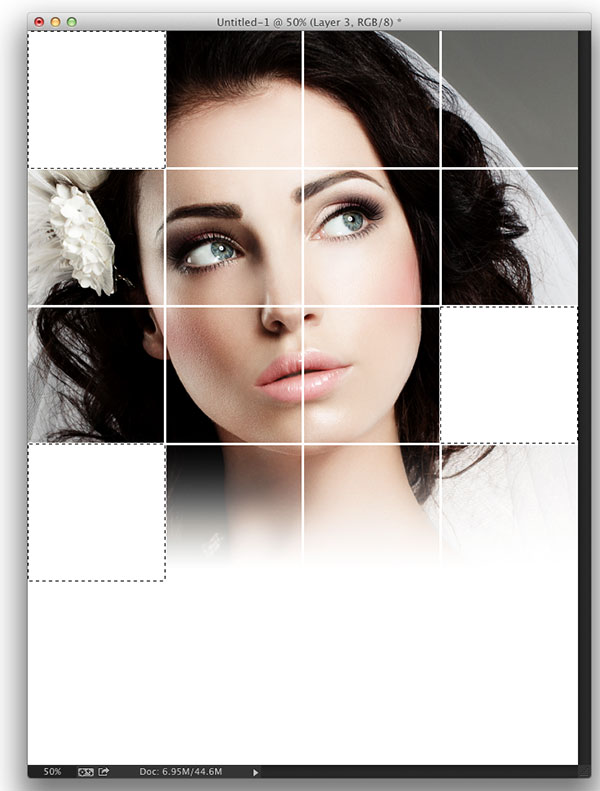
STEP FOUR: In the Toolbox, click-and-hold on the Rectangular Marquee tool (M) and choose the Single Row Marquee tool from the toolset. Click on the first horizontal grid line at the top of the document and it will add a selection 1-pixel high and the width of the document. The selection will snap to the grid line. Then, hold down the Shift key and add selections to the remaining horizontal guide lines. Remember to hold down the Shift key to add each selection to the existing horizontal selections.
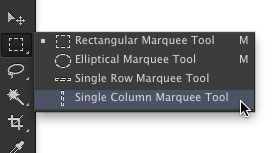
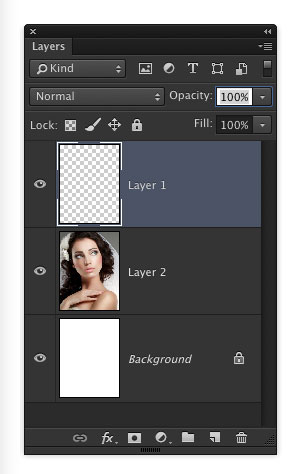
STEP FIVE: Go to the Toolbox again and grab the Single Column Marquee tool. Use the same process to add selections to the vertical grid lines (don't forget the Shift key). Once the selections are made, click the Create a New Layer icon at the bottom of the Layers panel. Press D to set the default colors, and then press Command-Delete (PC: Ctrl-Backspace) to fill the selections with white. Press Command-D (PC: Ctrl-D) to deselect.
STEP SIX: Open the model shot you're going to use in the design. We're using a photo of a bride courtesy of Fotolia. I liked this image because of the lighting and the positioning of the model in the composition. Use the Move tool (V) to click-and-drag this image into the grid layout file. Press Command-T (PC: Ctrl-T) for Free Transform, hold the Shift key, and drag corner points to scale the model in the composition. Click-and-drag inside the bounding box to position the image. Press Enter to commit the transformation. Also, in the Layers panel, make sure this image layer is placed below the layer containing the grid lines.
CREDIT: FOTOLIA, GROMOVATAYA, IMAGE #60388839
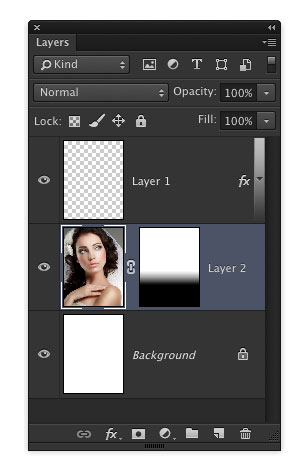
STEP SEVEN: With the model layer active, click the Add Layer Mask icon (circle in a square) at the bottom of the Layers panel. Select the Gradient tool (G) from the Toolbox. Click on the gradient preview in the Options Bar, choose the Foreground to Transparent gradient preset, and click OK. Press X until the Foreground color is set to black. Click-and-drag the gradient starting at the second grid line from the bottom of the photo up to the next grid line to fade the image to the white background.
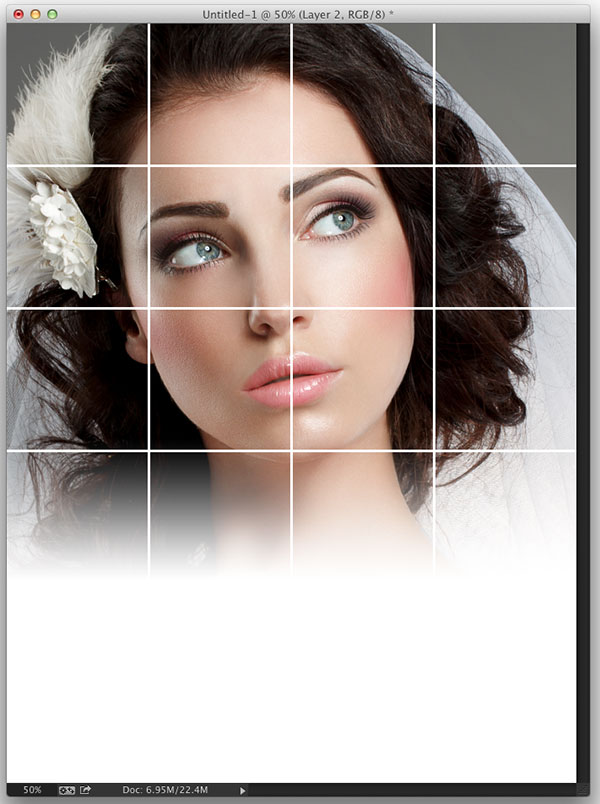
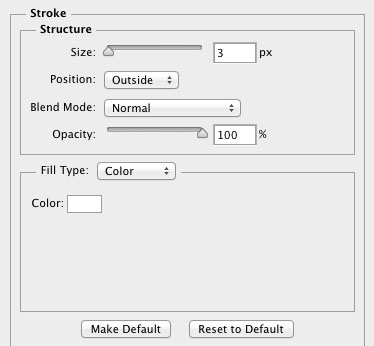
STEP EIGHT: Now to make the grid lines a little thicker we'll use a simple layer style. First, turn off the grid by going back to View>Show>Grid, and click on the grid lines layer in the Layers panel to make it active. Next, click on the Add a Layer Style icon (fx) at the bottom of the Layers panel and choose Stroke. Click on the Color swatch to open the Color Picker, set the color to white, and click OK. Then, set the Size to 3 px and make sure the Position drop-down menu is set to Outside. Click OK.
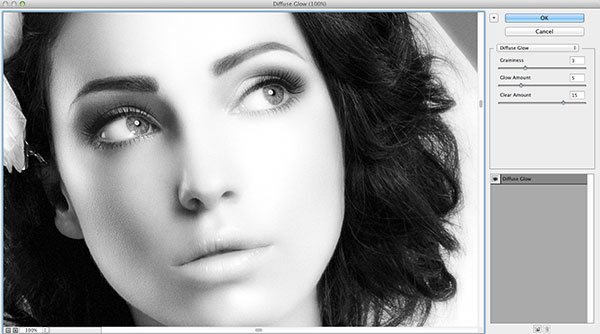
STEP NINE: Now reselect the model layer and make a duplicate of the layer by pressing Command-J (PC: Ctrl-J). Press Shift-Command-U (PC: Shift-Ctrl-U) to remove the color from this duplicate layer. Go to Filter>Distort>Diffuse Glow. (Note: If you don't see the Diffuse Glow option under Distort, choose Filter>Filter Gallery instead, then click on the Distort folder near the right side of the dialog to reveal the Diffuse Glow filter.) Set the Graininess to 3, the Glow Amount to 5, and the Clear Amount to 15. This will blow out the highlights a bit and give us a stylish grain over the whole image. Click OK. (This setting will vary with different images; be sure to experiment with other settings to get the look you want.)
STEP TEN: In the Layers panel, change the layer blend mode to Soft Light and drop the layer Opacity to 75%. This will add some stylish contrast to the image.
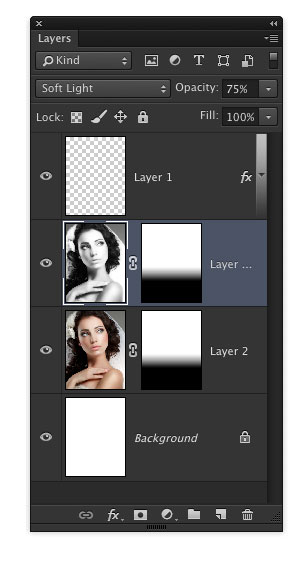
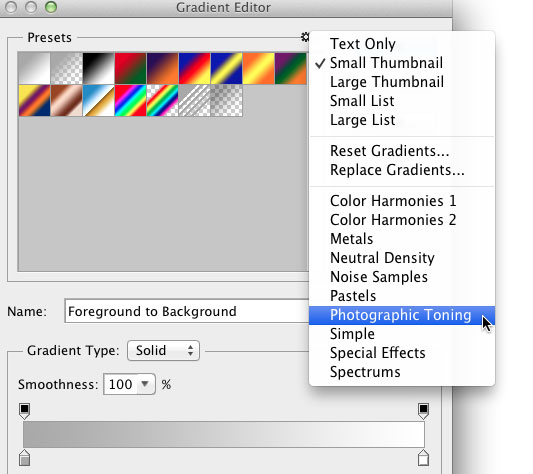
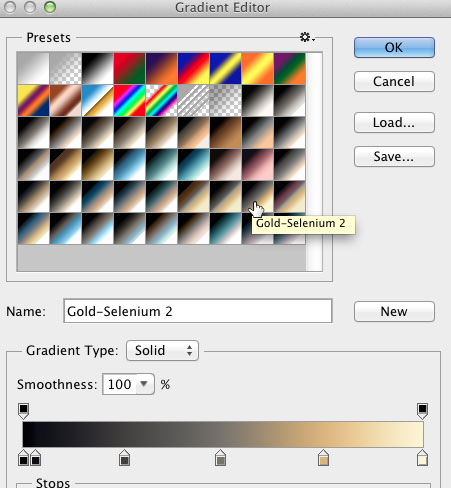
STEP ELEVEN: Now let's add a subtle color effect using a Gradient Map. Click on the Create New Adjustment Layer icon (half-white, half-black circle) at the bottom of the Layers panel and choose Gradient Map. In the Properties panel, click on the gradient preview to open the Gradient Editor. Click on the dialog's flyout menu (gear icon) in the upper right and choose the Photographic Toning presets. Choose to Append to the existing set when asked. Choose the Gold-Selenium 2 gradient, and click OK. In the Layers panel, set the adjustment layer blend mode to Soft Light and the Opacity to 25%.

STEP TWELVE: Make the layer containing the grid lines active. Select the Magic Wand tool (nested under the Quick Selection tool [W] in the Toolbox) and click inside the top left square. Hold down the Shift key and add two other squares like you see here, or however many you would like. Once the selections are in place, create a new blank layer and fill the square selections with white. Deselect.
STEP THIRTEEN: Now make the grid lines layer active, and use the Magic Wand tool once again to select three more squares. Click on the Create New Adjustment Layer icon again and choose Black & White. This will make the selected areas of the image black and white, giving us a very cool finished effect. Feel free to play around with other adjustments or colors to get different results.
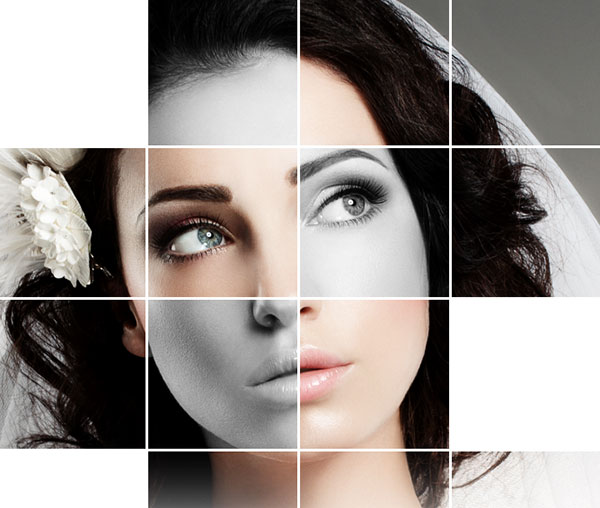
STEP FOURTEEN: Finally, just drop in some text and you have a finished design. You can see we also used the white squares to act as frames for the text.

This article is courtesy of Photoshop User magazine, the official publication of KelbyOne, which provides quality online education for creative people. For more information, visit KelbyOne.com.
