
There are lots of great background techniques around, many involving a huge number of layers and a variety of blending modes. Here’s a quick way to simulate one of those “looks”
Open a new RGB image of the appropriate size. I’m working with an image measuring 800 pixels by 450 pixels, but you can work with any size image (adjusting the various variables as you go, of course). Add a new layer and fill with black. (For this technique you could work on the Background layer, but working on a separate layer is, well, good practice!)
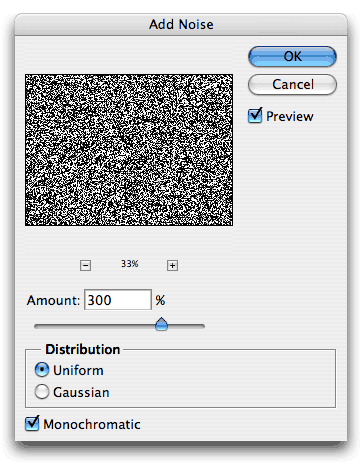
Open the Noise> Add Noise filter. I’ve selected Monochrome (you should too), Uniform distribution (your choice), and an amount of 300% (you want a distribution similar to that shown here).
Because this technique calls for larger “chunks,” use the Pixelate> Crystallize filter. I’ve selected a cell size of 20 (you want a rather uniform distribution of large cells for your image).
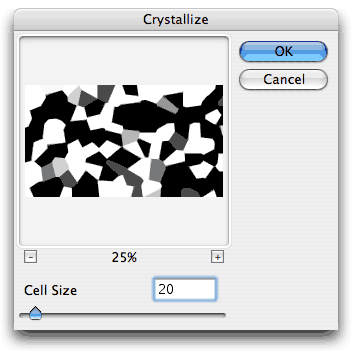
NOTE: You can use the arrow keys on your keyboard to re-generate the Crystallize filter. You can, for example, set a Cell Size, then press the up arrow key repeatedly until you see a distribution you like. Then click OK.
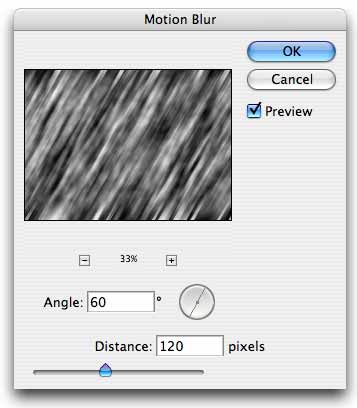
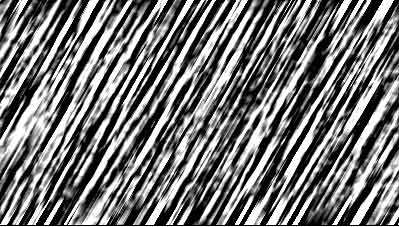
Now go to the Blur> Motion Blur filter and choose an angle and a distance. For my sample, an angle of 60 and a distance of 120 pixels is suitable.
The Unsharp Mask filter shows the heart of the technique. I used an Amount setting of 250% and a Radius of 6. Your project might require other settings (but keep Threshold set to zero).
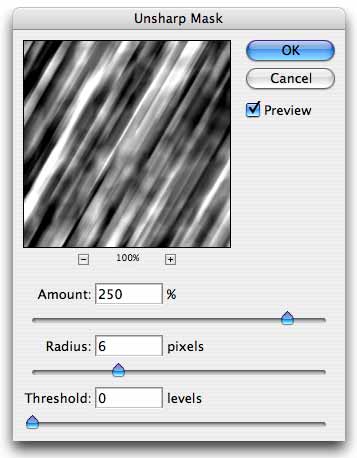
Use the keyboard shortcut Command-F (Mac) or Control-F (Windows) to re-apply the Unsharp Mask filter with the same settings, but only once.
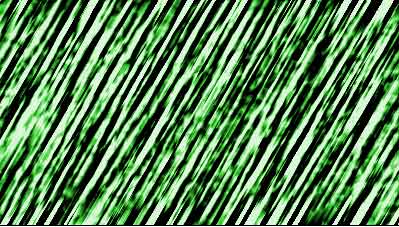
To complete the effect, use a Hue/Saturation adjustment layer (or adjustment), check the Colorize box, and adjust the sliders to suit your needs.
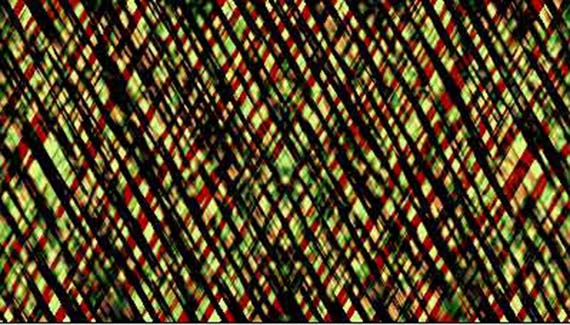
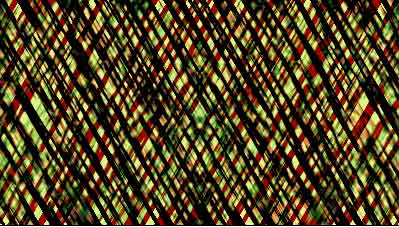
The resulting image can be used as a background, or you can copy/paste it into another image and experiment with blending modes and opacity settings. To really dress things up, try this:
–Duplicate the layer by dragging it to the New Layer button.
–Edit> Transform> Flip Horizontal.
–Change the upper layer’s blending mode to Pin Light.
–Apply another Hue/Saturation adjustment with Colorized selected, choosing a contrasting hue. In this example, I used settings of 25/60/-40.

sweet